Jul 172017
 

I made a small furnace for heat treating steel, although it should also be hot enough to cast aluminium and brass.  The basic design is from a YouTube video by a schoolboy, and is the neatest small design I have seen on the web, although the basic principle could easily be modified to give different configurations – in particular it would be easy to make a front access furnace, or one that would take a longer part using the more of same bricks and elements etc. with a different configuration and a modified steel cage round it.   Having used the furnaces a few times I think I skimped by only having half thickness bricks on the base as it gets pretty hot underneath – although as its standing on  legs above a piece of stone it doesn’t really matter.    The basic parts of the furnaces were sourced from Ebay and I spent around £80 or 90 making it, but I did have quite a bit of old junk lying about that got incorporated, including the metal for making the framework,  the wiring bits for the circuit and the old plastic box and aluminium panels.


click here to continue reading this post Continue reading »

Mar 182017
 

The Andrews is a fairly typical travelling or possibly officer’s pistol of the turn of the 18th century.  Judging by pictures on the internet there were basically two common patterns of Andrews pistols of this type – the earlier with a rounded back to the lock and a semi rainproof pan and serpentine cock in the English style, and the later with a square back to the lock and a full rainproof pan and french style cock with a cutout.   This one is probably the earlier type based on the shape of the lock and so would not have had a full rainproof pan and french cock.


Stripping the pistol;-

Continue reading »

Dec 122016
 

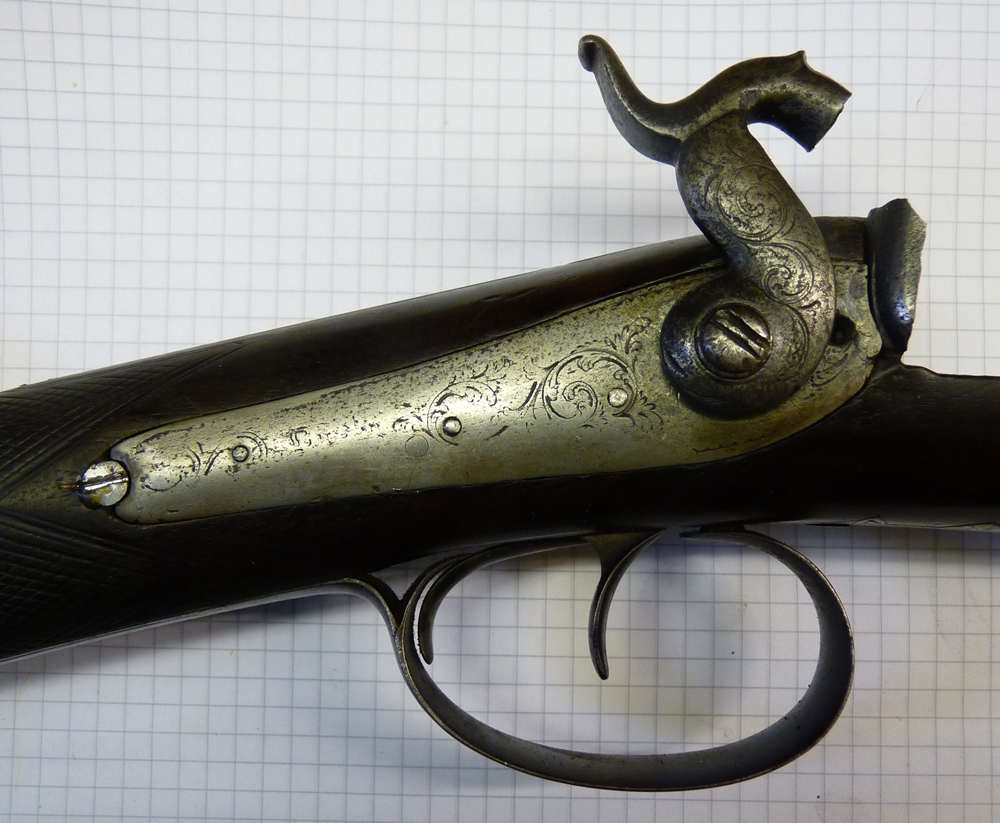
I thought it was time to pull together the bits and pieces that are in various posts into a coherent story!  This post is intended as an introduction to the other posts on barrel re-engraving of specific guns and pistols.


Before we get into the details, it would be a good idea to discuss the rights and wrongs of recutting engraving!   I have no problem with recutting on guns that have almost unreadable engraving and are not unusual or of high value – if something is rare and particularly if its old – say before 1770, then I would think very carefully about the need and justification for recutting – in fact I’d almost certainly not do it.  You will sometimes see guns in (proper) auctions that mention that the engraving has been ‘refreshed’ – that’s obviously not to make the gun sound MORE attractive, so it must be intended as a warning – in other words some collectors would avoid it  – so be warned!   I have recut engraving on barrels of good guns where it is worn much more than the rest of the engraving, but it requires great care to avoid it looking like faking.  Mostly I recut things that are being built as ‘bitzers’ to shoot, or not very special guns that have almost illegible engraving, where recutting definitely enhances the gun.

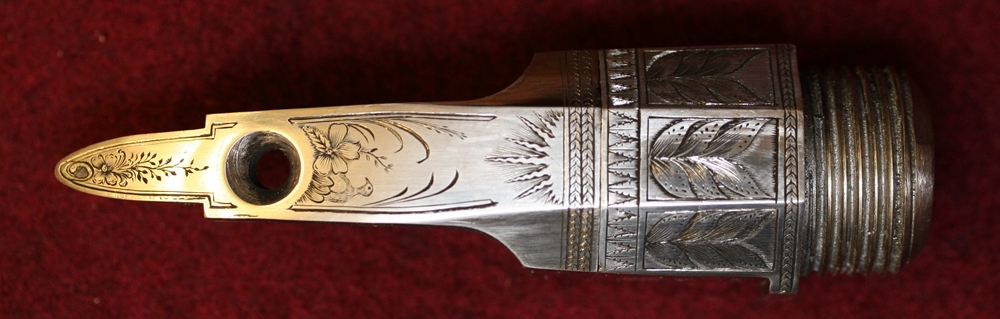
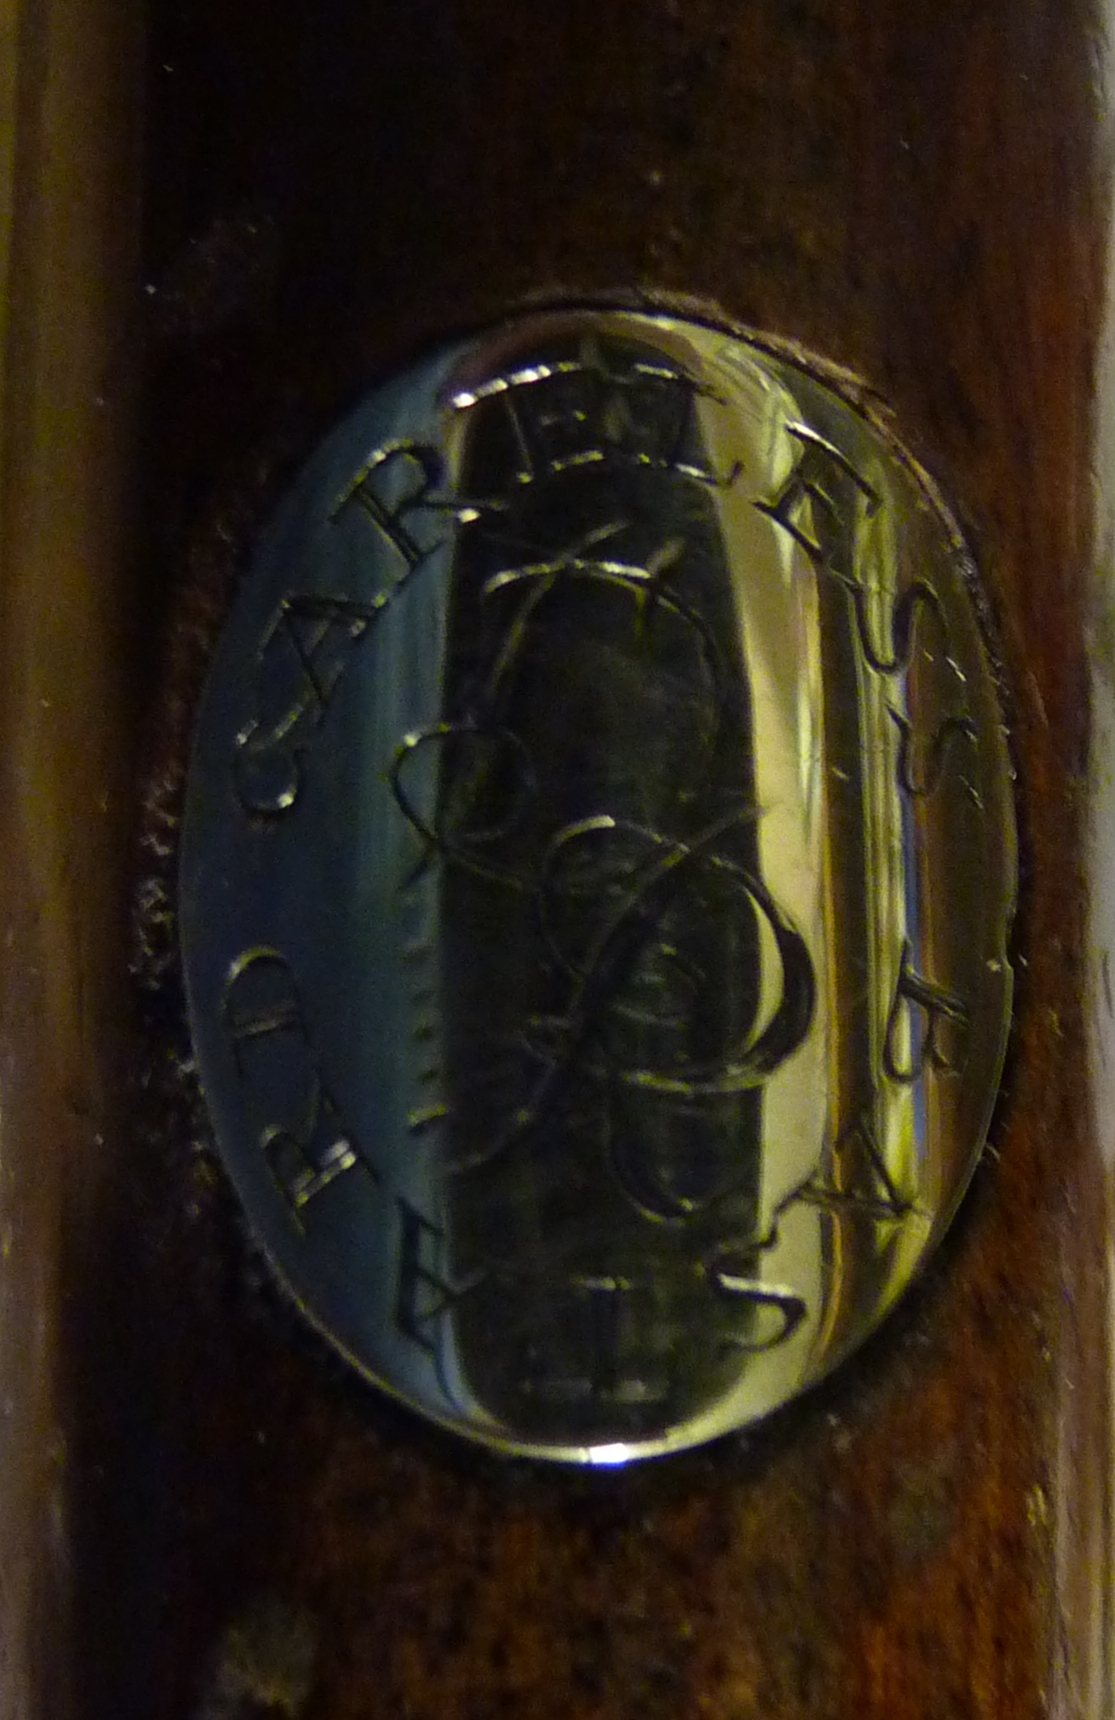
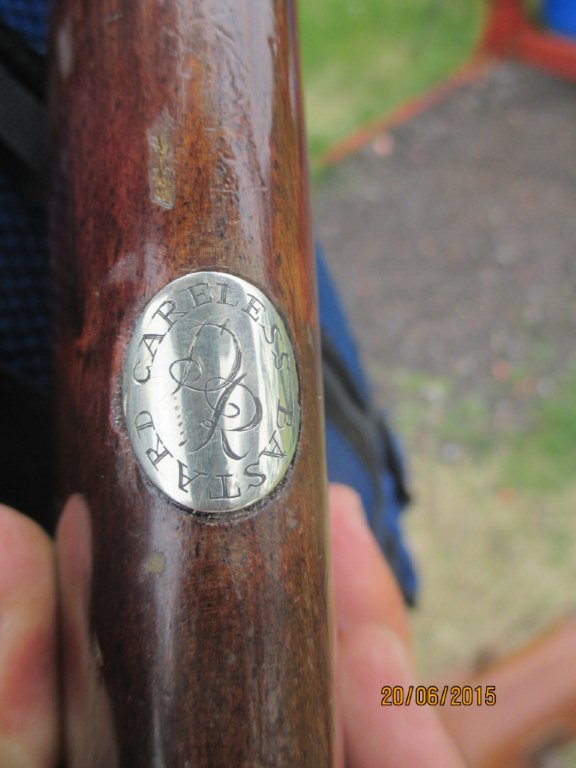
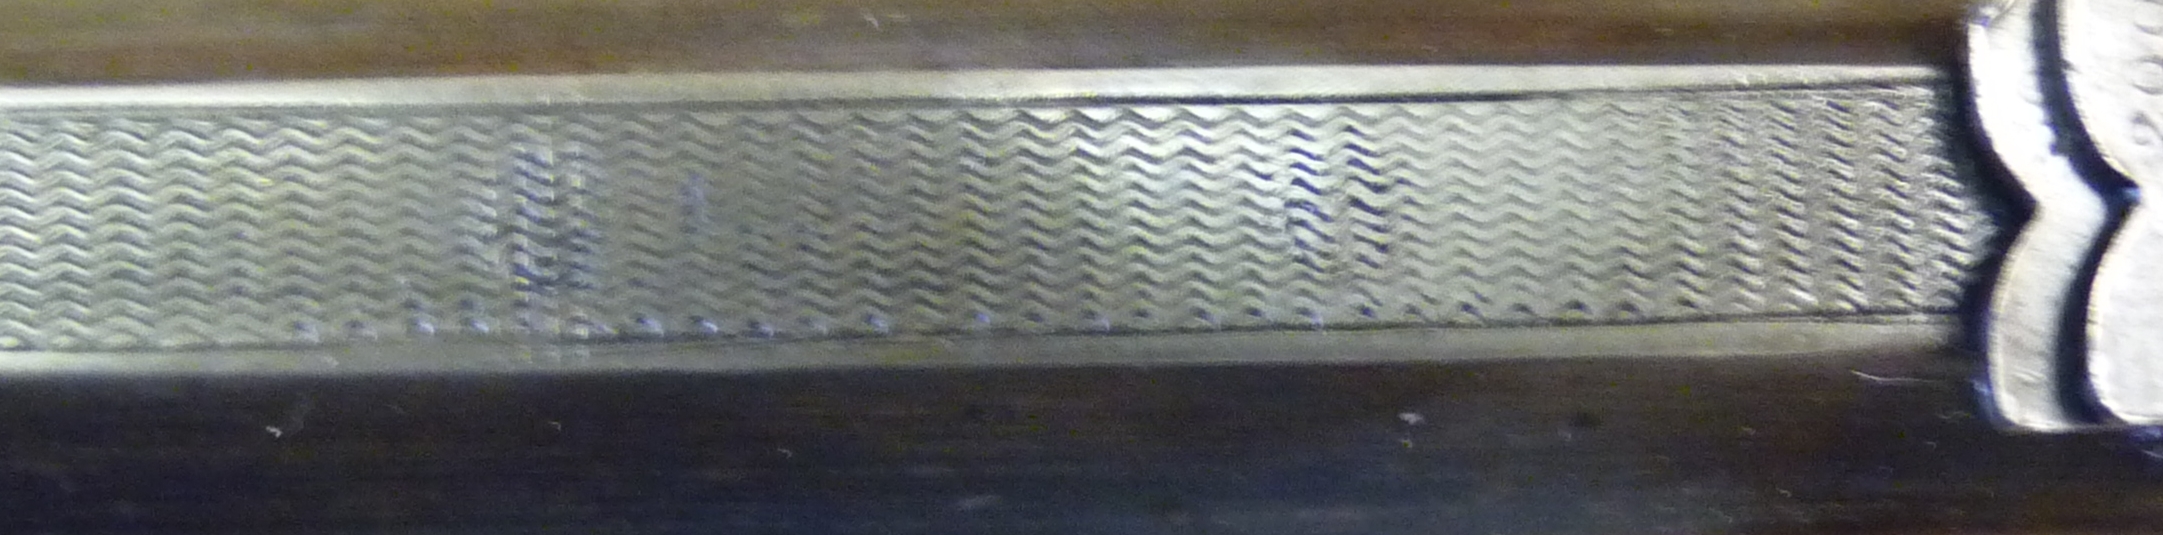
Just to get you in the mood, here is an example of very bad recutting, or possibly just faking on a barrel that doesn’t belong to the gun – with engraving this bad on a Purdey who knows what happened?  It’s difficult to see how this lettering could be put on top of ‘proper’ Purdey lettering, so I’m puzzled – barrel lettering is usually fairly widely spaced so that minor variations in spacing don’t show and it looks more even because the letters aren’t so visually close to each other and period Purdey lettering usually has extremely fine serifs.  ( Update – I have since seen  several Purdey  guns with similar engraving, and come to the conclusion that in fact its just surprisingly rubbish Purdey engraving!)

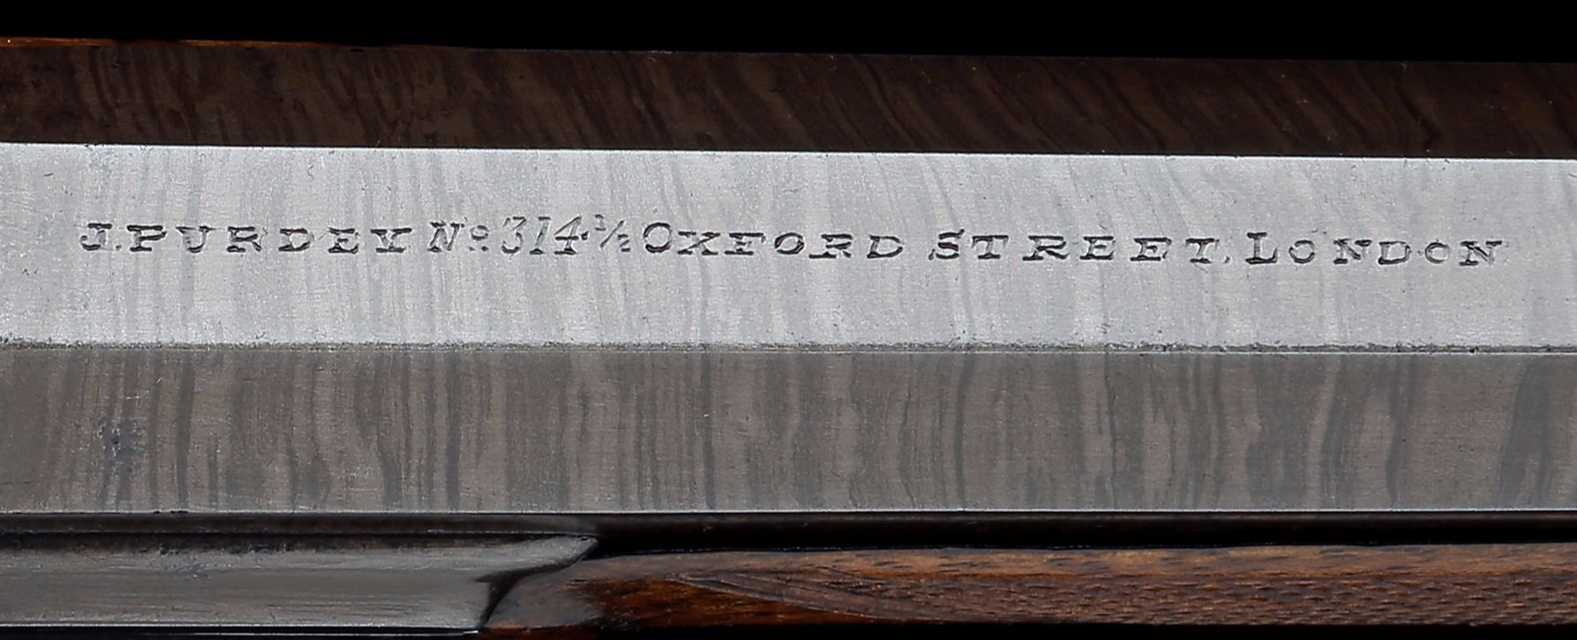
Faults include ;-  uneven vertical stroke angles, very poor spacing, ‘O’s too small and, stylistically, serifs not Purdey style, spacing too close, letters poorly formed, curved cuts not deep enough or ‘fingernail shaped’  – a complete dog’s breakfast of a job – glad I didn’t do it!

Continue reading »

 Posted by at 10:44 pm
Sep 082016
 

Here is another job that I have taken on – this cased double pistol is immaculate – it looks untouched by human hand – except the barrel engraving that looks as if the barrels have been refinished with a little too much vigour.  So I have to work some magic on them….

c-moore-before1


Continue reading »

Sep 072016
 

Here are a few examples of freehand borders copied from antique locks – I was playing about at the time and don’t have any note of which guns they came from, although I can remember a few.  I did these  years ago when I was learning and didn’t have a proper microscope,   I hope I’m better now – obviously I couldn’t even rule a straight line, but I have no shame and thought there was some value in showing them – I will try to do better examples when I have time!  Having said that, if you put these as borders on a gun probably no-one would notice how bad they are (except No2!).

Continue reading »

Sep 062016
 

Here are some of the myriad of possible designs for screw heads – almost all come from historical examples, although often  with a bit of poetic licence!  Most of these examples are test pieces engraved on the heads of ordinary old fashioned countersunk woodscrews ( bought from ebay) as its a quick way of getting something to engrave.  Of course the slots are much wider than one would have in a gun screw, so they don’t look quite right

View 15 photos »

Aug 312016
 

I’ve been asked to recut the engraving on the barrels of a very fine pair of Westley Richards target pistols that have lost legibility on the barrel engraving.

Looking at the lettering under a microscope it is clear that the lettering is not showing clearly for two main reasons, and I’m not sure which is the most important;-

Continue reading »

May 312016
 

My equipment and examples of engraving are pretty well covered on the posts  on ‘my setup’, ‘graver sharpening’ and ‘engraving-technical’ and are an essential background, but I thougth it was all a bit intimidating and implied that you needed to spend a lot of money before you could do anything, so I have set out here to offer a minimalist approach!

There are several essentials to deal with before you can begin begin,  seeing, holding, and sharpening, plus you need something to engrave and an idea of what you want to put on it!   All take a bit of thinking about, so here is my a starting point ;- engraving screw heads:-

screws 3-16

more follows….. Continue reading »

May 232016
 

You can see my YouTube video on sharpening at;-

Being able to sharpen your gravers is key to engraving  because it is next to impossible to engrave on steel unless your tools are both the correct shape and sharp.  You need to sharpen gravers frequently because they wear quite quickly when cutting steel, and its very easy to break off the point, especially when you are beginning.  So learning to sharpen your tools is a necessary first step to engraving, even if you buy a ready sharpened tool.  An experienced engraver will probably be able to sharpen his gravers freehand, but that comes with years of experience, even so, many chose to use a jig.  Beginners and journeymen certainly need to use a jig in order to ensure consistency and minimise the amount taken off the tool surface with each sharpening.  For convenience I have a carousel of gravers, mostly sharpened the same, so that I can change gravers quickly to continue working, and then have a sharpening session when I’ve exhausted my supply.

to read more click….

Continue reading »

Apr 012016
 

Here is a new project;-  I need a very low profile engraving vice for my portable kit, and it would probably make life more comfortable in the workshop – the height of my engraver’s block/ball, plus the working distance of the microscope plus the height from objective to eyepiece is uncomfortably close to the distance between my lap and my eye when sitting.  So I have a project to build a thin vice using only 8mm x 50 mm bright steel bar, an angle grinder, a pedestal drill  and some M6 screws and an M6 tap plus an M10 tap and an old M10 bolt for the fundamentals, plus a very small amount of TIG welding on the jaws (could be screwed).  I have cheated in that I put the half finished vice platform in the lathe to get it shaped – cosmetic only – I could have done it with the angle grinder given more time and patience than I had – plus I ran out of cutting disks for the grinder!

viceA

To read more click here…… Continue reading »

Feb 032016
 

A bit of casual research into the common 18th and early 19th century image often used as a motif for engraving on guns, mostly on pistols as long guns tended to have sporting images, but it was used on butt tangs, Trigger bows and lock tails of ‘bullet guns’ and sporting guns occasionally – it comes in various guises, including ‘Stand of Music’ with the weapons missing and sheet music featuring prominently.  The origin appears to be Hogarth’s engraving of around 1746, although whether he used an already common theme I don’t know ( he did, see below).  This is the start of a collection of related gun engravings, that I’ll add to as more examples cross my path.

694px-William_Hogarth_-_Stand_of_arms_and_instruments

 Here is the original engraving from Hogarth, reproduced from Wikimedia Commons

Here are a couple of earlier examples;-

This is an illustration from 1714 it has all the elements of Hogarth’s version.

This memorial dates from 1704

Click to see more………………..

Continue reading »

Jan 282016
 

Robin asked me to rescue this lock that had been converted to percussion and also savagely worked on at some later point – it isn’t clear what the objective was, but its a bit of a mess and I don’t feel that I’m violating my principles of not destroying historical material by recutting it – I’ll make sure I leave my initials on the inside of the lock….

robins lock orig1

Robin’s Lock in a sorry state – the engraving on the nose obviously dates from the conversion at least 30 years after the lock was made.

The tail has a ‘stand of music’?  engraving somewhat similar to the  ‘?stand of arms’ I just recut on Fred’s butt tang – I can’t identify most of the elements on this one either, but it must be a standard design of the period  (update – see separate post ‘ Stand of Arms’ for history of this pattern) .  

To read more …. Continue reading »

Jan 062016


I’ve now done four guns for Fred, one single barreled gun, two based on sets of McKnight casings from Kevin Blackley and one conversion of a double percussion gun by Clough of Bath.  I have put pictures from all four jobs here ;-


Fred’s single barreled gun – the first I engraved for him;-

false-breech1

to read more, click on the message;-

Continue reading »

Sep 272015
 

I did a practice Scottish Lock pattern  earlier this year (see Celtic Engraving below) and now Archie Owens has acquired the gun and made a new lock and has asked me to engrave it.  His grandfather fought with the Cameronian Highlanders in the First World War, and he wants to celebrate his Scottish ancestry by tying the gun to the memory of his grandfather.  He has the Glengarry (cap) and cap badge belonging to his Grandfather and would like elements of the badge incorporated into the lock design.  It is not too far from what I did before, so I now have to do some sketches and get them approved by Archie.  I will keep this blog updated as I go along…..   Now completed and delivered, but stupidly I forgot to get a pull of it!

blank lock

cap-badge

The Cameronian Highlander’s glengarry badge

CELTIC-COMPLETE

The completed lock – click on the picture – you’ll get a better resolution!   (browser back to exit)

Here is the final work, click below to see the steps along the way……..

Continue reading »

 Posted by at 12:18 am
Jul 202015
 

Out pigeon shooting, Derek propped his Ardesa 20 bore o/u against the hedge and turned his Land Rover to park it out of the way- you can guess the rest – a stock at 30 degrees to the barrel!  An amazing repair later by Chris Hobbs – the fibres of the wood had stretched 3mm & it was only possible to repair it because it was cheap wood – someone thought it would be a good idea to mark the event by engraving the escutcheon and it came to me for a little creative work before it got back to Derek………..


CARELESS-BASTARD-DR1

Not a very good photo, but you get the idea!

 Posted by at 9:27 am
Jul 192015
 

Dick had a pretty little Martini action rifle that had had 4 holes drilled and tapped in the top rib to take a sight, that his client wanted obliterated, so Dick made screwed inserts and peened them in, and filed them down and I re-engraved parts of the name, and the pattern on the rib.  An alternative would have been to weld the holes up, but this way was less invasive – and it was only intended to be a quick and straighforward job.  You can still see the marks, but only if you look for them.


falling block rifle

top-rib2

 Posted by at 9:30 pm
May 132015
 

Allan Owens mentioned at the last Anglian Muzzle Loaders’ shoot that he had a gun he wanted to rebuild as a Scottish gun as he has links to Scotland, so I thought that I’d have a look at what sources I could find, and as I was looking for a theme for a bit of practice, I decided to devote my beautifully polished bit of steel to a Celtic theme – nothing to do with the success of the SNP in the general election, although there might be a market there!

CCIceltic test 2

This is the finished test lock – not too bad, but need to flow the leaves a bit better in one or two places, and maybe it should have had a small thistle at the toe of the ‘lock’?  The thistle heads on the lock are not quite as good as the right hand one above.

Continue reading »

May 022015
 

\

For more photo examples see Engraved Screw Heads – Gallery post on this site.

For a list of dimensions of  most modern thread sizes click here;- Useful thread Data

Gun screws are one of the most common things that get lost, broken or mangled on old guns and so are often remade.  On an old gun a replaced screw that hasn’t been engraved stands out a mile, yet they are one of the easiest things to engrave, as we shall see…

Continue reading »

Feb 242015


Since putting this up originally  I’ve changed my microscope – the Wild I now use is described, but I also more recently  bought a Chinese AMSCOPE zoom trinocular microscope because I wanted to have a digital video camera that showed my work while it was in progress for demonstrations – unfortunately the cheap trinocular microscopes you can buy all seem to work by switching out one eye in order to use the camera, so you cant work normally and show it to a screen at the same time, so it didn’t do what I wanted it for.  It is, however, a perfectly good microscope, and I’ve fitted a pillar for a headrest in place of the digital camera mount.  Mine came with a very good stand with a sliding arm and quite a long reach, and it has the slight advantage over the Wild that the eyepieces have a longer ‘eye relief’ so your eyes can be further from the eyepiece lense and its easier to keep your glasses on.  The zoom isn’t much of an advantage compared to the 3 stage click magnification of the Wild as its easier to get the scale of things if its one of 3 magnifications.   All in all it is a perfectly acceptable microscope and for our purposes there is not much to choose between it and the Wild which probably originally cost 10 times as much, and even second hand cost 50% more.   ( I paid £600 for the Wild with case and stand and light, the Amscope was £422 with stand).

as of Oct 2018 I mostly use the Wild microscope in my workshop and the Amscope for demonstrating as it saves disturbing the Wild.


The starting point for engraving is the tools, for me that’s mostly push gravers, and mostly square gravers.   Since engraving steel wears the tools very quickly, and the biggest cause of slips and errors is blunt tools or broken tips, you won’t get anywhere until you have got the equipment and skill to sharpen your gravers – there is no short cut to this.  Experienced engravers can (mostly) sharpen their tools by hand without jigs or guides but for ordinary mortals it is not possible. Disbelieve me at your peril!

tools1


Part of my setup – the tools are mostly squares sharpened the same way so I only have to stop and sharpen tools when I have blunted a number.  There are a few other tools – knife and ongulet and some lozenge.

There is more here…………………………….. Continue reading »

Feb 102015
 

Here are a number of my practice plates – they represent most of the practice I have done – there are probably at most half a dozen very early ones that are too bad to contemplate!

testplate - lancaster3

Click below to see more practice plates……

Continue reading »

 Posted by at 8:00 am
Oct 052014
 

My latest project is engraving a gun that a friend Allan Owens has just finished.  Allan has built a number of punt guns before, including the restoration/rebuild of  the famous ‘Big Tom’, and this is his 15th gun, and I believe his first non punt gun.  I was a bit reluctant to cut my engraving teeth on his beautiful new gun, but he insisted, so I’ve got to do it!   Yesterday a parcel of the smaller parts arrived  – we had already discussed what style of decoration was appropriate, and agreed that it would be a very plain gun – I’ve got the lock design sorted, and am working on the rest, but while it is still waiting the first touch with the graver, here are some pictures of the gun.

So far I’ve fixed the parts onto blocks so that I can hold them in the engraver’s vice without marking them – no need to glue them down as there are enough screw holes.

Allan's gun in the white

Allan’s gun in the white

Continue reading »

 Posted by at 12:49 pm