I have a .75 bore 9 inch barreled pistol by Jas. Price that looks a bit like a heavy cavalry pistol of 1796 with 2 marks on the barrel, it has the crown and GR and Price’s name on the stepped lock and a flat swan necked cock and roller on the frizzen spring ( I’m not an expert, or even really beginner on military stuff – its all a bit of a dark art to me, but this clearly wasn’t a standard issue pistol) ;-
While I was stripping the James Price military flintlock to use it as a guide to making the inert pistol I realised how bad the stock was when a chunk of the muzzle end fell off when I knocked out the barrel pin! The grain is all over the place – at the break it was going off at 45 degrees to the barrel axis – and there are signs that a couple of other cracks have been glued up. There was also a split and missing wood at the muzzle end, mainly in the ramrod groove. As the lock is in very good condition and it is all quite crisp I thought I’d do a careful job of repairing the stock, and possibly re-browning the barrel as it’s in worse condition that the rest of the pistol. The break at the for end of the stock looks fairly recent and isn’t dirty or oily and fitted together perfectly so I wrapped the barrel in a single layer of cling film to stop the glue sticking to the barrel and used epoxy glue to fix it, using masking tape and rubber self amalgamating tape to hold it all together while the glue set. The choice was either to use superglue or epoxy – superglue is good but you have to get it correctly positioned or it sticks in the wrong place, and I’m not sure of its strength if dust or oil is about. On the other hand epoxy is not so runny and is not intended for very thin joints so sometimes leaves a visible line at the join. I went for epoxy as I prefer it if the parts have already separated, but I did put a lot of pressure on the joint by binding it with the self amalgamating tape, stretched well before applying. Gluing the joint worked well – its almost invisible, but that area will need refinishing, so I thought I might as well raise a few of the dents and dings by steaming, so I’ve now removed all the original (oiled) finish from the pistol – but most of the small dents have been raised almost flush – there is one ding in front of the lock that I can’t shift ! Anyway the pistol will need refinishing when I’ve done the rest. Now the the stock has the chunk in its place I will need to figure out a secure way to hold the stock while running an 8mm milling cutter down the muzzle 2 inches of the ramrod groove to get rid of the split and oily wood – I’ll need to cut out a bit more to one side as it will be necessary to insert a small wedge alongside the replacement ramrod groove. (Given the weaknesses on the stock I’ll use the repair here to restore strength – primarily a structural repair rather than a cosmetic one) I can’t clamp the stock fore-end without the barrel in place as it will just crush, and if I put the barrel in I risk running the milling cutter into it! I may have to turn up a dummy barrel – I have some bits of broom handle and my wood lathe is ready….. ( I have learnt many times over that the secret of any machine operation is in the clamping – you are far more likely to damage the work through weak clamping than you are from overtight clamping….)
Here are some pictures…
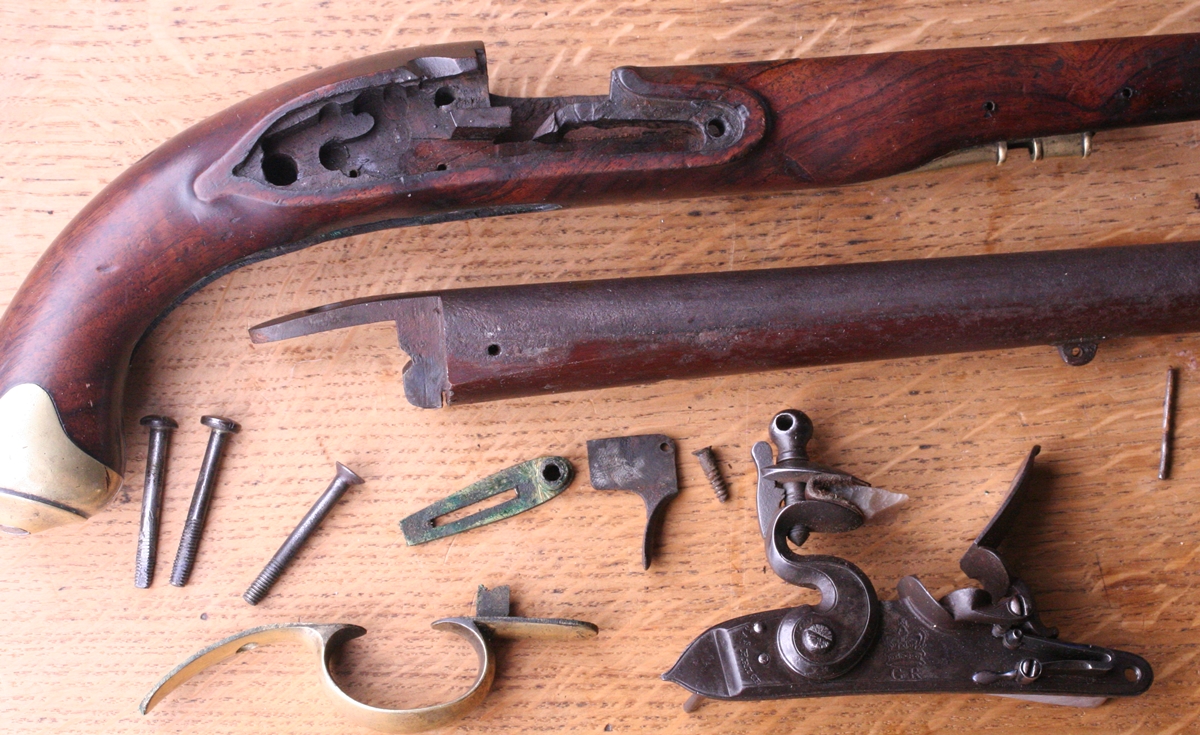
The parts of the James Price Pistol before repair.

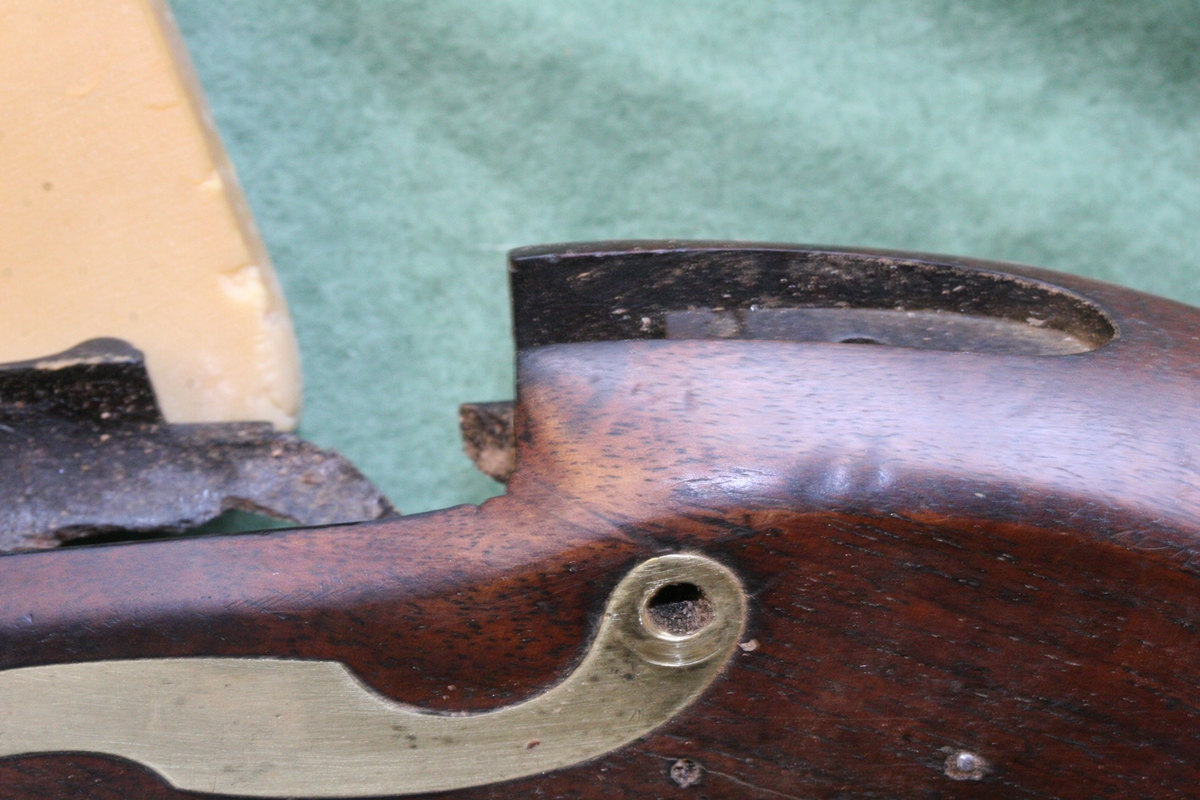
epoxy repair under tension – not a perfect use of epoxy as it likes a thicker glue line – but an almost invisible repair
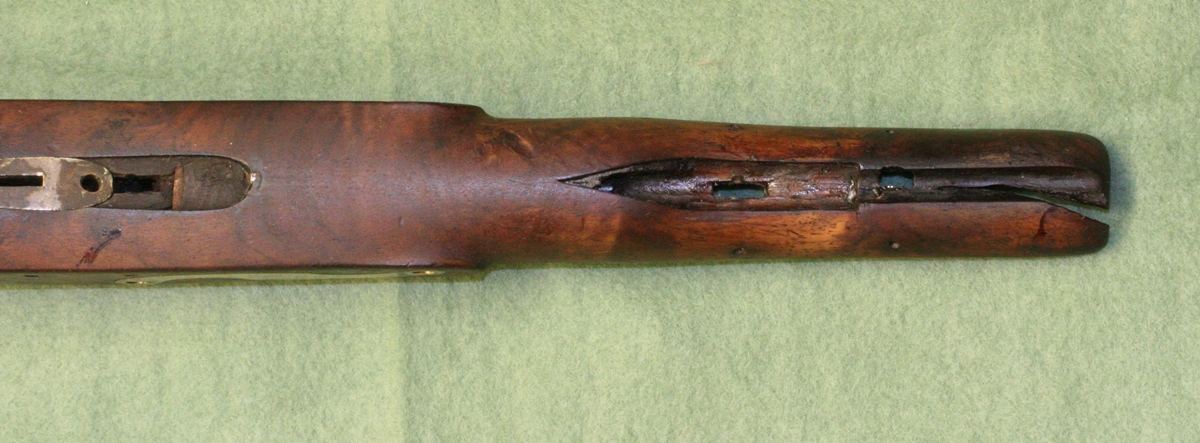
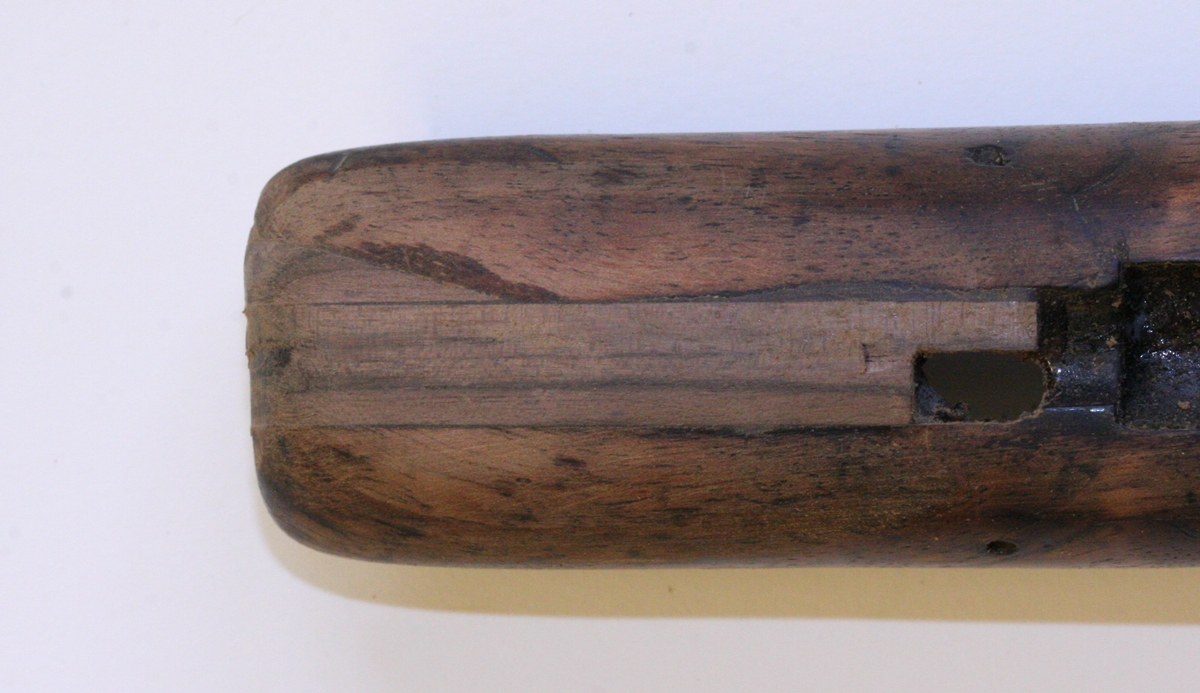
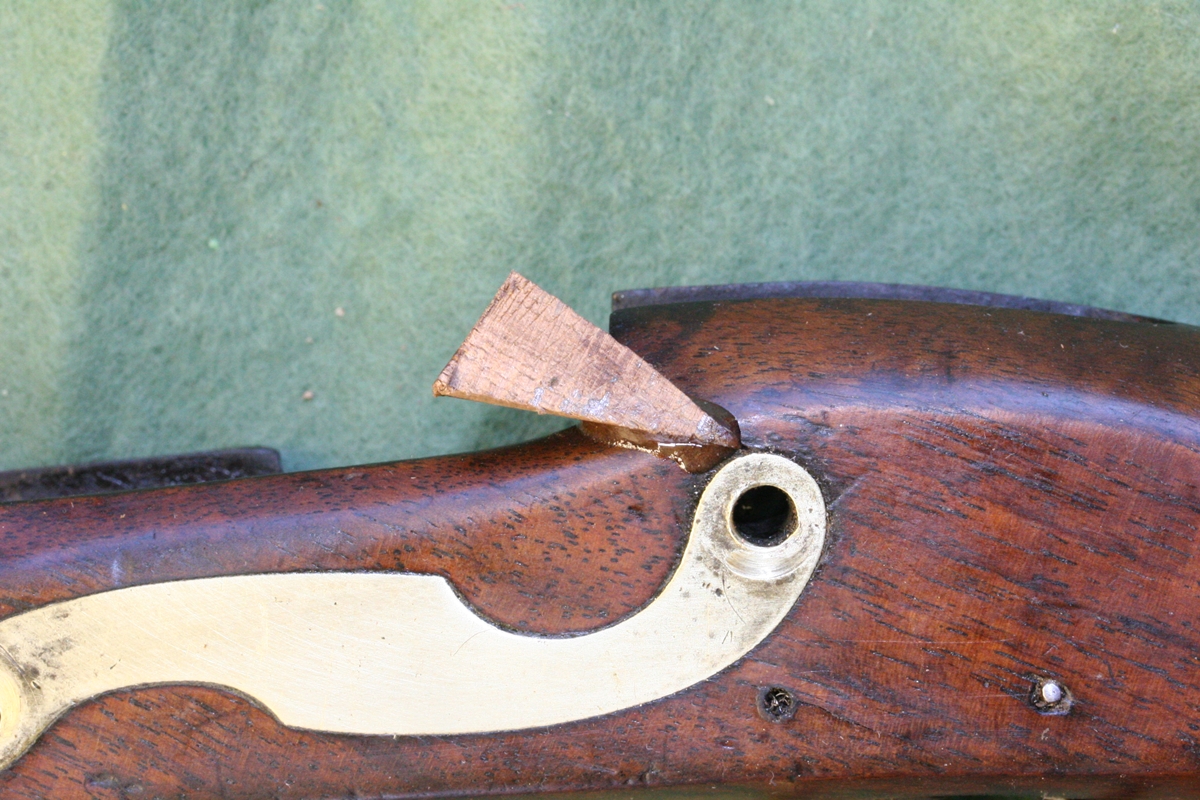
Split and missing wood in ramrod groove back to hole for barrel lug, behind that I glued the crack with superglue run into the crack that went as far back as the lug for the ramrod pipe.
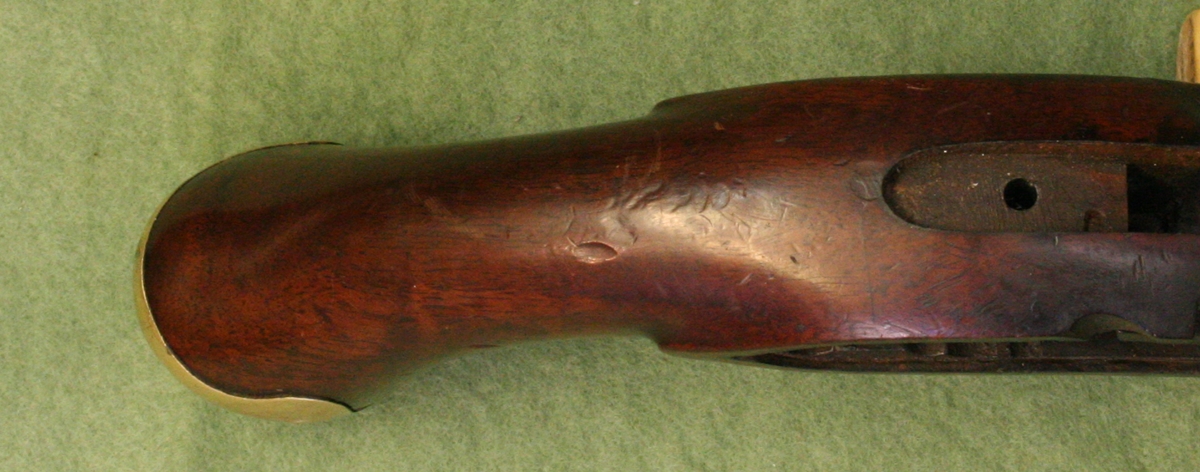
There were just too many dings for my comfort so I have done some steaming to raise them, but in the process the (oil?) finish has largely gone – it will have gone at the muzzle anyway.
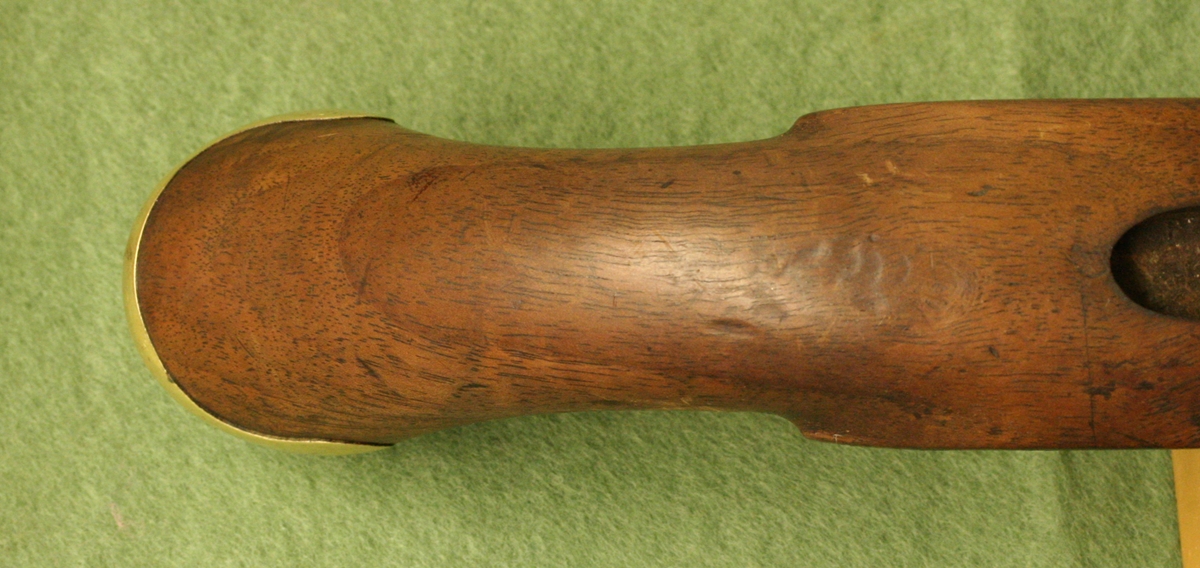
A few minutes in the steam from a kettle really raises and softens the dings – there is no need to sand down the surface, just a light rub with steel wool and it will be ready to refinish when the rest of the work is done….
The clamping of the stock for milling out the broken wood was made easier by having made a set of tapered round blocks for sanding out barrel grooves – I just needed to select the nearest smaller size and wrap a couple of layers of masking tape onto it so that it was an exact fit in the barrel groove – a couple of bits of an old cork table mat made good pads for holding the stock. I ran a 6 mm cutter a couple of times up and down the groove to trim out all the broken wood, then cut and glued a parallel sided bit, then cleaned out the apex of the wedge shaped gap and sanded a piece of walnut to fit – I have a 12 inch disk bench sander that is ideal for shaping small bit – I even managed to use it to round off the ebony ramrod for the inert pistol. Having glued and trimmed the inserted wood I reclamped the stock in the miller and ran an 8 mm ball end cutter up and down the new wood to form the ramrod groove.
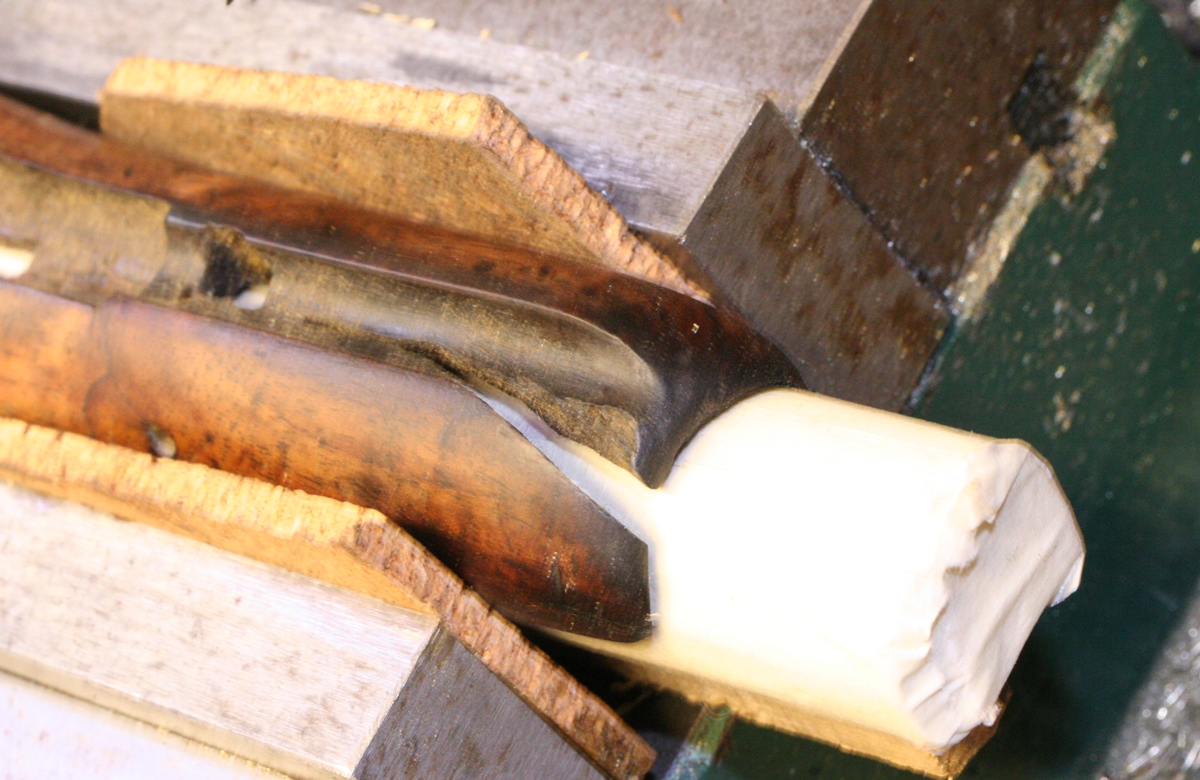
There is quite a lot of wood missing – you can see why a proper, strong repair is needed. It is important to hold parts you are machining very firmly, hence the tapered dowel in place of the barrel – the cork table mat pieces make ideal clamping pads.
The next step is to run an 8 mm ball ended cutter down the ramrod groove using the previous clamping arrangement.
Having got the shape of the barrel and ramrod grooves restored, the lug on the barrel for the securing pin must be fitted into the stock by trimming the new wood. – having made sure the barrel fits the stock can be lightly rubbed with medium grade steel wool and the oiling begun using ‘Slackum’ lenseed oil and beeswax mixture.
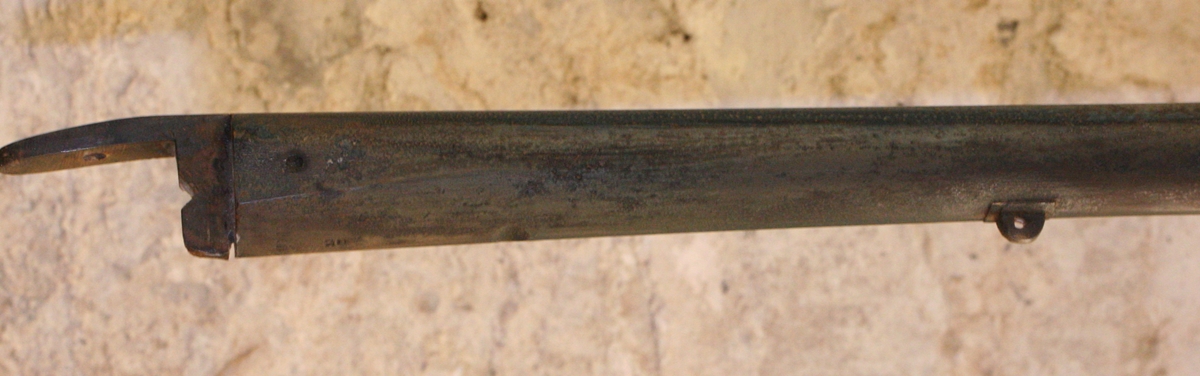
The barrel was then ‘struck up’ with a file, taking just a little off, and finishing with draw filing it, then using 320 grade cloth backed tape and finally using 400 grade paper along the barrel. I haven’t taken much off at all – to get rid of all the rust marks would have required loosing too much metal., just tidied up the surface. The barrel was then washed in hot water and detergent and brushed over with chalk dispersed in water to remove any grease and facilitate rusting – then when the chalk is dry it’s brushed off with a toothbrush and its its down to the cellar with Blackley’s Slow Brown solution. If its too slow I’ll take a bowl of boiling water down and put it under the barrel!
I alternated between the Blackley’s Slow Brown and Tim’s used PCB etchant. Blackleys gives a very subtle pale greyish brown, whereas after the first rusting with Tims the barrel develops very blue black tones that I enhance by steaming. This barrel showed mostly blue/black with a few brownish fringes. I think I’ll have to do some more scientific tests of the two solutions – I have the length of barrel left over from the Inert pistol – about 24 inches – which would allow me to compare half a dozen samples of the two solutions with or without steaming…..
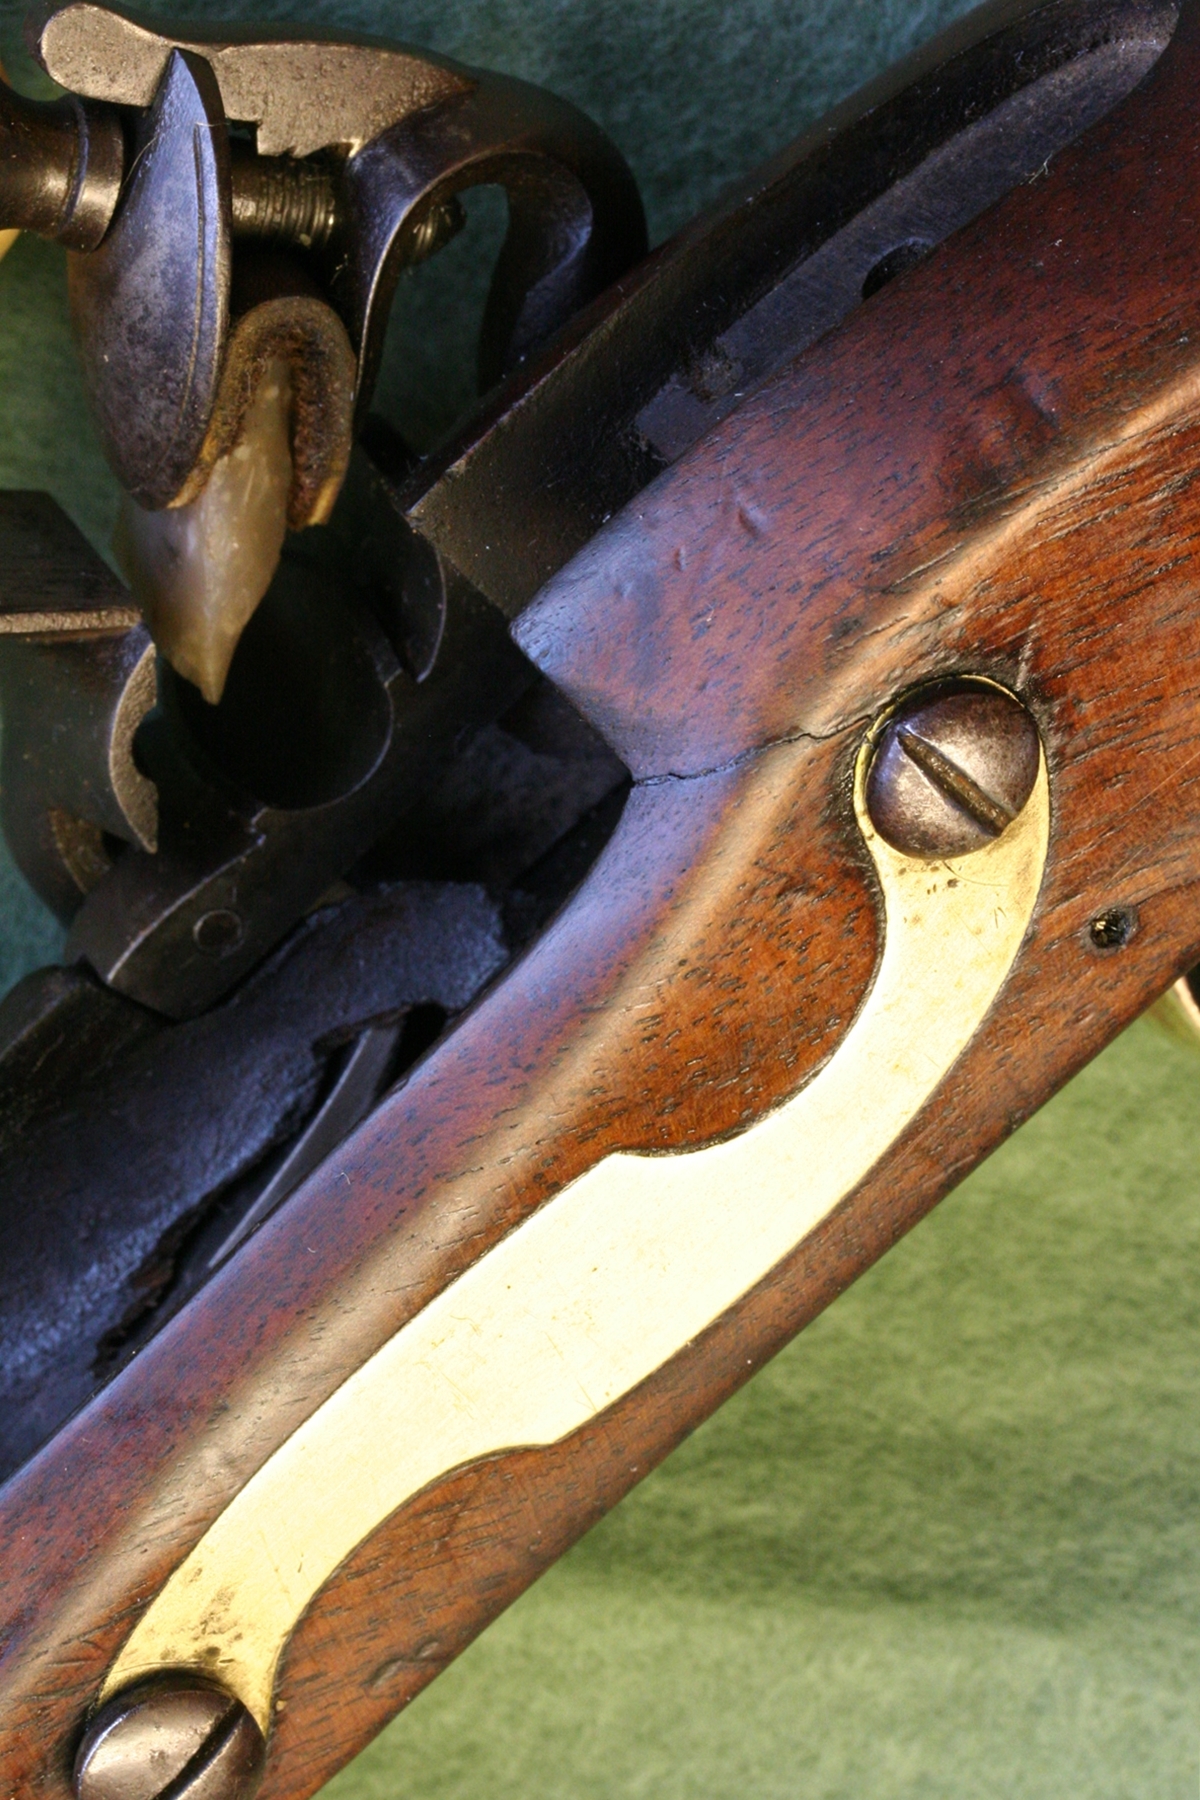
Finishing off the Price, I realised that there was a nasty conspicuous crack by the breech on the left side – it seemed to have been glued up internally but the external repair was poor. One lesson I learned from Dick early on was that to fix a stock fault usually involves making things worse before they get better – which if, like me, you are none too confident, means you run the risk of an even bigger mess – hence the machining out of the whole ramrod groove. Anyway to fix this nasty crack I checked that there was no movement if you tried to flex the stock, and then cut out the crack in a shallow angle wedge – the only tool I have that will reliably cut into a very sharp ‘V’ is a piece of 12 inch hacksaw blade that has been ground down to a toothed knife edge – anyway a wedge of walnut with the grain aligned was glued in using instant glue mixed with walnut dust – make sure it goes right in first time. This is then trimmed and sanded to lie smoothly in the stock – at this point it looks better, but its still a bit conspicuous. The next step is to do a bit of discreet colouring with spirit stains – English Walnut and Ebony Black are the colours I use. The result is pretty good – an expert would still spot it but it doesn’t shout anymore. See Jas Price Repair for more pics…..
Nasty crack – no movement but still needs attention
Wedge glued in place and cleaned off – less visible but still seen – I think it was oiled before the photo!
It will be even more discreet with a little more subtle colouring!
You can see a photo of the finished pistol in the INERT PISTOL post.