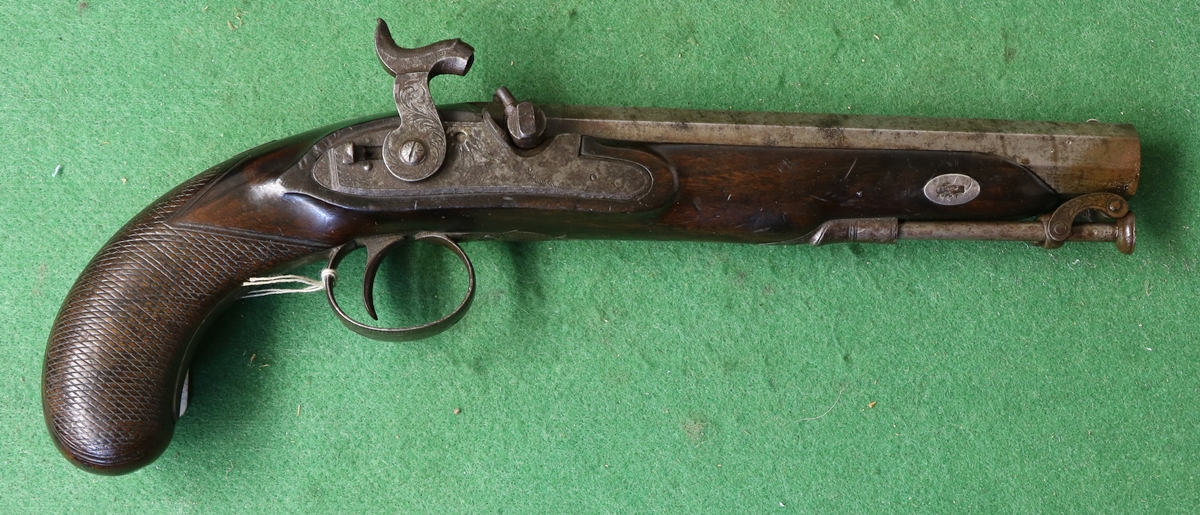
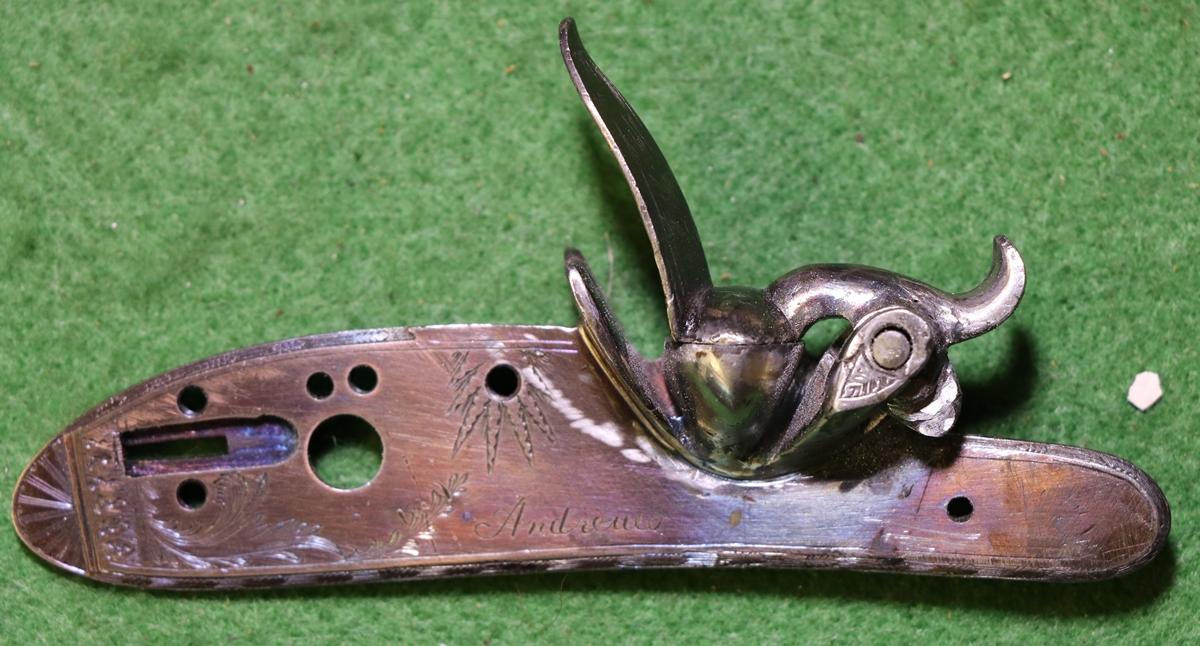
The Andrews is a fairly typical travelling or possibly officer’s pistol of the turn of the 18th century. Judging by pictures on the internet there were basically two common patterns of Andrews pistols of this type – the earlier with a rounded back to the lock and a semi rainproof pan and serpentine cock in the English style, and the later with a square back to the lock and a full rainproof pan and french style cock with a cutout. This one is probably the earlier type based on the shape of the lock and so would not have had a full rainproof pan and french cock.
Stripping the pistol;-
The first rule is DON’T do any damage – if you can’t get it off without damaging something, do you really need it apart?
The secret of not doing damage is fairly simple;-
- Use only well fitting turnscrews in slots that have been cleaned out with a suitable tool ( e.g. pointed bit of hacksaw blade)
- Hold the gun very securely in a vice with lots of padding and a block under, so that you can use maximum force on the turnscrew without the gun shifting – you are much more likely to damage things through parts moving than from over zealous clamping. If the screw doesn’t undo try doing it up few degrees first. Sometimes a drop of oil/acetone mix will help break the grip, or maybe a very hot copper rod applied to the screw, or a very fine flame if you can use it without damaging anything. Check if the screw is a woodscrew or a ‘nail’ screwed through into another piece of the furniture – guns differ in this respect, and although there are fairly common arrangements in later guns and pistols, early guns and pistols may be quite different. The nail in the tang of the false breech is usually tapped into the trigger plate, and the front trigger guard or finial nail often goes through into the bottom of the false breech. Sometimes the threaded end of a nail has got spread, and grinding it off a bit with a fine tool on a Dremel type drill clears the tread.
- Older guns and pistols were held together by fine steel pins through the woodwork and through a tab on the furniture – As with most relevant parts, English ( & Scottish etc.) guns inserted pins and bolts from the LEFT side, French guns, I believe, from the right. If you look at a number of antique guns you will sooner or later see where a pin has been knocked out and taken a chunk of the wood with it as it was rusted in. To remove pins you need a long and fine pin punch and a light tack hammer and a bit of sheet lead – fold the lead up so that you have a pad at least 6 mm thick and hammer it flat. Place the pad on a flat heavy surface and put the left side of the gun on the pad so that the wood surrounding the pin is in close contact with the lead pad and gently tap out the pin. With luck the pin will make a neat hole in the lead and leave the wood intact You need to be careful, particularly with pins that you knock out from within the lock pocket that the pin punch stays on the end of the pin and doesn’t slide down beside it.
- If the gun is very rusty be extremely careful removing the furniture as it may break the edges of the wood.
- Barrel bolts always get abused and the escutcheons around them, in later percussion guns, get badly dented from attempts to prize the bolts out with a turnscrew. it is better to use either a sharpened bit of polycarbonate, or a turnscrew end, to tap the bolt out from the right side until you can get hold of it to pull it. The bolts are held in by a small pin that can usually be lifted out with the corner of a chisel.
- To remove the cock you can try prizing it off, but that risks damage if it is tight. My preferred method is to take out the cock screw and place the gun across my knees so it is on a resilient surface, and sharply tap the end of the tumbler with the largest punch that will fit inside the square – this will usually pop it off – its not really obvious why! Failing that, strip the lock completely until you are left with the lockplate, tumbler and cock and place the lockplate across the jaws of the vice and tap the tumbler out.
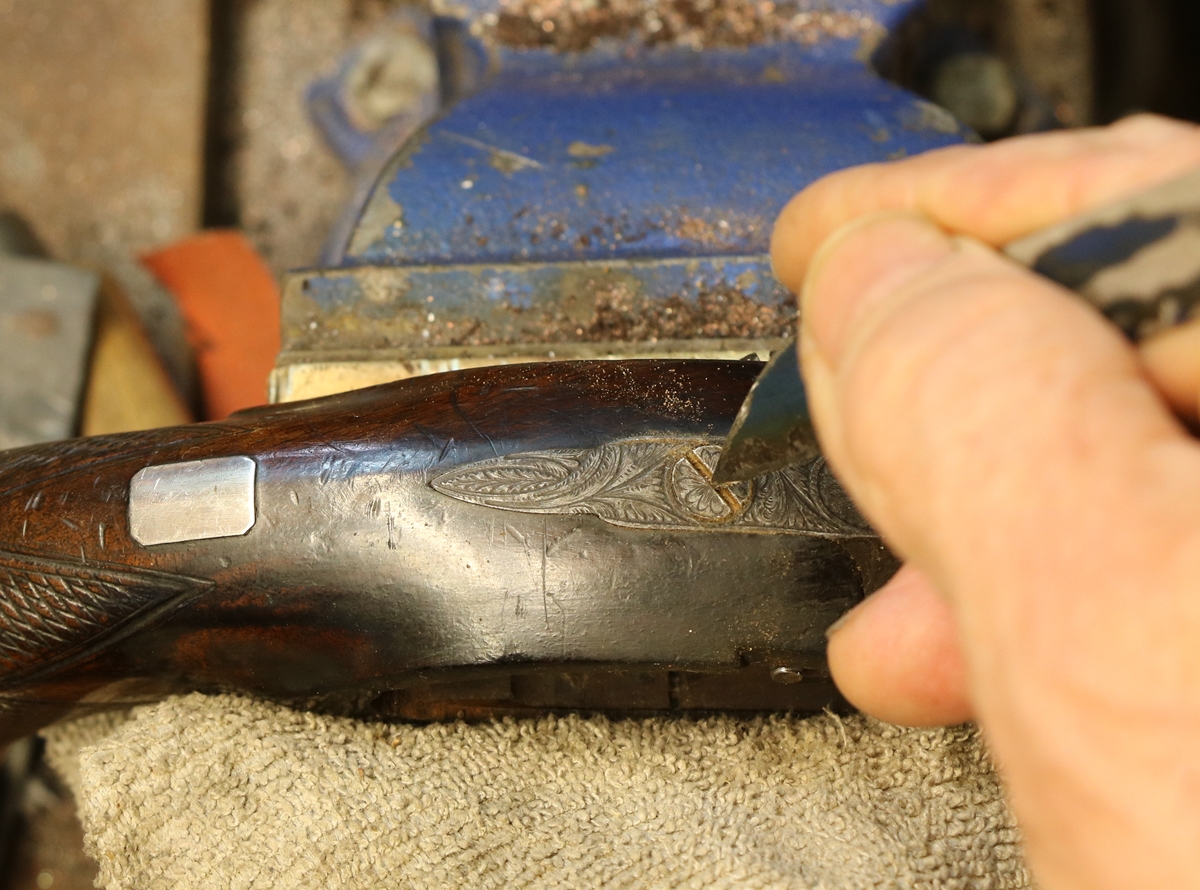
The end of the trigger guard screw was a bit battered so I ground it off slightly
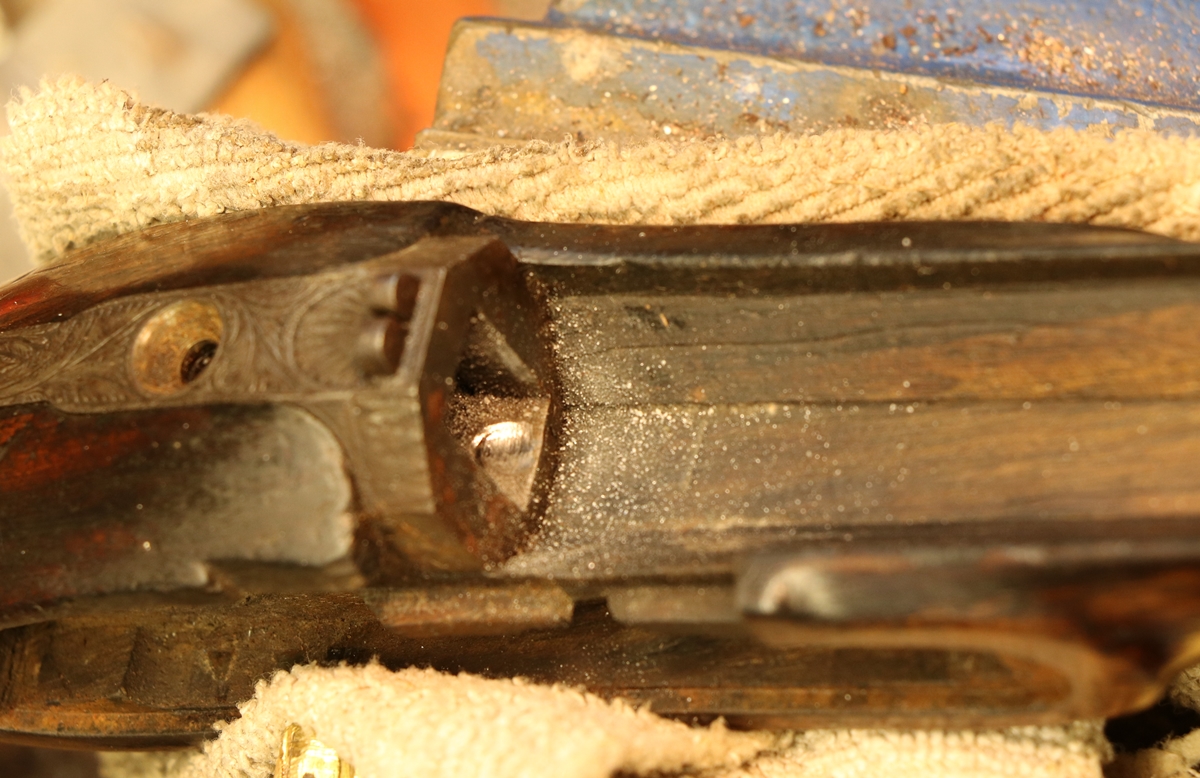
Knocking out the trigger pivot pin onto folded lead sheet

The barrel has been ‘struck off’ first with a 6 inch smooth hand file, then with a 6 inch No 6 cut file, tehn with a fine stone, 600 grade strip,and ultimately with 2000 grit paper and then polished with 2500 paper. After that it was washed in warm water and detergent and coated in chalk slurry which was dried and brushed off. It is now in teh process of being browned…. The nipple drum came unscrewed easily and has a good thread.
I decided that I couldn’t bring myself to cut up teh original lock plate to fit a pan, so I am making a completely new lockplate – it will take me a lot longer but I will feel happier, and anyway I like making locks. So here are some photos;-
![]()
I only had 6m mm plate and it should ideally have been 1/4 inch (6.4 m m) but I can probably live with it.
![]()
It was about 4 – 5 hours work to get the plate to this stage. The gap in front of the top of the lock will go as that whole section will be replaced.
I cut the outline with an angle grinder with 1 mm disk and then used a 50mm linisher and then filed to get the blank – I have now put the step on teh tail of the lock – Now I need to check where the touch hole comes and check that my pan will fit and everything will align, then if its all OK I will have the tricky job of transferring all the holes accurately from the original lock plate onto the new one – I will use all the original internal lock parts as they can be swapped back to percussion if needed. Then I have to file a bevel round the lock plate to match the old one and do the engraving. When teh engraving has been done I will cut the lock plate for the pan section and weld it in – I will leave that until the engraving has been done as the pan gets in the way and its easiest to weld in the pan last – I might cut the slot for it before engraving so that I can see how much space I have to fill.

Lockplate drilled and milled for the safety and engraved to match the original

The pan section has been welded in
Glue the frizzen to the pan with Araldite to hold it while drilling the pivot hole.

The pan section and frizzen have had a lot of work with fine files to get the shape right. The pan now works