___________________ DIARY _____________ _________
7th April – Gave up on Parcelforce after another ‘I’m very sorry but there is nothing I can do…’ so went and bought another basin and fittings for another £150. Now I suppose there will be a fight to get the money back on the original order from Better Bathrooms! I heard today that E.J. Blackley, the founder of the eponymous company has died. A great guy and a great inventive genius – the business continues to be run by his son Kevin. I had a look at diamond sharpening stones, and was pleasantly surprised that the prices were considerably less than the last time I tried to buy one. From www.buybettertools.com a 6 inch DMT (reliable brand) stone in 1200, 600 or 325 grit costs 29.99 including VAT. My very fine diamond stone is a DMT extra extra fine at 8000 grit, but I didn’t feel it was worth the cost (£101.99) as it didn’t give a very good surface finish. A half decent 6 inch x 2 inch Arkansas stone is going to cost at least £50, but with care you could make do with a slip of 1 inch x 3 inches. (disclaimer – I have no connection with ‘buy better tools’ and have never used them, but the stones are branded so shop around for DMT diamond stones…) I looked at optical visors before I got a microscope, and borrowed an expensive Optivisor, but it didn’t really do anything special for me that a cheap one didn’t do perfectly well. As explained elsewhere, with simple optics there is a direct relationship between magnification and working distance – the higher the magnification the shorter the working distance. A magnification of 3.5 is about right to give you enough room to engrave without sticking the graver in your nose. A number of professional engravers use a single loupe or eyeglass in one eye, and engrave with their face very close to the work, but I find it very difficult. I now rely entirely on my microscope which gives me magnifications from about 5 up to x 25, but a decent stereo microscope that is suitable for engraving will cost you several hundred pounds secondhand, or about £600 or more for a Chinese version. I found a very good second hand Wilde ( later Leica) with stand for the price of a new Chinese model. I was lucky that the microscope I found had almost suitable magnifications for engraving, and I found an add on lens that made it perfect for my work. The big advantage of a microscope is that the more complex optics breaks the relationship between magnification and working distance, so that I can have about 120mm of working distance at all magnifications I can use. Don’t buy a microscope until you have checked out the magnifications available and the working distance- you need a low mag. of x5 or less, and are unlikely to need much above x25 even for very fine work. A working distance of around 120mm is good – much more and you can’t get your hands and eye into comfortable relative positions, much lee and there isn’t room for your hands between the objective lens and the workpiece.
6th April – Still tearing my hair out over my missing parcel which hasn’t materialised. Hours trying to phone just gets people who say ‘ terribly sorry, but there is nothing we can do’ – Its still in Birmingham as far as I can see, but in the digital pipeline and inaccessible to mere humans – it it doesn’t materialise tomorrow I’ll have to find a substitute. The missing item is a bathroom basin that I need to replace one I have already taken to the dump, and I need the room finished soon as it will be used next week. It’s supposed to be delivered tomorrow, but I’m loosing hope………………… Thinking about starting engraving, I realise there is quite a threshold to cross, because, althought it seems that it is a fairly simple process, you can’t really see well enough with the naked eye so you need an optical aid of some sort, which you won’t at first be used to using. You also need some means of holding the workpiece, and since the force you need to exert for engraving steel is quite high, the holding needs to be secure but you need to be able to move it with your other (left) hand and to use it to oppose the force of the engraving hand. All this bearing in mind that in the beginning your graver will occasionally come out of the metal suddenly and fly off and impale your other hand – all that without the complication of actually engraving. Plus there is the problem of what you are going to engrave! I haven’t managed to find a source of suitable soft, uniform steel with a fine or polished surface in pieces that are handy for engraving. I usually buy cold rolled mild steel bar in 6 or 8 x 50 mm in 3m lengths and get it cut into 150mm lengths by the supplier ( I need to check who is best) and then get a local firm to surface grind it, but I haven’t found anyone who will produce a suitable surface, so I have to do a lot of work to get the surfacc fit for engraving with a fine file and then wet and dry down to 1000 grit. I have bought cheap little engineers squares and engraved those for practice – check out Tracy Tools on the web, great service and very very cheap for what seems like perfectly good stuff – I get blanks for gravers from them, plus drills, taps and dies. I must investigate getting steel with a decent finish and add it to my shop. Having got that far with our beginning engraving, we then meet the next little problem – within a few minutes you will either have blunted your graver or more probably broken off the tip as you tried to finish off a cut without impaling yourself – so you need to sharpen it – whole new can of worms! As a beginner you CANNOT sharpen a graver without a jig, you can get a proprietory one or get one of mine. Then you need a ‘stone’ to sharpen it on, and since gravers are hard and the surface to be sharpened is small they will quickly wear the surface of anything but the hardest ‘stone’ into an uneven shape that won’t sharpen true. If you break the tip off your graver you’ll need to remove quite a lot of metal, perhaps 1/4 mm or more to get the point back, so you need a fairly coarse ‘stone’, but that won’t give you a very good finish so you need a finer ‘stone’ for finishing. Even that stone will be a bit fierce for putting the tiny heel faces on the back of the point ( maybe a triengle of 1/4mm side). So you need 3 ‘stones’, preferably the coarse and the finishing will be diamond ‘stones’, and the heel stone an Arcansas stone – about the hardest, finest stone in use – you can’t get proper black Arkansas any more, but the white is OK. I use 260 and a 1200 diamond, and a white Arkansas stone, plus I have an old 10000 grit diamond that I just use for starting the heels so that I don’t score the Arkansas ( the 10000 grit diamond was a disappointment for sharpening as it didn’t give a particularly good surface and was very expensive). You can’t shirk the sharpening palaver especially when beginning as you’ll spend around 1/4 to 1/3 of your time doing it, and you won’t get much joy out of your engraving until you have mastered it. BUT it is perfectly possible to master it all in time – I did, and I didn’t have any hints on steel engraving, just an old graver that I used rather primatively on brass 50 years ago…………… If all that sounds a bit daunting you can always cheat and start with copper, which you can buy with a good finish and won’t require so much force, or be so destructive of your tools, so less sharpening time, then when you have made some progress you can make the transition to steel. I wouldn’t recommend brass as it is difficult to get a soft grade that engraves easily – most brass is a pain to engrave as it requires quite a bit of force to cut but will then suddenly yield and your tool will skid off making a nasty unintended cut across the surface and into the side of your thumb! I have found rifle cartridge cases engrave well but the curved surface is not easy for beginners……
5th April – Spent hours chasing a parcel that had gone astray and that I needed urgently. The , I bought it off had given it to Parcelforce in time, but Parcelforce had ‘ sent it to the wrong depot’ – how you can do that with everything computerised with bar codes is beyond me. Anyway I spent hours waiting in queues to talk to the supplier and getting no-where – the phone number they gave me for Parcelforce also got nowhere In the end I googled ‘Parcelforce Birmingham phone number’ (the latest depot it had been sent to) and in 30 seconds got sense and a promise that it would be prioritised and arrive tomorrow morning – we shall see! Anyway I got so frustrated that I took a chainsaw to a massive Budlia tree/bush and reduced it to a mangled stump, which left me with a very large heap of tangled branches to get rid of – still, I felt better for it. Still having some issues with my over enthusiastic Rottweiler blocking my visitor, but I’m working on it. And so, unfortunately the Gun Case Blog is again neglected. I had an email asking about what was needed to start engraving, so I might see if I can come up with a simple list. I get a few emails every week from visitors to the site and I’m always pleased to hear from interested enthusiasts, so if you have any questions you think I might be able to answer, or constructive comments for that matter, email me as per CONTACTS………….
4th April – My Rottweiler (named Wordfence – see below if you are not a follower of my blog) bit me, presumably for interfering in his choice of who to block from this blog, and blocked me! That is more difficult to deal with than his blocking of other people, as I can’t get onto the site to unblock myself! Fortunately I have a ‘get out of jail’ card, otherwise I wouldn’t be on the blog now. I’m sure it blocked me for some transgression that I hadn’t committed – If you get blocked from the site email me and I’ll sort it! These tribulations are sent to try us……….
3rd April – Internet came back last night, probably somewhere flooded, there was a lot of water about and the phone was on the blink too. I managed to re-instate a regular visitor to this blog who had somehow got blocked by my pet Rotweiler – Wordfence – that guards my blog against the (literally) hundreds of attacks every day. Anyway I managed to catch it blocking his IP address and duly admonished it. Peace is now restored! I was prompted by his recommendation to a watch ‘The Repair Shop’ on BBC2 that I’d recently been invited to apply to take part in a TV show being produced that wanted real ‘nutters’ who were prepared to go to any lengths to find parts etc to restore the object of their passion, the nuttier the better. I did give them a brief intro to the world of muzzle loading shooting and restoration, but I must, unusually, have sounded too sane for their plans, and they went off in search of more interesting nutters – perhaps like the 40 odd families I met at a lock on the Thames this summer who were each driving some form of amphibious vehicle on a rally on the river – ex army DUKW’s, amphibious 1940’s Jeeps, converted estate cars and whatever the little amphibious car of the 1970’s was – 40 of them in total – what a sight. The extraordinary thing was that they had come from all over Europe, as far as Poland, driving the bigger vehicles or trailing the smaller ones – talking to them, I realised that I and my muzzle loading friend are indeed sadly far far too sane to qualify!
2nd April – My internet is playing up and its almost impossible to do anything – try again tomorrow!
1 st April Too late for April fool’s jokes, that has to be before noon. I have been reading Keith Neal and Back’s book on gun cases and trade cards. Its a very useful guide to dating cases and also for anyone who wants to case antique guns, either in an antique case or a adapted box. While the best course of acction for anyone contemplating doing that would be to buy a copy of the book, they are hard to come by and expensive, so one gun may not justify the trouble and expense – I thought I’d extract some essential information from the book and put it in a Post, and add a table of dating features to my GUN DATES page – so that is the intention. I also need to do the promised Post on duelling pistols…..
30th march – Almost another month gone… I put all the furniture back on the 8 bore, where I know the fit is bad I put a bit of hard black wax on the edge using my tiny hot air gun (1/4 inch nozzle) to take up the gap, and melt more into any remaining gaps. The butt plate needed the bottom edge trimmed slightly – they often stick out a bit and catch, anyway it all went together reasonably well, and I got the screw heads aligned perfectly. So its beginning to come together – at the moment its all covered with sticky slacum ( boiled linseed, beeswax and terbene driers) waiting for it to go jelly like so I can wipe/rub it all off again. This process will be repeated until the finish is good enough, although it is always possible after a few coats to change to wax furniture polish and cheat! I was checking Brownell’s website for honing stones – I might just buy a few bits to make up a hone – the regular ones go up to 10 bore but I’m sure I can fudge things – the extension rod to make the hones long enough to go down the barrel are much more expensive than the rest of the kit and definitely won’t work with 8 bore barrels, so again I’ll resort to making something. I wish I had access to a Delapina lap, but never mind! I am not sure I have the perfect recipe for Slacum – I did a series of trials and came up with a maximum of 5% beeswax and around 1% terbene driers – but it didn’t seem that critical, apart from keeping the beeswax content at 5% or less. On the last lot I made the terbene went into short strings when I added it to the oil – not sure what happened there……….. My hard wax is made up of beeswax and carbon black, but it is possible to buy very hard coloured wax for repairing scratches in furniture that would be better – trouble is it costs £100 for a kit and has mostly colours we wouldn’t use. I was wondering today what essential kit one would advise someone starting out in restoration to buy initially – If I think what I would not like to be without, apart from the obvious collection of screwdrivers (turnscrews in gun speak) I guess I’d say a simple derusting setup, if necessary using an old phone charger or similar, and a cheap grinder with a very fine wire brush (probably as expensive as cheap grinder!). If I were mostly dealing with guns in better condition than I normally restore, I’d probably come up with a different list. Whichever you tackle, the need to be able to make screws will come up sooner or later if you can’t outsource that work, which takes you into the realms of a small lathe and taps and dies. And so it goes on………& on……………..& on………………………………………………….
The steel cup is a bit thick (limited by size of available end mill!) and I didn’t get rid of all the defects around it, but its meant as a functional restoration. Steaming has taken most of the dings out – minimal sanding was done – it is very effective.
The finial is quite badly rusted round the edges, which makes the fit rather poor, but improved! It no linger looks like a tired old gun that has been neglected and I hope one day it will see use again when the barrel is done.
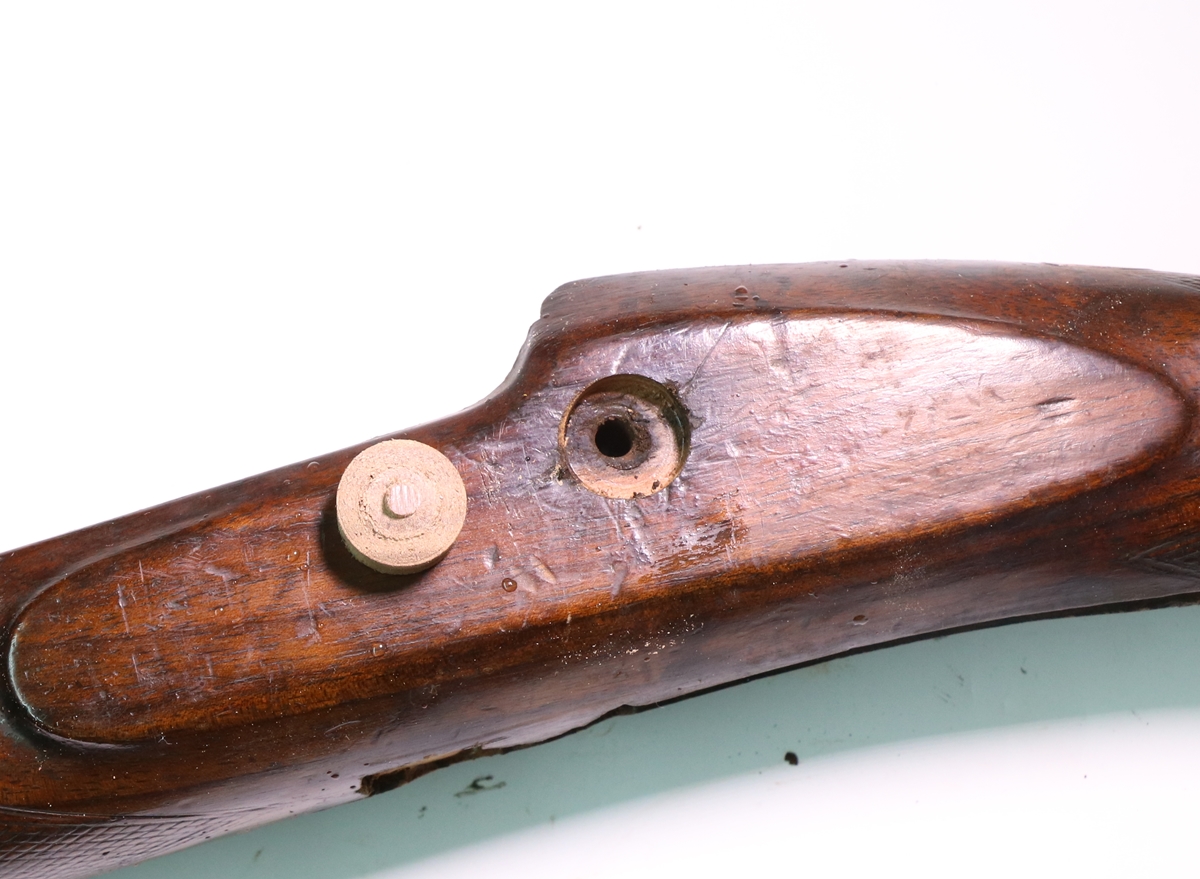
29th March – More 8 bore… I forgot to mention when discussing removing screws that one of the problems with fitted screws in old guns is that the heads are contoured to fit the furniture and as you unscrew them you need to keep the screwdriver aligned with the slot, which often means tilting it as you turn it, otherwise you partially come out of the slot. Anyway having stripped and cleaned all the furniture I escalated the job to include gently refinishing the stock as it had plenty of dings etc. I inlet a small piece of wood where a bit had come out round the finial of the trigger plate and cut the surface flush and refitted the finial temporarily, then set about steaming out the dings in the spout of a kettle on the AGA – difficult to do if you are using an electric kettle, but a wallpaper steamer would work. That got out or reduced a lot of the dings and destroyed some of the finish so I removed most of the rest on the butt with 320 grit sandpaper and methylated spirits (wood alcohol) as it was varnished with shellac. I cleaned the chequering using an old toothbrush and meths, enough to show the chequering reasonably clearly. Several goes over the stock with medium grade steel wool and meths got it to a reasonable finish – I didn’t want a complete strip to bare wood, just a somewhat better finish. There were a number of black stains – probably iron stains, so I very carefully applied oxalic acid with an artist’s paint brush to soften the stains – you need to be very careful or it will bleach the unstained wood very pale – if that happens you will need to colour it down with Van Dyke crystals in water or a spirit stain, applied carefully. When you apply oxalic acid or stain using an artist’s brush, apply it streakily along the grain of the wood – that way you hide any edges amongst the grain markings. Having got the wood to a fair finish and acceptable colour I wipe over it all with a piece of kitchen roll dipped in shellac dissolved in meths – button polish is one name for it – this seals the grain. Applying a second coat messes up the finish because it leaves smear marks, so at that point I’ll go to using ‘slacum’ to give an English oil finish, which will require several dozen coats, but before that I’ll remount all the furniture. At the moment I’m waiting for the butt plate screws and the sling mount to derust….. I also need to fit the steel cup for the side nail. The next big job will be to sort the barrel, but that may have to wait a while as I need to make/buy a tool for lapping the barrel before I rebrown it. lapping the barerl will have to wait while I clear out the outside workshop as I can’t move in there at the moment for stuff bought back from the flat – I have just about cut up all the wood from the window surrounds and fittings but all the tools, plumbing bits and electrical wiring parts are scattered around – if you don’t get much gun stuff on the blog for a bit it will be because I’m trying to have a massive sortout – there is a certain amount of domestic pressure for de-cluttering etc in addition to the workshop……………….. Happy Easter!
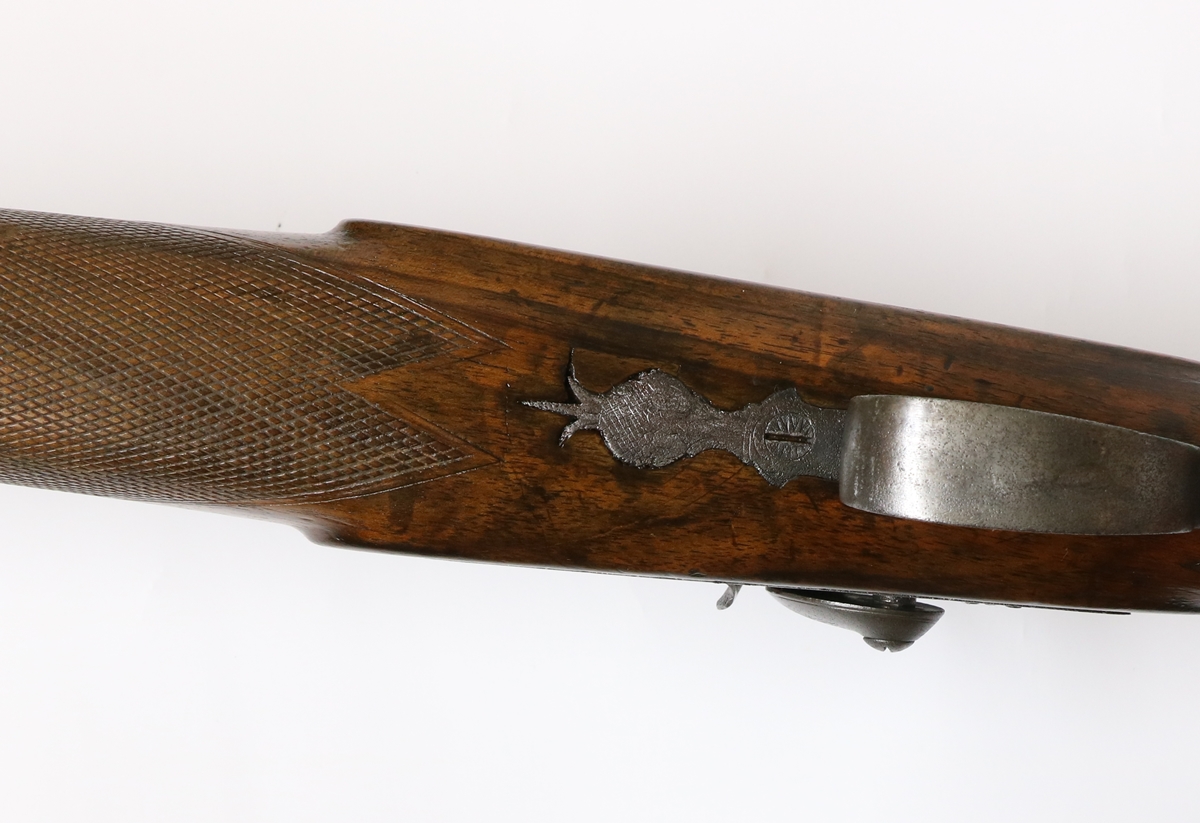
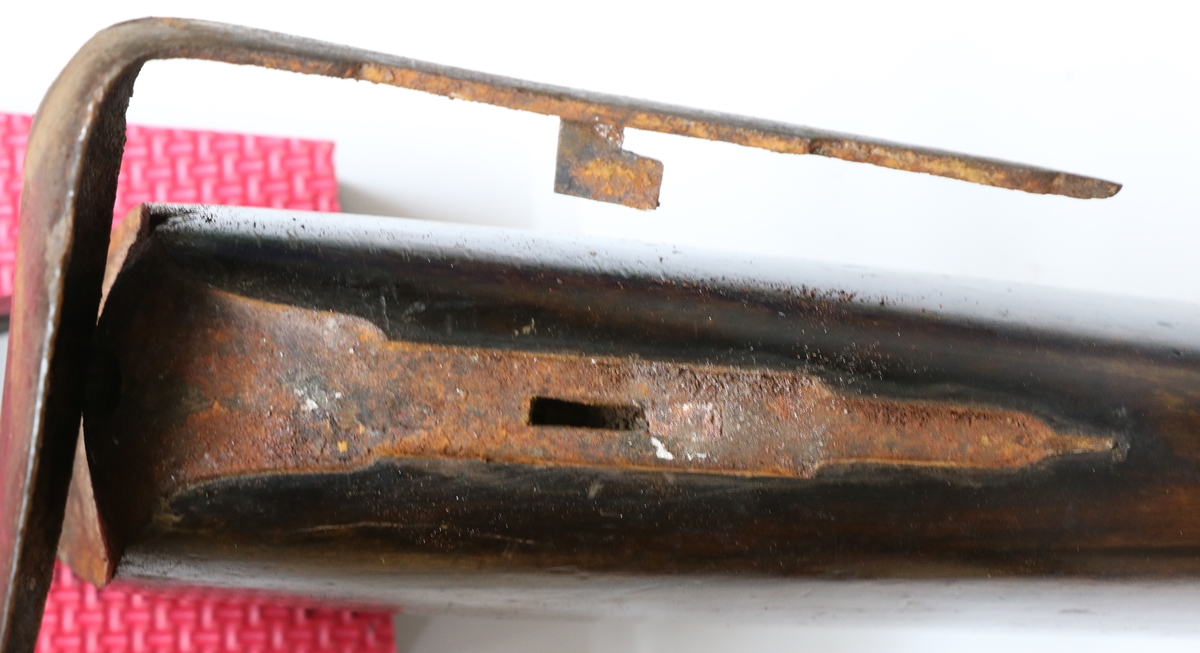
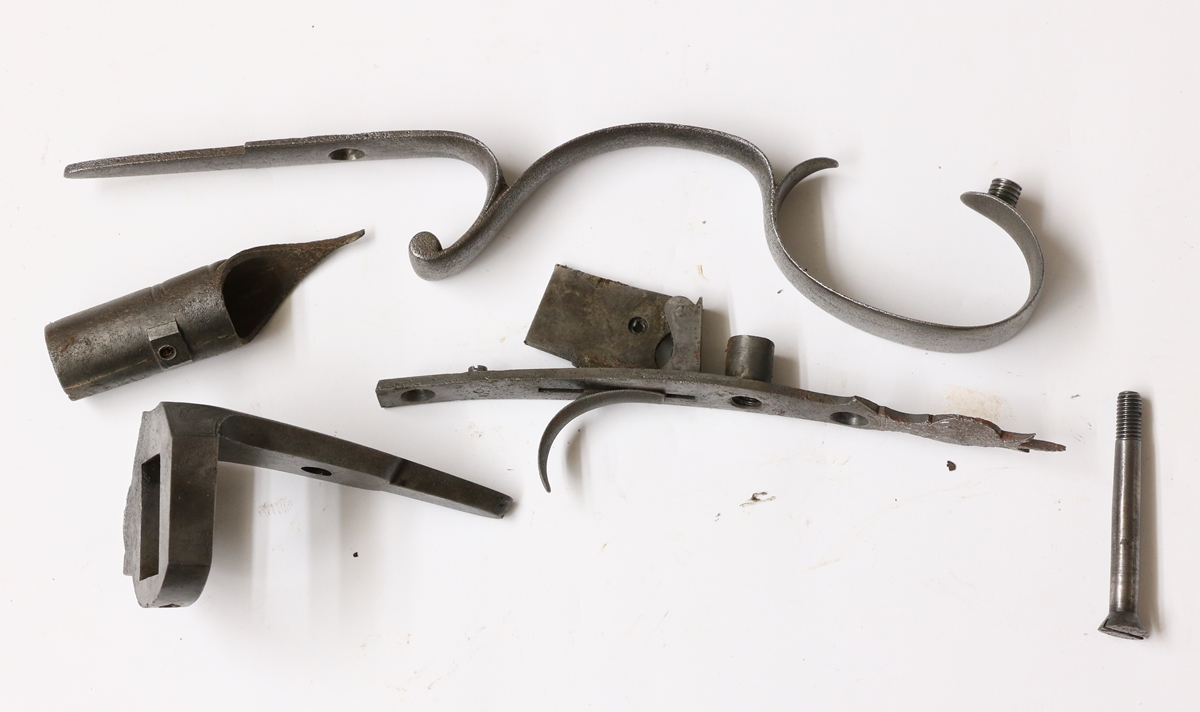
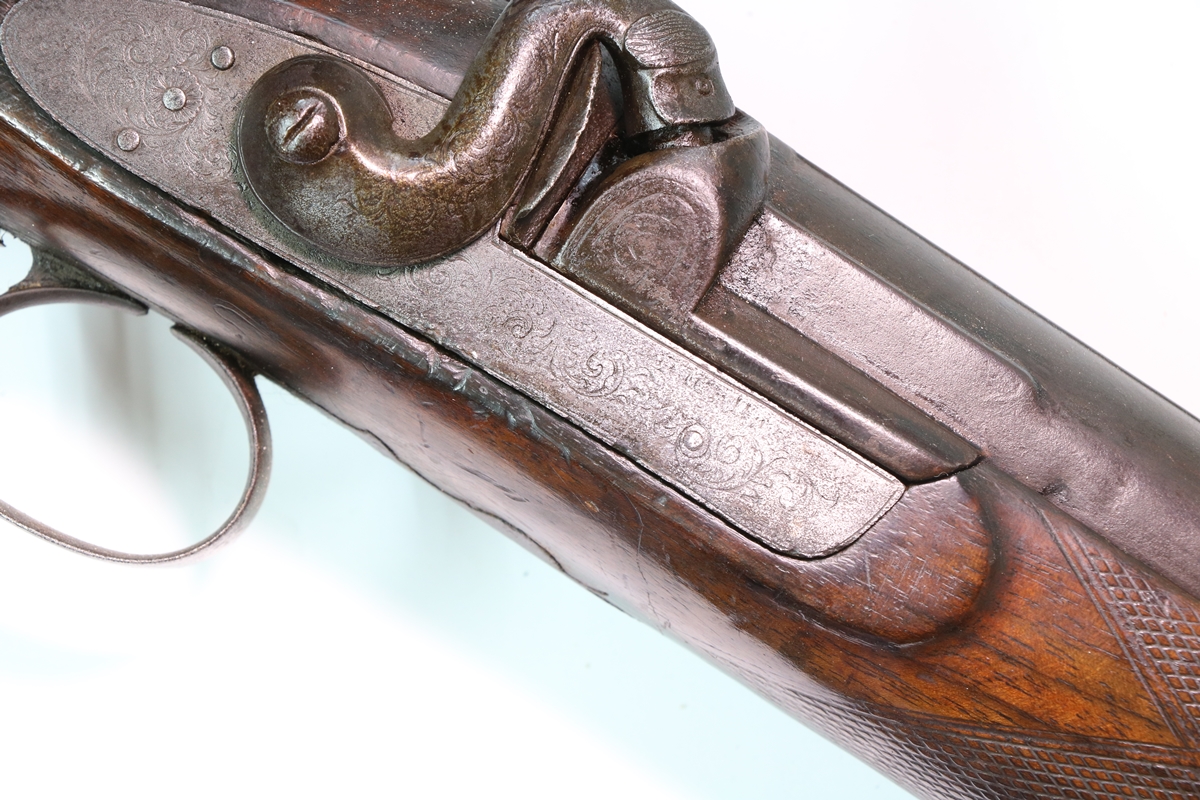
28th March – Continued with the 8 Bore restoration today with a visit to Dick to use his vice and torch to shift the breechblock, which we did successfully – its a strange fact that breech plugs almost always come out with perfect threads without a trace of rust. Any rust is usually confined to a tiny bit around the joint at the barrel and on the edge facing into the powder chamber. I don’t know what they used to lubricate the thread, but it certainly lasted 200 years or so! This one was no different, once heated almost to wood charring temperature and held very very securely in the vice it yielded to a 2 ft lever and came out easily thereafter. The passage from nipple to main chamber contained a lot of hard blackish powder, but as it was slightly damped with cleaner or whatever I couldn’t get it to flare like black powder although I think it may have had some in it – by the way, I DID carefully probe the barrel with a screw rod to check it wasn’t loaded before heating it! Anyway a trip to the electrolytic bath and a bit more picking out the passages with bits of bent wire and I’m sure its clear now. Now the breech plug is out I can see that the barrel is pretty reasonable, certainly shootable. I may have a go at lapping it if I can make a suitable tool. The side screw hole was a mess so I dropped a 16mm cutter into it and made a plug and glued it in, but I then made a steel cup for the head of the side nail so I might put that in instead. I initially thought that I would leave the butt plate as they are usually horrible to get out, but the rest of the furniture looked so much better than it did, so I took it off. The two screws holding the butt plate are almost guaranteed to be rusted around the heads and stuck fast. The threads are often rusty and stuck in the wood too, often pulling most of the threaded wood out with them. The technique to get them out is to very carefully pick out the slot in the head of the screws down to the metal, and put some release ‘oil’ on the joint – I put a small drop of gun oil and then take a brush of Acetone and brush it around the edge of the screws – it penetrates better than proprietary penetrating oils. You need to hold the butt very securely and have a screwdriver that is a perfect fit and try carefully. The top one is usually the worst – if it doesn’t budge fairly easily play a fine torch flame onto the screw head ( it does need to be a very fine flame) and try again. The 8 bore butt plate screws came out fairly easily, the top one with heat, and once started the screws themselves were as clean as a whistle. There was quite a bit of flake rust on the inside of the buttplate and on the wood and it took about 3 hours at 2.8Amps to derust the buttplate fully. Having derusted the furniture and thoroughly wire wheel brushed them ( .03mm wire brush) I generally coat the hidden surfaces with ‘Metalguard’ which leaves a thin anti-corrosion film over the surface of the metal as its in a fairly active state after derusting and will rust easily. I’m generally happy to put the furniture back with just the Metalguard as protection, sometimes putting on another coat if the part has been handled much since first coating. Most oils and greases soak into the wood so be sparing if you use any behind the fittings.
You know how it is? Having got so far with the restoration (actually more of a tidy-up) I can see that the woodwork could be a bit better, so for completeness I might just steam out the dings, and possibly refinish it – in for a penny, in for a pound……
Yes, I know its not quite centered!
The buttplate is held on by two screws and the tab along the top. After removing the screws the whole buttplate must be moved backwards by 6 mm to disengage the tab. As you can see, there was quite a lot of rust under the plate- its surprising that the two screws were in perfect condition in the wood.
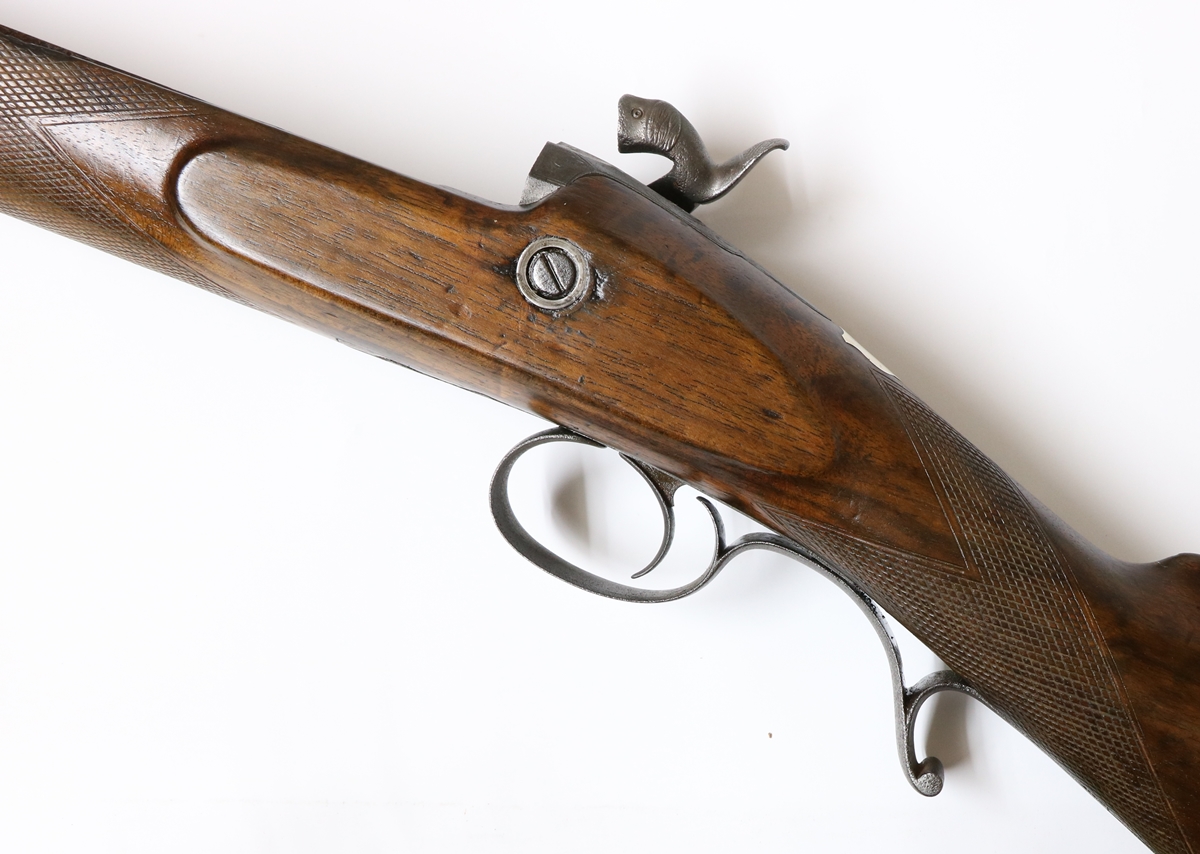
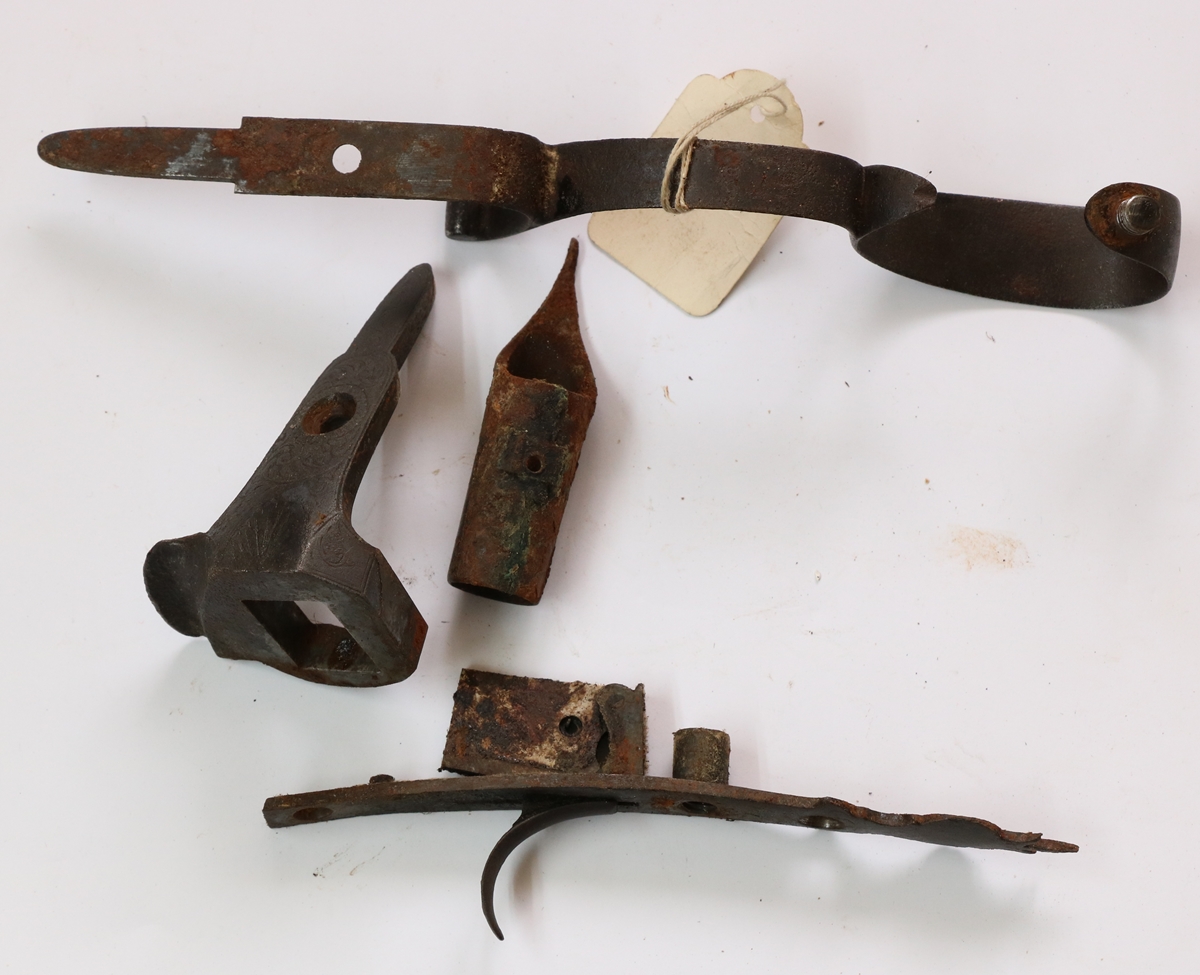
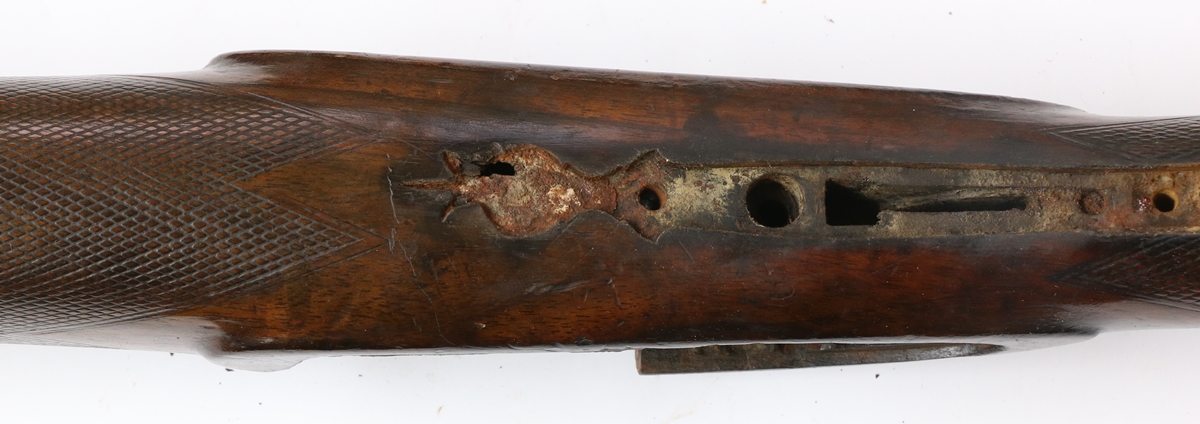
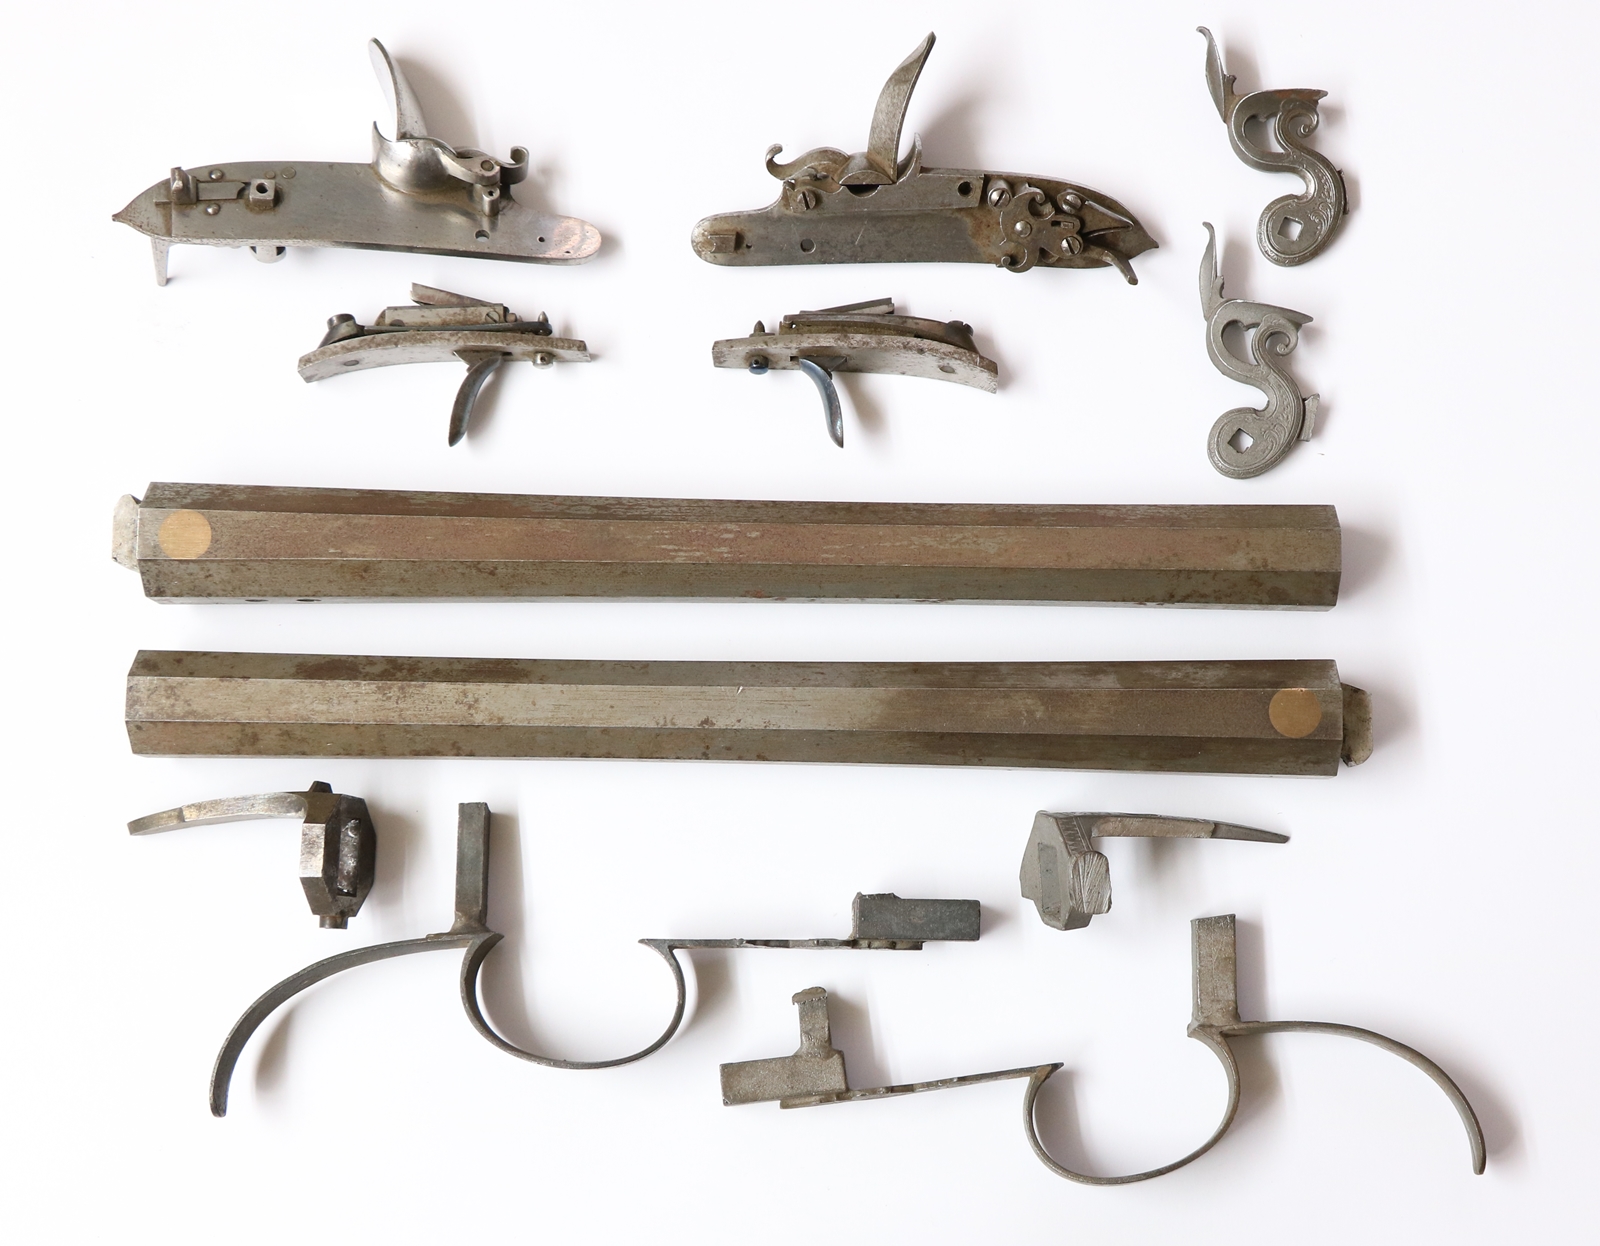
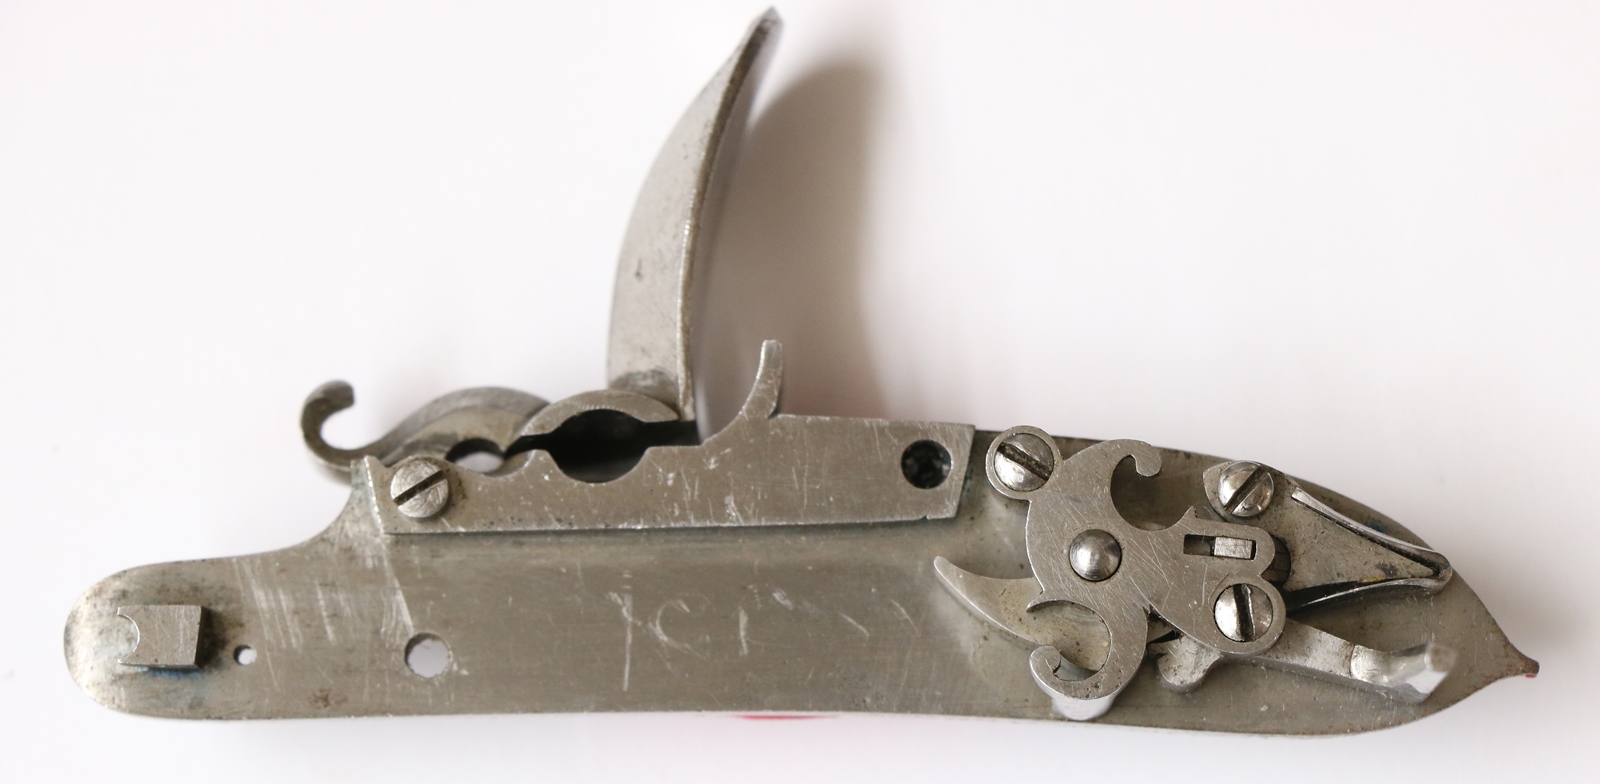
27th March – I think I have identified a couple of cocks from E J Blackley & Son for the Post Office pistol and the Mortimer, so I rang Kevin B up and had a nice long chat – Kevin asked if the P.O. pistols would have had a French style cock ( either a spur cock or a true French cock ) or an old style cock. The French style use their ‘chin’ as a stop on the edge of the flash guard, rather than a step on the back of the cock hitting the edge of the lock. Kevin pointed out that the stock needs a small cut-away section for the stop of the ‘English’ cock, whereas the ‘chin stop’ doesn’t have the cut-out. We decided that they had had English cocks and possibly his pattern FC91 would fit so I’ll order a couple. The ‘Mortimer’ of course hasn’t yet got a stock so I can’t use that guide to the cock style, but the locks were made for a mainspring without a link, bearing directly on the tumbler as of old, so I guess that its an old style lock and would suit an ‘English’ cock – I guess it probably didn’t have a roller or link on the tail of the frizzen or the frizzen spring either. I reckon Blackleys cocks FC90 would fill the bill – I’ll have a look for frizzzen spring castings for the ‘Mortimer’, but I’ll probably make the mainsprings as I enjoy that. I’ll see Kevin at the Birmingham Antique Arms fair in June so I hope they will be cast by then – Kevin says he is doing fairly frequent castings now. I stripped the furniture from the 8 bore and put it through the electrolytic derusting. It was quite pitted and the engraving is quite worn and pitted so it won’t restore to anything like original state, and as most of the bits are hardened, I can’t easily recut them. I did try on the finial of the trigger plate by annealing it, but its too far pitted to make any difference so I’ll leave it. The wood around the furniture is badly stained black, and on one side of the finial is missing – I think the staining is a combination of rust and too much oil on the wood – my father, who owned the 8 bore before me, used to slosh oil about on guns and several of ‘his’ guns suffered from staining, although in this case there is also quite a lot of rust under the furniture that I have now scraped away carefully. I’ll go down to Dicks tomorrow and we’ll remove the 8 bore breech plug (with luck) – I ran out of gas for my Butane torch today, and my vice is not really man enough. I also need to take back the engraving I did for himon the Fowler duelling pistols. I will start a new post on both the PO pistols and the 8 bore.
Looking at the insurance certificate that came after transferring my insurance to the new Land Cruiser I spotted an exclusion – apparently I was allowed to carry up to 2000 cartridges but no explosives – now of course black powder is an explosive so I was a bit concerned that my insurance would be invalid if I carried a flask of BP to Cambridge Gun Club, let alone brought a couple of Kg back from purchase from our group. Anyway not wanting to find my insurance void I rang my broker and explained how I used black powder in a muzzle loader instead of cartridges. They very helpfully said that’s OK, you can have BP up to the equivalent of 2000 cartridges – now at 2.5 drams per shot and 1.77 grams per dram that amounts to round about 10Kg. of BP ! Anyway I said thank you very much, and they made a note on my insurance that they have authorised it. Result! But you had better check your own insurance if you carry BP in your car.

A selection of cocks from stock, on the left ? for the good PO pistol, the rest are ? for the ‘Mortimer’, FC 90 is on the right.
Furniture as was – click on pictures to see in detail.
After an hour each in the electrolytic derusting bath and a fine wire wheel.
26th March – the year marches on… I managed to sell my old Land Cruiser Amazon for the asking price and it was away within 8 hours of it being bought so that makes the new one a bit less of a shock to the finances. I drove the old one to get it out, not having driven it since I got the new one, and immediately realised just how much more solid and hefty it was – a lot more tank-like to drive too. But I did really like it and it didn’t let me down once in 10 years, so goodbye…… I took a photo of the two Post Office issue pistols I bought in Bonhams for a ridiculous price some time ago – I still can’t work out why as there is a lot of work in restoring them. They were listed as rare so I guess I was taken in in an absent minded moment!

What a mess!
By Harding, some of the lock parts are missing, and one cock is completely wrong, the other is possibly OK but a replacement. It will be a very good exercise in restoration for this blog! I now need to source a pair of cocks for these pistols and a pair for the ‘Mortimer’ repros.
25th March – busy day – has the feel of the first day of spring which I define as being able to leave the back door wide open while you potter about outside without worrying about the kitchen getting cold. I sorted the kit to go in the new Land Cruiser – it is the same position in the range as the old one but doesn’t have quite the solid feel of the last and while most gadgets are identical it has lost the programmable driver’s seat positions and the steering column now adjusts manually instead of by motors. I guess the weight has been cut down a bit to improve fuel consumption – I can now carry the (removable) back row seats with one hand where I used to struggle to lift them. But it does have a camera to view the tow hitch while reversing! My old one is getting lots of offers on Ebay, but so far not quite high enough to temp me.
Looking round for guns to sell to make some space ( pistols don’t really take much room) I came across an 8 bore percussion wildfowling gun – its reasonably nice – wildfowl guns were never very fancy as they were strictly working tools for rough conditions, – I can’t read the name as the lock is a bit worn and pitted. The barrel is pretty heavy and fine on the outside but had patches of rust inside so I set about cleaning it by running 320 grade paper up and down by hand and in a drill . This generated a lot of messy rust as I’d squirted Napier cleaner down the barrel. Anyway after a long session including getting bits of 320 grit paper stuck in the barrel, and then ‘loosing’ a couple of tissues that I was using to clean out the mess I did get it clean enough to look at the bore – probably OK is the interim verdict. I took out the flattened nipple with some difficulty but there is no passage through to the barrel. The next stage is to remove the breech block – its a round barrel with a scalloped ‘flat’ on top so I’ll have to be very careful not to damage things. I had a try with the breech cold but I was in my indoor workshop and the vice is not really man enough for the job and you do more damage that way, so I need to migrate to the outside workshop which I haven’t used since the Autumn and is full of junk – nothing is simple……. Anyway when I’ve had a good look at it I will tidy it up and put it up for sale on this website – I suspect that it will again make a fine wildfowling gun…. but I’ll sell it as an antique anyway.
8 Bore single wildfowling gun – a typical functional working gun – it will clean up very nicely
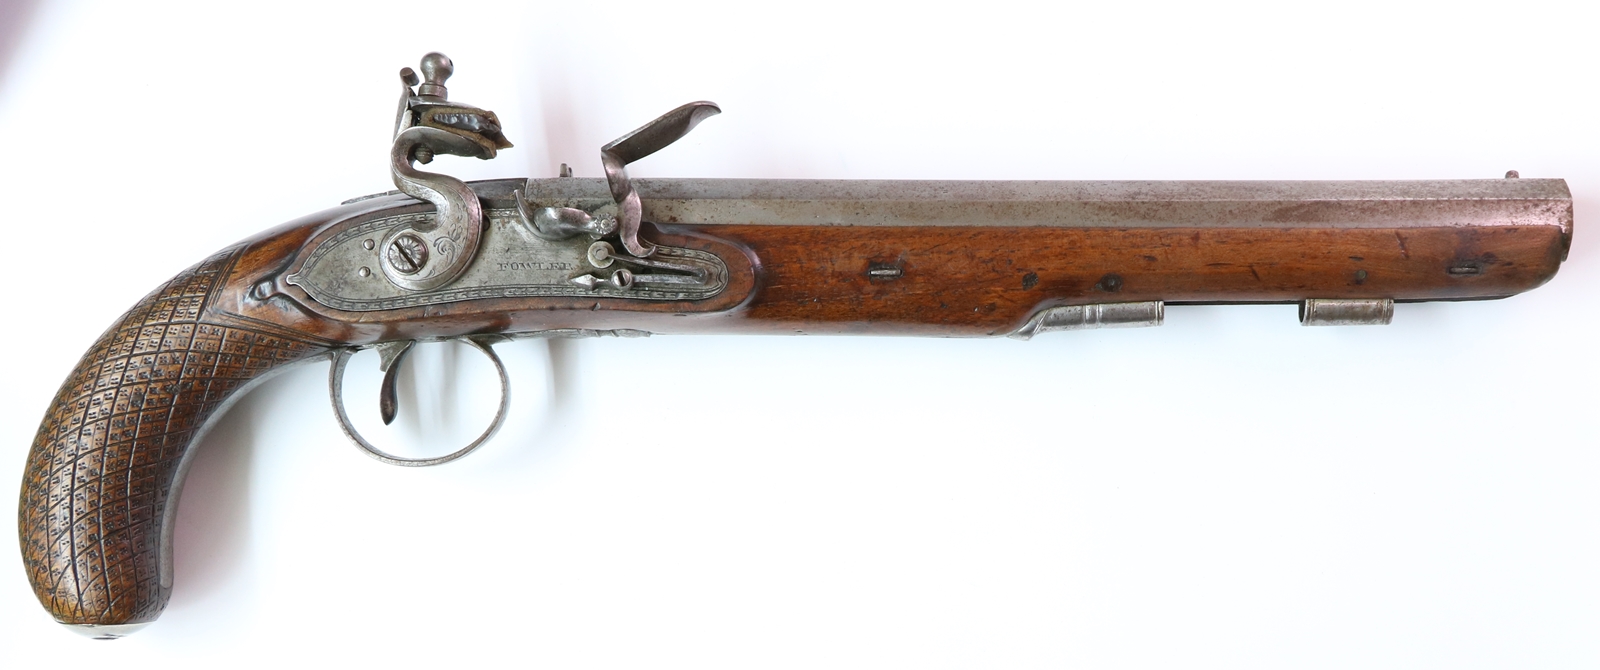
24th March I had a look at a typical Irish Duelling pistol from the height of the duelling craze in Ireland
Features of note are;-
- Octagonal barrel – after about 1770 – Spanish form before then.
- Round butt section – most early English duellers had flats down the sides, wider at first. Post 1790? The ‘hatching with 4 dots in each diamond resembles that used by Durs Egg in the early days of the genre.
- Roller on frizzen spring (also known as ‘feather spring’) This is probably post 1780 ish.
- Bolts secure barrel – replaced pins around 1775, later style pistols had silver ovals round bolts for protection.
- non rainproof pan – not necessarily a good dating guide as many old style pans were made long after the rainproof pan was patented.
- Running leaf (feather) engraved border to lock – this came into use in English guns around the turn of the century(?), along with little bits of engraving such as that on the cock of this gun – I’d rate this a strong pointer to a date.
- No set trigger – the best duellers usually had a set trigger, but some customers probably didn’t want them on teh guns they ordered.
- Tip of cock rolls forward – early or old fashioned feature.
By Comparison here is a duelling pistol by Hutchinson of Dublin.
It has;
- No hatching, small flats on butt – probably earlier than the above
- A link from the tail of the frizzen to the frizzen spring – probably an early feature, maybe 1770s. (later – roller on frizzen tail, then on spring.)
- Similarly plain lock – the cock is a replacement, copied from another Dublin dueller by Edwards of about the same date(?).
- Tip of cock rolled forwards .
- More pronounced ‘swamp’ on barrel. (i.e. a more pronounced ‘waist’)
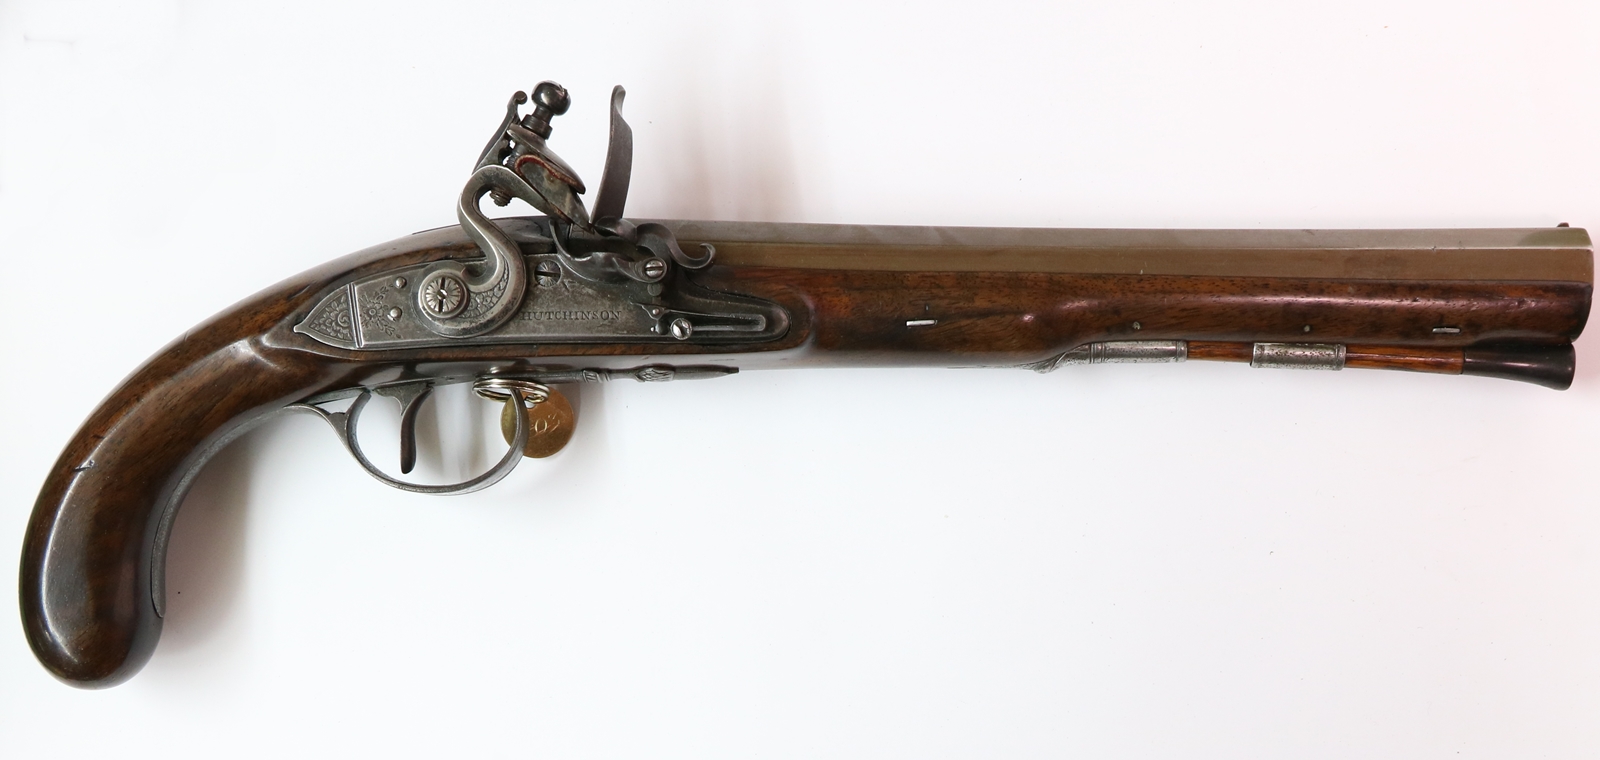
I’d probably put the top one at around 1800 or a bit later, mainly on account of the lock border engraving – other features support a date of 1790 or later. The Hutchinson may be a bit earlier – possibly around 1780 to 1790. Estimates like this are always approximate unless you have something more concrete to go on, like an patent, or the introduction of platinum (John Manton 1805 ish) but in this case the link on the frizzen is an unusual feature and suggests an earlier rather than a later date, unless it was a speciality of Hutchinson. Of the two, I’d say the Hutchinson is the more elegant pistol.
22nd March Had a look at the result of Holts Auction – quite a lot of guns sold at the low estimate and I noticed a couple that sold below the bottom estimate, which is almost unheard of in Holts, although fairly normal in Bonhams and other auctions. A couple of guns went well above estimates, but its a difficult job picking out what will appeal to collectors and I guess its easy when you are pricing hundreds of guns to miss the occasional special. There were a number of unsold lots too. It’s impossible to tell how much the price achieved is more or less set by the estimates, or its just that the estimates are accurate – for expensive stuff the price is determined externally to a large extent, but for the run of the mill stuff I suspect that the estimates are important in setting the price achieved. Difficult to make a judgement about my area as there were not many decent muzzle loading shotguns, although I think it would have been possible to pick up something shootable at a reasonable price. The Nock 7 barreled gun made £20,000 but it was very fine. Unfortunately I couldn’t find any suitable restoration projects for the blog, so I’ll have to do one of the many that I already have. Went to test drive a car for a friend but had to wait while the salesman sold a £50000 10 year old Aston Martin to a youngish looking chap – I can’t imagine what the insurance must have been – but not my cup of tea even if I had the cash. Off tomorrow to pickup my ”new’ 9 year old Land Cruiser – come to think of it, by comparison maybe the Aston Martin wasn’t such a bad buy! Dick has a pair of duelling pistols by Hawker of Dublin for light restoration – Hewker was second only to Rigby as an Irish gunmaker of the late 18th century. ( ……Usual for breakfast)
21st March – busy day – off to Holts at their new location in Blackheath, S.E. London. I drove because I had the Alex. Henry and the Theo. Richards to return, and I also wanted to go to Cricklewood to look at a replacement Land Cruiser so it involved a journey across London – not only did I have to pay the congestion charge but an additional ‘naughty boy’ charge for having an old diesel vehicle – around £21 in all. But it is quicker than the previous journey by train to Hammersmith. Anyway I meet increasing numbers of ‘old friends’ at the auctions as my circle of contacts widens, which is nice although it cuts down the time available for looking at guns. I did check out a few percussion shotguns and had a quick look for good restoration projects (none) and checked out a gun that Martin fancied. One friend I met said apropos of this blog that I included everything except what I had for breakfast! Well, just to complete the picture, the answer is toast. No more details will be revealed. On to Cricklewood where I crawled under and over an ’09 Land Cruiser that was starting to corrode underneath – shame as the price was good, then onward to another on the way home which was the same age but much better and lower mileage but more expensive than my target – but I bought it nevertheless after a bit of a haggle, so now have to get rid of mine on ebay as the part exchange price didn’t excite me. Now I will have a smart, undented vehicle for the first time in ages, have to try to keep it that way! I’m pleased to report that our work on the Alex Henry met with much admiration – it was a good example of our ‘less is more’ approach – do the least that you can get away with to achieve the truly authentic result, and make your improvements incrementally – only resort to major surgery when a bit of simple cleaning and refurbishing leaves obvious problems. Had a discussion about making ramrods – one suggestion was a section of an old greenheart fishing rod, optionally ‘ebonised’ with a blowtorch. We all went away determined to have a try with out preferred method, so I’ll have to finish the ebony squares I have cut – I will try and make a jig to plane them octagonal, or possibly 16 sided, and then experiment with a form of ‘cenreless grinding’ with a belt sander, or possibly turning in a lathe by advancing in short sections – we shall see, I’ll report here…..
19th march – I sold the pair of pocket pistols by Abbey of Long Sutton – it was a beautiful little set and quite a bargain – I am not sure why I sell my small stuff and keep all the big guns, they take up too much room! now I’ll have to find a few more from my collection to put on the website – its time to go hunting for some restoration bargains, although I can’t pretend that there is any profit in it, (except to my wife, who fortunately doesn’t read this blog!). I do have a little pair of flintlock pocket pistols made for the Post Office – at least it is two almost identical pistols. They are in very bad condition and missing the proper cocks. I bought them at auction for a ridiculously high price – they were catalogued as ‘rare’ and I fell for it, more fool me, although I suppose someone else must have bid one offer down from me so I’m not entirely alone in the idiot stakes. Anyway I ought to fix them up, which involves getting cocks for at least the one that has a very home made cock. The one with the almost right cock has 1969 and some initials stamped tidily on the back of the cock, so that is hardly original! I also have to get a pair of cocks for the ‘Mortimer’ pistols so I’ll have to hunt around. I’ll do some photos of the Post Office pistols some time. I discovered this morning that my little CNC machine had managed to bend its spindle a bit so the cutter doesn’t run true – must have happened when it drove the cutter into the work in a mad moment – the only solution is a new DC motor at £40 or a nice brushless 500 watt motor at £90. Unfortunately neither have substantial bearings, but maybe I’m expecting too much. Tomorrow is a day for car hunting if I can find any to look at – I also have a couple of meetings at the school which promise to be ‘interesting’……… c’est la vie. Wednesday is Holts viewing and Thursday and Friday might wrap up the vehicle saga, who knows…………….
18th March. I got into trouble from one of the regular readers of this blog for my tardiness in keeping him entertained! Apologies! I will do better in future…. Yesterday we had an Anglian Muzzle loaders shoot at Cambridge Gun Club in the freezing cold – I had lost my capper on the last game shoot of the season and hadn’t replaced it so by the end of the morning standing around for 2 hours in a biting wind I could only fit a cap on the nipple by a sort of random process of tries since I couldn’t feel anything. Unusually we shot the ‘driven’ stand as part of the competition, which helped (almost) everyone’s scores – I can shoot those clays well when they are coming more or less overhead but the few that come lower to the side I miss. I think the ones I can hit are the ones where the muzzle of the gun blanks out the clay as you try to get a lead on it, so you are effectively shooting ‘Churchill’ style ( follow, accelerate, fire as you pass the clay and keep going) rather than maintained lead where you get in front and try to judge how far ahead you need to be as you wave the gun about. I also manage to hit a few that are so fast I don’t think I stand a cat in hell’s chance of hitting them so there is no chance of a considered maintained lead – I obviously need to train myself a bit better. Anyway I had a reasonable result by my standards! Apropos of the parts for the Mortimer duellers, I looked through my bookcase for inspiration and came across a book that I didn’t remember – The British Duelling Pistol by John A Atkinson published in UK and Canada in or before 1978 which is a very thorough summary of the development of the type from 1770 to 1850 or so with particular reference to the key makers – Griffin (&Tow), Twigg, Wogden, Durs Egg, Staudenmayer and the Mantons. It has lots of dating information and lots of typical 1970’s black and white photographs that are almost entirely useless as the only details visible are things that show up in outline! In spite of that it is a very good reference, although how accurate it is I am not sure – I say that because its section on Forsyth seems not to agree with things I have read elsewhere – for instance claiming that his initial work was with chlorate mixtures rather than the fulminates as mentioned in his patent. There is also no mention of Purdy who was involved in his business as far as I understand – I had better read Keith Neal’s book on Forsyth next….. One detail that interested me was the observation that the gold poinsons set in the breech blocks of guns were stamped with a gold foil facing, rather than being solid gold pressings – bit like UK copper coins nowadays! That might explain why those in my Manton double flintlock have lost their gold, and make it more acceptable for me to gold plate them. This week I’m off to view Holts sale on Wednesday in Blackheath – first time since move from Hammersmith – its quite convenient as its an hour and twenty minutes away and plenty of parking – I just need to remember to book the Dartmouth crossing on the web before I go or I’ll be in trouble. I’m not planning to buy anything, although I have a few things to check out for friends and a couple of guns to take back for people who will be at the sale, plus a couple of guns that are going into the next auction. I must try and find a day to go on another car hunt – I’ve promised to find a small car for a friend, so I’m looking at the baby version of the car I got for Penny – a Mazda – not as common as one might expect, but right at the top of the Warrenty Direct reliability index, and they should know as they insure cars against mechanical breakdown – also cool looking, although I’m not sure my friend will be as keen on a red one as Penny was ( I’d already bought it when she saw it so in truth she didn’t have much choice) ! And I started to strike up the barrels of the ‘Mortimer’ to see how much work they needed – quite a lot of file marks to get rid of, it turns out! I’m hoping I can train my little CNC machine to cut the lock pockets and possibly profile the stocks – hope dies eternal in the human breast….. Goodnight.
14th March – I just noticed – something strange has happened to this website. A few days ago the number of daily visitors dropped from about 350 to about 170 – almost halved. My first thought was that all my regulars had given up as I’d vanished, but I didn’t think I had that many daily visitors! A careful check in my protection software showed me that almost all the attacks on the site that try to find a way to log in ( but don’t get anywhere near finding out how) had stopped overnight – so half the traffic to the site was spurious, and presumably since it all stopped pretty suddenly it must all have come ultimately from a single coordinating centre. I wonder if its gone for good?
14 March – Sorry, long time without blogging! I decided that all my old shot flasks leak and because of the way they are sewn it tears the leather beyond repair, so I thought I’d make another one, using a modelling clay block to mould some soft suede round and then clamping round the edge it with a couple of bits of ply with the right shaped cutout . Cutting out the profile for the clamping plates seemed like a nice easy job for my CNC miller but its got me totally confused – the actual milling seems OK BUT the mill shoots all over the work area before starting and usually crashes into one edge stop or another. I have tried editing the G code file but I can’t work out where or why its flying about in the pre-amble – maybe it will all come clear tomorrow! I went hunting for a replacement Land Cruiser today – its fascinating what you learn from people in the used car trade if you chat to them. I found that the reason there were virtually no 2009 or 2010 Land Cruisers on the market is that they all get shipped to Kenya, which won’t allow import of pre-2009 vehicles. The older ones go to Tanzania. Apparently a team comes over to the UK a couple of times a year from each country and just buys them all up to ship back – presumably new ones carry a huge tax and the bane of old Land Cruisers in the UK – underbody corrosion – doesn’t happen in hot climates so they last indefinitely. I might have found a good one but I have to wait for the boss to come into the showroom to see if he will accept my offer! Then I’ll have to get rid of my old one, rust and all, although I did get a fairly decent offer in part exchange – because he knew he could certainly sell it on to the Tanzanians. Unfortunately the P/E offer related to a Land Cruiser that I didn’t want to buy at a different used car lot. I often get queries about gun related matters via this blog – at the moment I’m trying to help unravel a J Probin flintlock that is missing the locks and has a gold banner with ‘WESTLEY RICHARDS’ on the barrel which seems a bit out of place…. any ideas?
9th March – I am still working on the cnc miller, but making progress. I have found a workaround for most problems, and I created a model of a curved shape as a trial – although it was only a small shape 30 mm x 100 mm it had radiused top edges and they take a lot of passes to shape – the estimated time to complete was over 2 hours, but on the first run the cutter came loose in the collet and I had to abort the run – I couldn’t work out how to resume it, so I started again from the beginning with a new piece of wood . On the second try I accidentally closed the program on my laptop half way through, and that killed the job! But each time I get more things sorted out. The job I’d most like to be able to do is to cut accurate lock pockets, so I have started to look at ways to copy parts from photos as locks are not good for drawing using the normal tools in CAD packages! Anyway here are the photos of the parts for the pair of Manton Duelling pistols I bought off Dick – the locks were beautifully made by an ex-Purdy man – the cocks are wrong so we’ll get some older style ones. One false breech is wrong, but it is possible to make one from stock steel with an angle grinder and a bit of welding and a lot of drilling and filing! I’m not sure about the Blackley castings of the trigger guards – they may be a bit late – the originals would probably have had a simple acorn finial in front of the guard and a wider guard. I’m not sure about the set triggers either – a bit of research is needed! Going through some dating clues I would put the model for these parts at the late 1970s – it has the old pan shape, which changed around the early 1780s, but a fully octagonal barrel that came in during the 1770s. It could have been half stocked, but I think probably without a rib, but with loops for the ramrod fixed directly to the barrel. More research needed!
and they need mainsprings and frizzen springs………………………
6th March – I’ve been rather busy trying to get my little CNC 3040 milling machine working. Up to a point I have succeeded – well I’ve learnt a lot along the way. I haven’t done anything useful yet as I’m still struggling to get the host software (bCNC) working properly – after each job the P.C. looses its connection to the cnc controller box and has to be reset, which is a pain – I’m not sure if it will run a proper job without stopping but I’m getting near to trying. I’ll have to get a CAD program up and running to generate something to make – probably Fusion 360 as its free! I got a set of parts for a pair of fine duelling pistols from Dick – tehy were made by someone who was a Purdy gunsmith some time ago – the locks are fine – machined from solid, not castings but he didn’t have the proper cocks. They need a few more bits sorted but will make a fine pair of pistols. The barrels are nice but I suspect they are not twist so won’t pass as the real thing. I’ll make them up as a pair of inert pistols as I don’t want to bother with putting them on a certificate – at the moment the barrels are unfinished. I have some nice walnut for stocks, so it should make a good project – Dick says thay are copies of a Mortimer pair – I must look out some photos so that I can get teh engraving right. I’ll post some photos of the bits soon, when I stop playing with the CNC.
March 1st – Quite Arctic round here and a bit of snow, coming home last night my 4×4 was skating all over the road if it got half a chance. I spent the morning taping up draughts in the workshop as I couldn’t get the temperature up above about 16 C even with the woodburner and a 3KW fire going. Its now well above 20 C so OK. I bought a book from Amazon, well more of a leaflet, called ‘Firearms Lock Design’ by Steve Culver. Its actually restricted to the design of the sear and tumbler (or cock) and the proper geometry to ensure a safe trigger pull, but you can’t get everything in 26 pages. Its a commendable effort, obviously home produced although printed by Amazon – but with very clear diagrams. I am not sure I have come across many original guns that have the nose of the sear 0.9 mm across as he suggests, but the principles he lays down are sound and should help anyone who tackles the ticklish job of refurbishing a worn sear-tumbler engagement. I had hoped for some suggestions and advice on the cock-frizzen geometry in flint guns, but that isn’t as clear cut as the geometry of the sear-tumbler and anyway was more of a matter of opinion and development. Steve’s basic geometry requires the tumbler pivot centre and the sear pivot centre to make a right angle at the point of contact of the sear and tumbler – that way when the sear moves its end moves along a radius from the tumbler pivot. If that isn’t clear, best get the book from Amazon! I managed to get most of my ‘bandolier’ shot flask done and added the strap and buckle and temporarily put in the Irish dispenser so I could try it out – it seems to work fine, the leather is much softer than a traditional one, so its more comfortable to wear, and it holds a good load of shot – I haven’t checked how much. I’ve just got to add stitching to the straps. I have a number of old flasks that have started leaking and would be very difficult to repair neatly (rather than Bev’s technique that involves rolls of duct tape) so I might use their dispensers to make a few more flasks – I rather fancy a suede flask. My next project is getting my Chinese toy cnc machine ( a 3040) working with a new controller board – at the moment I’m trying to sort out the wiring of the new ‘Smoothieboard’. I can’t work out if it is capable of driving the stepping motors of the 3040 or if it is meant to rely on external drivers – the documentation is a little haphazard……. Also on the agenda are a couple of ebony ramrods – I ripped up a couple of square blanks from my nice stock piece, so now have to round them, but its much too cold to venture into the unheated outside workshop to do them…………………
Feb 25th Celebratory meal and a bottle of champagne at the flat to celebrate (almost) completion. It really is a super flat, the basic design is good and Giles’s interior design is brilliant, and my 4 month’s work is well justified! Result. Since it was the first nice weekend I’ve had free I ventured out into the garden _ I can see I’ll have to get tough with the rats that eat the chicken’s food – I did stand around with a .22 air rifle but it has telescopic sights so is almost impossible to use without baiting them – I need a No. 3 garden gun! Anyway poison will suffice after I’ve been to Horse Requisites tomorrow. I continue to get a good number of visitors to this site, about 350 a day -although about half(?) are bots trying to bust the site. I do get about 30 visitors from Google and other search engines including Baido, the Chinese search engine. I must justify all this support by putting some more gun stuff up!
Feb 23rd. Busy organising and then running a class on computer programming at ‘my’ primary school with my friend Dave. We have both done a lot of programming professionally and have a fairly dim view of the way its taught so we had a chance to try our way. I wrote my first program in 1966 on punched cards to run an an IBM mainframe, and we used old punched cards of that era to write down commands of our ‘people computer’ programs in class. For some reason the cards were never numbered, and a fairly simple program generated quite a stack of cards – so if you dropped the stack………..
I’m experimenting with leather to make an Irish pattern bandolier flask – making progress. I am revisiting Cruddington’s book on modern shotguns, Vol 3 to refresh my mind about single trigger mechanisms. The problem is that between 1889 and 1910 there were 91 patents from UK gunmakers for single trigger mechanisms as they scrabbled to find another innovation to keep the market bubbling after the hammerless ejector and self opener were established. The problem was (and is) that best guns last too long to sustain a trade without continuous new and wonderful inventions! There are basically two ways of making a single trigger fire two barrels without double discharging on the involuntary second pull that almost always follows when a gun is fired – the first invented and original English mechanism used a fairly involved linkage between trigger and sears to ‘loose’ the involutary pull – like for example the Boss rotating turret that moved with each pull and only allowed the gun to fire on the first and third pull. The other class of mechanism involves inertial weights that are driven by the gun’s recoil and change the linkage between trigger and sear – most modern production shotguns (Beretta , Browning and clones) use the inertia system. You can tell which your gun has by firing off snap caps – if mechanical changeover you will probably need to make a dummy pull between firing pulls as you won’t make the involuntary pull on a ‘dead’ gun. If you have an inertial changeover you won’t fire the second barrel without bumping the butt on the ground to mimic recoil between the pulls. I find it very difficult to work out exactly how the various patents work from the drawings in Cruddington, so I usually doze of while trying!
Feb 21st Still suffering from the effects of solder fumes – I thought I’d do a web search for solder with less bad flux, i.e. colophony free, but then I found I was already using that, so maybe I’ll go back to the normal, bad, colophony flux. I was trying to buy some faux ivory from the US as it claims to be used by various museums, and I thought I’d make a few brushes and a couple of pots for caps, but the minimum order is $50 and the carriage would be $60, so a bit pricey for something to play with! Maybe I’ll stick with the Axminster stuff. Or I could use ebony or horn or box.
I dug out a nice single percussion barrel that I bought with a junk stock and took out the breech block – the bore is quite good – I am sure it would hone to a perfect bore and still be a safe wall thickness. It has a percussion breech, although it might have originally been a flintlock. I was thinking that I might see if I could get/make a new breechblock so that I could make it up as a flintlock. The barrel has Birmingham proofmarks but the pitch of the thread is exactly 1.5mm – not an whole imperial size. The O.D. is 20.5 mm. I do have a not very nice stock that I have fitted the barrel to – the easy thing would be to make a percussion gun, but I don’t need another one! It might be a good barrel to try lapping………..
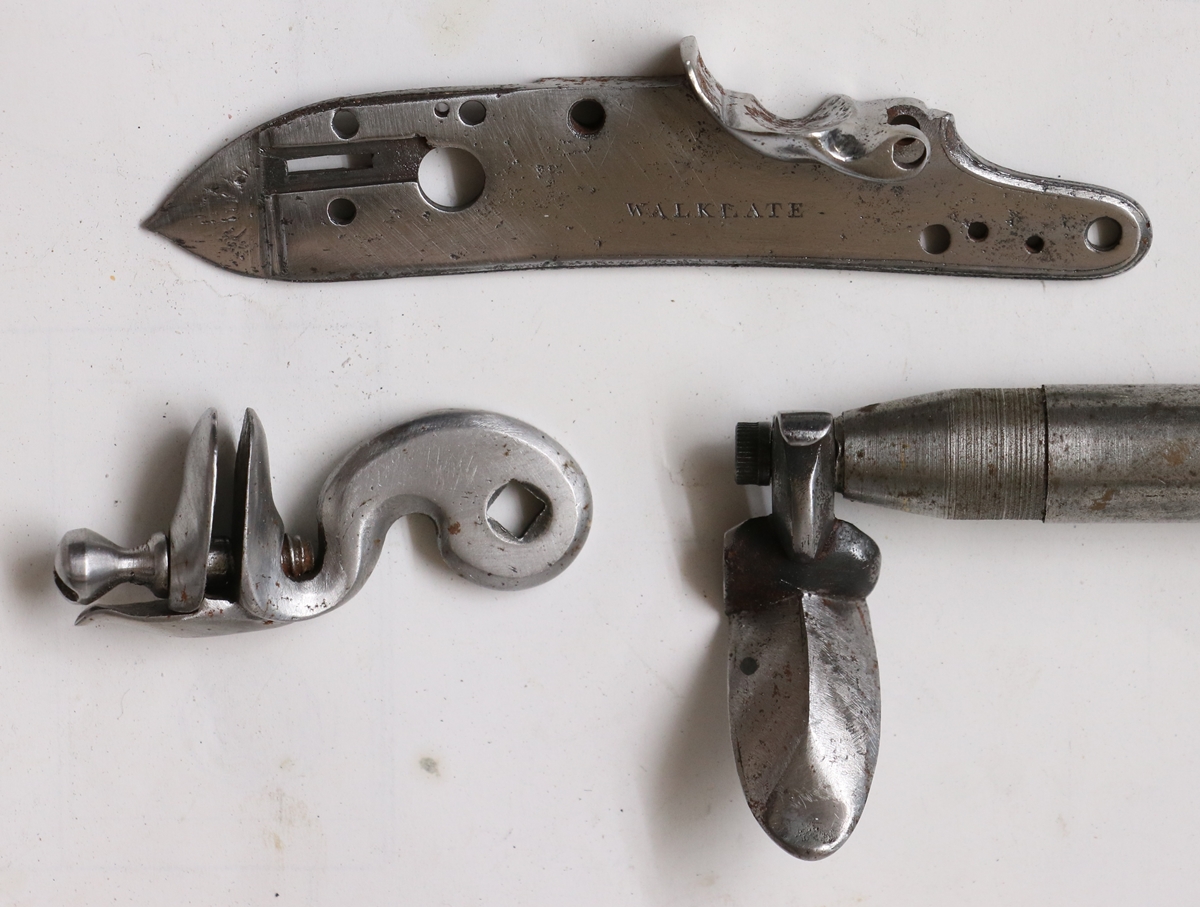
Feb 20th – I had to do some electronic assembly of printed circuit boards for a client today. I have a real problem with the fumes from modern solder flux which give me every kind of respiratory irritation and really crock me up, so I bought a new extractor/filter fan and replaced the activated charcoal filter in my old one, but somehow the fumes managed to escape the suction and got me – I’ll have to think of a better way – perhaps put the whole outfit in a large box with elasticated arm holes as for shot blasting or solvent cleaning. ……… I went to see Dick today and took the Walklate bits I had engraved, which he was well pleased with. Earlier he had mislaid the locks of the Blair and Sutherlands that I had left with him to get Jason to weld and Dick to reshape the frizzens and he was in quite a state – I was a little concerned as the gun is worthless without them, but I was sure he would find them, which he eventually did, in a pretty box exactly where he had put them for safekeeping! When I loose things I’m reluctant to move anything in the search, because I always assume it will turn out to be within plain sight. I think as you get older your sight might be OK but some of the higher processing gets a bit worse so you miss spotting things you once would have picked up on. ‘The flintlock lads’ are going to CGC on Thursday and I might join them, but I might have to do some preparation for my Mindstorms school stuff as I will have to be ready on Friday to keep 25 children occupied/entertained/learning – the really nice thing about not being a teacher is NO PAPERWORK.
Feb 18th – I’ve finally taken most of my tools back from Gile’s flat and given him back my visitor’s parking badge so I can no longer run away to Cambridge and buy the only decent bread in the county from Maison Clement on Hill’s Road! But I plan to get Giles to go in early and buy some of the ‘mother’ that they use to make the sourdough bread so I can make my own sourdough! Now I have to concentrate on helping with computing lessons in school using the Lego Mindstorms. The computing syllabus in primary schools is quite comprehensive and involves teaching the kids what ‘algorithms’ are – I know one when I see one, but defining what one is is another thing altogether! Anyway Wikipedia says that ‘defining ‘algorithm’ is quite challenging’, so I feel vindicated. I was trying to think of an example and came up with a handy one – find the difference between two given numbers, If I give you two numbers you can give me the answer easily, that is solving a specific problem, but if I ask you to write down the full sequence of basic operations by which you could find the answer for any two numbers, say a and b, then that is an algorithm, or generalised method ( clue -you don’t know which is bigger). Another little little chore awaiting me is to buy a replacement Land Cruiser as mine is getting a bit long in the tooth. I’ll have to get one about 10 years old and it won’t be much different from my present one (17 years old) , just, I hope, not so rusty. I’ve been watching the ads on the web for a few weeks and those on offer seem to be having price reductions so I haven’t been in too much of a hurry and haven’t really had time to drive round the country looking at them. Now I’ll have to concentrate…………………….
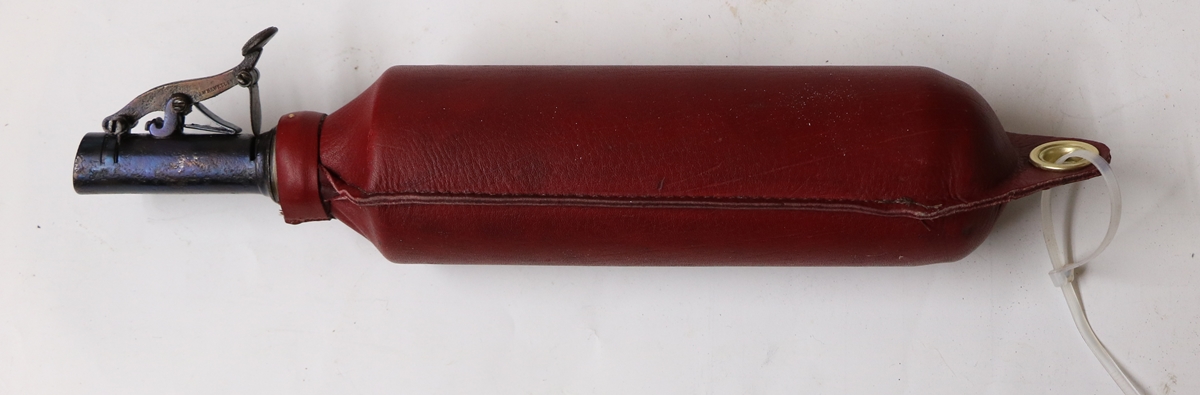
Feb 16th Another day of playing – where will it end? I cleared out my indoor workshop in the morning, and then my piece of faux ivory arrived so I thought I ought to use it. First I went through all the books I could find to look for photos of gun cases with brushes. There are a number in Keith Neil’s book on cases, although most don’t have a visible brush. He lists them as being accessories in cases but doesn’t illustrate them with his other accessories. I guess that they are the first accessory to get lost, and anyway will certainly wear out before any of the rest of the outfit so one shouldn’t be surprised that they are a rarity. Although they are usually thought of as a flintlock accessory they were, it would appear, included with some percussion pistols and ? guns as well as percussion revolvers. I found one design that seemed to appear in John Manton cased pistols and guns, including a pair of cased percussion pistols from the Paul Murray collection in the November 2017 sale and a very similar brush in a cased flintlock fowler in the same catalogue. As they were both from the Paul Murray collection one can’t be certain that they were originally with those guns – it would appear that a lot of ‘restoration’ went on, although having said that, there is a similar brush in a cased pair of John Manton pistols in Keith Neil’s ‘The Mantons’. I’ll start a separate post for these photos etc. Anyway I decided t make a rough copy of the John Manton pattern brush so I did a bit of scaling from the photos and concluded that the brushes were pretty small – the body barely 2 inches long. I tried turning the faux ivory, which is just a polyester rod on my wood turning lathe but I don’t have a short toolrest and can’t get the long one near the work if I’m using a live centre, as I was. The result is that it was impossible to turn the rod freehand as the tool just chiped the faux ivory (polyester rod) and eventually shattered the end off. It did cut in my metalwork lathe but of course I can’t do very nice curves using the handwheels. Still I got a fair approximation to what I wanted. I’ll have to find a way of sticking the bristles in without the glue running so far up the hairs – maybe epoxy instead of cryoacrelate.. I tried my new flask, and found that it doesn’t shut off very securely, so out came the spring for a bit of adjustment – anneal, bend, harden and temper – it now seems to be much more secure.


Feb 15th. Valentines’s Day went without my noticing it – shame on me! My first day of playing for the week. Every time I’ve used my flintlock I have felt the need for one of those little brushes that you occasionally see in cased flintlocks, I know you can buy them from Kranks etc, but that goes against the grain somewhat! I remembered that when I did lime plastering I use Chinese pig hair as a reinforcement for the first plaster coat on the lathes and it comes in neat rounds all standing on end, and I still have a couple of unopened bundles which look like a giant brush 3 inches in diameter and 1 1/2 inch bristles. I needed to use my wood turning lathe to make a former for the end of my flask, so while I was at it I turned up a little brush handle from a scrap as a proof of concept (more later on that) – a bit tricky to get a suitable bundle of bristles and then feed them into the hole in the handle but with the aid of masking tape it was done and a few drops of very low viscosity isocyanate put round the edge sealed it all in and stiffened the brush just enough – perfect. Looking at the photos in Keith Niels book on cases I see that most of the brushes seem to be handled with ivory – elephants not being available on ebay I settled for faux ivory and have ordered a piece of 1 inch rod to try out. Using the former I turned, I completed the end of my leather covered plastic bottle flask by clamping and gluing the leather and adding an eyelet – now completed, I checked and it throws 1.1 oz of shot ( or about 30 grams) which is fine. The full flask is a bit heavy but for clays I need that much shot and I can usually put it down on a table. I visited Dick to take the frizzen and screws I’d engraved and pickup another little job – a lock by Walklate needing a border and a couple of sunbursts and a border round the cock and frizzen – lock now done…. On the subject of ‘proof of concept’ I learnt during 40 years building specialist equipment for geophysical research and as a small company that if possible you should always try out a minimal solution before embarking on anything fancy – that way you either discover that the fancy wasn’t necessary, or that the whole thing doesn’t work anyway, or if you end up making the fancy version you save so much time and trouble because you know what you are doing/want that it saves time overall. A number of the jobs that clients bought to me were an unnecessarily fancy solution to a problem that hadn’t been thought through properly and I almost never managed to put them off, with the result that by the time I had done the design and was ready to make the kit they had backed out – I charged them 90% and delivered nothing – which was frustrating but profitable! I get the feeling that the government ought to try the proof of concept approach with all its horrendous IT projects that flounder.
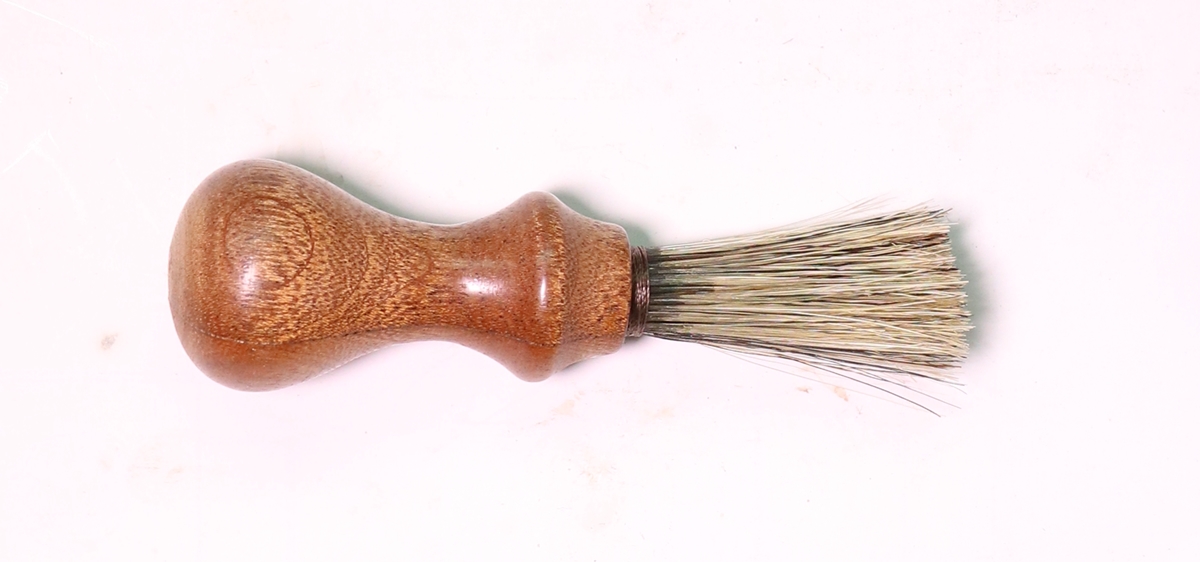
‘proof of concept’ brush – should be ivory or possibly ebony or box

Border recut and sunburst on tail and in front of cock.
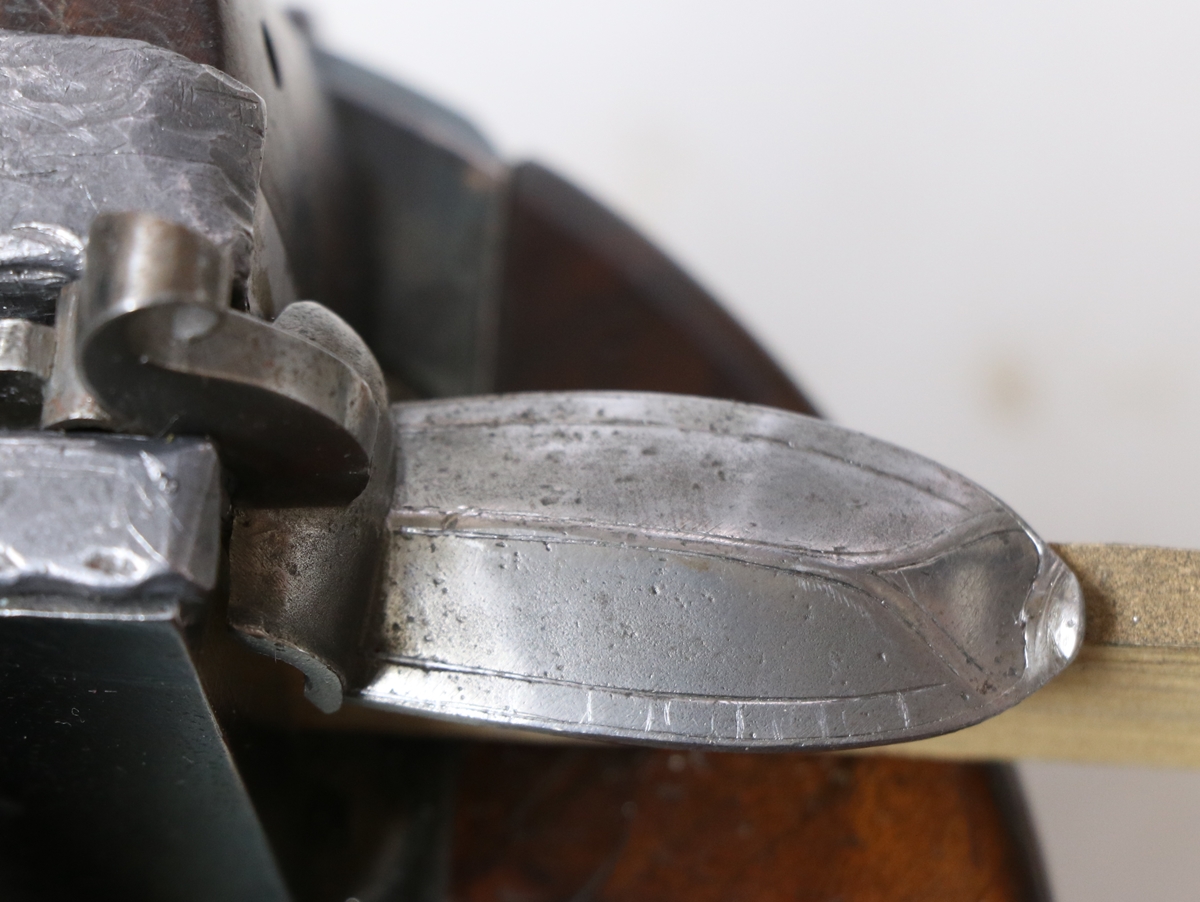
Feb 13th. A bit low on gun related activities – Mondays is my day for the work on the Bullard Archive of Geophysical Instrumentation when I’m not doing other things, and today I was fixing up Giles’s wardrobe at the flat. I must admit that I am reluctant to go into my workshop at the moment because its freezing and my little woodburning stove takes at least a couple of hours to heat it up because there is so much metal in there – for that reason its not really viable to do much work in the evenings. I did manage over the weekend to sew a leather cover for the plastic bottle that is the body of my shot flask – the bottle is a nice 250 ml bottle from a hand soap pump. I wondered how much shot you could get in 250 ml so a quick calculation… Lead has a density of about 11. So if full of lead the flash would hold 11 x 250 gms = 2.75 Kg, but of course its full of lead spheres so you need to take into account the packing coefficient which will be about 0.6 (perfect packing would be a bit more, perhaps 0.64 or so), so that reduces the weight in the flask to 1.65 Kg. A typical charge is 1 oz, which is 28 grams, so my flask will hold almost 60 shots. The dispenser, however, is supposed to throw 1 1/4 or 1 1/2 oz so unless I modify it by sticking a bit of packing in the tube, I’ll get about 47 shots of 1 1/4 oz , which is fine for a 40 bird competition and a few spares….. I need to work out how to finish the end of the flask, I’ll probably use an eyelet somewhere so I can hang it, but I’m waiting for some leather glue before I tackle that job.

The leather was sewn on a sewing machine and put on soaking wet. The external seams stop it rolling, which is handy.
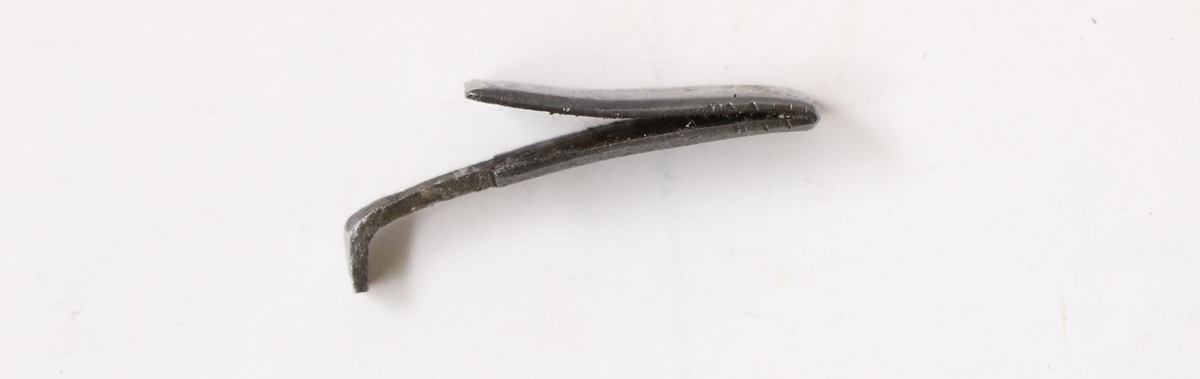
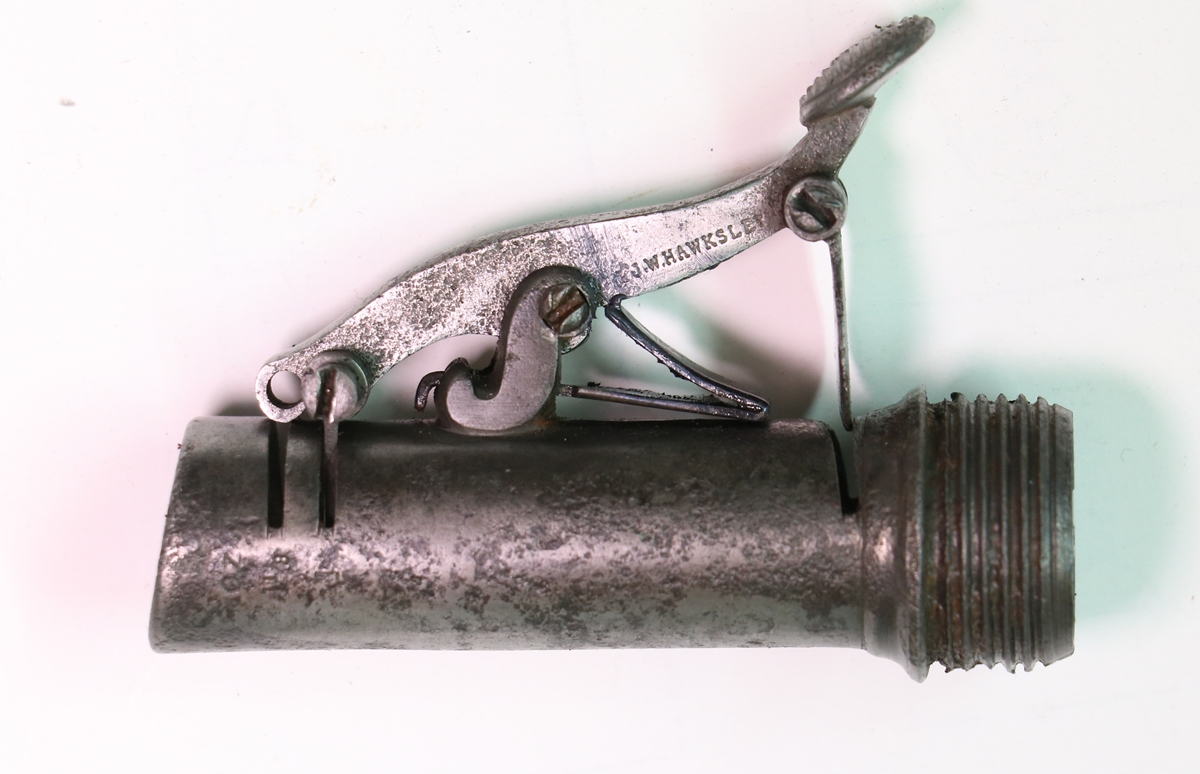
Feb 10th. I have a project to make another shot flask as a couple of mine have splits in them. I did get a leather bandolier from Pete and made an Irish shot dispenser that fitted, but the bandolier ( which is a Kranks pattern) is a bit too stiff to be comfortable, and in sorting out stuff I had picked up as part of a job lot at auction I came across a steel Hawksley English pattern dispenser, and found a plastic bottle of suitable size that the dispenser screwed into. The Steel dispenser more or less worked, but didn’t close the first shutter ( nearest the bag) fully so No 7 1/2 or smaller shot could still escape. I figured this was because the spring fouled on the shutter, but when I looked at one of my working flasks I realised that the spring was in the wrong way up, and that it was the wrong size to fit properly – so I set about making a new spring from a piece of old spring of the appropriate thickness – making springs is one of my favourite jobs! The angle grinder and 1 mm cutting disk let me rough shape the spring in a couple of minutes, then I annealed it and filed it to the right blank shape and heated it to red heat and bent it where I reckoned it should be bent and hammered the bend flat. It was a simple job to fit the spring and get the right degree of opening, and I then heated it up to bright red to quench it in water – unfortunately my gas/oxy torch was a bit hot and I melted a bit of the edge – first time I knew that the little torch ( I bought it for lead welding) could get hot enough to melt steel! Still, it was usable so after quenching I polished it and annnealed it to blue on the hotplate of the AGA. The rest of the dispenser looked a bit patchy so I popped that on the AGA too, and it came out a uniform purple colour – I wasn’t trying to make it look authentic so the result is good – now I’ve got no excuse for not finishing the flask
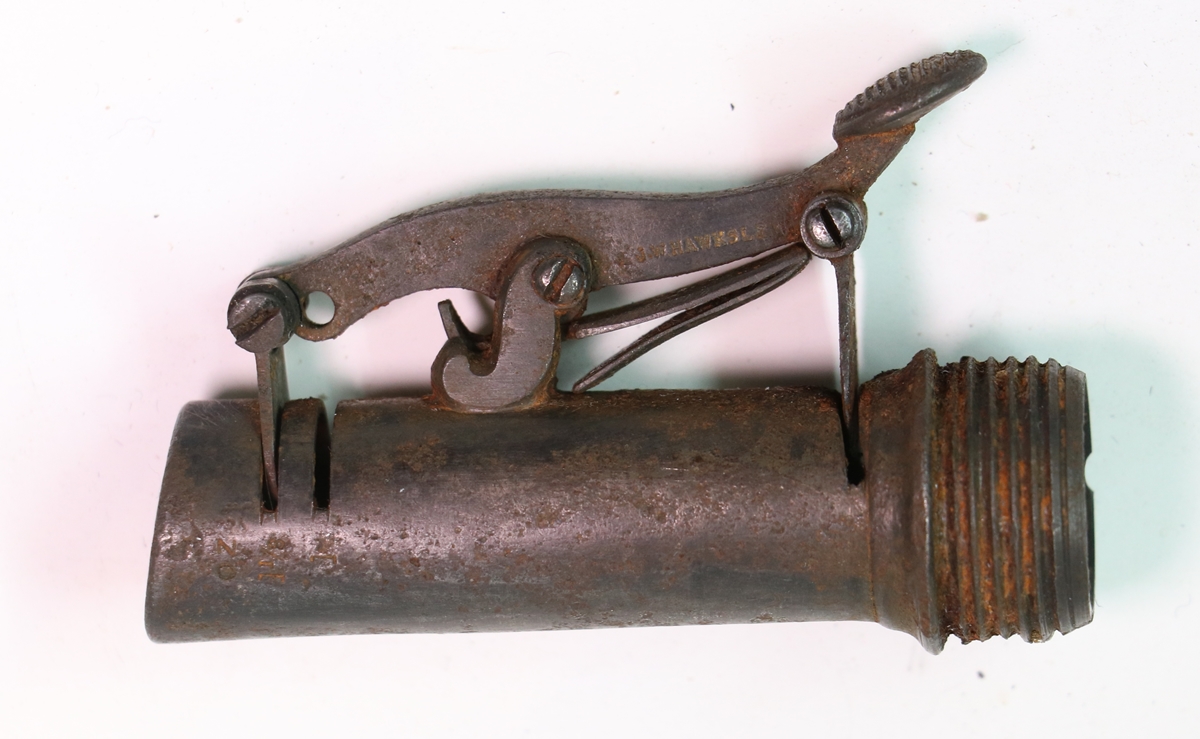
The dispenser as found but after a dip in the derusting tank – the rust seen is loose and will brush off. Notice the spring orientation.
This is the old spring shown in the correct orientation – it is too long to fit properly, which is presumably why it was put in upside down.

This is a working flask – the spring is the other way up.
New spring made, hardened and annealed to blue.
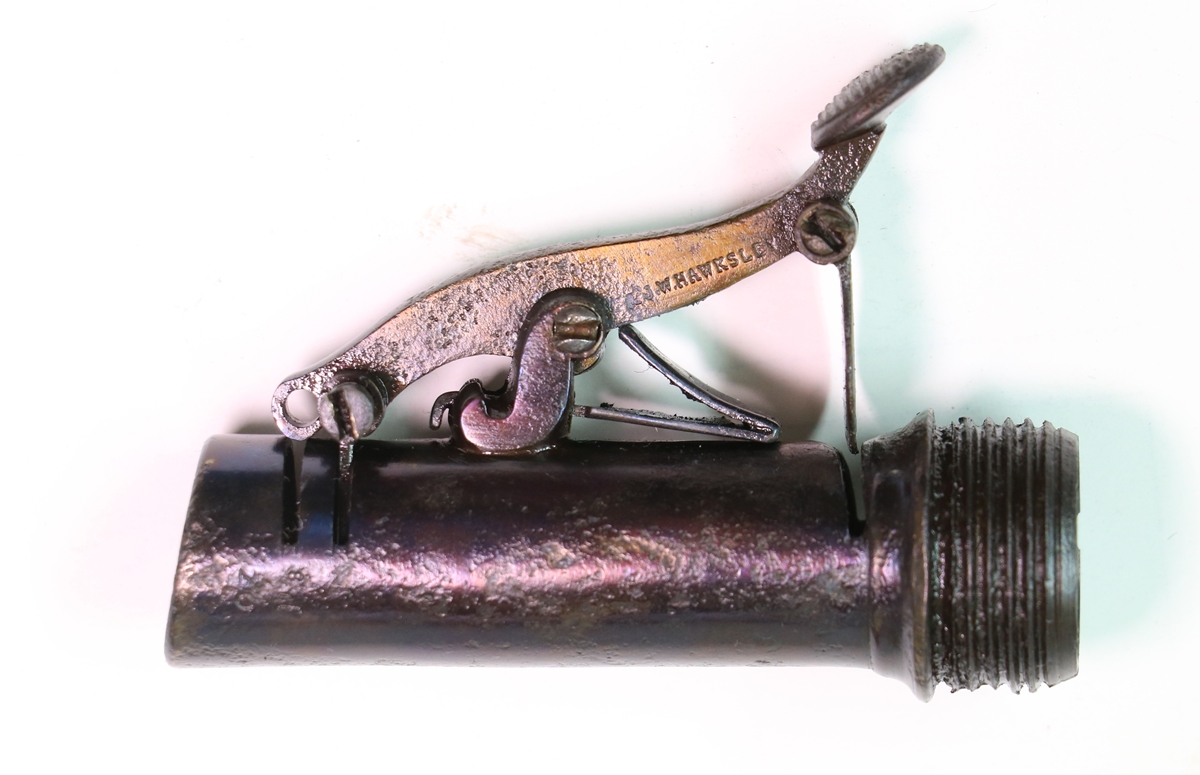
Quick flash on top of the AGA to give it a uniform colour. The right hand shutter should be the other way round to clear the slot fully but I can’t get the screw out! It does work, just occasionally it isn’t as smooth as it might be. I know its not an authentic colour, but neither is fixing it to a plastic bottle – albeit leather covered!
Feb 9th. Finished off the bit of engraving for Dick’s funny pistol, which is coming along nicely. By coincidence the hammer (frizzen) needed a wiggle engraving similar to that on the trigger guard on the Alex Henry. The pistol is a bit of a joke and so Dick hadn’t spent too long on the parts and the hammer is a pretty raw casting from Kevin Blackley that Dick had in store from ages ago – I cleaned out the lines and did the border – it looks the part. The screws match those already fitted. Nothing very demanding there! I have now sold the Perrins youth’s fowler and am advertising my mint Mortimer reproduction single barreled 12 bore – it has hardly been fired and worked well for me, but I have an old single that I slightly prefer, plus my pride and joy Manton double meets most of my flintlock needs!
Here is the fantasy pistol restoration of a wreck found buried in a garden at an early stage – now nearly finished..
(This photo dates from before I got rid of the warm white tubes in the workshop!)
Feb 8th. Thinking idly about double charging a gun and flame travelling from the first charge to the second, I wondered about what was originally used as packing between the powder and the shot. My ‘unthought’ was that tow was originally used as wadding – tow is unspun broken fibres of flax, jute or hemp originally. From the late 18th century when best guns were often cased ( cost was probably around 2 to 5% of the gun price) a wad punch of the correct size was included – presumably that would be used for overshot cards too. There is an advertisment reprinted in The Manton Supplement’ for John Manton that is for ‘wadding’ and says that if you send the number of your (Manton) gun they will send you the wadding of the correct size – which clearly refers to precut wads similar to what we might use now. I seem to remember that accidents during loading were attributed to fibres of tow remaining in the barrel and still glowing. Presumably if loose tow was used it emerged from the barrel as a flaming mess – I have occasionally used a paper tissue as a wad, and can verify that it burns and smokes on the ground afterwards. Any information would be welcome. One reason why we are always careful to see where the wads land when shooting over dry grass in summer. I picked up a couple of pieces of engraving from Dick for a ‘funny’ gun he is restoring. It was dug up in a garden so there was only a bit of the stock remaining, so he has made a fine saw handled pistol and is restoring the remnants of very fine chequering – I don’t know how he does it, it requires much more patience than I can muster. I am to try to engrave a border on the hammer/frizzen. I’m always unsure which word to use for it, the traditional usage is that in flintlocks the cock is the cock and the frizzen is called the hammer, but in percussion guns the cock is often called the hammer – I’m not sure if it was ever still called the cock? I had to go to Giles’s flat to ‘snag’ a problem – in order to insulate the 25 mm gap between the plasterboard and the underlying brickwork in one (cold) wall I drilled a series of holes & injected aerosol expanding foam only to have it coming out round one of a row of power sockets. When it had ‘set’ I unscrewed the fronts of the three sockets but they were stuck fast. I didn’t think it was a good idea to have power sockets set in possibly inflammable foam, so today I prepared for a major job, probably involving taking out the sockets, boxes and all. Unusually it turned out to be much easier than I had feared because for some reason the foam didn’t adhere to the plastic of the sockets at all, although it stuck firmly to everything else including the wires and the screws in the sockets. Anyway I was able to pries (prise?) the sockets out and clear out the foam around the wires and eleswhere and put it all back in pristine condition in about 3 hours – that job done……. My next project, before I start on any more of my pile of guns to restore, is to get my little Chinese CNC milling machine ( 3040) working – Giles and I ran into a brick wall with it last time we tried as its control board runs from the parallel port of a P.C. and modern ones don’t have parallel printer ports and it you use an add-on port it doesn’t work fast enough, so I’m going to have to get a different control board from the web. CNC milling requires a number of processes, all of which are dependent on pieces of software, and if you don’t want to pay out for them – they can cost a lot more than the machine – you have to scrabble around to find free programs. The process consists of software for designing the shape, then software for working out the toolpath necessary to cut it, then software to turn that into G code instructions for the X,Y and Z axes in terms of distance, and then software to turn the G code into pulses to drive the X,Y and Z motors – getting it all to work without a commercial package to sort it for you is somewhat tedious…..
Feb 8th. I had an enquiry about the T Perrins I have for sale, so I got it out – it was one of the first guns I restored, and when I look at it now I think I did a decent job of it. I was fairly sure that it wasn’t a shooter when I restored it, but looking at it now I think it would stand a proof charge pretty well. There are pits on the outside of the left barrel but the 6 inches or so of the breech area is good. A lot of my friends shoot worse! Provided that there is no air gap in the load most old guns will stand double shot load perfectly well – I heard an account of a terrible accident when a beginner double loaded one barrel and it split at the breech with dire consequences. This raised my curiosity because double loading with two normal loads would be unlikely to ignite the second lot of powder because the wad, shot and card would be in the way. If it were just the normal first charge that ignited then you just have the equivalent of maybe 2 1/2 times the normal shot load which doesn’t add up to even a moderate proof charge and is something that any gun in use should stand or it shouldn’t be in use. So what went wrong? If the second charge ignited when the load was some way down the barrel it would have burnt quite slowly, but if that happened some way down the barrel where the walls are quite thin it could have split there. A much more likely explanation is that the second wad and shot load was never pushed down into contact with the first load – its a known problem that if there is a gap very high pressures will be experienced, as when a barrel is plugged with mud or snow, or a bullet is incorrectly seated. The maximum pressure occurs at the blockage as the pressure wave from the explosion is reflected by the block and effectively doubles the local pressure for a short distance – hence the ring bulge that forms in rifle barrels if the bullet is not fully seated, or gets jogged along the barrel. I suppose it is also possible that the second powder charge has such low density and so much air within that it acts as a gap. I have inadvertently fired a double loaded gun without harmful effects – even the recoil was quite reasonable – I am much more careful now – I use a marked loading rod so I can see immediately how much is down each barrel.
Feb 7th. Looking at the Alex. Henry again, I came to the conclusion that maybe the barrel engraving would benefit from a bit of TLC. My client had suggested it and I had thought it wasn’t necessary, but looking at the gun with all the rest of the engraving crisp, I could see that the barrel had the usual problem that the engraving had got filled up almost flush with the surface with a hard layer of rust and maybe oil so that it couldn’t easily be seen. So biting the bullet I carefully picked out the rust using a variety of engraving tools. The aim is to take out the rust, but inevitably you cut into the metal slightly, so you need to use the tools you would for engraving the letters. Basically in this case I used a flat that was the same width as the wide strokes, a slightly rounded onlette for the fine strokes and a ‘square’ ground to about 70 degrees for the angled bits of the serifs and the round letters. The engraving was interesting because the name and address engraved on the breech side of the rear sight is subtly different from the patent and gauge engraving on the muzzle side of the sight in script and also how it’s cut. Anyway I’m quite pleased with the improvement – worth 3 hours of very careful work! I also replaced the pin that holds the bolt into the stock – the bolt(s) that holds the barrel on should be captive, held in the gun by a small pin driven through the stock and running in the slot in the bolt. The pins are usually removed when necessary by sticking the edge of a blade into the pin near the top and pulling it out – for this reason it is better to make replacement pins out of fairly soft steel so the blade can get a grip – don’t be temped to break a bit off an ordinary domestic hard steel pin. Incidentally, I’m fairly convinced that the rifle was beautifully re-stocked some time ago and not used since. I cleaned out the nipple nipple and its hole – the nipple is an original and has a platinum plug with very small hole at the exit – probably around 0.7 mm – the thread is fine – safe to shoot. The nipple hole was pretty rusty so I can’t guarantee that the cross passage between the nipple and the chamber is clear – I ought to put a small brush down the barrel to clean out the powder chamber anyway. If I was about to shoot it I would probably clean the barrel with boiling water and pump it through a few times to get rid of any loose muck, but the bore looks good. The breech block has a platinum plug on the outside of the cross chamber to plug the hole where it was drilled – I would not want to remove it. Some double guns have a screw on inner face of the breech plug for access which can (sometimes) be undone to get access for clearing out.


I found it difficult to photograph the engraving because the rust pitting tends to catch the light – click on the photos for a better view.
Feb 7th. – I realised that the ‘wear’ on the Alex Henry trigger guard tang was the result of filing out the worst of the rust. The notes on speed of ignition of gunpowder from the Health and Safety report on powder storage (see below) are interesting ;-
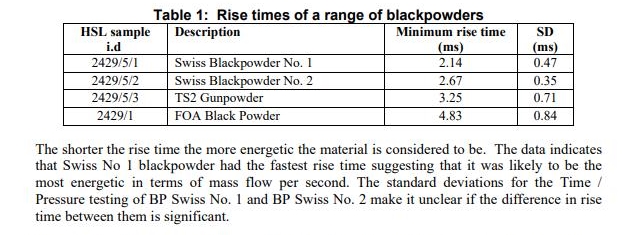
The argument about the SD (standard deviation – a measure of the variation seen in a number of experiments – applies equally to the difference between Swiss No 2 and TS2 – but its clear that in general the numbers support our experience of these powders – I wonder where Czech powder comes on the scale?
Feb 6th. STEM club at school this afternoon – more peaceful than sometimes! I think we outfaced the children with Lego Mindstorms so we’ll do something a bit simpler next half term. I have been chasing round as I had forgotten that I had an outstanding order for some electronic boards that I supply so I had to spend this morning soldering in components – I need some connector strips that are due tomorrow, then I can finish enough to satisfy the customer for a while! I did get round to visiting Dick to pick up the Alexander Henry rifle he has been cleaning and titivating, and fit the trigger guard that I had re- engraved – he has done a super job of cleaning up the furniture and getting dings out of the stock etc. The rifle is in mixed condition that makes one wonder how it got like that. The stock is very crisp and new looking- the chequering is like new and all the stock edges are sharp and unworn and the inletting is very close fitting. The engraving on the lock is very high quality and sharp and the furniture matches in quality. There is a fair bit of wear on the tang of the trigger guard where the hand would grip and a bit on the bow of the guard. The breech end of the barrel is in clean condition but 6 inches further towards the muzzle it is quite uniformly pitted with rust – quite deep along the junction with the under-rib in places. There are also small rust pits on the patch box lid. The bore is pretty good but has a slight patch of rough near the muzzle (I haven’t tried to clean it out). Antique rifles don’t usually show as much use as shotguns (unless used extensively in e.g. Africa) but I wonder if this one has been restocked at some point, like my Purdy rook and rabbit rifle? I suspect that the rust was the result of a small number of wettings, possible just one that wasn’t dried off and oiled… the owner must have been gutted, as this wasn’t a bargain basement rifle! Its what I love about antique guns – there are always multiple layers of mystery to be unraveled after almost 200 years! Oh, and it needs a good ramrod! I have a piece of ebony I bought at great expense that would make half a dozen rods – I must pluck up courage to cut it up now that I have a new blade in my radial arm saw……….
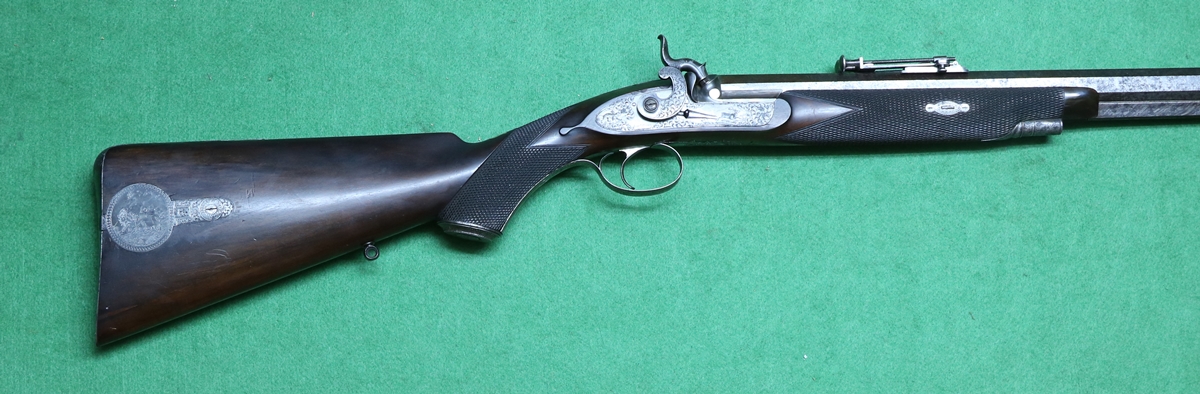

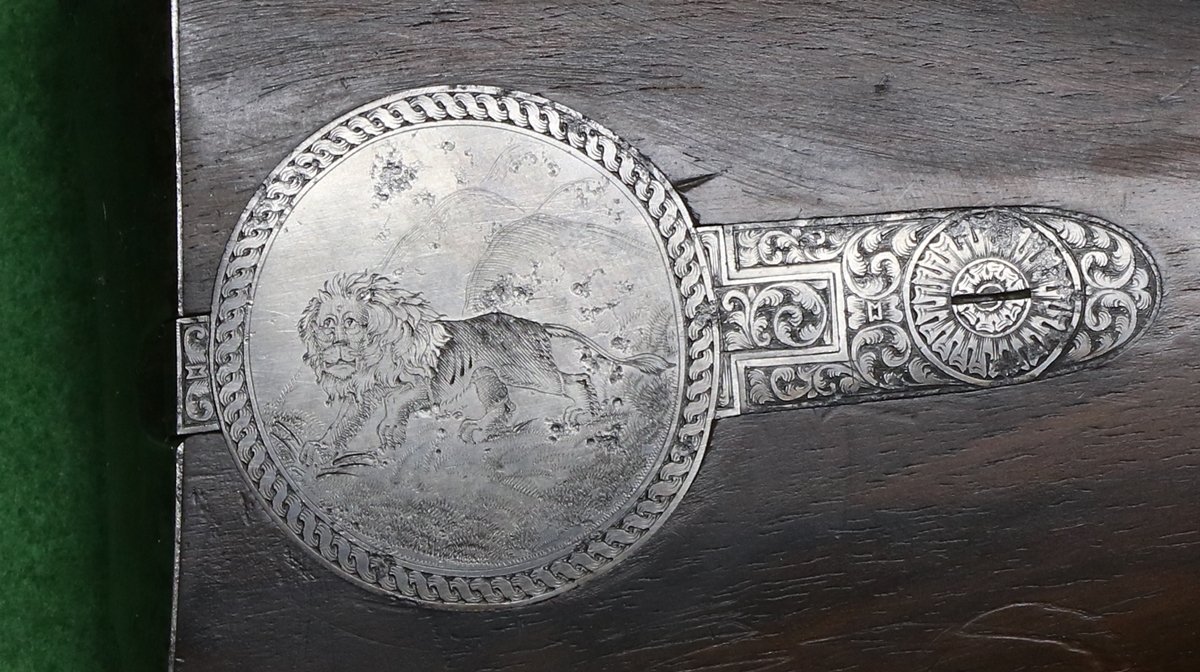

There is a terrific sense of movement in the scroll engraving – very clever work – wish I could do it!
Feb 4th – I decided that I needed another storage box for black powder and while driving was discussing with Giles how the regulation design of boxes worked in the event of fire. With his usual inquisitiveness and love of the internet he came up with a report on the latest (2013) tests done by the HSE on setting fire to the boxes. What is interesting, apart from what actually happens when you put a regulation box containing plastic bottles of black powder in a bonfire, is that the research concludes that there isn’t any significant difference between 500 gm and 1 Kg containers of BP, and that 25 x 1Kg containers in one box was no more dangerous that 9 x 500 gm containers. They also concluded that the ignition speed of the powder didn’t make any difference to the overall conflagration. Its a shame that the HSE hasn’t updated the design of black powder boxes to take account of this research, especially since black powder continues to be sold in 1 Kg plastic bottles, which means it all has to be decanted into smaller bottles that are in all probablility not black carbon loaded antistatic plastic like the original ones. I notice that my new explosives licence has no limit on the amount of explosive I can keep – I thought it was 10 Kg, which is enough for me, but not excessive – it amounts to 20 x 500 gm bottles assuming they are all full – quite a big box. Incidentally, if you do have a fire your powder box should survive for 8 to 12 minutes before going up, and bottles will mostly go up separately. Here is the HSE report on the 2013 testing…. rr991- storeage of black powder, test data
Remember, this is the website for wacky facts – and don’t forget to email your comments on Air Guns to firearmsconsultations@homeoffice.gsi.gov.uk today or tomorrow!
Feb 3rd – Having nearly finished the flat (nothing in our household is ever completely finished – we would feel a loss of purpose if it was) I can play a bit. I recut the borders and motif on the trigger guard of the Alex Henry rifle. Its a tricky part to engrave because of the rounding of the edge where the border lies, and the obstruction caused by the trigger bow and curvature of the guard. The original engraving was done by a right handed apprentice and was not particularly good – you can usually tell which hand they engraved with because the little ‘comma’ motif can be cut easily in the normal i.e. writing, way but is more difficult if it curves in the reverse direction – it has to be cut from the narrow end and its easy to turn towards your body, not away. Anyway that came out an improvement and I coloured it a little with a gas torch to match the rest. In our discussions about how far to take a restoration job Dick and I try to avoid anything that looks too perfect, referring to that kind of over restoration as an XXXX job, where XXXX is the name of a well known restorer! We had that discussion over the Alex Henry barrel. I also finished the butt pad for the Manton – as I wasn’t sure how it would turn out I did a fairly quick and dirty job, but it fits well and is secure and the gun comes up much better. It was good to get back to a bit of engraving………………
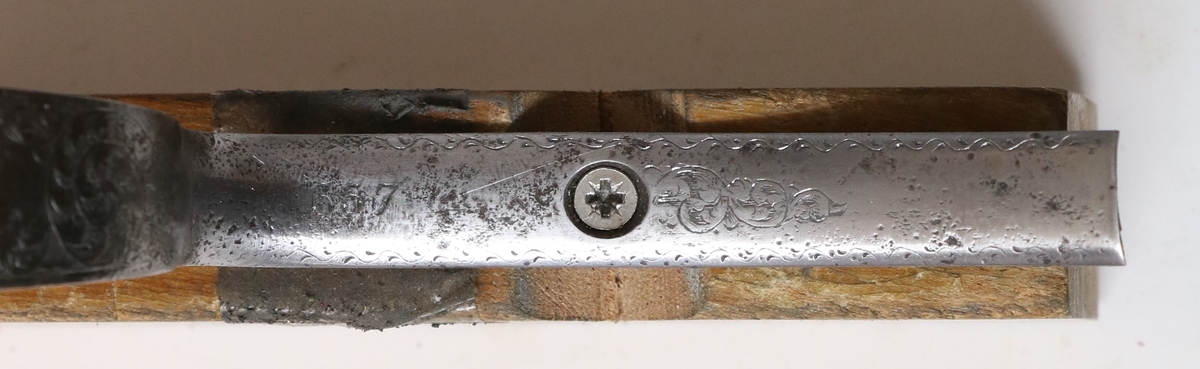
I had just started to recut the top border here….

The wiggle border is quite tricky on the rounded edge of the trigger guard as its easy to skid.
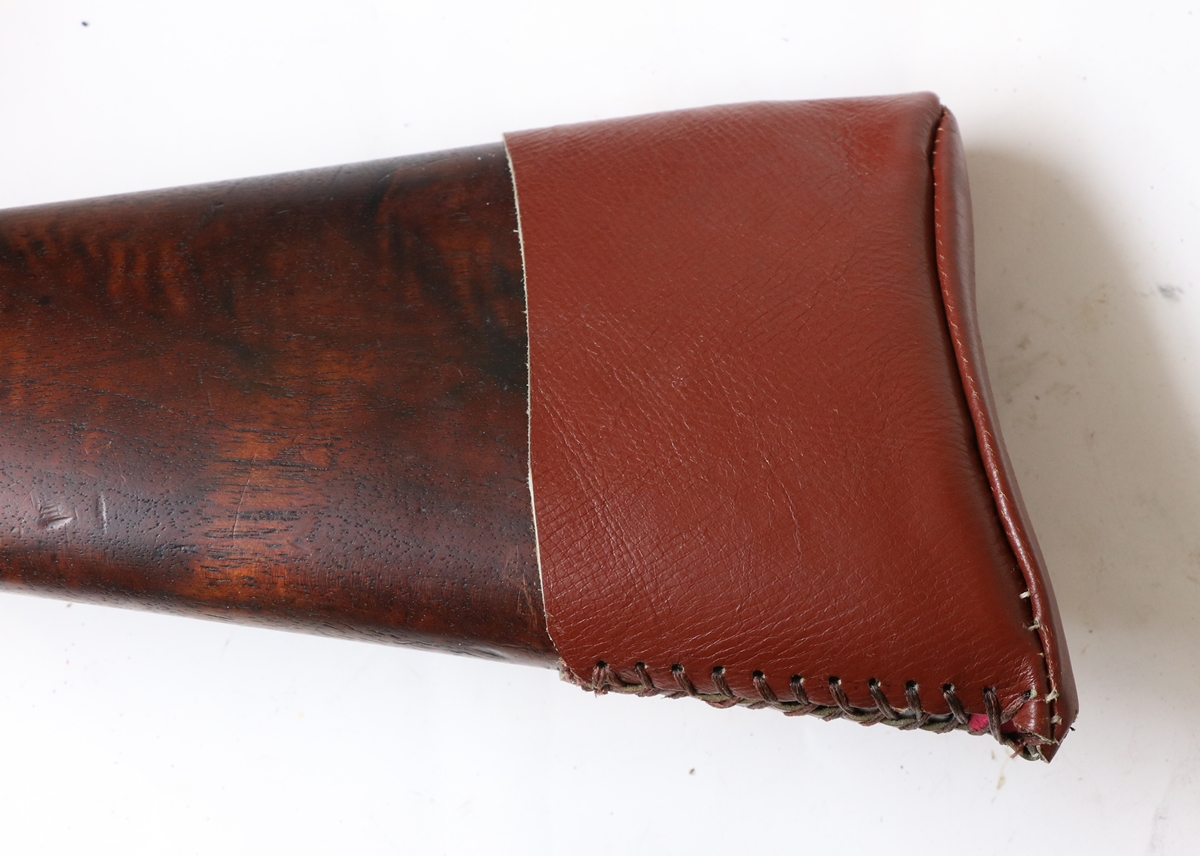
More of a trial than a quality product!
2nd Feb – I sent some time this morning struggling with my computer, which had decided that my email program Thunderbird hadn’t updated fully and I needed to reboot – after a couple of reboots and no change I went online and found some ‘remedies’, none of which worked and I couldn’t download another copy on top of it – in the end I deleted a few likely looking files from the program directory and managed to re-install a new version without loosing all my emails. In the meantime the computer decided that I couldn’t log into my bank account, although by this evening it had relented! Dick finished the repair of my ‘Egg’ percussion that fell and broke the fore-end into 5 pieces – I don’t know how he manages to get things back together again so well, but its difficult to see any signs of repair unless you look very carefully. He has almost finished the Alex Henry – its coming up beautifully, everthing is pretty well mint except the trigger guard ( which I’m going to do a bit of refreshing of the engraving on) and the barrel which is a bit pitted on the outside . We have had several discussions about what work its appropriate to do on the barrel and have come to the conclusion that its an all or nothing job, there is no halfway option, and we both think that the rest of the gun is so good that to do a full striking up of the barrel and refinishing it will spoil the authenticity of the rest. Plus it would be pretty expensive! We’ll see what the client thinks. I have done a bit more work on the butt pad for the Manton – then I stood it against my Samuel Nock percussion the stock is almost an inch shorter so the butt pad is needed. I’ve just got to finish it off and lace it to the stock.
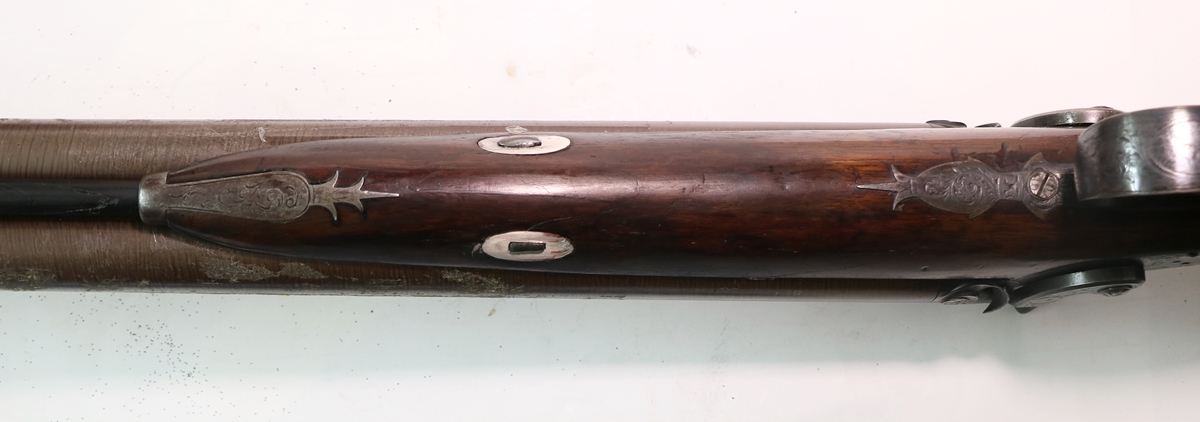
This was in 5 pieces with the bolt broken out – superb repair by Dick

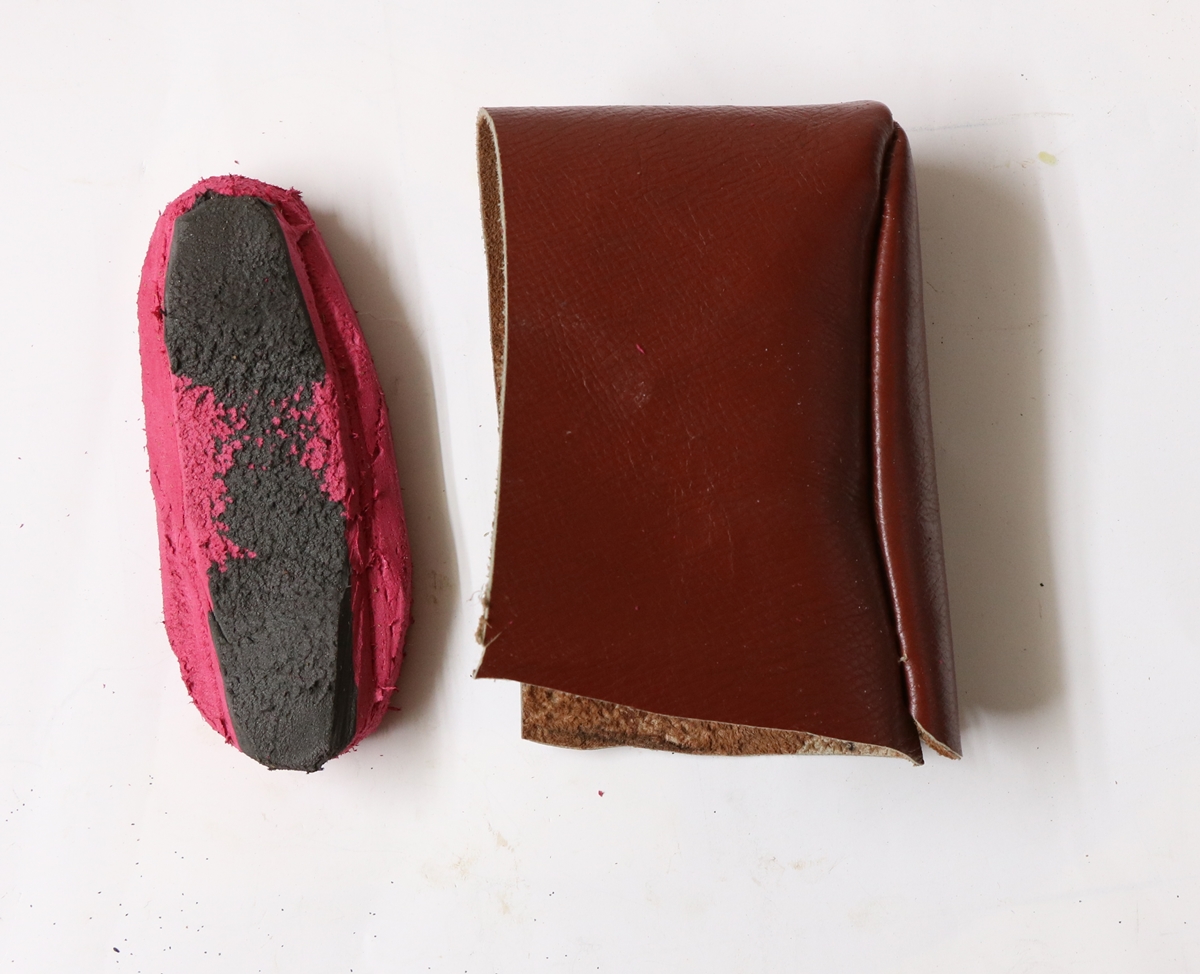
Its really a prototype/ proof of method, but I may never get round to making the real thing!
1 Feb – another month gone… I heard yesterday that our muzzle loaders/MLAGB and not going to the British Shooting Show in a fortnight – I was looking forward to manning the stand and meeting a load of interesting people – shame. I had an email from someone who tried to list an old lock for a flintlock on Ebay and got it kicked off as being part of a firearm – Sites like Ebay and Amazon are paranoid, as are many carriers, so be warned. I guess we all know that we are in the sights of lots of organisations – a couple of examples come to mind – Everyone with a shotgun license or a firearms licence is on a government list of potential terrorists – i.e. people having access to firearms. Some of my friends have been asked out of the blue at ports if they are carrying firearms. I did hear a report that if a firearms holder rings 999 for a burglary in progress the police will wait for an armed response unit before attending – I can’t verify that. Another important issue all those interested in shooting should be aware of – the government is running a consultation on sir gun law and amongst the possible outcomes is to bring our laws in line with Scotland – i.e. licenses for all air weapons – you can imagine the chaos in firearms licensing departments from the extra load of this pointless exercise in nanny statism. The consultation ends on FEB 6TH so not long to do it – you can see details at here and send your email response to firearmsconsultations@homeoffice.gsi.gov.uk
BASC makes the following points about the issues raised – if you haven’t got time to compose an email just cut and paste this, it will be better than nothing! ;-
We have highlighted the following points:
- Current legislation already addresses the issue of storage and under-18 access
- Airgun fatalities are extremely rare. The Home Office has been able to identify only four involving minors since 2005. A national licensing system would lack proportionality
- Airgun manufacturers already supply products that are safe, fit for purpose and fully comply with firearm and consumer laws. If an airgun is modified without proper authority, then the person making the modifications is responsible, not the manufacturer
- The police already struggle to properly service existing certificate holders and simply do not have the resources to deal with millions of additional certificates
- Airgun restrictions would have unintended consequences including a collapse in sales for the trade and a loss of opportunity for young people to learn marksmanship and proper firearms handling. Restrictions could also undermine conservation efforts as airguns are used to control grey squirrel populations.
29th Jan. I put in an alteration to my shotgun certificate recently to take off a couple of antiques that were not shootable any longer, and put on two others to replace them – the old guns going back to my (section 58) collection, and the ‘new’ ones coming from my collection. Each time I do this I get an email asking me who I transferred the guns to and where I acquired the ‘new’ ones from, although I indicated clearly that its my collection in both cases – I guess the clerks don’t get to deal with shooters of antiques very often, but I’ve had to give impromptu lessons on the firearms act several times. I might offer to go in and take a load of antiques! The certificate forms have had the number of spaces for changes drastically reduced to 6, so I’ve already used 2/3 the available spaces withing the first three weeks of the certificate’s life! I was in the flat today to hang another door, which called my attention to my new ‘tool’ discovery – often when I do a job I discover some device, tool or gadget that is so useful that I regret not having come across it years ago for the time it saves – this jobs gadget is a big bag of colour coded plastic spacers from Screwfix that stack together and come in a range of thicknesses so that you can make up any thickness of spacer from about 1 mm to 20 mm to within a mm or less or more when perched on a block of wood). Perfect for fitting and levelling doors, windows, cabinets, cupboards, worktops etc, – anywhere there is a gap to be controlled.
28th Jan Giles has now more or less moved to his flat and I only have a few jobs to finish – like fit the 3 remaining doors and make a desk and stop the washing machine from destroying itself when it spins on account of the decking is too springy for it! Anyway I am now able to have weekends at home to catch up with domestic and gun fettling. I did the shopping for the first time in months – I’d almost forgotten how, and Giles and I finished the wood (offcuts from the American Walnut work tops at the flat) for his coffee table, and I welded and painted a base out of some old bits of scrap 1″ square section steel tube I had lying about – I bought a cheap chop saw for metal and wood recently – the way it chews through metal is impressive, although it does spray bits of red hot steel all over the place – you need a helmet as bits fall on your head, as well as full face protection. I fitted a new blade on my radial arm saw as the old one was getting a bit tired – luckily the 30 mm to 16 mm bore adapter from the old blade fitted the new one exactly. I even found time to fix up a sling style Irish shot flask from an old nozzle I had and a leather that Pete kindly gave me. When I shot the Manton I realised that the stock was a bit short for me – I couldn’t find my leather pad so I bought a nasty rubber one at CGC so I’ve started to make a leather one that fits the gun properly – I have made a pad from the Judo mat foam I had, and ordered thread and leatherwork bits, so I’ll put up photos when I do some more on it. To top off the weekend I managed to make 28 lbs of marmalade to see us through the next year! Now exhausted – makes me realise that spending all weekend working on the flat was a doddle!
25th Jan. A very pleasant day at Cambridge Gun Club, apart from having to cross a lorry route 4 inches deep in sloppy mud in my shoes! Anyway Bev and Pete both gave the seal of approval to the Manton as being a good fast shooter, and I did hit a few with it, plus I’d cured the stalled cock problem. I used my Samuel Nock percussion after lunch and had some luck, and one or two nice clays that I wasn’t expecting to hit. My conclusion was that I might as well shoot flintlock as the results are not much different and its more fun!
24th Jan – My next job at the flat is hanging new doors – I bought 4 oak doors on offer – they seem to be part solid part veneered with a ‘manufactured’ core and look the part – my problem, if indeed it is a problem, is that they weigh 34 Kg each and need 3 hinges, not two. I don’t fancy cutting all the rebates for the hinges in the oak edging strips by hand with a chisel, so I thought I’d see if I could buy a jig for a router. Unfortunately the jig costs about twice what a router costs so its plan ‘B’ – make a jig! I had fun this afternoon as Dave and I have been helping Cherry Hinton Church run a STEM club for children aged 7 to 11. This week they had to build something to transport a 1Kg weight across an 80 cm ‘river’ so we stretched a string on some frames and made a carriage to carry the weight across. Its great to see the children tackling problems but doing it all in less than an hour is challenging. I’m off for a quick shoot with my flintlock friends tomorrow – the weather promises to be fine although there will be a bit of breeze. I’m hoping to pick up 2Kg of Swiss No 2 as I’m completely out. I have reluctantly come to the conclusion that I am not good at judging how fast a flintlock is going off ( unless its painfully slow!), except I can roughly tell by the recoil how fast the main charge is burning (at least I can tell that Czech powder is very ‘soft’ and TS2 less so). The experts seem to be able to hear from the sound of the firing just how fast ignition is, and to tune flintlocks up by using slightly different loading techniques for the fastest ignition. They are quite sure that Swiss No 2 and Swiss OB priming powder are the right things to use. I’m not sure I can tell the difference between Swiss No2 and TS2 but I’m told the latter is significantly slower. Lots more for me to learn here – still, from the photos my Manton is producing loads of sparks in the pan!….. we shall see.. I might take my camera to see if I can get a video that can be used to time the whole discharge process.
23rd Jan – Busy weekend entertaining grand daughter (7) who was fascinated by engraving and the microscope. I’m having a day off from the flat to get the Manton sorted so that I can try it out on Thursday at CGC. If you’ve been looking at my previous entries you may remember that the frizzen of the left lock doesn’t fully open of firing – I took a video of it sparking, and you can see that it produces plenty of sparks in the pan before it stalls – see frame below. The left frizzen opened a bit further than the right before it reached the ‘flip-over’ point so I took the left frizzen out and worked on the cam that runs on the frizzen spring roller on my 1200 hone and a fine diamond slip, I took it very gently as I didn’t want to overdo it, and after half a dozen attempts got it to open fully on sparking. I use a small ‘mole grip’ to hold the frizzen spring off the frizzen while taking it on and off. A quick polish on the fibre wheel finished the job, so I hope it will now function as it should, although as you can see from the clip before I worked on it, there was no shortage of sparks falling into the pan, even though from the geometry it looked as if they might not make it into the pan. I would put the video on the web, but being a cheapskate I’m using a free version of Videopad and it wants me to buy a copy before it will let me export videos – I’m sure there is a workaround but I haven’t time to sort it at the moment. Looking at the photos, it occurs to me that by the time the flint has travelled to the bottom of the frizzen the flint really isn’t moving at an angle to put much opening force on the frizzzen and by then the frizzen should be flying open under the influence of the frizzen spring. Obviously the flint has to scrape down a lot of the face of the frizzen to generate a good supply of sparks – I guess that the inertia of the frizzen actually carries it over the ‘flip-over’ point after a certain point. I have read that flintlocks should fire without any significant strength in the frizzen spring, just on the inertia, although I haven’t tried it – in the flintlock days, the balance between the mainspring and the frizzen spring was regarded as a key factor in ignition speed. I must go through the video and work out how fast things happen! Answer – really too fast for my 50 frames per second camera- its mostly over in 40 mSec but the glow lasts for about 3/4 of a second – when I put powder in the pan everthing is obscured by smoke after about 40mSec. – the persistence of the heat shows why you have to wait in the event of a hang fire.
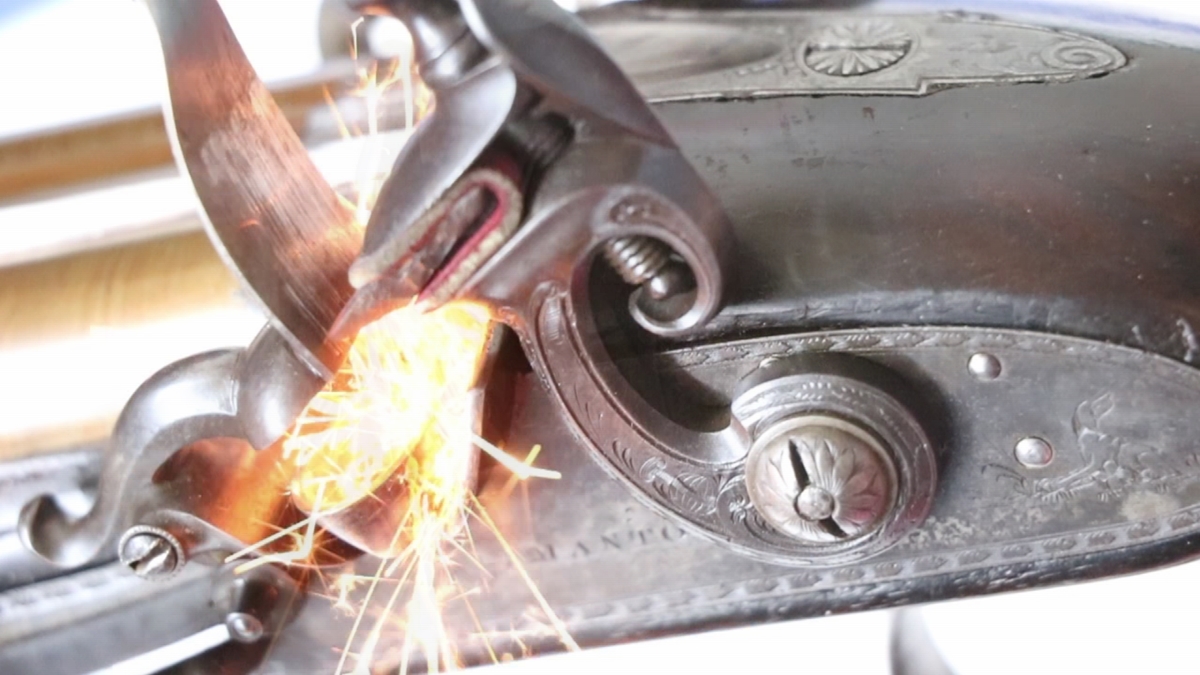
Nothing wrong with the sparking here, but the frizzen stops there! Its surprising how long the glow from the heat lasts on the flint.
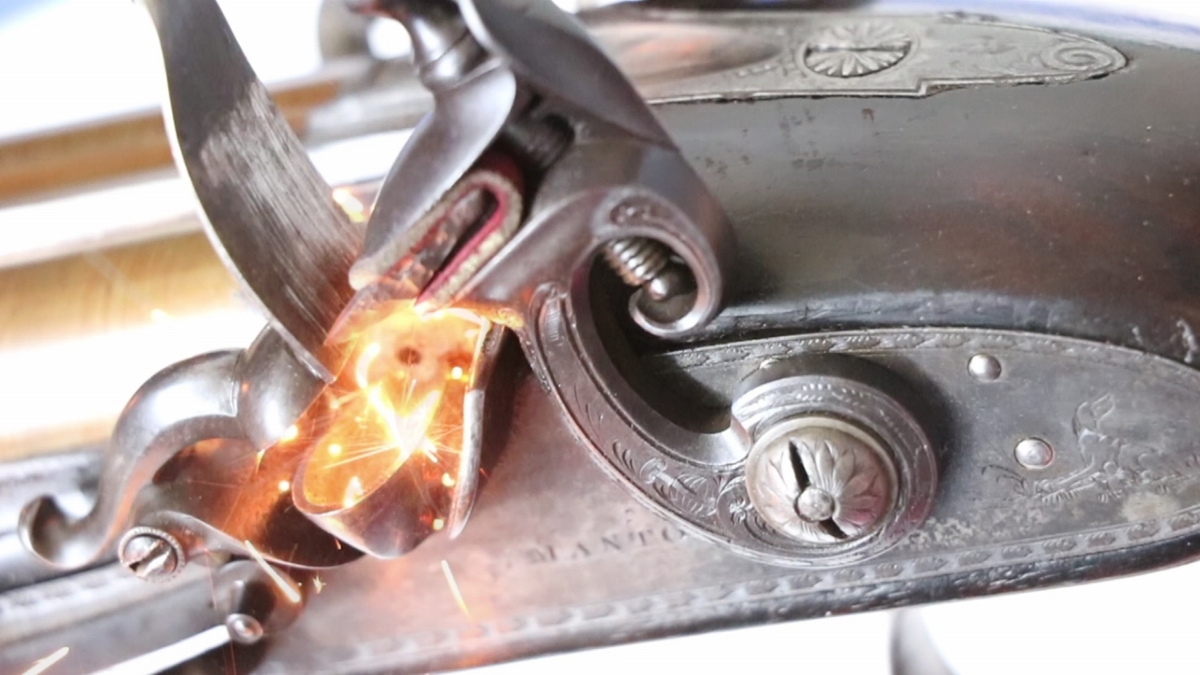

The clamp is one I usually use for resoldering ribs on double guns.
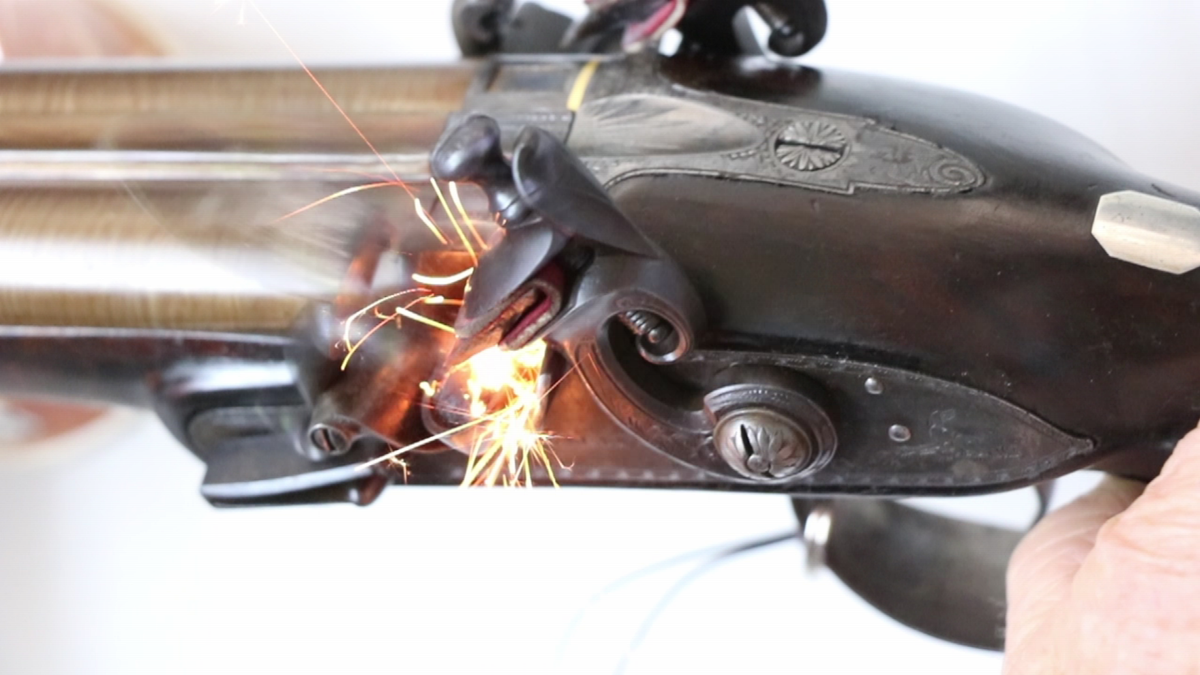
After repair – you can just see the ghost of the frizzen in the open position. This is the first frame (50 f.p.s) of action, the next frame is blanked out by smoke from the powder. My camera is not a proper video camera and makes a bit of a mess of very fast moving objects. The image is mangled – you shouldn’t be able to see both the frizzen and the rib underneath it in the same frame, but the editing software might have somehow scrambled it!
18th Jan. Back at the flat today after I had picked up a couple of 12 bores from a recently widowed friend and took them to an RFD for a safe ekeeping. I have a couple of little jobs to do including fixing an IKEA cupboard door – I bought a set of hinges from Screwfix as it is a waste of time struggling to buy anything small from IKEA, only to discover that they sabotage that possibility by drilling out the normal fixing screw holes ( which they don’t use) so that they are too big for any standard hinges! ( typical IKEA) – I managed a good fix using plastic bushes made from wall plugs, so I got away with it, I think. I will attack the problem of the Manton frizzen soon! The left frizzen won’t fly open on firing – I tried inverting the flint, or using a different flint but they strike the frizzen in about the right place (around 1/3 the way down), and seem about the right length, they match the one in the right cock which works fine. In the literature they talk about balancing the strength of the main and frizzen springs for fast ignition, and it is possible that the frizzen spring is a bit strong on the left frizzen – I have seen it said that guns will work with almost no frizzen spring, but I’m not sure they would be very fast in that state. Looking at the equilibrium position of the frizzens (the point at which they are balanced between springing shut and springing open) I see that the left frizzen has to be more open before it is accelerated by the spring compared to the right frizzen by about 10 degrees or so. This is a function of the exact shape of the lobe on the back of the frizzen that is in contact with the roller on the frizzen spring in relation to the roller position. The amounts of metal that need to be removed to change the equilibrium position are quite small, so I might first have a go at gently reshaping the tail of the frizzen so that the left and right are the same. The next step would probably be to weaken the frizzen spring very slightly. It is quite interesting when I spark off the left lock and the frizzen doesn’t open – the edge of the flint that is shaving off the sparks & steel slivers momentarily glows red hot and cools over maybe half a second. I guess the hardness of the frizzen face has an effect on the friction/heat/work generated as the flint gouges down the frizzen face, so maybe hardening the face would be another solution? I’ll take some photos tomorrow, and try to get a video of the red hot glow.
16th Jan. A very pleasant day’s shoot at Woodhall Estate – sunny, not too cold but with quite a breeze. I started out with the flintlock using TS2 but I wasn’t confident that it was going off fast enough and I wasn’t having much success so I decided it had better wait til I could try it at clays with some expert guidance in tuning it up. Annoyingly for the last shots the left hand frizzen wasn’t opening fully, although it did fire (another thing to sort out & put on the blog!). Anyway out came my Samuel Nock double percussion, and I did begin to connect. I found crossing birds difficult in the wind but I improved as the day progressed and had a cracking last drive with birds going like rockets directly over me (my favourite shot), so I accounted for a significant fraction of the bag on that drive. We always get a modest bag on muzzle loading shoots, which is why I like them – mine is usually particularly modest! Anyway since I broke my Egg double, the Nock will become my percussion gun of choice.
14th jan. Time to tackle the problem with the double discharge of the Manton. Sometimes the full cock position is not secure as it should be, so that the gun will release the cock of the second barrel when the first is fired. This may be due to one of two causes, either the bent ( the notch in the tumbler that catches the sear ) is worn or not properly formed so that the sear can slip out too easily, possibly in combination with a worn, rounded nose on the sear, or the sear/bent are perfectly OK but the sear is not able to move far enough to engage the bent fully. The sear arm is lifted by the trigger blade, and should fall far enough to let the sear engage. There are two things that might prevent the sear from falling, the trigger blade may be too high or the wood of the stock may be getting in the way. The arm of the sear that contacts the trigger blade is often bent as a result of previous ‘repairs’ so you need to check carefully to ascertain the cause before attempting to fix things. Fiddling with the bent and the sear nose is very tricky, and not something to be embarked on lightly. In the case of the Manton it was clear that both bent/sear combinations were pretty near perfect and the problem was that the left sear arm could not fall enough to engage the sear nose fully in the bent. As a simple test, when the gun is at full cock you should be able to feel a little play in the triggers before they engage with the sear – in my case there was no play. Looking into the hole in the stock where the sear arm goes I could see that the wood was not getting in the way, although there wasn’t a lot of clearance. At this point I remade the little roller on the left sear arm as the one on there was bigger than that on the right (The Manton is unusual in having a roller on the sear arm). This of course provided a bit of clearance, in fact more or less cured the problem, but I wanted a little more clearance, and the right trigger also had no clearance, although the sear did just manage to engage its bent. Apart from bending the sear arms (not really possible with the rollers) the clearance can be made in one of two ways – you can directly file or gently grind a little off the top of the trigger blade which will mean that the triggers move further back to fire the gun, or you can file/grind a little off the front of the triggers where they are stopped by the end of their slots in the trigger plate, which will mean that the triggers have a little more forward movement. I opted for the second method, having first polished the tops of the trigger blades on my fibre wheel to give a good bearing surface, I ground a little off the fronts of the triggers on my 260 grit diamond lap. I now have about the right amount of play ( 1 mm or so) on the left trigger, and a bit less on the right, but enough clearance for it to function correctly. One of the interesting speculations when fixing things is how they came to be like that – is it just the result of wear, and if so where/how, or does it indicate something has been changed/repaired – maybe different locks put in or a reconversion attempt? In this case I don’t have an answer! Clearly the gun nearly worked and it might have been a very minor thing that tipped it into not working but I can’t see what that was.
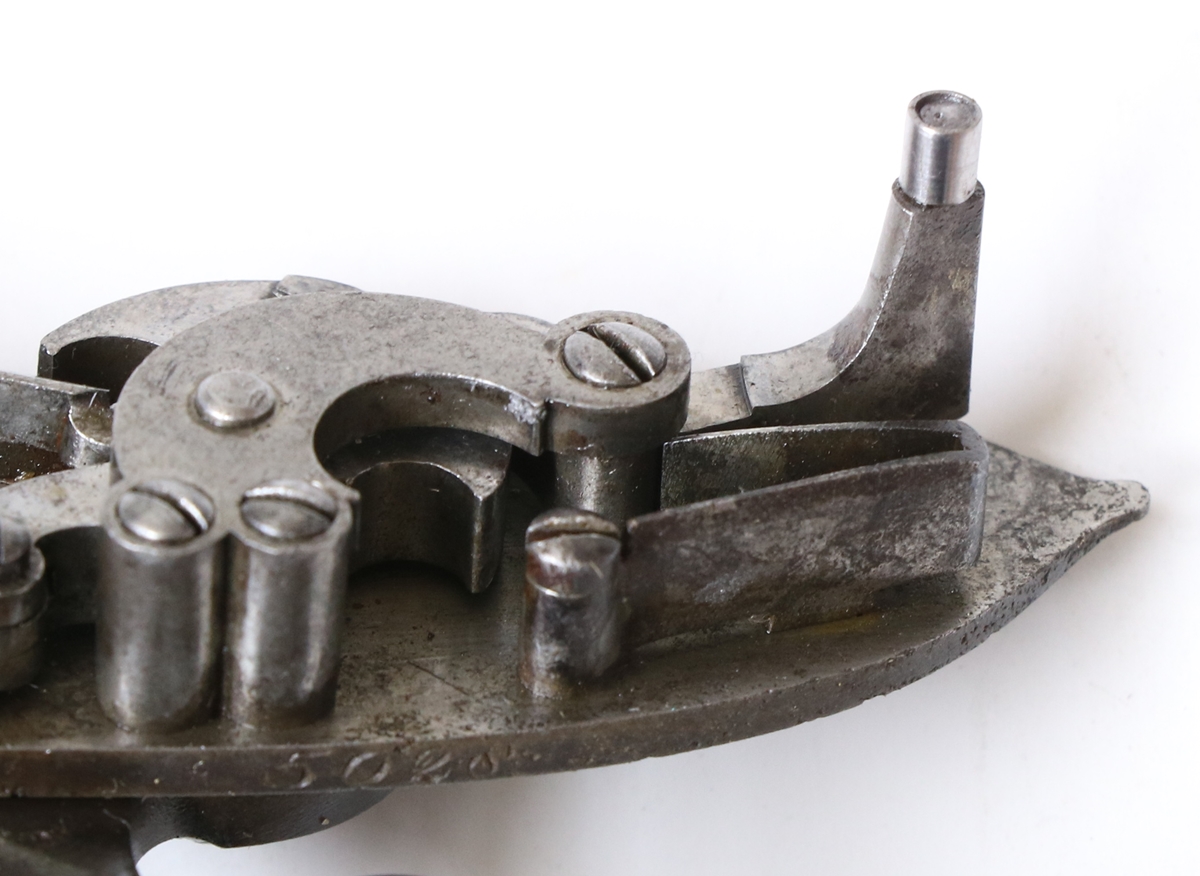
New smaller roller
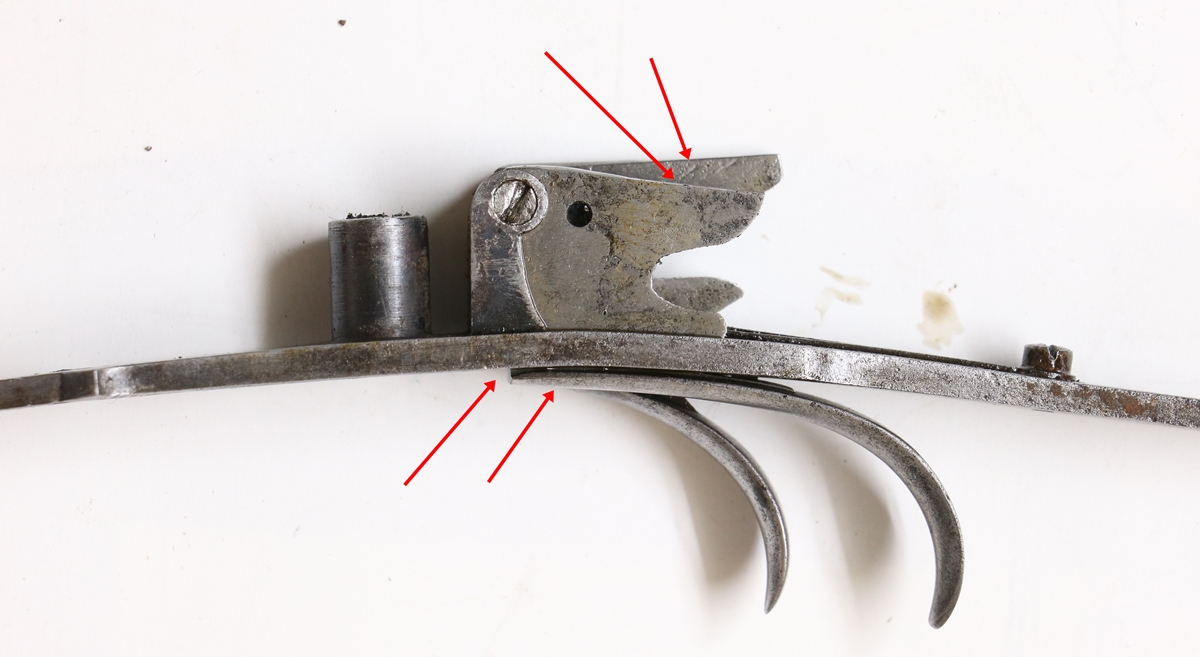
Possible places to relieve the trigger blade height.
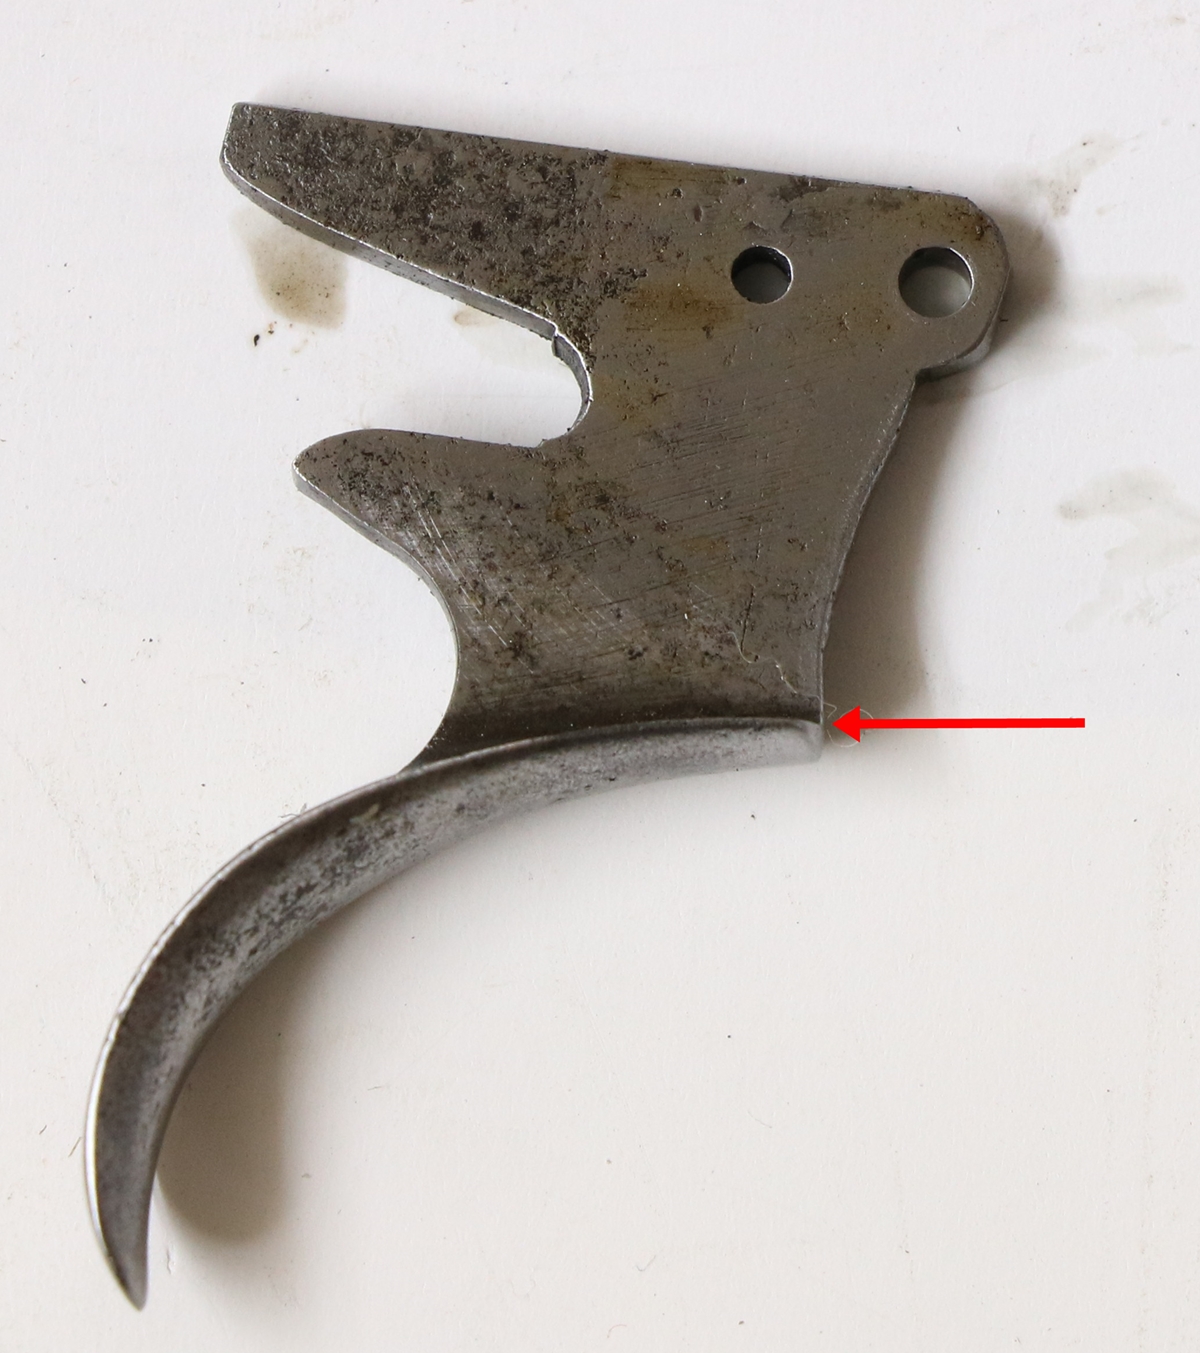
I ground here on a 260 grit lap
13th Jan. I’ve just come back from Somerset where I was very kindly invited to a shoot on Friday. We had a very pleasant day on a small, informal shoot in some lovely country and the weather was kind. Birds were a bit scarce, but that didn’t detract from the day, especially for the three of us who were in period costume and shooting muzzle loaders – 2 flintlock and one percussion. I took my new double 16 bore flintlock John Manton, which I had never shot before, and my faithful ‘Egg’ – inverted commas a because its one of those guns that obviously came out of Birmingham and had a name put on it that would appeal to punters – whether it had anything to do with any Eggs at any time is immaterial! My Egg fell over in its slip at home and when I got there it had snapped off the stock in front of the locks into several pieces, so the Manton it had to be! I started with Swiss No 2 powder and 1 1/4 oz of No 6 shot (stolen from 12 bore cartridges as I had run out). The first shot resulted in both barrels firing as the sear was jogging out of the bent on the left lock when the right barrel fired. I didn’t really have time to investigate, although the full cock on the left barrel seemed to hold, so I just took to firing the left barrel first – it was a bit trickier to take a second shot by moving to the front trigger than the normal sequence, but it enabled me to carry on. Anyway my second shot connected so that was good. I ran out of Swiss No 2 (black powder) towards the end and swapped to Nobel TS2 that I had – it seemed to burn quicker than the Swiss and gave quite a recoil with 2 1/2 drams of powder and 1 1/4 oz of shot. My host was shooting an 18 bore flintlock using Czech powder and had told me that it had virually no recoil so I put 2 1/2 oz of my TS2 in his gun and he was surprised at how much recoil there was. I will have to see if I can find a source of TS2 as it was very clean and burned fast. I had two misfires where the pan flashed but the barrel didn’t fire – I put that down to not pricking out the touch hole between shots. The Anglian Muzzle loaders ritual requires that the touch hole is blocked by a pin during reloading to keep powder out of the pan and make sure the hole is clear. I can’t do that with the Manton on account of the ‘lips’ on the hammers (frizzens) – see photos below. It was quite clear from Friday that the lip on the left barrel, which is as intended by Joseph Manton, was there to allow air but not powder to pass – it very effectively stopped self priming, which did happen a bit with the right barrel. ( I will do a bit of welding to reproduce the lip properly on the right hammer) I had a look at the sears tonight – both seem to be touching their respective trigger plates when on full cock, the left is definitely preventing the sear from engaging fully in the bent, the right more or less OK but I’d like a little bit of clearance to take up when the triggers are pulled. The roller on the left sear is a replacement and slightly larger than that on the right and may be the problem – I’ll remake the roller tomorrow and see where we are. One thing is certain, when free to move the sears are very securely located in the full cock bents – in fact possibly too well seated, which may have something to do with the current problem. I have to go to Dick’s to take him a brace of pheasants so I’ll discuss it with him. While in Somerset I was taken to meet a man with a fine collection of flintlock guns who turned out to know many of the people I know – its a small world! Now that I’m shooting flintlocks I really need a new version of the de-capper that will be useful for both flint and percussion – I’m making a prototype with a turnscrew blade for the cock screw for flint changing and a bigger pin for poking touch holes.
8th Jan. I took the Manton barrel to Dick’s this afternoon to be proof tested so that I can be confident to shoot it when the opportunity arises. My main concern was/is with flintlocks that they may be a conversion or a bodged job and the touch holes may blow out as a missile – I have similar concerns about the nipples in percussion guns, but they are easy to check/repair if they look dodgy, whereas you can’t investigate the touch hole. I strapped the barrel (wrapped in a towel) into the stock of my large rampart gun, with a pad of judo mat behind the breech plug, and clamped the stock into a flattened workmate and tied it in. Each barrel was loaded with 4 drams of Swiss No 2 and 2 1/2 oz of shot. We laid a short trail of powder to one touch hole and lighted it with a gas lighter which produced a double discharge as there was some powder scattered about. Anyway the arrangement worked well, the breech punched a neat hole half way into the judo mat but stayed in the stock in the workmate and still on the ground – a lot better than last time we proved a barrel when it took off into the mud. I should point out that Dick is an RFD and knows what he is doing, having made innumerable guns himself. At least I can now be confident that the Manton won’t explode when used with normal loads ( 2 1/2 drams and 1 or 1 1/4 oz). I collected the fore-end Dick had sorted for Bev – to be honest I didn’t recognise it as the same fore-end I’d given him, it looked like one from a new gun – I don’t know how he does such good chequering on such unpromising material. He has also sorted the touch hole in the Theop. Richards flintlock – it looks perfect, and I am assured that nothing will shift it short of blowing up the barrel! I had a good look at the Blair and Sutherlands – it is a re-conversion and the frizzens are wrong so we’ll see what can be done, photo included here……

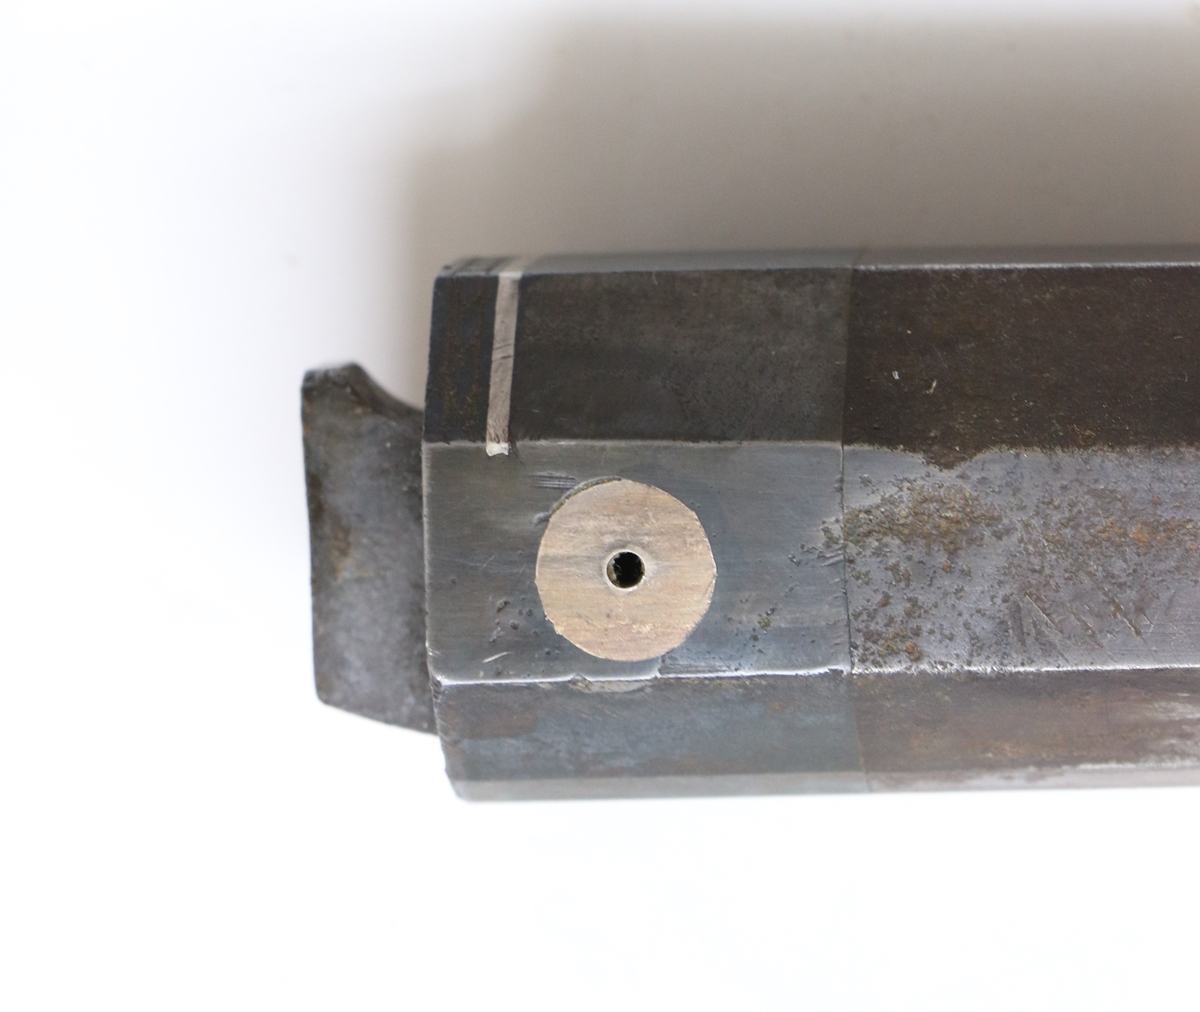
The frizzen doesn’t fit the pan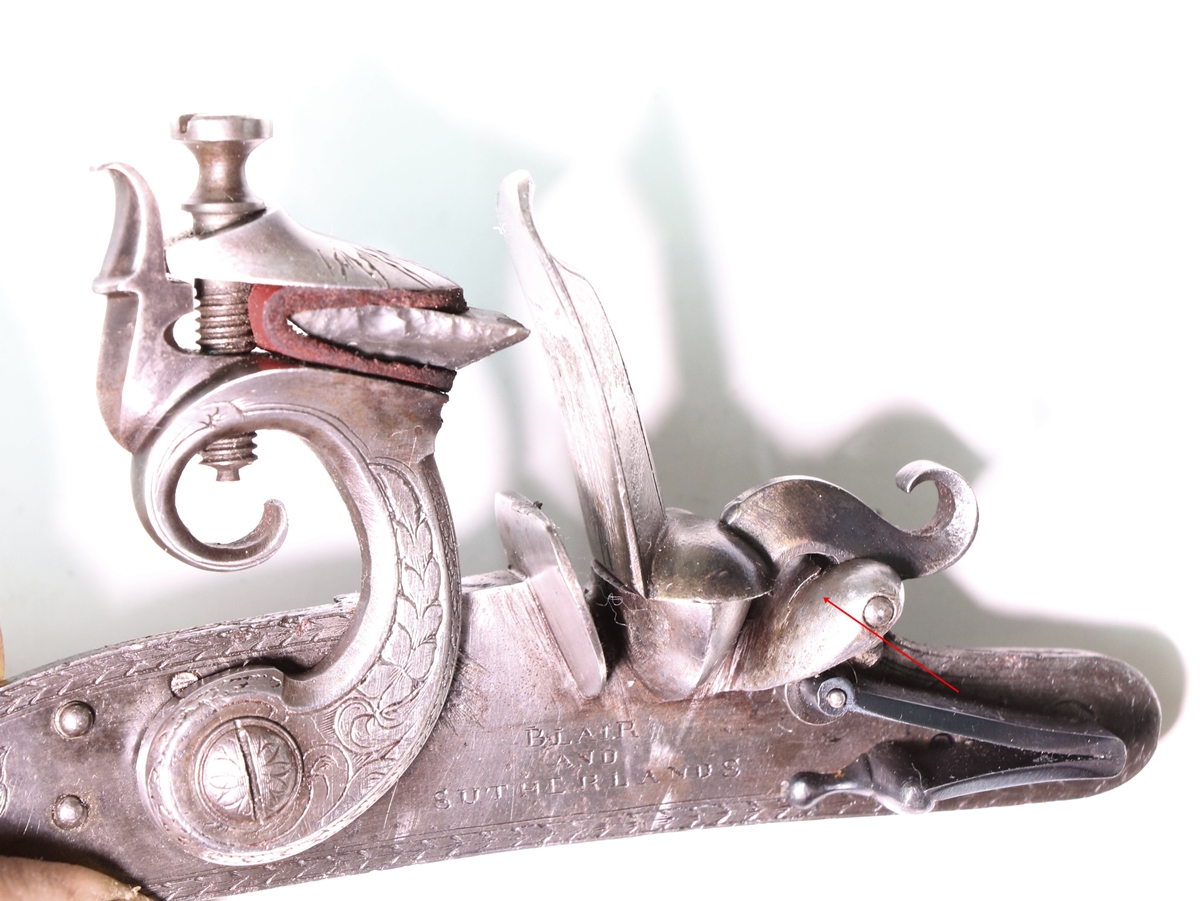
Blair and Sutherlands – The frizzen doesn’t fit the pan and there is a crack in the support – red arrow points to it. Its a fairly poor re-conversion.
6th Jan. Back in the flat for a bit of sorting out, then a bit of work on the Manton. I decided that I needed to do a more thorough job of sorting the false breech as just padding the face of the stock with epoxy wasn’t going to do much for the appearance! I did a little filing with a diamond file on the breech plug and false breech to get a better fit, they are better, but I couldn’t get them into tight alignment – I’ll live with that for now and tackle it later when I decide if I’m going to take out the breech plugs and lap the barrel. Anyway I did a bit of building up of the top edges of the stock with epoxy and rottenstone and adjusted the fit of the false breech to get rid of the gaps, and and does look better now. The photo was taken when I had applied a few coats of dark shellac to the work area to ‘bring it all together’ but before I’d rubbed it down. I need to work on the oil finish of the stock too. I’ll also have to get rid of the ginger browning on the barrel soon as it mightily offends my sense of historical accuracy! Some of this can wait until I see if I can hit anything with it! I got out the Blair and Sutherland double flint I bought some time ago as its on certificate and can now be replaced with the Manton. The B & S needs the frizzens attended to and the frizzen brackets on both are cracked and will need welding – then it might have to go!

I still need to rub down the shellac and fill the couple of nicks in the inletting, but it is much better.
Much better fit of the false breech in the stock, but I still need to get the breech plugs tight against the false breech, but as both are hardened it is difficult to work on them – I haven’t really found where the problem lies, despite smoking the parts – maybe I’ll take it to Dick and ask him, he is better than me at spotting these things. He has now finished replacing the touch hole of the Theopolis Richards single – it was a re-conversion and had a screwed plug, which he replaced with one with a better fit with a German silver facing. He had planned to soft solder the facing, but in view of the fact that it will eventually be shot, I got him to hard solder it instead. The barrel appeared to be loaded with wad and shot but no powder. He has also cleaned up the Alexander Henry rifle, and I look forward to seeing that.
5th Jan – In the case with the Manton was a three piece cleaning rod and jag, a spring clamp and an Irish pattern belt shot flask by Sykes that had lost its scoop. I like Irish pattern shot flasks and use a small one hung round my neck by a loop on the bottom of the flask for game shooting. I had the top parts of a similar flask I had bought at auction in a box, so I appropriated the scoop. First problem was that it was too long, so I trimmed it to fit the belt flask and checked that it held 1 oz of shot, which is probably my normal load. It is important that the scoop catch works well or you loose the scoop in the field, and if you are unlucky, all the shot at the same time. The catch on the replacement scoop was a bit weak, and had been made for a thicker rim so it was a bit loose in the belt flask. I decided to remove the spring catch from the scoop – it was held by a small, almost invisible brass rivet that I drilled out. When I got the catch out it was broken and quite rusted, so I decided to make another one out of a piece of 3mm x 10 mm spring steel (the stuff I use for de-cappers) Making one allowed me to make the catch a bit stronger and more positive in action, and to make a slightly bigger thumb lever, and chequer it with an engraving tool for better grip. The new spring fitted well, and could be bent so that it held its tension and stayed in place reasonably well, so I hardened and tempered it and put it in with a touch of epoxy glue, which seems to work. I will put a small rivet in when I can find a suitable material to make one from, probably copper wire. See photos. I’ll need to get a leatherworker to make new leather bits as the existing leather is cracked and leaking. My attempts to pack a new bed for the false breech of the Manton failed miserably – the epoxy stuck perfectly to the clingfilm and peeled off the wood which I hadn’t degreased adequately. Anyway I cleaned it all off and have built it up with a paste of epoxy and rottenstone, which appears to be a better colour than epoxy and wood dust, plus it seems to harden better. So I will now reshape the epoxy to fit tightly on the false breech. – actually as usual when I came to fit things it needed a little more epoxy in one or two places………………..
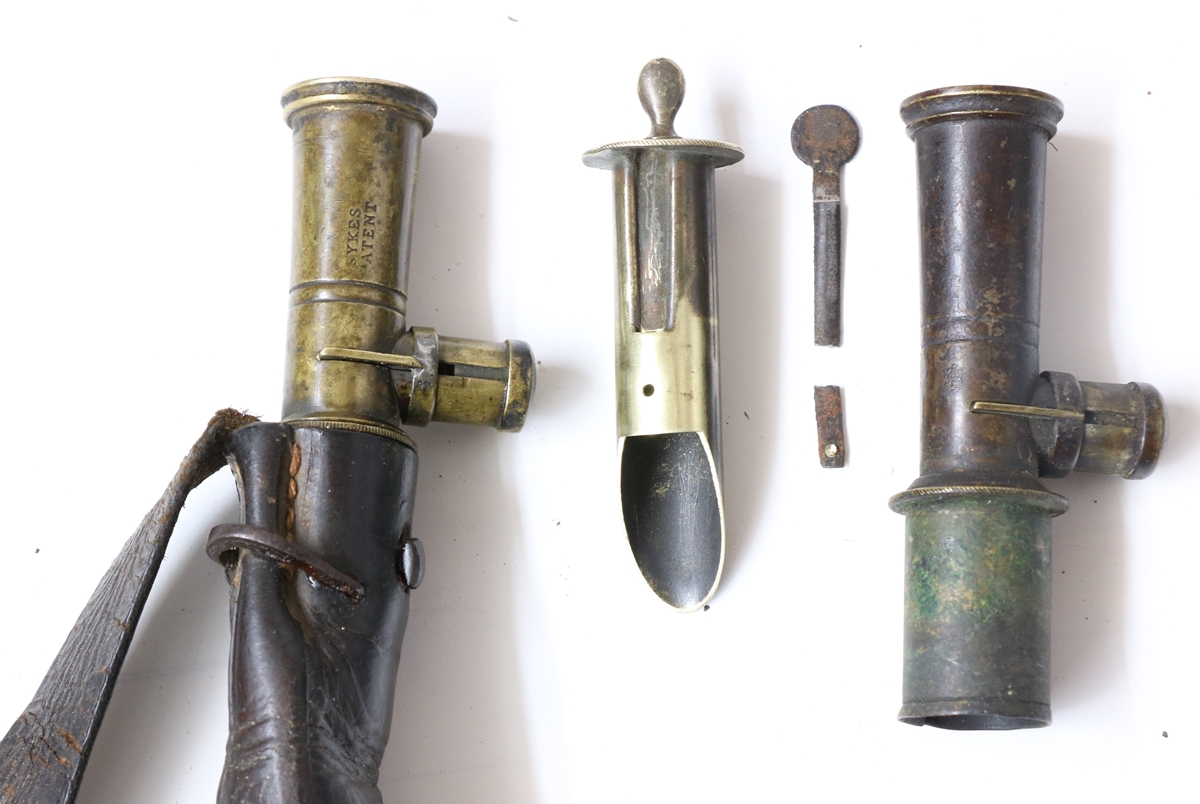
Irish belt flask, replacement scoop, broken catch and donor top. Bent nail holds the belt flask together!
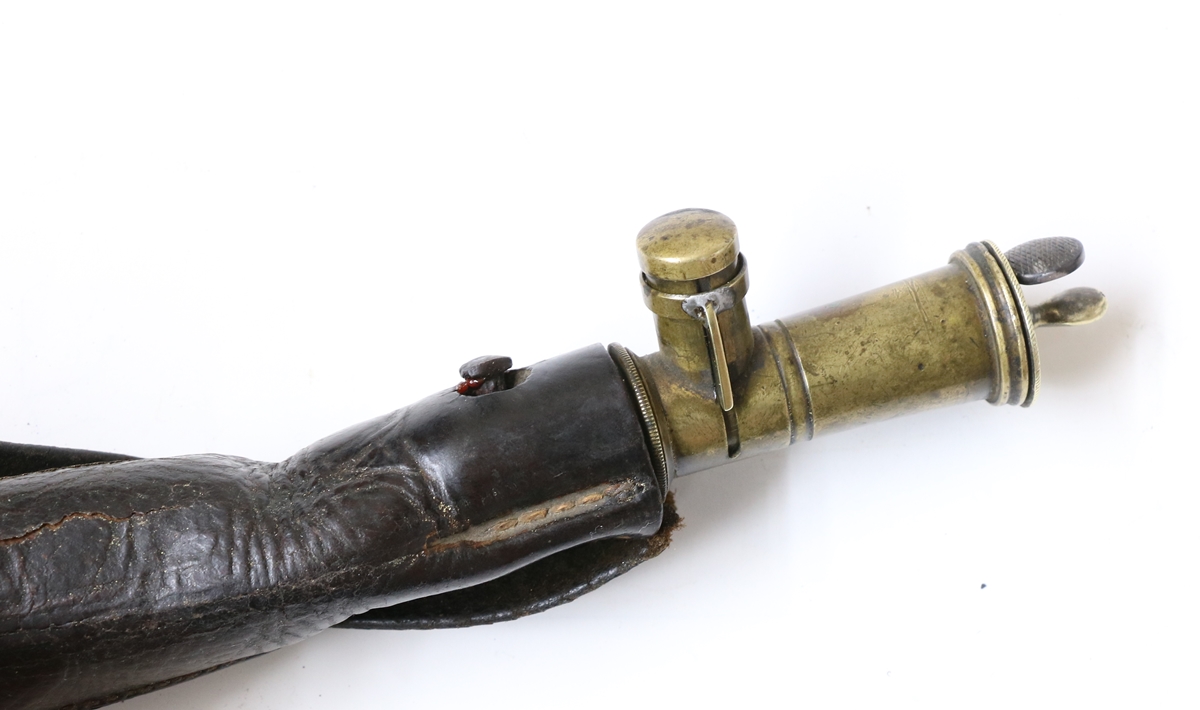
Flask with new scoop in place, with bigger thumb piece (chequered) and stronger spring and better catch. It now needs the leather replaced!
4th jan – Bev did come back to me re the lip on the hammer of the Manton, so I had another look at ‘The Mantons – Gunmakers’ to see what I had missed. The illustration that went with Patent 2722 was so bad that its difficult to make out how it is meant to be, but I read it as similar to my gun but with the hole in the lip on the line of the surface of the hammer pan lid, with the hole carried across the surface as a half round depression to exit on the outside of the pan. On my John Manton, the hole in the lip is such that it just misses the surface of the hammer. Some of the confusion comes about because there were two court cases concerning the lip, 6th July 1814 Joseph Manton v Parker, and 20th June 1815 Joseph Manton v John Manton, both are described in detail in the Manton book. In the first case the argument was that the lip and hole had been used as a self priming device, so that powder could flow through the hole into the pan to prime it, and then when the hammer was thrown back on firing, it cleared the powder from around the hole, avoiding ‘fusing’ and giving faster ignition. In the second case the argument revolved round the use of the hole to allow air to escape from the barrel without letting powder out. Joseph’s patent only mentions the second function of the lip and hole – he lost both actions on the basis of prior art, in the first case the argument seems to have been that even if the perceived function is different, it was the same thing.
The obvious thing was to see what happens when you try and put a typical powder through the hole in the lip, so I filled the pan with our normal shotgun powder and shut the hammer down – however hard I tapped the lock with the lip downwards, all I got out was a few grains of dust, certainly not enough to prime anything! That confirmed my suspicion that to self prime the hole would need to be comparable with the touch hole, and it is much smaller. It would only reliably self prime if you used very fine and well graded powder, which they didn’t. case closed……….
I did a bit more ‘fettling’ of the gun – one of its several problems is that the false breech doesn’t fit snugly against the stock, which is not good if I want to shoot it as that is where all the force of the recoil is transmitted. I am not yet sure if my ‘fudge’ will work, but I carefully wrapped the false breech in clingfilm and put epoxy glue mixed with walnut dust onto the wood and replaced the false breech in position – it still needs time to harden so I don’t know if it will work, but it looks promising. ( Its not intended to glue the false breech in, the cling film is the release agent). I steamed out a couple of dings, and have started to grainfill the stock a bit with rottenstone mixed into red oil with driers. Red oil is linseed oil that Alkanet root has been soaking in for months – a lovely deep red colour.
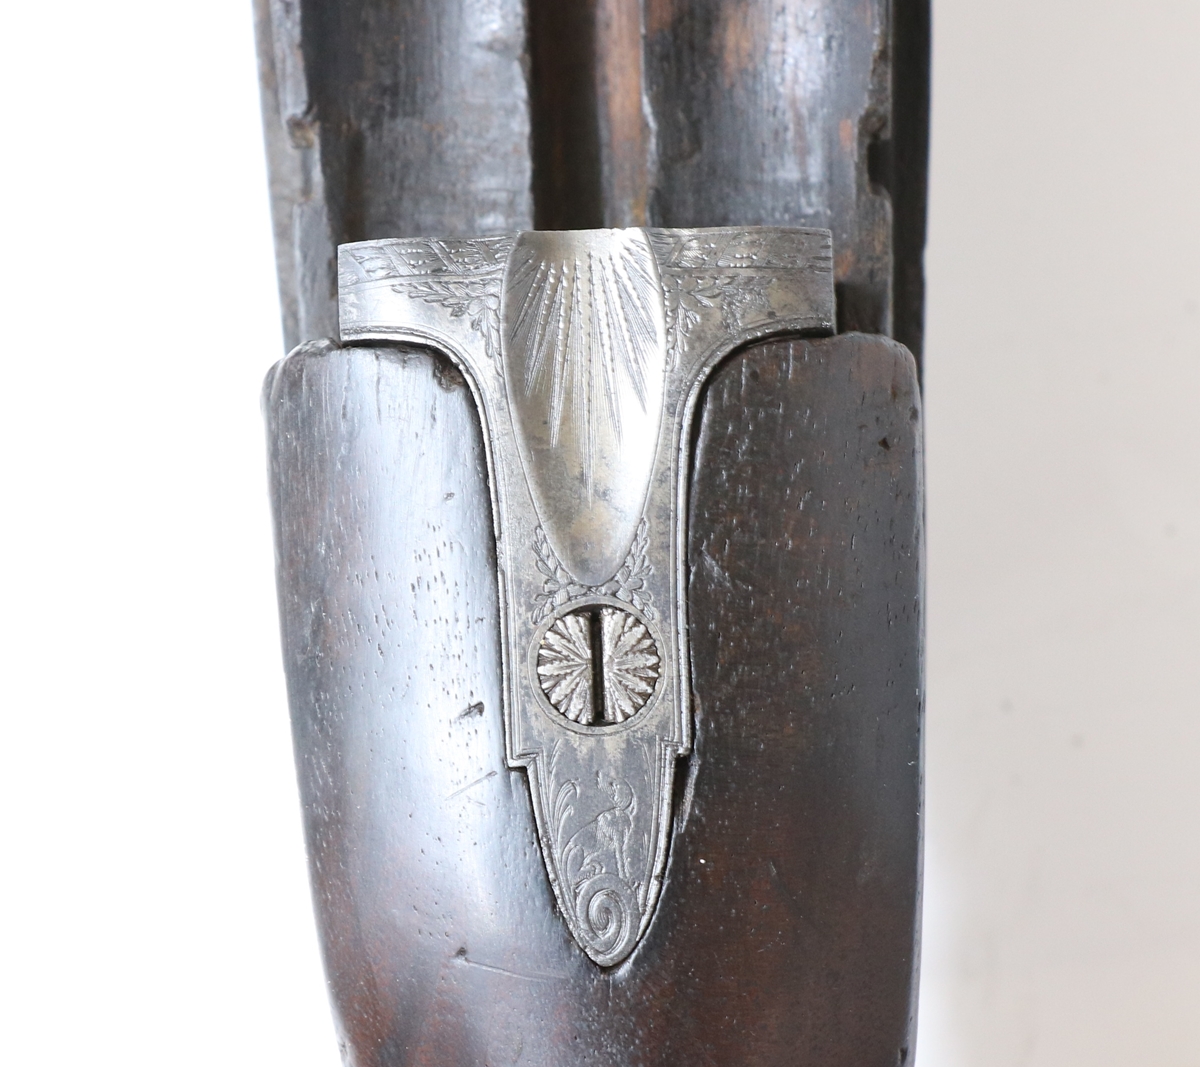
Not a very snug fit – not sure what is going to take the recoil!
3rd January – A bit more pondering the Manton, sorry if I bore you! The left hand lock (probably the least repaired) has a lip on the frizzen (hammer in the language of the time) that covers the touch-hole when the frizzen is closed but has a small hole through it aligned with the touch-hole. The right lock has a crude attempt to fake it. There is some confusion about the purpose of this lip and hole so I went back to the Manton book and found it in an 1803 patent of No 2722 of Joseph Manton, younger brother of John, and a subsequent legal case for breach of patent in 1813 between the brothers which is fully written up. It was known that you should not pile up the priming powder around the touch hole, but have it out of direct contact – the reason being that flame propagated more slowly through the powder than if the flash jumped a gap. Piling the powder and getting slow ignition was known as ‘fusing’. It would appear that the principle was well known and that some guns were made with the frizzen obscuring the touch hole when closed so that the primer was not able to pile up at the hole. Joseph Manton’s 1803 patent was for a lip that covered the touch hole but with a small hole in its centre to allow the air to escape when the wad was pushed down the barrel, without spilling the main charge into the pan, where, being coarser, it would have ignited more slowly. Joseph’s patent had a channel from the hole in the lip through the pan to the outside to allow easy escape of the air.
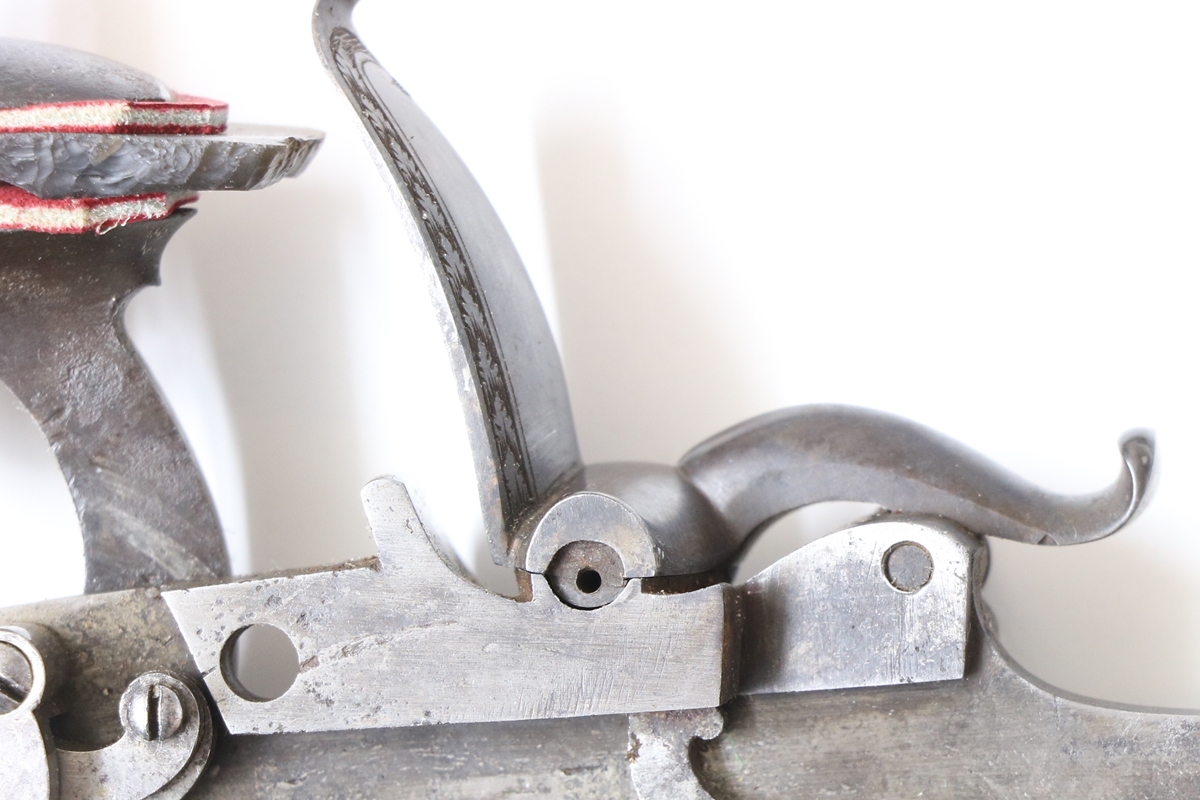
Lip and hole as per Joseph Manton’s patent 2722 of 1803
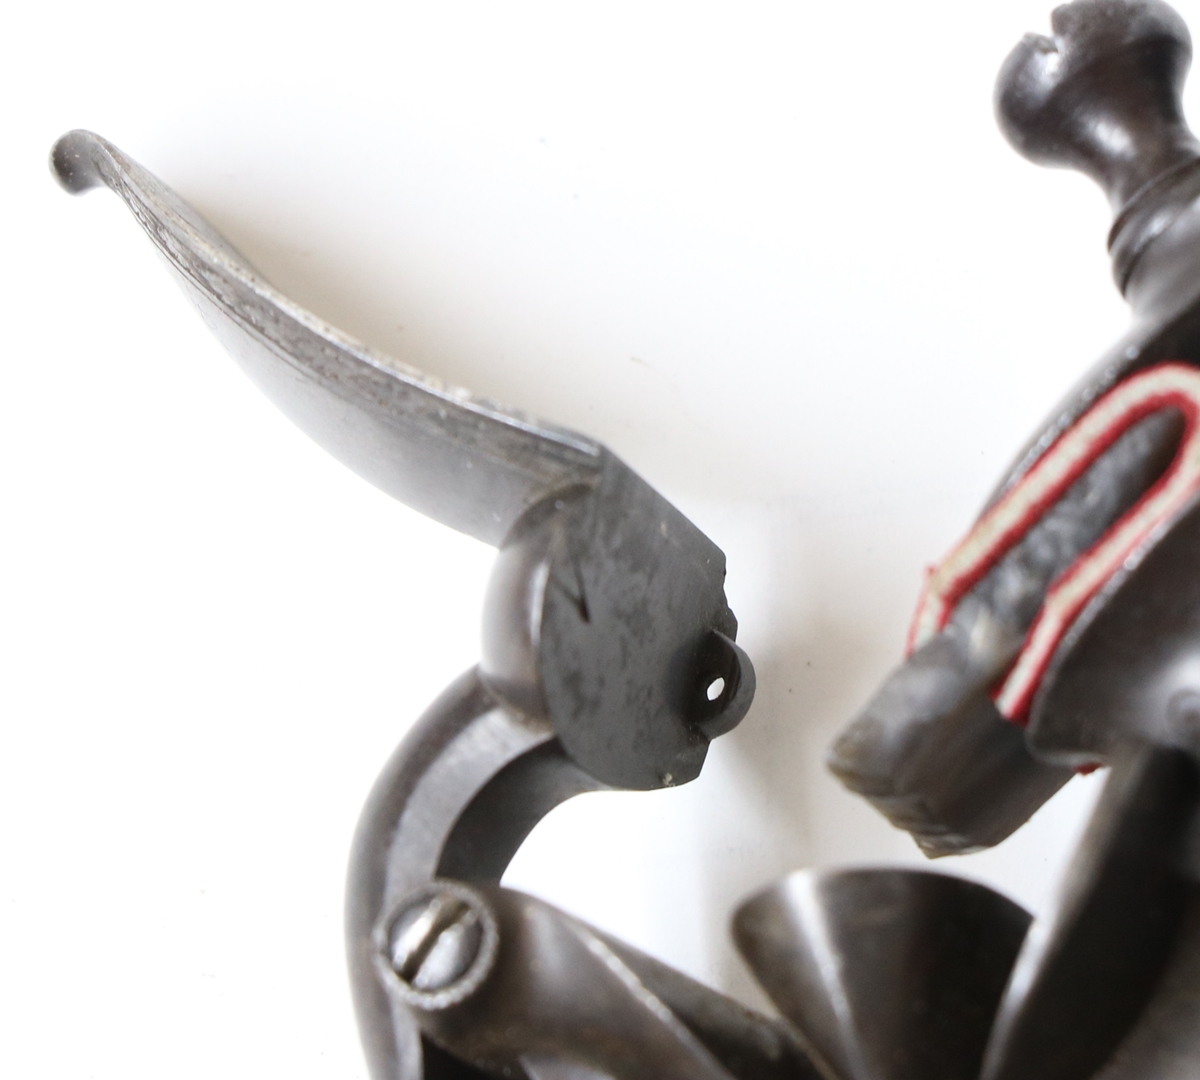
Manton’s patent shows a channel cut in the frizzen under face to allow the air to escape
Joseph’s claim in 1813 against John for infringing patent 2722 on two issues was thrown out because prior art was produced on both issues – on the lip and hole one witness claimed to have been making guns with this feature 27 years earlier for a period of three years. Since no guns could be produced with this feature dating before the patent it can be presumed that the lip and hole were not really a sucessful, revolutionary idea, as indeed Col. Hawker said at the time! Anyway my John Manton of 1808 has the feature on one frizzen almost exactly as illustrated in the patent specification in a drawing with such bad perspective that I’m not bothering to show it! So my gun made in 1808 was one of the supposed infringements, but lacks the channel through the pan to allow the air to escape, although its difficult to see how the pan was that well sealed to need it! Anyway having read all that, I will make sure I’m not guilty of ‘fusing’, or at least that I experiment to see if it really does slow things down. I’m sure Bev will tell me if I’m barking up the wrong tree.
I am continuing to sort out a few things on the Manton – the trigger guard tang didn’t lie flush so I took all that out and cleaned out the bases of the inletting – if the parts have rusted at some time in the past they get a hard layer on the wood that stops the part seating – this can be very carefully scraped off, avoiding touching the sides of the inletting or you will spoil the fit – if the parts bed properly don’t touch the inletting! I ran the trigger guard and trigger plate etc under the very fine wire brush and they do look better now. The nails and screws all fit very well and are (probably) original. I got most of the muck and varnish out of the chequering with methylated spirit – the chequering is somewhat uneven flat topped engraving and probably original. The stock is very open grained so I might do a bit of grain filling as I refinish the stock – an oil finish as it is would leave too much grain visible. Apart from the barrel, which needs rebrowning a proper colour, I’m offended by the escutcheons round the fore-end bolt (that holds the barrel in place) as they are just too big and bold. Dick suggested that, as I don’t really see an easy way of replacing them with smaller ones, I engrave matching leaf borders round them – its something that I think wasn’t done till later in the percussion era, although I’m not sure. Anyway it may be better than leaving them?

Rust and muck can be CAREFULLY removed, keeping away from the sides!
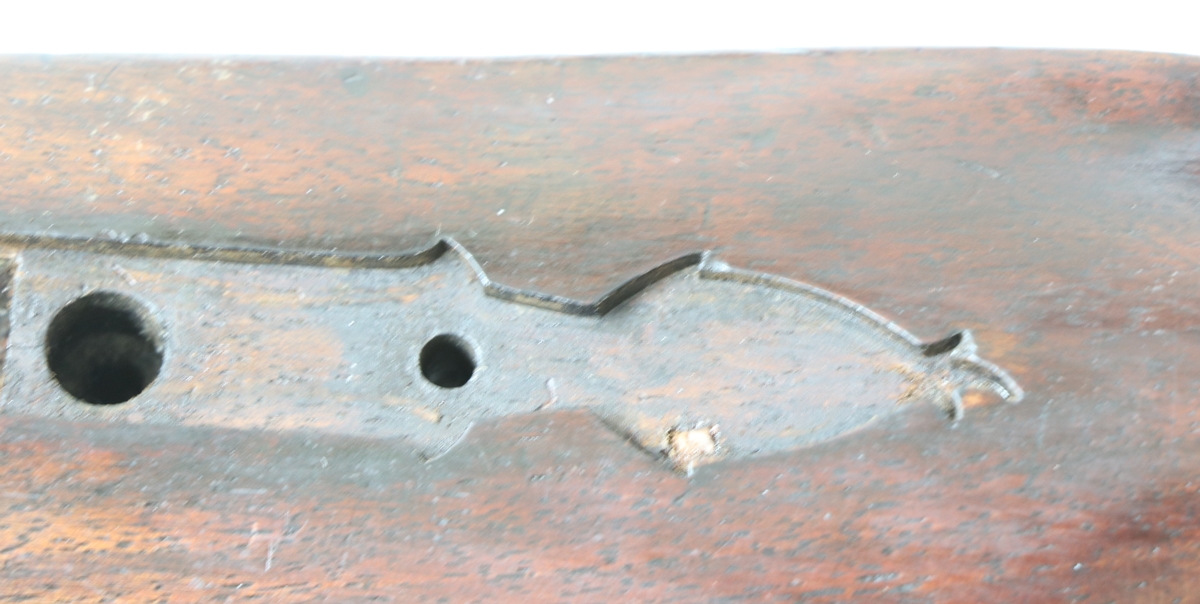
The edges are a bit rubbed but there is nothing to clean off here!
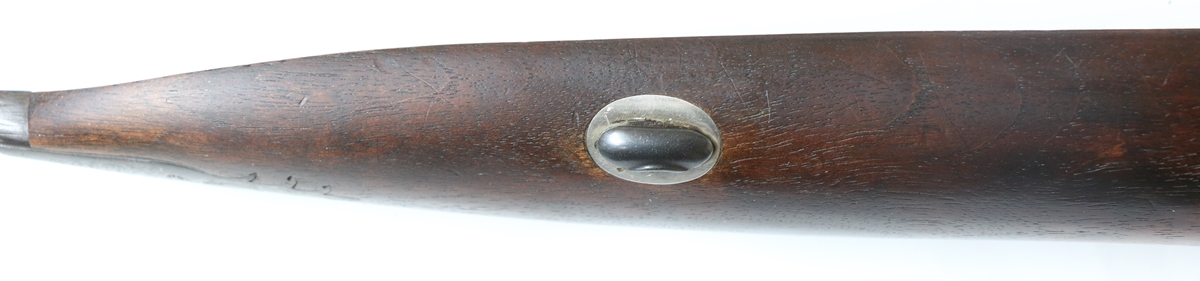
This escutcheon is too fat and looks wrong! The bolt head is a bit too big too.
2nd January 2018 – better get used to writing the new year date! I went to Dick’s today for the first time in months to show him a couple of jobs that need attention, and get his opinion on the Manton – however hard we tried, we couldn’t find any evidence of modern re-conversion or lockwork – the only repair that is modern is the splicing on of the new fore-end and that is done so well that if you hadn’t been told, you would be unlikely to see it in any normal inspection. So I’m happy to accept that it was a good buy! I noticed before I bought it that it had a significant ‘cast on’ i.e. the stock doesn’t line up with the barrel in the vertical plane but the butt is to the right of the barrel centre line by about 1/4 of an inch (about 1/8 of an inch would probably be more normal) At the time I thought I might need to have the stock slightly straightened, but then I forgot all about it. Now when I try the gun it ‘comes up’ beautifully and I think will suit me well. Bev had a look at it but when he mounted the gun his eye was well over on the right barrel – too much cast! I’ll be interested to see how I get on with it – I have a feeling that I’m too adaptable in my gun mounting so that I usually feel most guns fit me, but whether they actually do when I’m shooting them is another matter! As an experiment I’ve taken an unknown gun and never put it to my shoulder until I’ve called for the clay, and hit it. We shall see. One poor bit of my Manton is the chequering, which is well filled up with ‘gunge’ and almost disappeared in places – its usually very difficult to clean it out – if you try to recut it without removing the hard stuff, the tool will wander because the wood is softer than the infilling dirt etc. sometimes Methylated spirit ( wood alcohol) will shift it but more usually I need to resort to paint stripper of the dichlormethane variety. I’ll give it a try and take some photos. I’ve left Dick with a very nice Alexander Henry percussion rifle that needs the metalwork cleaned, and a Theophilus Richards single barreled flintlock fowler that has blown out its touch hole and needs to be safe to shoot – it has had the cock replaced as have so many guns – it looks as if it should have a French cock because of the shape of the fence – but that has signs of welding so I’m not sure what was going on – also the barrel looks a bit early for a French cock- Dick will have a proper look when he takes the lock out. He has a small flintlock lock for me to recut but hasn’t finished all the work on it yet.
31st December – Busy with getting the house sorted for another onslaught! I had a look in the Manton book to check my assertion that the chequering on my Manton was too modern – from his photos most of his guns were chequered around that date, and the chequering was fairly plain and similar to fairly coarse modern chequering. The most obvious difference is that chequered John Manton guns from those few years (around 1808) had chequering that just ran out at the edges like a fringe of about 2 to 3 chequer pitches length. The run outs appeared to be very even and there were no deeper/wider or other distinct lines around the chequered area. My Manton does have the chequering outlined with border lines as in modern stock, I don’t think it will be feasible to return it to the original borderless pattern. I had a few hours on Friday to make another small batch of de-cappers and engrave them – when I haven’t engraved for a while, trying to do it on spring steel snaps the points off my gravers – the harder ( & more expensive) the graver steel the larger the bit that breaks off. So I ended up having to grind about 20 gravers, some of them by as much as 3/4 of a mm. By the third de-capper I was more or less back in the groove and managed to wear down the points on several gravers before I broke the tips off!
29th December – I had a further look at the Manton and took a few more photos. I’m convinced that the locks are original and came from a John Manton gun , I believe both were from No 5028 ( the illegible number on the edge of the rt hand lock would be consistent with 5028), althought interestingly there are subtle differences in the engraving on the two locks that only an engraver would register, so perhaps the two locks were engraved by different people or the engraver didn’t have a consistent style. The main differences are in the border – the left lock tends to have 4 nicks in each side of each ‘leaf’, whereas the right lock has mostly three nicks on each side of each ‘leaf’. The same pattern is followed for the borders on the two cocks, although the right cock shows burrs thrown up by the engraving tool which suggests that it has been engraved since the rest of the locks received their current level of wear (so possibly a replacement). There are also differences in the engraving of the two dogs on the tail of the locks, although these might be due to the different handedness of the engraving. Its probably worth noting that most gun engraving in London was done by specialist companies that did engraving for a large number of gunmakers, and for ‘ordinary’ engraving as on the Manton several people might work on different bits of the gun. What questions remain, and how might they be resolved? Let’s accept that the lockplates are original and from a John Manton gun No 5028 of 1808 or thereabouts. I also think that the left hand cock is contemporary. The right hand cock is a little bigger than the left but matches it closely – the engraving is a little less refined and hasn’t worn much – it could be a replacement from way back or a fake. The frizzens are similar except that the left one has a proper small shutter with a small hole to mask the touchhole and stop loss of powder during loading, the right has a bit punched up to replicate it, with no hole. ( The Manton book shows this feature on Joseph’s guns not John’s)) The engraving on the frizzens is closely matched and looks original or a good fake). The barrels have 5028 stamped on each, with London V and C/P marks in ovals, and one had the barrelmaker’s initials (?) T V or T Y stamped on it (p.s. its clearly T Y). The breech plugs are both numbered 5028 – they do not quite mate flush with the false breech, which suggests that the false breech is not the right one – it isn’t particularly well let into the stock either, or possibly the fit is not perfect because the breech plugs have been out and not returned exactly in the correct alignment. The tang of the trigger guard has 5028 engraved on it (not stamped as I originally thought, which would be wrong!) , and the trigger guard is engraved with the dog scene that appears on the tail of the locks – so I guess the trigger and mechanism is original. The butt plate has engraving en-suite with the rest and fits well (now I have knocked the peg in a bit). I can’t find a number stamped on the stock anywhere but I’m not sure it would have been in 1808. Looking at the locks etc under x 20 magnification it doesn’t look like a re-conversion, although I could be taken in – I haven’t examined a lot of top quality reconversions in great detail, I know there are one or two engravers around in the UK who can do good imitiations of 18th & 19th century gun engraving, but I’m not usually taken in, so I have to think that it may well be more original than I anticipated. Given that the gun came with a contemporary case, a Dixon powder flask ( although with too small a throw for a shotgun, 1 1/2 dr max – more like a rifle load – it will probably do for my Nock rifle) and a 3 piece cleaning rod I think the price (£ 1700 hammer price) was fair, although not a bargain.
I had a look at the bore – as I saw before I bought it, there is a bit of pitting but it looks OK to shoot. The barrel has had the ribs resoldered – not a perfect job as you can see the solder through the browning. The barrel measures 29 inches – in all probability it started life as 30 or possibly 32 inches – they were common lengths for Manton at that date, so it has probably been shortened, which would explain the healthy amount of metal around the muzzle. I ran some 600 grit paper up and down the barrel, plus a steel Turk’s Head mop – I might try lapping it if it shoots well.
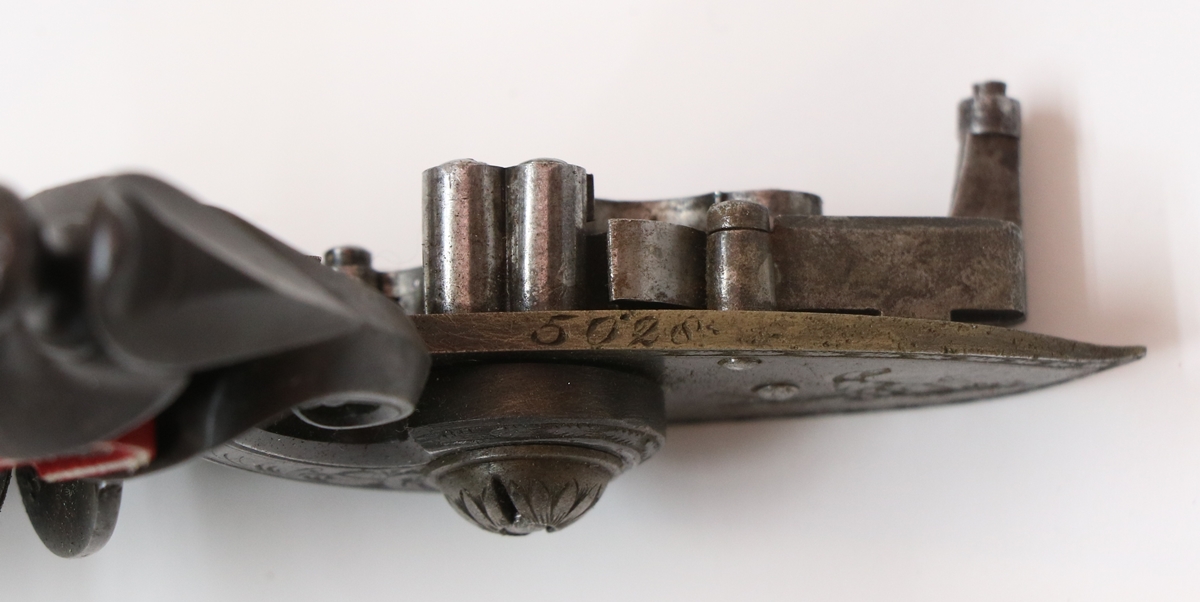
Number on the edge of the lock, and replacement (?) roller on the sear ( I have never seen one before)
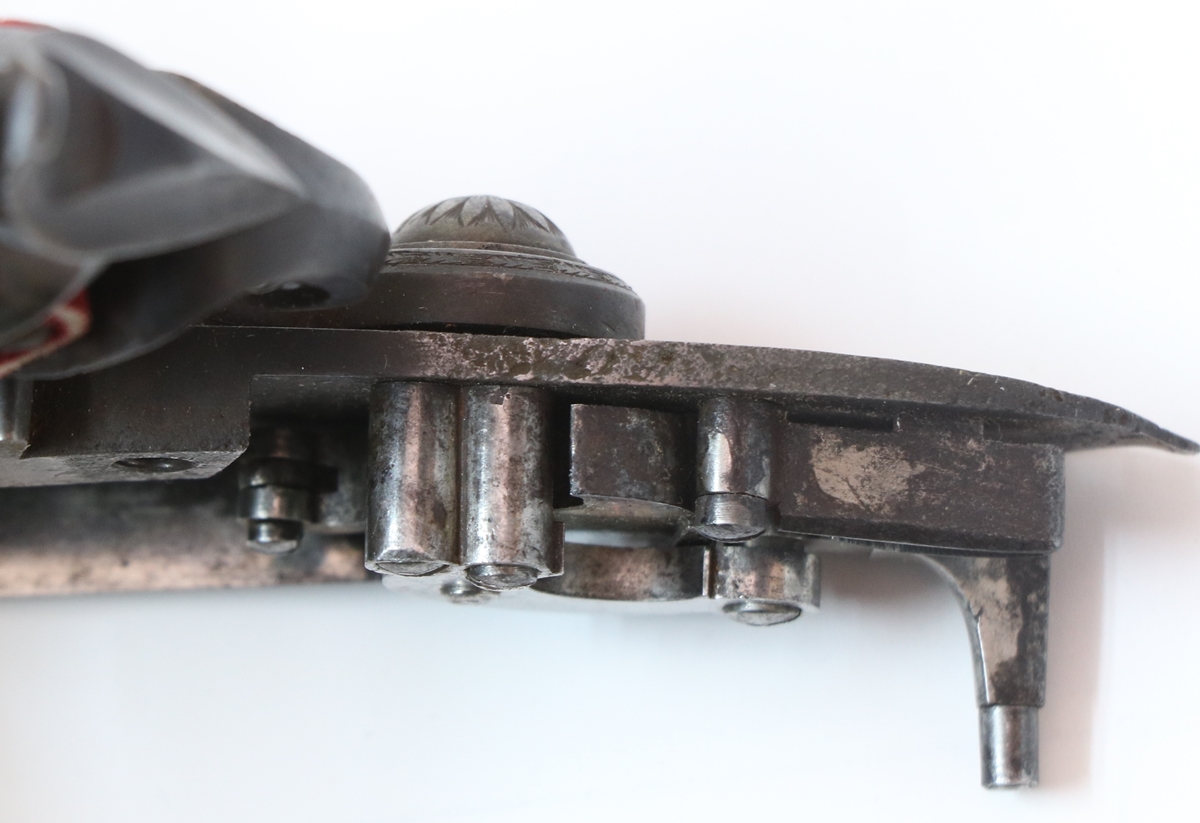
Could be 5028 on the edge in the same place? The roller on the sear is as it should be.
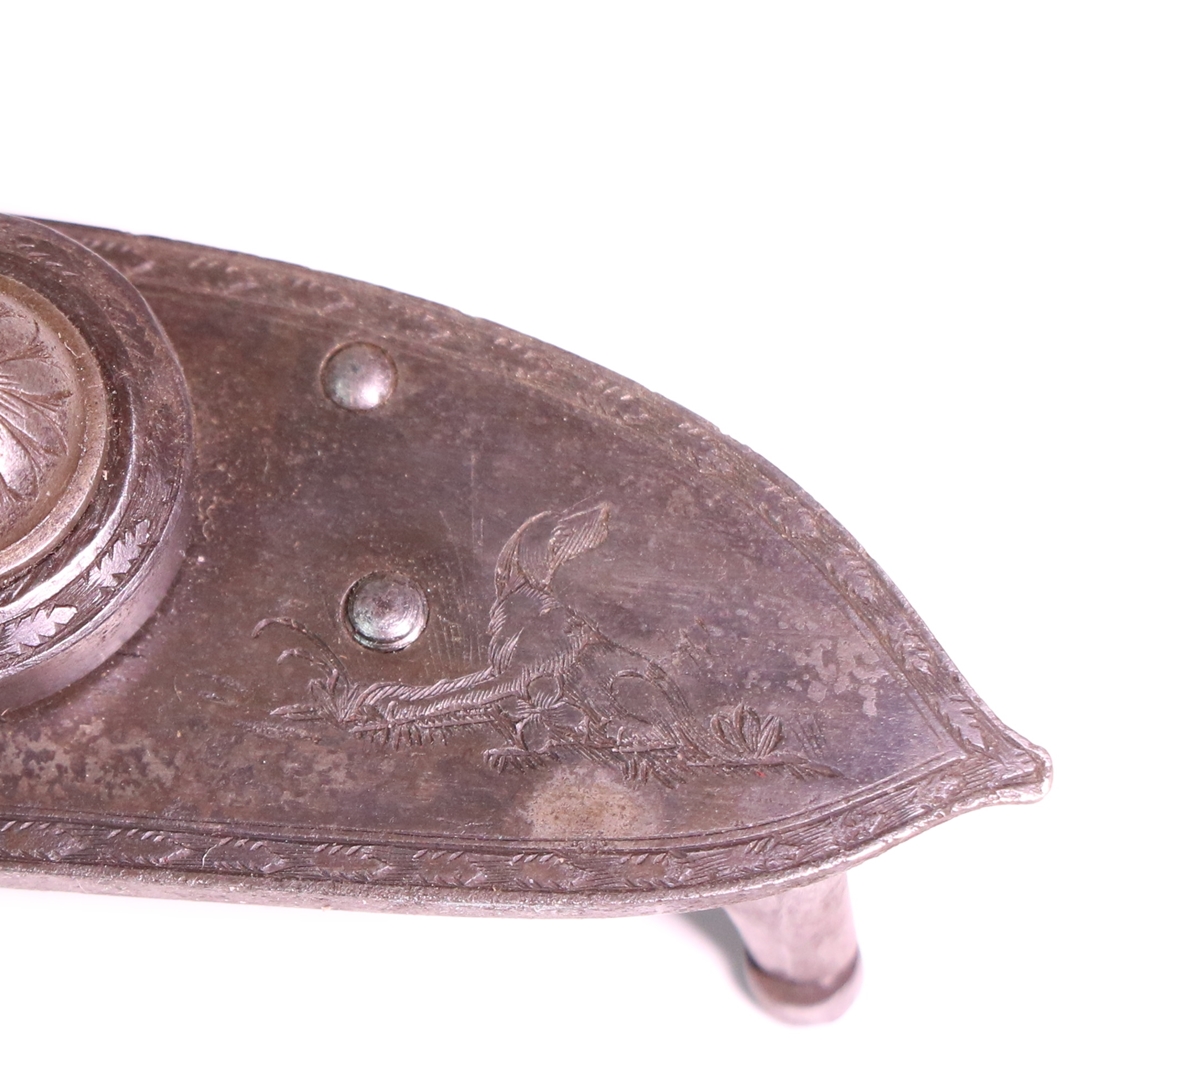
Mostly 4 nicks in each side of each leaf of the border.
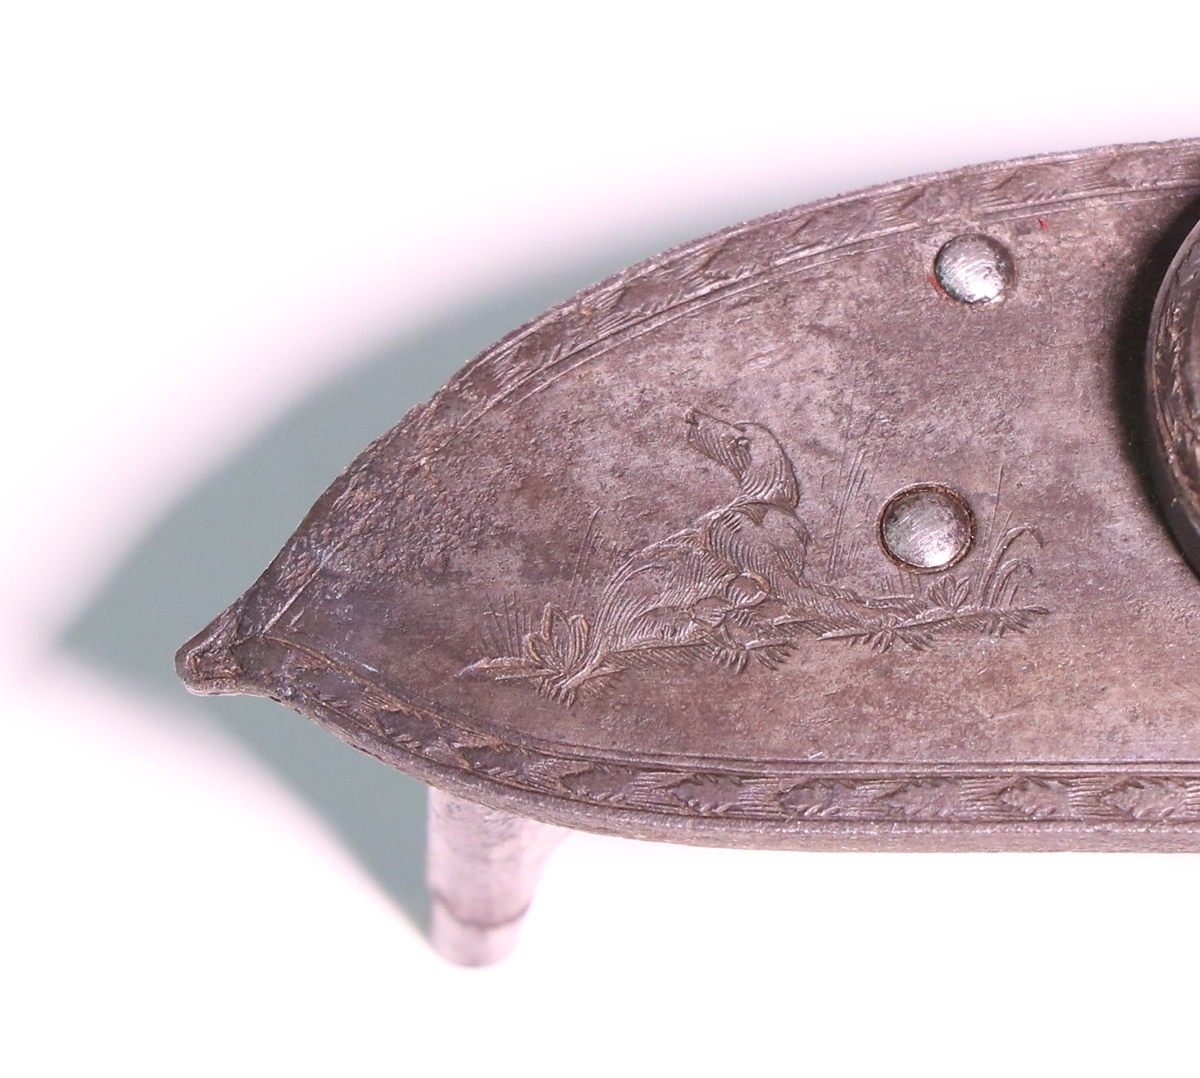
Mostly 3 nicks in each side of each leaf
28th December – Family party passed off without injury Tom and I put on a demonstration of shooting out a candle flame at great risk to his person – he is alive and recovering well. I had a look through the Manton book to see how my new gun matches the photos – it is certainly right for the serial number in most details, and there is even some evidence that John Manton locks had the name engraved in rather asymmetrical places. Looking at the photos I took you can see a few minor differences between the two locks. Two features mentioned specifically in the Manton book for guns with serial numbers close to this one (5028) were the serial number engraved on the edge of the lock plates, and a roller on the sear to reduce friction between sear and trigger plate, thus making the action smoother. The left hand lock has the correct number engraved on its edge behind the cock, and the right lock has some corrosion there that makes it difficult to be sure – I’ll need to look under my microscope some time. Both locks do indeed have the roller on the sear, although one looks like a replacement. The cocks are French pattern, which is also right for the serial number, as are the gold poinsons and the London proof marks in an oval. An interesting feature I hadn’t noticed before is that the frizzen springs ( and mainsprings) have a tab to locate them in the lock plate instead of the more common peg – you can see it in the photo of the underside as one frizzen spring is standing off the lockplate. I am inclined to believe that the locks are original, but the jury is out on whether they are re-converted from a percussion conversion (pending time under the microscope) – it is also just possible but unlikely that the locks come from different guns. Of course the locks could just be clever reconstructions using the information in the book but it wouldn’t make any kind of economic sense given the state of the stock and if so it has me fooled for the moment! On balance I’m happy that it is basically original and should make a good shooter – better than I thought it might be when I bid for it.
CLICK ON THE PHOTOS FOR BETTER PICS!
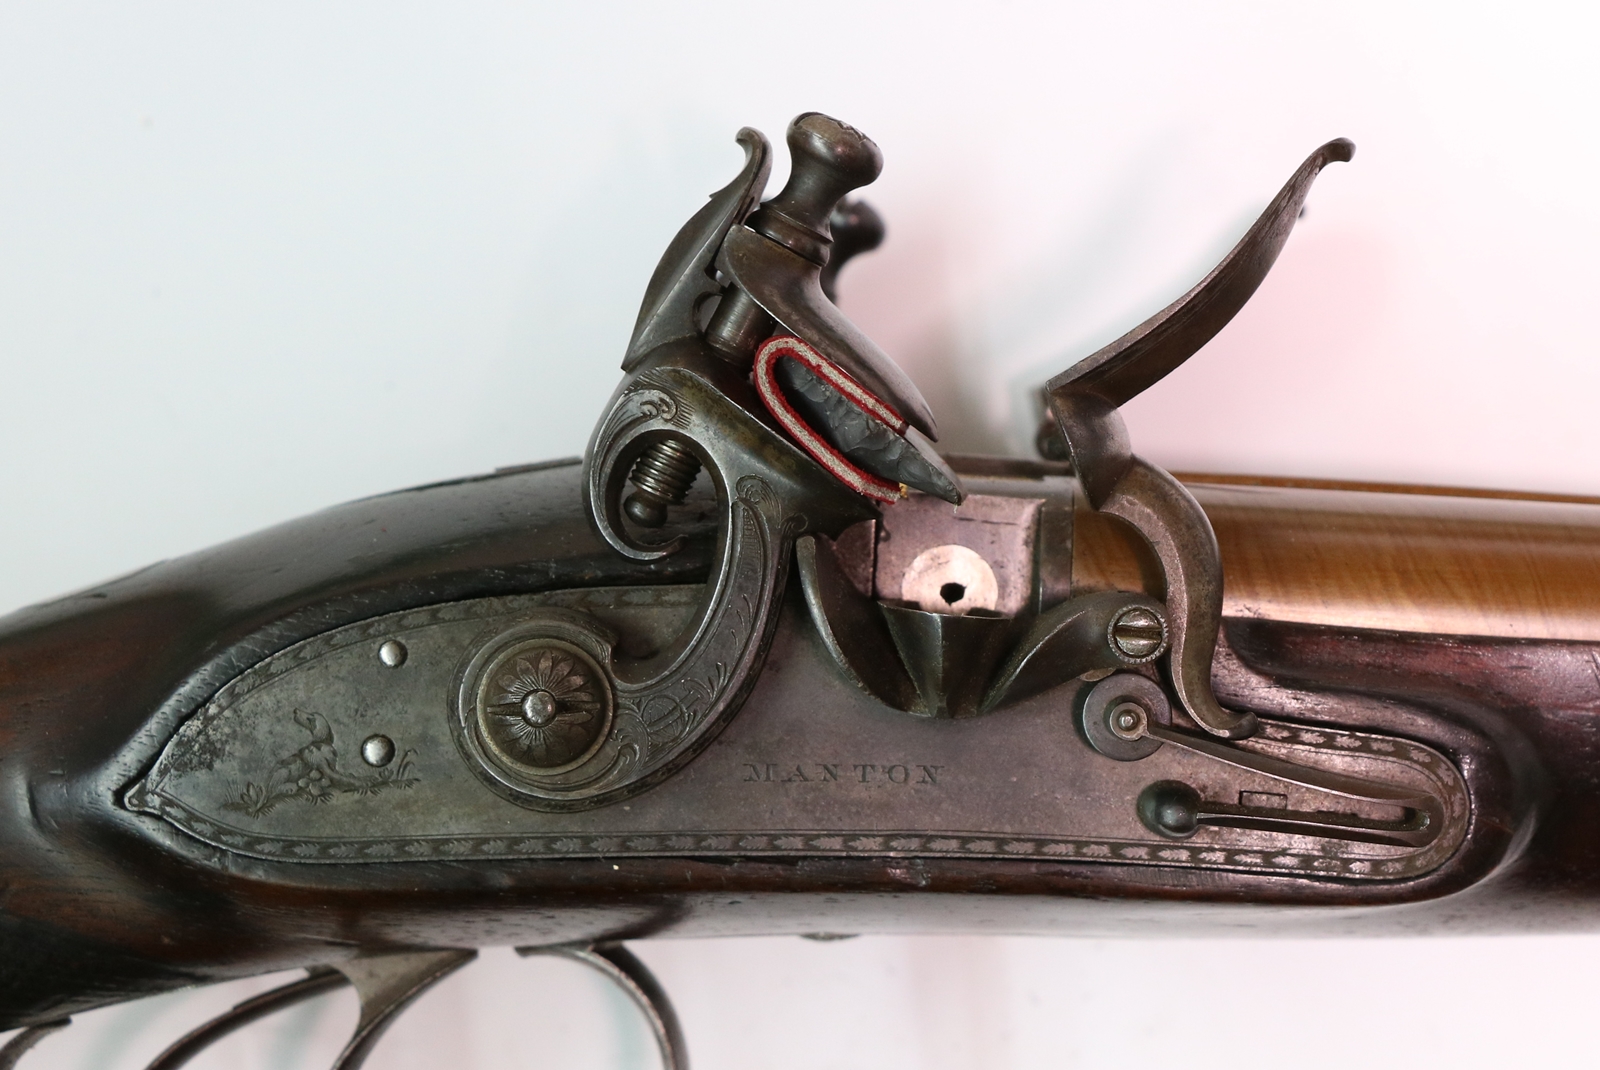
The engraving is classic William Palmer for around 1808, the year Manton used the 5028 serial number.
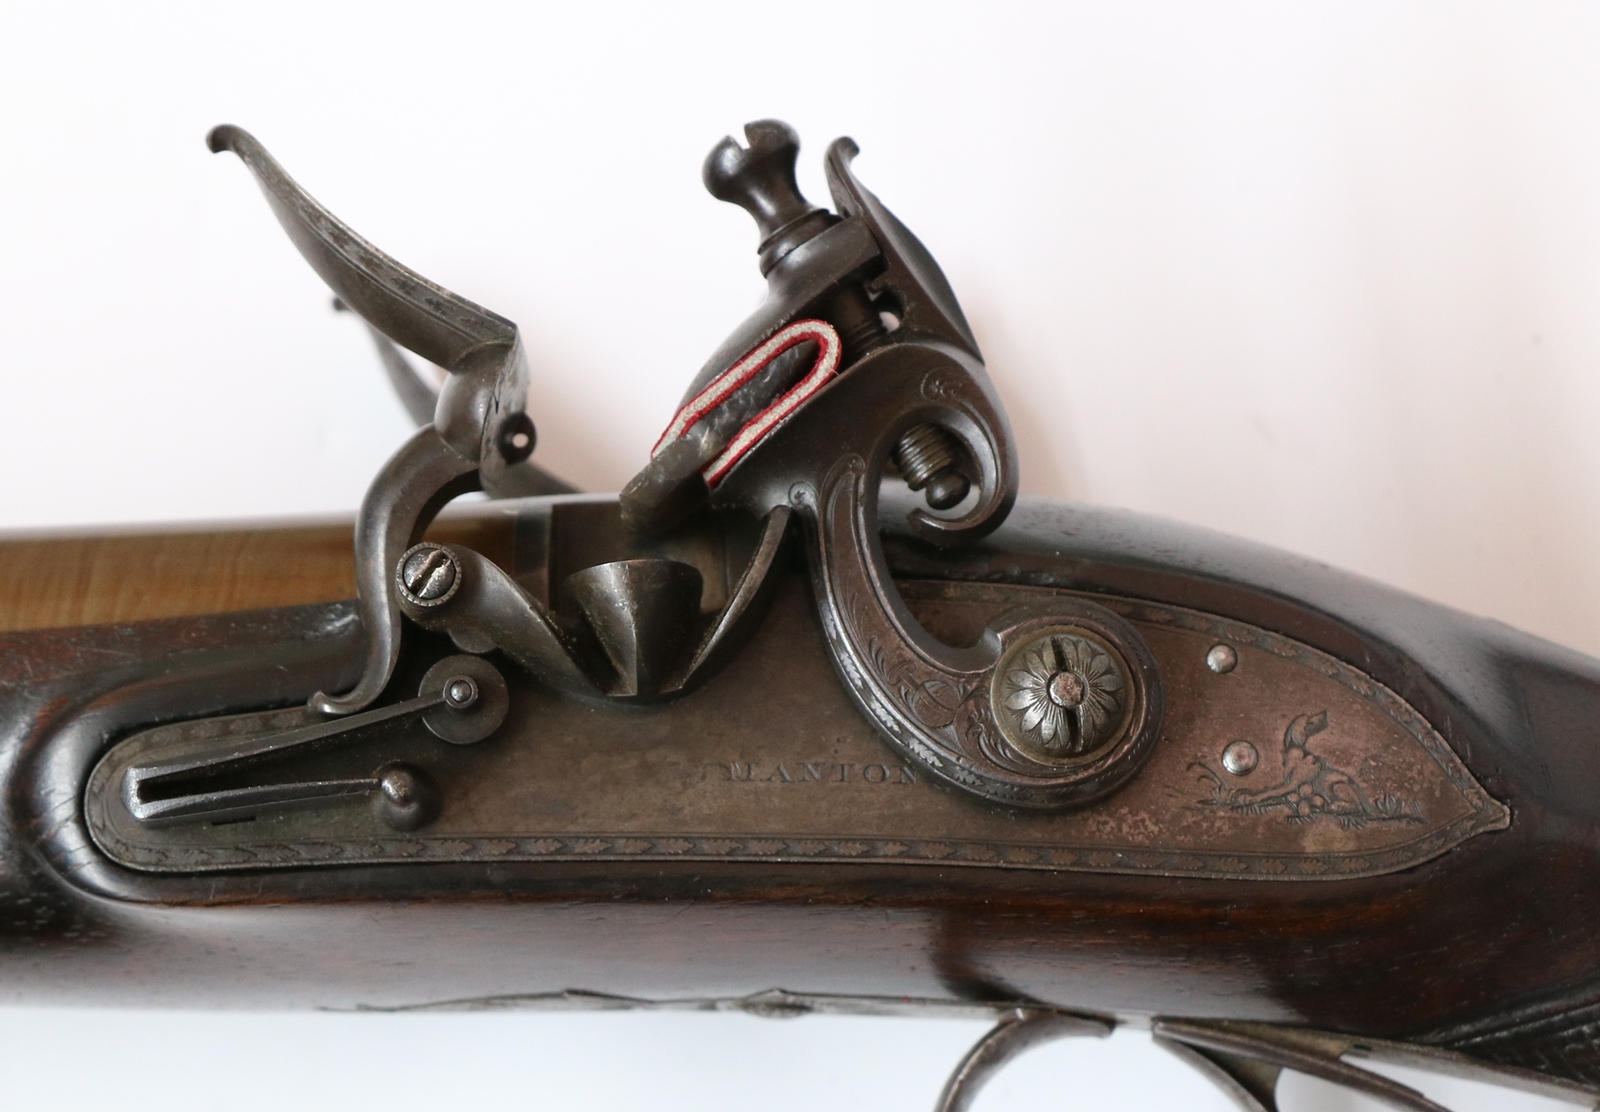
The last ‘N’ of Manton gets close to the cock, but there are photos in the Manton book of similar ‘mistakes’.
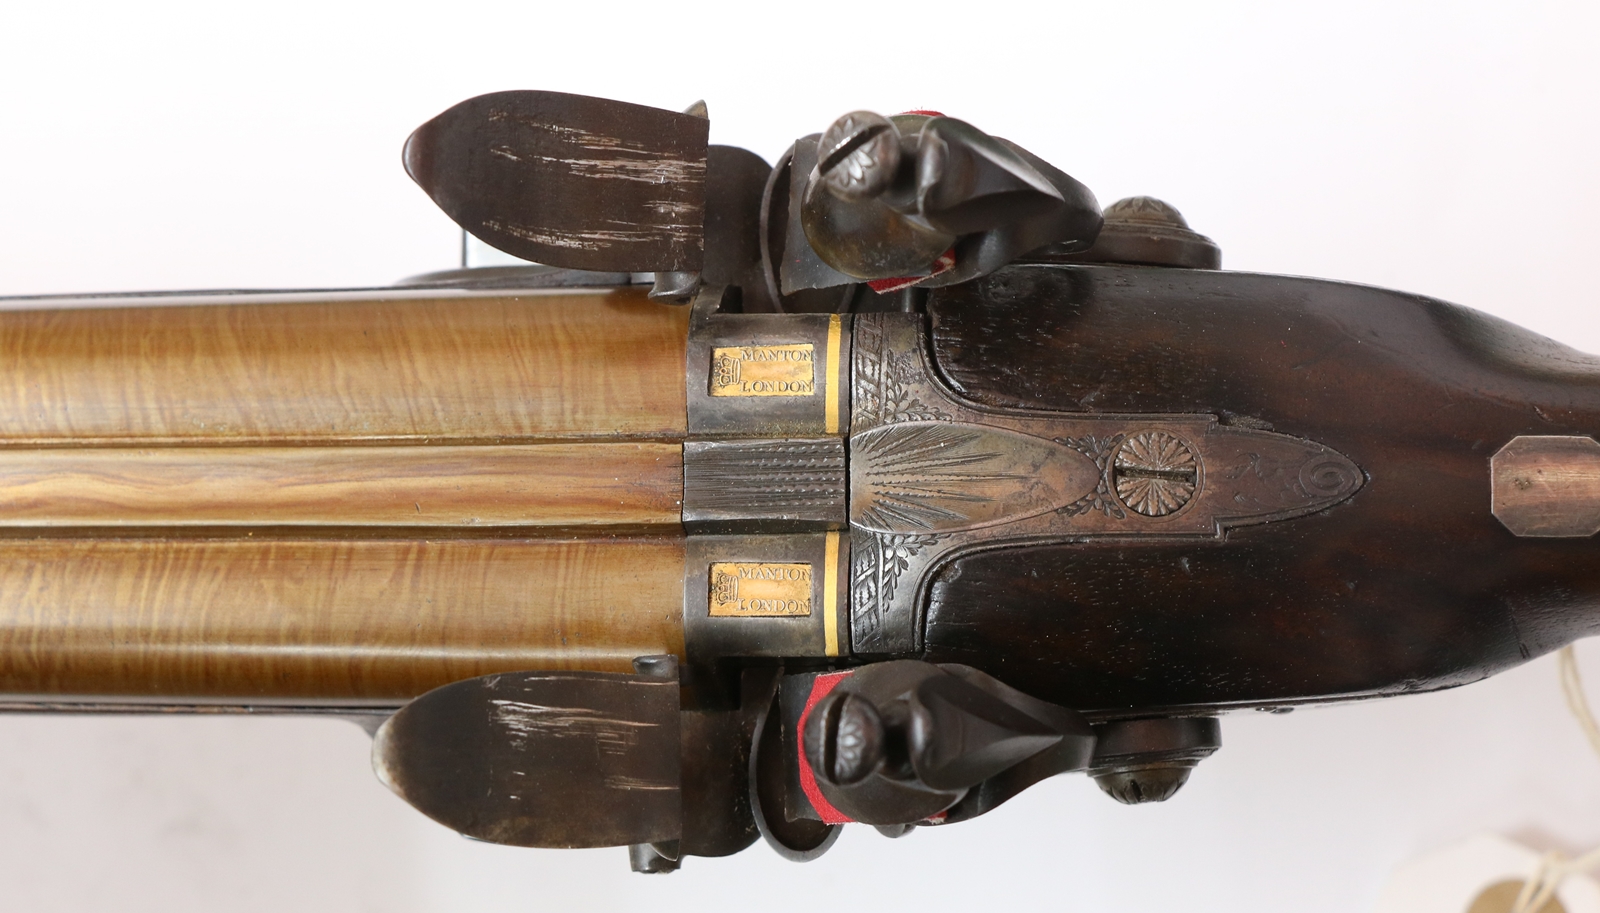
I have a strong dislike of ginger rebrowning as I think it was never like that originally, but I’ll live with it for the time being!
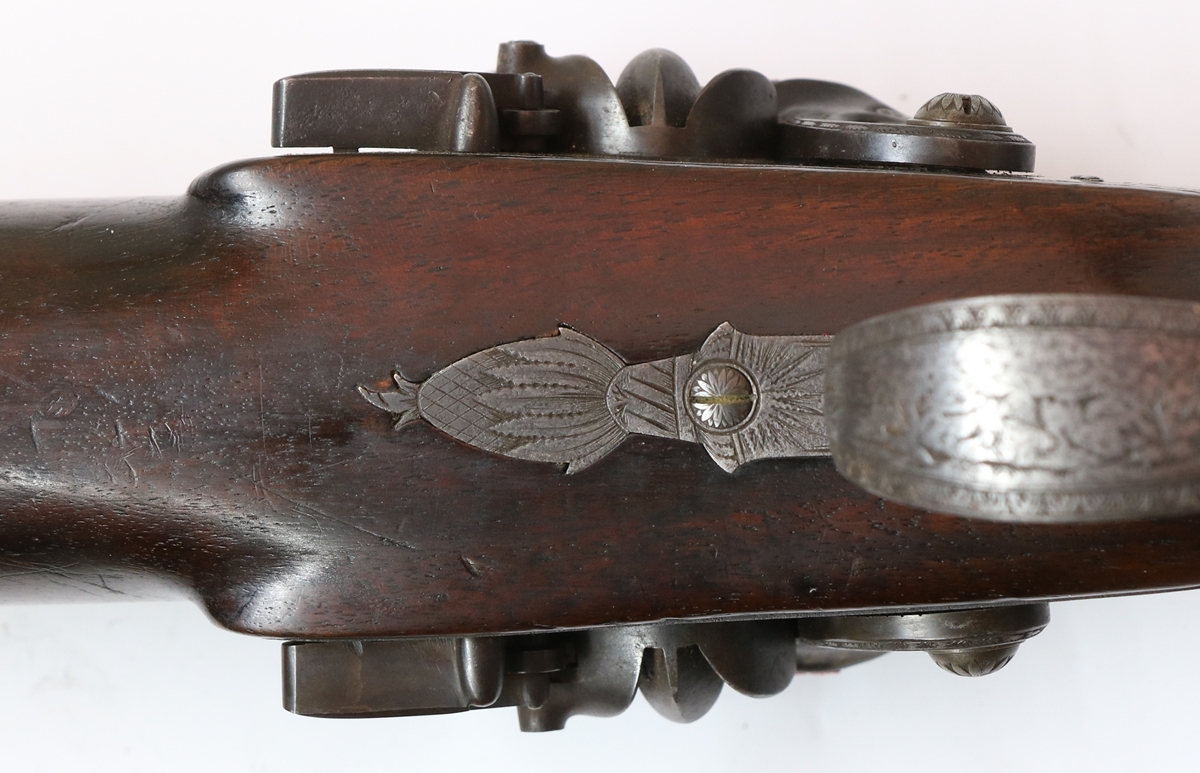
You can see the tab on the frizzen spring on the top lock.
27th December. I hope you are all had a good Christmas – we are still in the thick of it as we always have a large family party a few days after Christmas and another at New Year. So I haven’t done much with guns, although I did get out my new ‘Manton’ that I bought at Bonhams last auction. I bought it to shoot, and at a price that clearly wouldn’t buy a pukka cased double flintlock by John Manton so its interesting to see how much of a dog it is! It came form the Murray collection that had a lot of guns that had been through the hands of ‘restorers’, most of them reasonably competent at e.g. reconversions. This one was obviously in a poor state as the fore-end has been largely rebuilt and the checkering very worn ( and probably a bit modern too). The barrel has the appropriate Manton London poinson in gold and a single gold line, and has a nice twist (it has been rebrowned) and has the number 5028 and London view and proof marks. Its fit to the false breech is not perfect – there is a small gap that I need to look at, but the barrel isn’t obviously suspicious. The touch holes look like platinum. The locks could be reconstructions – the cocks are possibly slightly different, although not obviously castings – the lockplates are ‘right’ but the name is in the ‘wrong’ place on one and is slightly obscured. The works look OK. One top jaw is slightly bigger than the other. The touch holes on the two sides are in very slightly different alighnment with the pans, which always suggests re-conversion as its an easy error to make ( been there, done that!)! The tangs and butt plate don’t lie well in the woodwork and the number on the triggerguard tang is stamped not engraved. The case is about the right date although the label, possibly genuine, is later than the gun or box(?), the case has probably been refitted a bit, the layout is now correct for a Manton flintlock, with the locks dismounted from the gun for storage – incidentally on many of the double flintlocks with recessed breeches you cannot (should not) remove the barrels without first removing the locks as there isn’t enough clearance in the frizzens to miss the stepped out barrel as you lift it – you risk doing damage if you try. Anyway, it ‘comes up’ nicely and I’m looking forward to shooting it shortly. I put in a couple of new flints ( yes Bev, I do have a few) If it does shoot nicely I might be tempted to re-stock it, I have a nice piece of wood! I’ll put up some photos in the next couple of days when I get a moment – currently the workshop where my camera is set up is so cold it is painful to spend any time there!
24th December (just!) It’s too late to get all the prezzies you forgot, so just relax and enjoy the day – they’ll probably be cheaper in the sales anyway!
23rd December. Very magnificent rib of beef (chosen in preference to the T bone) now in the fridge! I’ve just sold the last de-capper that I had in stock so I’ll have to make another batch – I get rid of one or two every time I go on a shoot- they are not much in demand for clay shooting, although I use mine fairly often for both. Making them is a good excuse to do a bit of engraving practice – I’ll see if I can do some over Christmas when being in the midst of one’s loving family becomes a little overpowering! I took the Andrews pistol lock off to photograph the safety catch mechanism from the inside and now find that the side screw is missing – I have a nasty feeling that it fell on the floor and got hoovered up! Since it was made by me anyway its not too serious. The workshop is a complete mess as I haven’t done anything in there for three months except clean a couple of guns – another little chore for Christmas.
22nd December. Back from a quick visit to family in Wales, I can now sort out urgent things like securing a large T bone joint of beef for Christmas day! I popped into the flat to take a couple of photos before I went, see below, its looking good, and will be super when tidied up and finished – about a couple of fairly gentle weeks work. I rang the firearms department to see if I was going to get my renewal by 2nd Jan when it expires, mindful of the intervening holidays and was given the mobile number of my F E O who basically sorted it all out over the phone including calling me back with a couple of queries – their records differed from mine – that we sorted out very quickly while I was parked in my car. Fantastic service and the F E O was happily aware of the difference between ‘certificatable’ firearms – those that must be on a FAC or Shotgun certificate, and Section 58 guns that may or may not be on a certificate – it makes discussions much simpler! Anyway I should get my certificates in time to avoid shipping my guns out to Dick’s store. I see that I got into the latest issue of Black Powder – I seem to have achieved notoriety because I had been shooting my single barreled Twigg flintlock with the same flint since I got it ( a few ‘have a go’ sessions and a couple of practice sessions) and almost got through the 30 shot flintlock competition, but had to change it for the final few shots – I have to admit that when I removed it from the gun it didn’t resemble any gun flint I’d ever seen but until its end it hadn’t misfired once! Bev said it looked more like a pebble than anything else, and I wouldn’t argue with that, wish I had a photo of it.
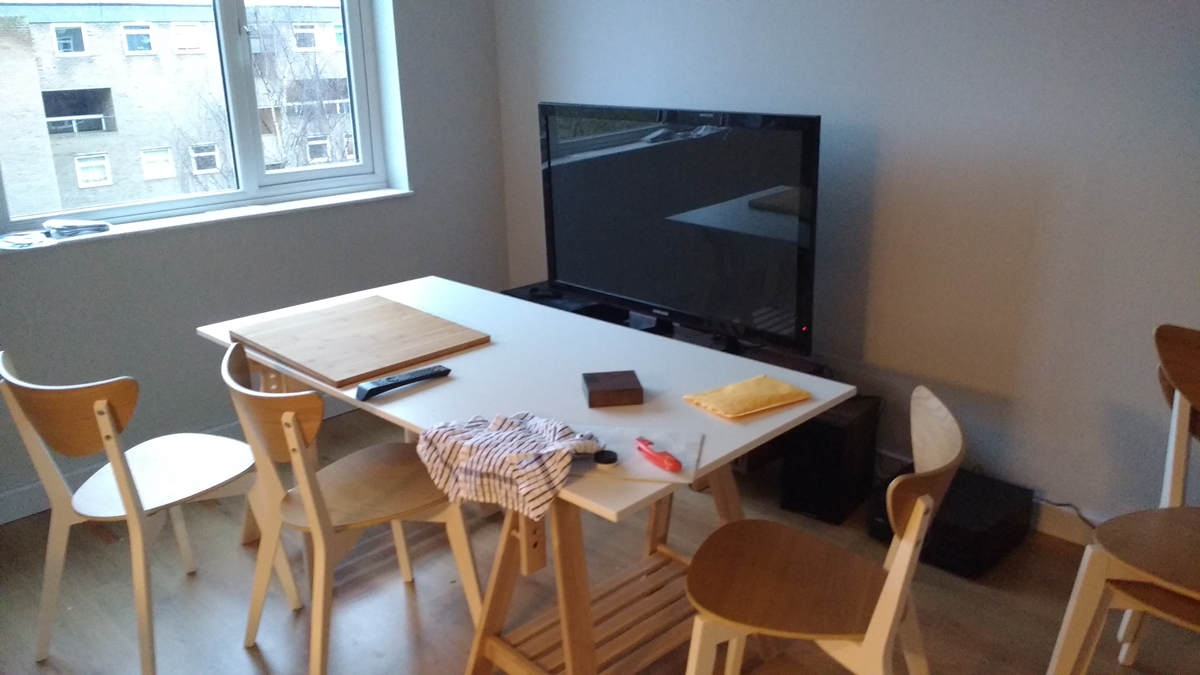
19th December. I have now knocked off from the flat for Christmas! A chap came and fitted the gas hob today – he asked me if I’d thought of doing it myself, looking at the rest of the renovation – the answer is that the lease requires gas work to be done by a gas safe engineer, and I don’t fancy being in the dock if we start a fire in the block! Otherwise I would have done it! Anyway the kitchen is now fully operational ( Giles is cooking dinner with a friend there tonight) and most of the rest is working – the few remaining bits can wait while I belatedly think about Christmas…. I might even get out my Manton purchase from Bonhams and have another look at it. My Certificates run out on 2nd Jan and I haven’t heard anything from the Firearms team, so I think a check up is in order. I don’t want to have to take them all to Dicks if it runs out!
18th December, Gas fitter turned up today to fit the gas hob but didn’t have the required gas tap, so that didn’t happen! maybe tomorrow, although I’m beginning to think that the hob will never be installed. There doesn’t seem to be clarity in the regulations, which makes things difficult. The regs originally said that the hobs must be installed with fixed piping, not the flexible pipes used with gas cookers, but then this was ‘clarified’ to allow fitting using convoluted stainless ‘flexible’ pipes. I’m not sure that most fitters realise this, althought you can buy the pipe from good old Screwfix, so it must be OK!……..
17th December, Still at it! Today we shifted a completely full Land Cruiser’s worth of old doors and windows and old PVC trunking & junk to the dump, so things feel a bit better. The walls are done, most of the lights are fitted and working and the clean-up has begun. The office, which was more or less finished, is now the dumping ground for flat pack furniture and a sofa – Giles says he wants to have a dinner for his friends on Tuesday, so no peace for me in the interim – he has been working very hard on it himself, he was painting at 7 a.m. this morning – so I feel I have to do my bit! Still got the ring, skirting and 9 sockets to fit in the living room, and the heater.
15th December. Sorry, I haven’t posted on the website for whole week due to flat panic – Giles wants to move in, or at least be able to stay there by the beginning of next week and I want the bulk of it out of the way by 20th December. Lots of it is almost finished, but very little is completely done! The bedroom and office have been carpeted and their skirting boards and electrics are installed, so they are pretty much OK – the bedroom even has a bed now. The bathroom is waiting ceiling paint before it can be finished, but I did get the underfloor heating working today and most of the stuff is in except the shower screen and a mirror and mirror light. The kitchen is waiting for a gas fitter to fit connect the hob, and some cupboard work. The living room is the last to get attention – it needs the final coat of paint on the walls and the skirting and electrics fitted and the storage heater installed with 150 Kg. of bricks! Plus a major effort clearing all the rubbish out- the plasterers left several bags with lumps of set plaster and all the old skirting and other debris needs to go down 4 flights of stairs……………! Anyway today saw the installation of a new consumer unit with proper RCD protection, so I can get the lights working at last! I’ve been using some nice looking slate effect ‘screwless’ electrical fittings – sockets and switches – from Screwfix, but they are a pain to install as they are a very tight fit in the boxes and don’t allow the normal angle adjustment – they hardly fit in 25 mm deep boxes – next time ( if there ever is a next time) I’ll stick to good quality fittings! I apologise for the absence of gun related stuff – I will try to do better over Christmas – I expect I’ll be bored stiff once the flat is put on one side!
8th December. Bought the Christmas tree today, so it must be getting near! I got the ‘office’ at the flat into a fit state for the carpet to be fitted – the trunking skirting boards are in and all the wiring is installed ready for the sockets to be fitted – once the carpet is in (on Tuesday) it will be ready for furniture. We now have to get the bedroom to a similar state by Tuesday to receive its carpet. I’ve started to re-install the wiring – great masses hanging down everywhere – its lucky I spent a lot of my life with electronics in the days when everything was connected by massive wiring harnesses, so dozens of identical wires don’t phase me! I think Giles wants to be able to move in at the end of next week – so I’d better make sure there is some lighting, at the moment its a couple of portable photographic lights on tripods. I tried again to drill into the concrete ceiling but the masonry drill didn’t make any impression so I used a cheap 8 mm diamond coring drill – I got about an inch into the concrete then swapped over to the masonry drill to break out the core left by the diamond drill and it almost immediately broke through into a void – presumably the concrete beams are hollow or have hollow cores. Anyway good enough to fix a ceiling light fitting.
6th December. I cracked a problem I had been struggling with at the flat today – the ceiling is made up of large slabs of precast concrete with chamfered edges butted together, the whole skimmed in weak gritty plaster about 6 mm thick. The joints have moved a little so we dug them out and as there is not enough skim to bury a wire to the ceiling lights we thought to run a 1 mm T&E in the crack and then fill it flush. I spent an hour with a sticky Fix All grab adhesive trying to stick the wire in the crack yesterday without success – the gluey wire kept falling out onto me. Today I tried with No More Nails grab adhesive and fixed the ends first, and used hardened tacks to hold it up while the glue dried – it stayed up! when set I covered it with tile adhesive, which is strong and flexible and bonds well, and scraped it flush – now I just have to smooth it with filler or decorater’s caulk not sure which at the moment. I tried drilling into the concrete slabs, but after 5 minutes I’d gone a couple of mm at the most, so I decided there must be easier ways of fixing the ceiling light – use a Rawlplug and screw into the crack – seems to work!

5th December. I did have a look at the Holts auction Catalogue for next week, but I could only see one possible flintlock double that might interest me (the Burnie), and I wasn’t too excited by that, so I’ll keep my hand in my pocket and carry on fixing the flat. I went in this morning, and the study that Giles had painted last night felt like being inside a cardboard box on account of the colour not being that different, and causing the walls to come in at you. So maybe a bit of a rethink. Carpets in the office and bedroom are due to go in on Tuesday so a bit of a rush on to get the messy jobs out of the way and the skirting fixed – all the wiring runs in 100 x 25 PVC skirting as as there is nowhere else to secrete it – it then goes up bits of plastic trunking embedded in the walls to the recessed sockets and will look much better than the single sockets mounted on top of the old skirting. Unfortunately the further through a restoration you go, the more little jobs there are and the longer everything takes…………………
3rd December Dick reminded me that there is a Holts sale coming up soon, and his catalogue is 50% bigger than usual – so there are probably lots of goodies on offer – I’ll have to have a look. Holts got kicked out of their Hammersmith venue – I’ve heard two stories, one that the young Duke of Westminster wants it for a flat, and the other that the regiment that used it has amalgamated with several others and needs it full time. Anyway the next sale is at Blackheath, to the South East of London more or less on the M25, so it might be quicker to reach by car for me – but I will have to remember to prepay the Dartford crossing fee! I went in to Screwfix Manor today for a bit and ripped out most of the wiring that is redundant or will be replaced – the pile in the photo is about 2/3 of it! I’ll have to start putting it back next week when a bit more painting has been done – Giles is busy with that every spare moment. I found a horrific piece of electrical stupidity today – There was a cord pull switch in the bathroom (as there should be) but obviously at some time the switch had broken, as they do fairly often, so someone had carefully wired a torpedo switch on the end of a cable across the original contacts, so you now had to grip a small switch hanging down with live wires inside while in the bathroom. The appalling thing about it was that the workmanship looked professional!
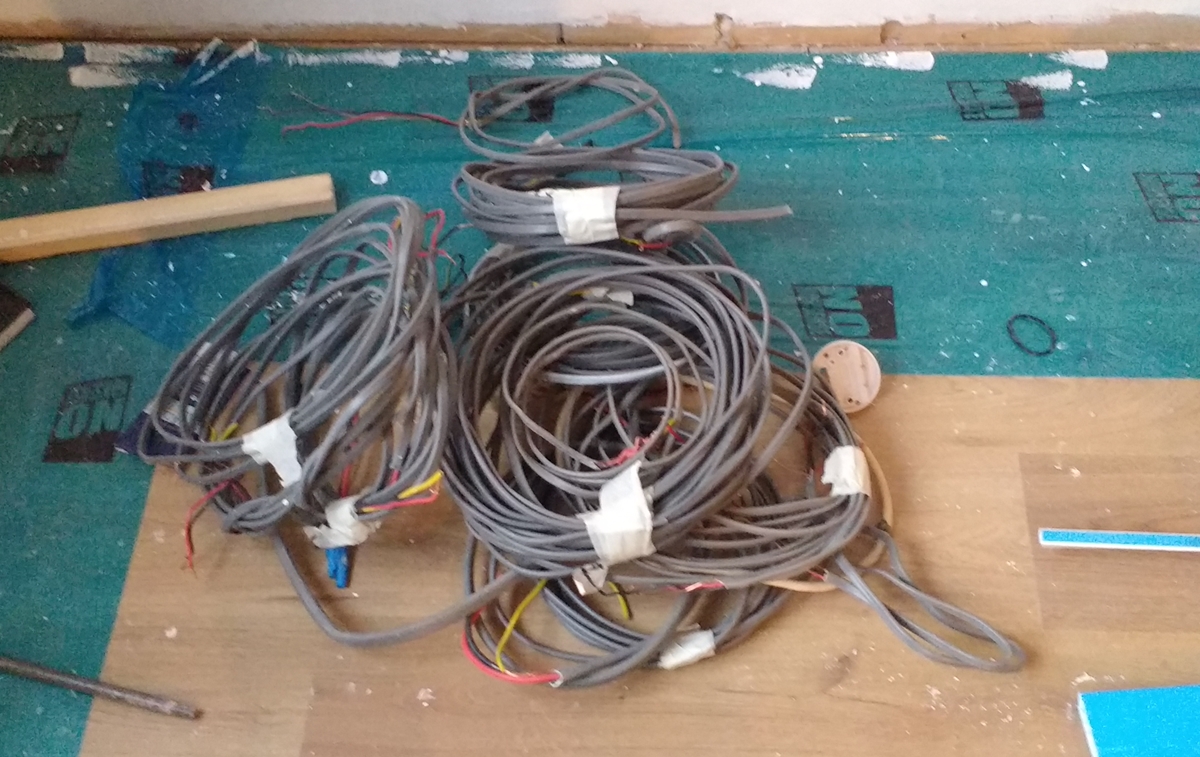
2nd December Another month gone, and still labouring on the flat, which should now be renamed ‘Screwfix Manor’ on account of the amount spent at Screwfix on an almost daily basis! Anyway I did have a couple of days off last week for the Bonhams auction. I bought a John Manton double flint gun that was listed as a reconversion, as it looks as if it will make a fine shooter. I had had a good look at it and decided that there were more questions that answers concerning its various bits, but the barrels had a lot of meat, and the locks were strong, so it would do – it has a case that is more or less right and a trade label for John Manton that is a few years later than the gun. Looking at it carefully I see that the cocks are very slightly different, and the lock plates were engraved by different people, so I can’t be sure the locks were not remade, probably using original tumbler, sear etc. We shall see how it shoots when I get a chance to try it. Whoever remade it did a rather good job – not just on this gun but on many of the guns from the Paul Murray collection in Thursday’s auction. I had a muzzle loading shoot on Friday near Sudbury with 7 other guns which was most enjoyable, the weather holding off and not getting really cold until the last drive. I realised that my success rate at partridges (French) is substantially better than at pheasants – I’m not sure why, but it may be that generally pheasants announce their arrival and give you lots of time to shoot, whereas partridges seem to be on you in a flash, and the less time I have to think about it the better I shoot. There was one strange problem on the shoot – one percussion gun failed to fire its caps – the nipples were rather large and the caps didn’t fit very far on, but the cocks didn’t seem to push them down fully. The mystery was that this gun had been regularly used in its present form on many shoots without a moment’s problems. We tried several makes of caps but it didn’t make any difference – we didn’t have time to make any detailed diagnosis before the second drive, but fortunately I had a couple of ‘normal’ 1/4 BSF nipples and a nipple key in my bag, and that solved the problem – but I’d love to know why the problem arose! Next week is a big push at ‘Screwfix Manor’ as Giles wants to be able to move in, at least partially, by the middle of December, and I am under notice that I have to be available for more mundane ‘get ready for Christmas’ duties at home ( although to be honest I think a couple of days should be enough for that, but I daren’t say so!). At the moment all the wiring in the flat is hanging down as the lights and trunking are removed – of course technically it will all be the original wiring replaced, with just a few extensions to the ring circuits as permitted under the regs! Onwards and upwards, no peace for the wicked…………..
28th November The flat is beginning to come together now – we have a loo and most of the rest of the bathroom done – just the grouting and the shower and shower screen to install, and the light and mirror to sort out. At least the plasterers have finished, leaving a thin wash of plaster over all the floors – plaster is wondrous stuff – you can mop down the floors many times, and they still look ‘cloudy’. It was STEM club this afternoon, and the children started building bits of the mechanisms for sorting red and yellow ‘apples’ – its amazing to see their concentration, and mostly they are getting on well in groups – only one ‘sulk’ today, which is pretty good. We had a visitor who is planning to start a STEM club in Cherry Hinton – I think he was impressed with the atmosphere, I certainly was! I’m still pondering the guns in Bonhams sale – there is one puzzle gun by Joe Manton with the ‘wrong’ barrel inscription – I had several discussions concerning its pedigree, Bonham’s think its OK, but the bore looks like it was made yesterday, and my instinct says if it looks like it was made yesterday then it probably was! Two uncertainties is enough to convince me that there is a 80% chance that its a modern replacement – plus there are enough clearly messed about guns in the Paul Murray collection for it to be possible, given the work that was put into restoring and re-converting others. We’ll see what the market thinks! anyway, here is the promised photo of the Theopilis Richards with the damaged touch hole. Its a bit of a mess, and will have to be done carefully as it is intended as a shooter.
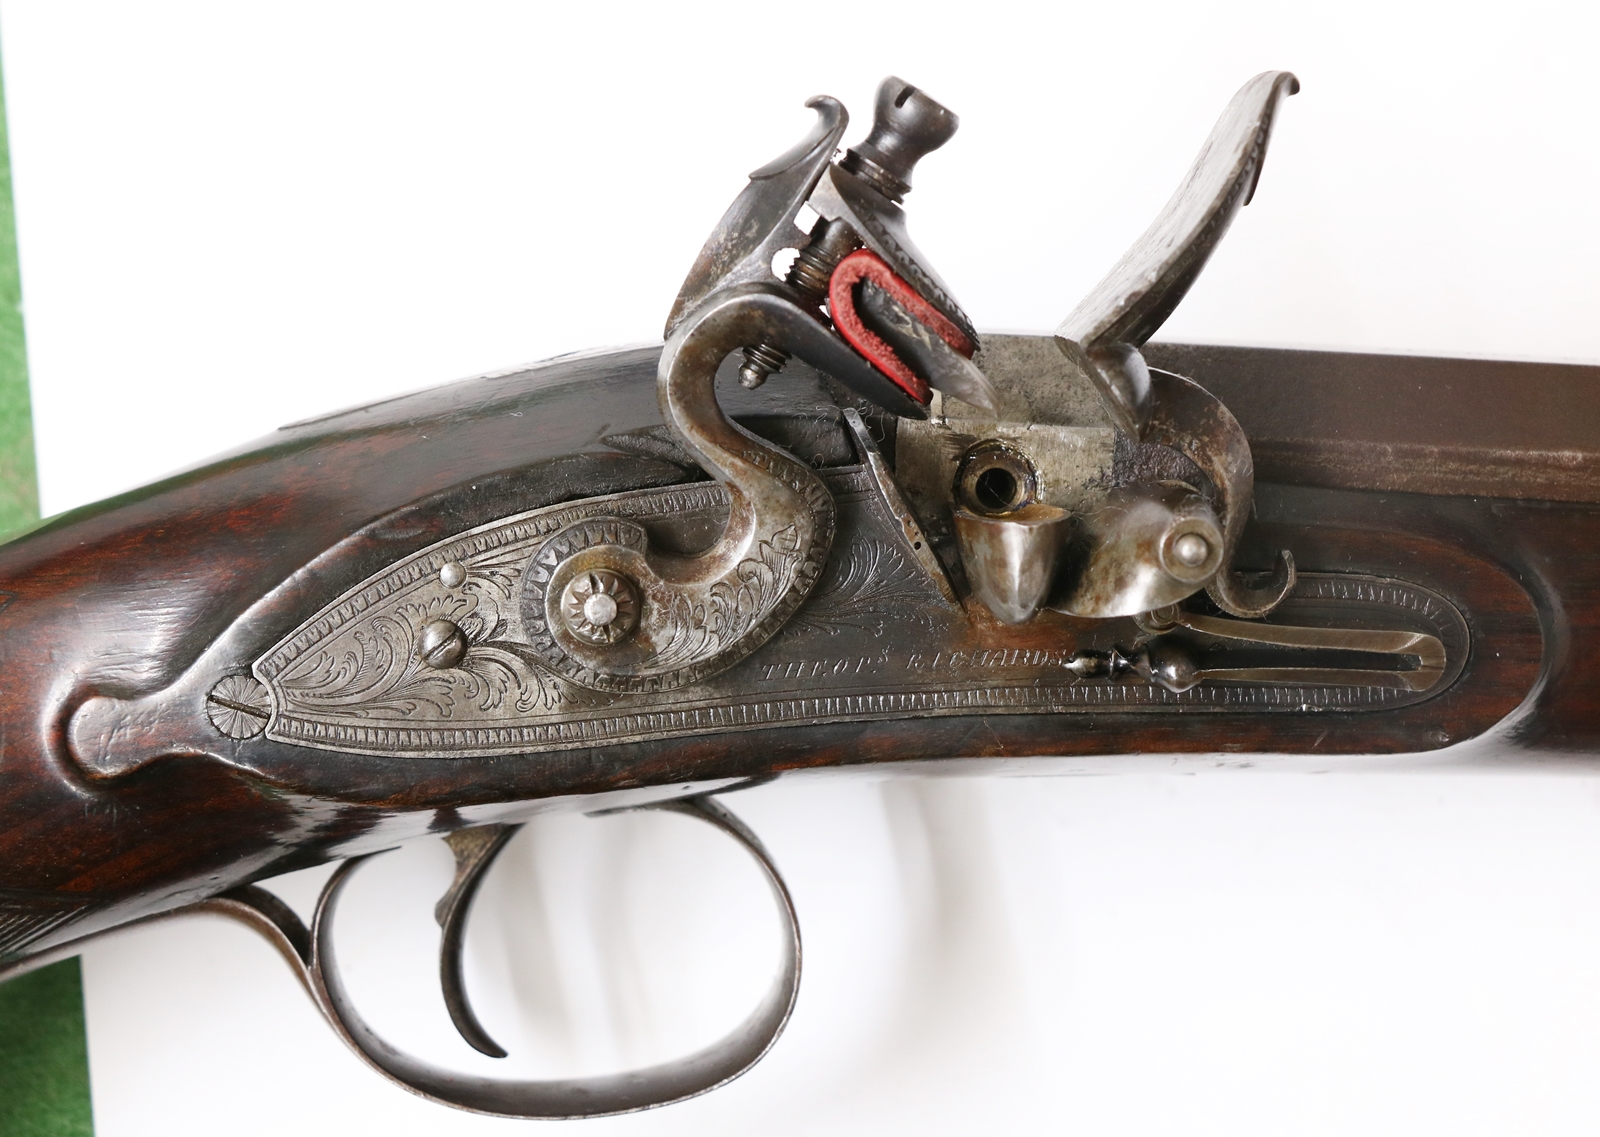
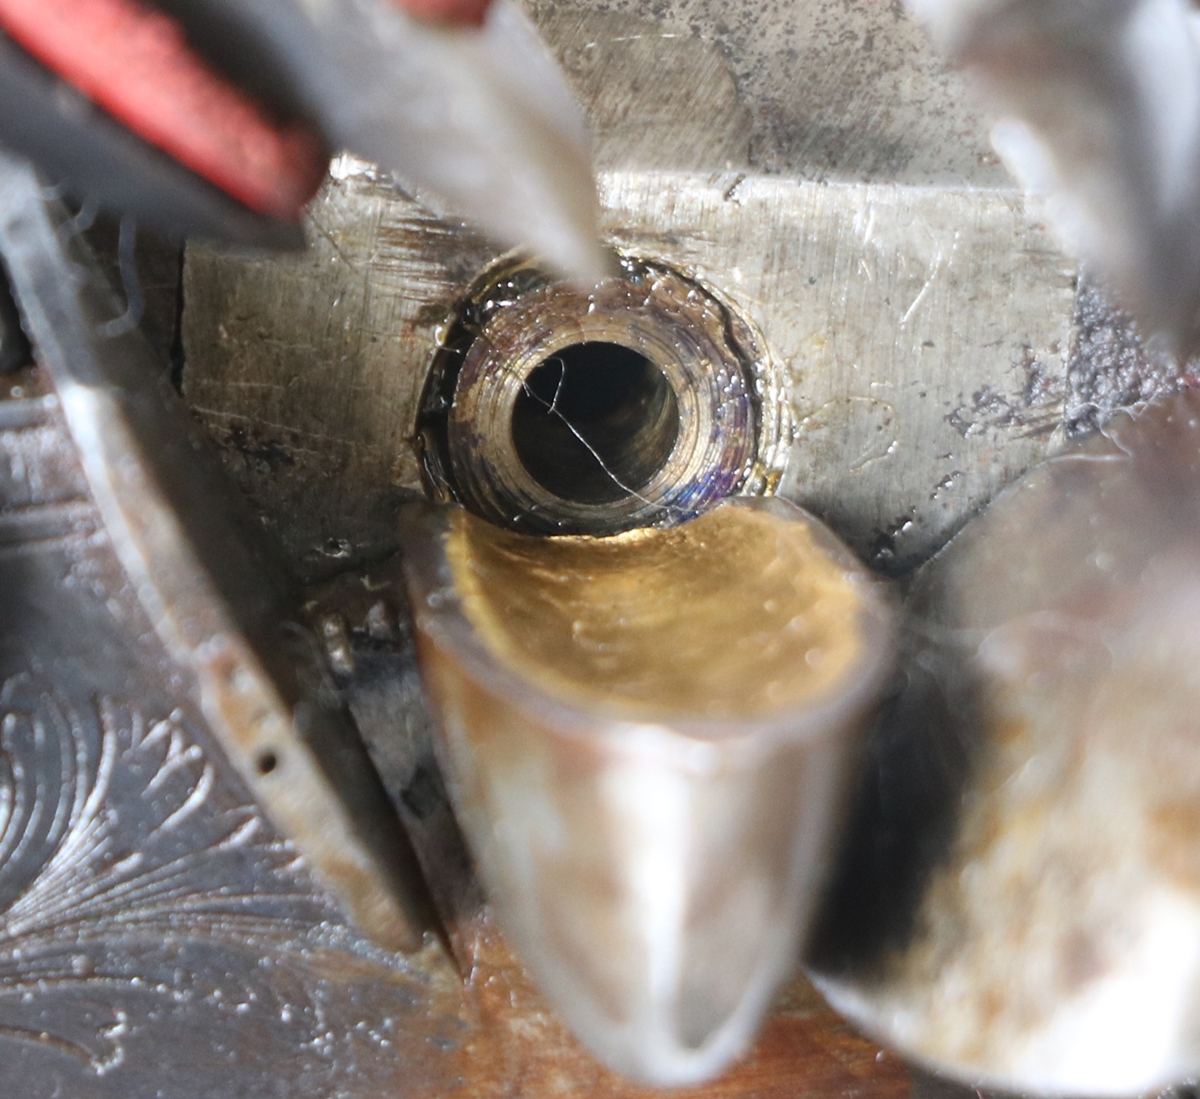
It looks a little as if the area round the touch hole has been welded ? Without probing the area further, it looks as if there is a threaded hole with a plug originally capped with ? gold, with just the gold drilled for the small tough hole, which is presumably why it blew out due to pressure on the back face. I need to look at it carefully to see if its by any chance a re-conversion. Probably best to take the plug out and make a new one with a thinner gold facing and the small hove beginning in the solid metal of the plug . I’ll take it to Dicks when I get a chance, although it has to be said that I haven’t been over there for weeks due to the flat work!
27th November Yesterday I went up to look at the guns in Bonham’s Auction, the imminent auction is over two days, the first day (this Wednesday) is mostly swords and miscellaneous firearms and armour, and the second (Thursday) is the entire Paul Murray collection from the US, so everything on teh second day has an additional 5% VAT as its imported. There are a lot of interesting guns, and some in the Paul Murray collection that have been extensively restored and are reconversions from percussion -some are fairly well done but not in the same league pricewise as the originals. There were a couple of nice percussion singles in the first day’s sale (lots 214 and 215) that had reasonable barrels and if they go for the estimates ( 450 & 500 up) would be good value as a shooter – I also liked the Rigby 18 bore double (lot 224) estimate £600 – 800 – remember that is the hammer price, with the buyer’s premium plus VAT on top – another 30%. It’s getting difficult to find a decent shootable percussion single shotgun for under £800 , and more for a double. The Paul Murray collection has lots of bits and pieces – if I thought I would get round to it, I’d buy a wheellock lock ( there are several locks on their own) and make a replica to fit it. The Paul Murray sale has a few flintlocks that are probably out of my range, and a number of very messed about re-conversions. There is a Joe Manton tubelock that I’m tempted to bid for – but I am expecting it to go for well above the estimate so I wont stay with it for long…. Its difficult to guess what the lots will make in relation to the estimates – in the past Holts was pretty realistic and nice guns were usually knocked down a few bids either side of the top estimate, but Bonhams I think uses the estimates to draw people in, plus you can’t telephone bid on estimates of £500 or below. One other little treasure that David Williams of Bonhams pointed out to me was actually two – a pair of bronze turnoff pistols in fantastic condition (lot 642) estimate £3000 to 4000 ( that is 4050 to 5400 to pay, with the 5% import VAT included) As the song goes ‘if I were a rich man…..’ I’d buy those – so pretty! I’ll probably go up on Thursday for the excitement of watching other people spend money and something might slip through the net and end up in my collection – the last time I was at a Bonhams I went to pay for whatever manky rubbish I had bought, and there was a chap wrapping up a nice double flintlock fowler, and saying ‘ I can’t believe I just bought this for £300’. I don’t know how I missed that one, but I did – a hint – Bonhams do sometimes sell below the lowest estimate, but Holts generally take the lowest estimate as the reserve and won’t sell below.
23rd November Just back from a splendid day’s shooting at Woodhall Grange estate in Hertfordshire. Ten guns all shooting percussion muzzle loaders and some really challenging birds due to the estate having lots of tall trees and the wind, which was pretty strong at times. It took a while to get a grip on the lead required as the birds were motoring on some stands and some guns ( me included) took a while to get to grips with it, but a lovely sunny day and not really cold considering the wind. Overall we got a shot to bag ratio of 2.7 which would be decent for a breech loader in those conditions. I came back with two antique section 58 guns to fix, a single flintlock 16 bore by Thos. Richards that has lost its touch hole and needs it put back in, and a nice old Alex. Henry percussion .461 cal rifle that is a bit tired and needs a thorough clean and gently brushing to see what it looks like, before deciding if it needs the engraving recutting – I’d only do it on the barrel anyway as most of the rest is hardened and it is good enough that it would be a sin to anneal it just to do a little titivating of the engraving…… I’ll post some photos of both guns when I have a moment. I have another shoot next week and I was trying to scrounge some No 6 shot, but Martin said he always shoots everything with No 7, clays and game and he is one of the more successful shots. Bev, who is a demon with percussion or flint, makes his own shot which comes out in a range of sizes and is mostly quite round! He tells me that the lead runs through very small holes ( I think .3mm diameter) and drops in to a fluid – I think he said that fabric softener was ideal. Maybe I’ll get him to take some photos for this website? How about it Bev? More on that later, as they say…
20th November While lying on the floor of the bathroom at the flat, pondering the slope on the bath waste pipe, which looks barely adequate but can’t really be modified as it goes directly in to the communal stack, I got to thinking about apple sorting machines for the STEM club children. There are lots of videos of modern machines on You tube – mostly annoyingly without much technical information and with tedious music, but I came across a video of a museum exhibit of a old apple sorter somewhere in the US that is hilarious – the link is https://youtu.be/y9MLs0mS_Hs. I’m learning the jargon of apple sorting – one new word was ‘singulation’ which refers to the point in the process where the apples cease to be treated in bulk and begin to be checked individually. In the museum video the singulation puts the apples past a human operator to pick out bad ones, then onto an Archimedes screw to transport each one to the size sorter – the size sorter is the fun bit, it consists of a spring loaded arm that throws each apple along a row of cloth bags, so that they are sorted into bags according to how far they are thrown by the arm, which presumably distributes them into the bags according to weight, which is a fair proxy for size! I’m not sure we want to copy the principle for our machine, but I’ll take the video and show it for fun. Anyway the plasterer arrived and started the ‘greening’, which is applying a green acrylic based grit wash to the walls as a bond for the skim coat. By the weekend he should have finished the skimming and we can start to put back the wiring in new trunking/skirting. Maybe I will have finished the bathroom by then – I look forward to having a loo again!
18th November I’m sorry that I have been too exhausted to post most nights lately, and I’m afraid that the number of visitors has dropped off in consequence! Work on the flat continues, the panic is due to the imminent arrival of the plasterer – by which time I need to have stripped off all the old plastic skirting boards containing the wiring and sockets, and all the rest of the electrical trunking, which means taking out most of the wiring, and cutting new boxes for sockets in the walls at the regulation height of 450mm. Plus sorting out the window sills so that the window surrounds can be plasterboarded, which will give a much better look than the prominent beaded wooden surrounds to the old windows… most of that is now in hand, and a lot of the debris from the flat has been removed today by Giles and a friend – its now in the back of the Land Cruiser waiting for a trip to the dump- probably on Sunday, which is a rotten day to go as all the world and their dog is incompetently maneuvering their cars and generally clogging up the place. Its rather like going to Screwfix on a Sunday – I am a fan of Screwfix, they have almost everything you could need in stock although how they fit it into the stores I cannot imagine, and every attempt I make to get things cheaper elsewhere ends in failure, plus they are so pleasant and helpful, which is presumably why on Sundays the world and their dog, having dumped their rubbish at the tip makes a bee line for Screwfix and clog that up too while trying to fathom out what they want, which usually ties up the assistants for hours. ( moan over…. )….and the extra little door for trade customers and speedy service ( I am for some reason one) isn’t open on a Sunday… On Thursday evening I noticed that our storage heaters were all stone cold – a quick check showed that the night rate was running and the clock OK and the rest of the power was OK but no live output to the night store consumer unit. A quick check on the web confirmed my suspicions that the contacter in the clock had failed. A phone call to E-on at 8 the next morning took 20 minutes to get through to the right department via several operators, but got a promise to come and fix it within 3 hours, a man duly arrived around 11 and changed the meter and clock for a new digital meter with some re-arranging of the wiring and was on his way by 12 – well done E-on! I’ve been idly thinking about the project for my STEM club – I have a load of 50mm diameter pool balls in red and yellow and I’ve bought 20 50mm wooden balls that are much lighter that I can paint. The idea we are forming is for the children to make one, or possibly two ‘apple’ sorting machines using Lego Mindstorms – it has colour sensors so can differentiate between ‘ripe’ and ‘unripe’ apples and also spot ‘bad’ (black) ones, and I’m sure the children can think of ways of sorting out smaller ‘apples’ and even possibly sorting light and heavy ones. The challenge is going to be to get 15 children of 7 to 11 and varying experience of Mindstorms to design and build it in one hour a week for 10 weeks – well I like a challenge, as does my colleague Dave….. I’ll try to get some more photos of the flat tomorrow….
15th November. Six hours of tiling heavy tiles (around 4 Kg each) and four or five trips up and down four flights of stairs carrying things has left me a bit exhausted! The main tiling in the bathroom is now done, although there is a little bit to finish when the bath is in place. I had a bit of a problem cutting the tiles longways for the top strip as you can’t snap them so I scored the front and cut them on the back with a diamond blade in the angle grinder and they chipped badly on the edge where the saw went through as you can see from the photo – but when grouted I doubt it will show at all ( I hope!). I now have to fit window boards and pull off the skirting board trunking and attached sockets and wiring so that the plasterer can skim the walls next Monday. Unfortunately there is a lot of ‘stuff’ up against many of the walls, so a major clear out and re-arrangement is in order! I’m looking forward to another muzzle loading shoot next week in Hertfordshire – all the shoots begin quite early and are at least an hours drive away so it will be an early start. I must get some more No 6 shot!
14th November. I wrote more yesterday than I published – I just forgot to press the button – its there now… Not much work on the flat today as it was STEM club time again! I had 8 children signed in for the first session and another half dozen jostling for places, so we signed up 14 in total, spread over year groups 3 to 6, that’s around age 7 to 11 so its quite a challenge to keep them all happy in a highly technical environment – this year we are doing sorting – the idea being to make machines that sort e.g ripe apples or tomatoes from unripe ones, represented by red and yellow pool balls using the Lego Mindstorms computers and sensors and motors and lots of cardboard and sticky tape. I’ve been watching videos on You Tube of commercial machines doing it – the scale of food production always staggers me. Just in case anyone is interested I’ll keep you posted on Tuesdays! Tomorrow I’m back at the flat attempting to finish off the tiling in the bathroom, then making the window boards on Thursday morning. I went to buy timber for the boards and found that premium softwood was about £9.50 per meter and I could get Red Grandia for about £11. since the softwood had loads of knots to be sealed and filled and the red was completely knot free it was a no-brainer…….
13th November. A RED LETTER DAY ! cablesfarm.co.uk has had 1 million hits (clicks) since it switched to its present form in May 2015, from a total of 140000 separate visits – which means that on average each visitor looks at around half a dozen items. The number of visitors and visits and search engine referrals per day has been rising steadily over the years, it now averages around 240 visitors per day, although that does include the site being scanned by the search engines, which they do frequently because the content changes often and they keep updating the information they need to respond to searches. This site comes fairly high up search engine listings, and has a very strong presence on Google images for anything related to antique firearms. The Police have started another firearms amnesty, which is of course a ‘good thing’ BUT I always worry that concerned people will feel the need to hand in perfectly legal antiques, and some valuable guns will be destroyed as I doubt anyone involved knows or cares about antiques. If you know of anyone who might hand in antiques, please tell them to check with a someone who might know. In fact there is nothing special about the amnesty arrangements except publicity – Home Office guidance is that the police should always accept surrendered firearms and only make inquiries if they suspect the weapon has been used in a crime ( same as for the surrender).
12th November. Day off while I sorted out mt tax and office work! Giles went to the flat to remove the wooden facings round the window openings (on teh insides) so that we can get them plastered next week, and found a disturbing void behind one – he didn’t think it was structural – we shall see! All points to a less than perfect standard of workmanship in the original build!
11th November. Back at the flat to try the bathroom bits in place and plan the plumbing etc and waterproof the walls to be tiled.. Managed to get the bath in but it involved hacking out a bit of wall. I’m going to have to leave out a couple of tiles when I put on the 10 mm thick tiles so that there is room to maneuver the bath in – they will have to go in afterwards. I had better take tomorrow off to do my tax and sort out my certificate renewals since you now need to get land authorisation and club signatures to renew – new from last time! And I need a photo……
10th November. I got the underfloor heating down – it was a loose cable that had to be taped to the floor – since the cable is a fixed length and runs had to be a set distance apart it was a bit of a gamble as to how much of the floor got covered, but in the end I got all the bits that you could walk on covered. Putting the tiles on top was a bit of a challenge – the tiles are big 900 x 225 – and its difficult to judge the thickness of tile cement as you have to be careful not to comb down to the wires – anyway I got by – a couple of tiles are not quite flush with their neighbors but they are out of the way ! They were still moving around a couple of hours after fixing – I think for the wall tiles I’ll try for a faster setting adhesive. Tiling the walls is going to be exciting, there are about 50 tiles of 800 x 200 to fix, with a total weight of 200Kg – I just hope the walls stand it! I think I had better do the tiling in several stages – 50 tiles falling off the wall at once would make mincemeat of me! A couple of gun related happening – a friend has bought a nice over and under flint pistol by Staudenmeyer that might come through the workshop, and a TV producer from Wales is looking for nutters who like restoring antique things and thinks I might be one such! Me, a nutter ? Anyway an early night as the w/e is scheduled for carrying on the bathroom, plus my accountant wants my tax return by Monday as she is away for the rest of the year – as she only does my tax as a favour ( after about 40 years, I think) I am grateful, and it will be good to get it out of the way. My old consultancy and instrumentation business is just about staggering on – every so often I decide it has died under me, only for it to pop up with something interesting that I feel inspired to do…. I’ll probably regret chucking in my VAT registration! I kept the old website going unchanged since about 1997, and was able recently to refer to it as a historic reference in a patent case !
8th November. I made some progress on the bathroom and got the cement board up on the stripped wall – I now need to take out the loo and skim one of the walls – then put in the board on the floor to receive the underfloor heating, then stick that down and put the tiles down. Fortunately the heating cable tail will end up in the cupboard with the consumer unit, so minimal wiring to do. I unpacked the bath and the cabinets and I think I can see how it all goes together – we seem to have sets of taps we didn’t order – they would not be our choice, so will be replaced.
7th November. I did my VAT return yesterday – its such a pain that I’m de-registering and ending many years of getting paid by HMRC as most of my outputs went abroad….. The flat is hotting up as I’m trying to get the bathroom in before I have to divert my energy into getting ready for the plasterer. I got the call to re-start my STEM club at school next week – I had thought that it was in abeyance until January but my co-STEMer Dave and I have come up with a project for the children that requires a bit of automation using the LEGO mindstorms computers – more on that later, as they say………… So back to safety catches on muzzle loaders… Safety catches were often fitted to percussion rifles – my Lancaster double rifle has safety catches – but they differ from those common on overcoat pistols such as the Andrews described below – In many rifles the catch is fitted in front of the cock and has fewer parts and a simpler construction. These catches work on the inside face of the cock, which has a radial groove with a notch in it. The slider combines all the functions of the knob, bolt and spring, and apart from the groove and slot in the lockplate and the groove in the cock, the only other part is a small screw with a flat head that screws into the slider from the inside of the lock. The slider has a raised lump on the rear end of the spring tail that engages the groove in the cock, and the forward end of the slider is formed as a spring with a slight protrusion on the underside that engages with one of two depressions in the face of the lockplate to hold the slider in the safe or open position. A further groove on the inside of the lockplate takes the head of the screw so that its top is level with the inside face of the lockplate. So there are only two additional parts to this safety, the slider and the screw.
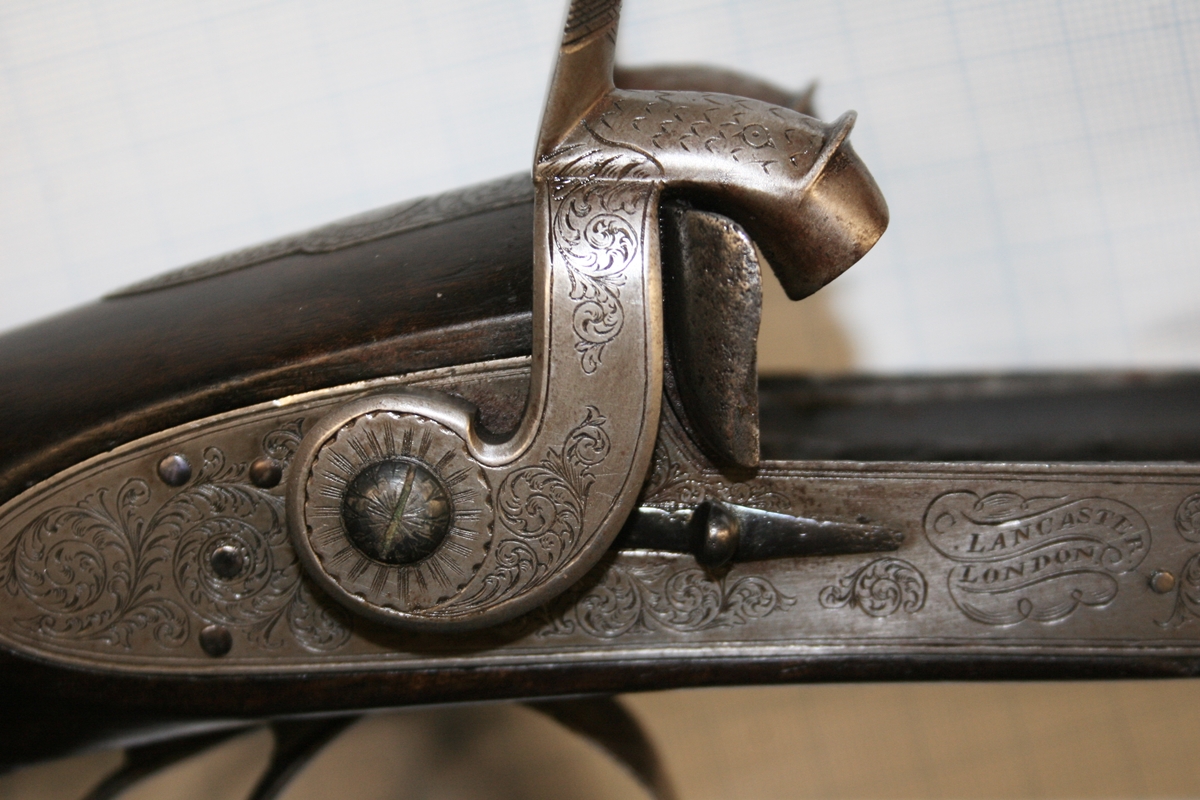
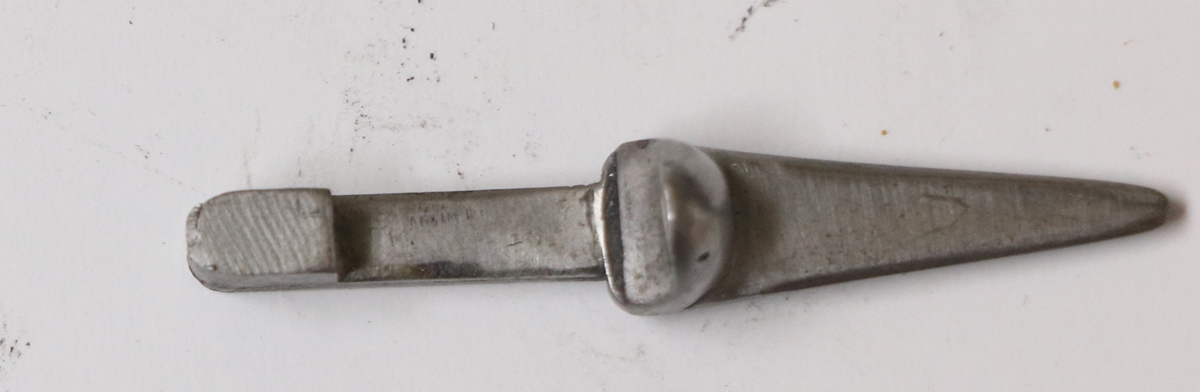
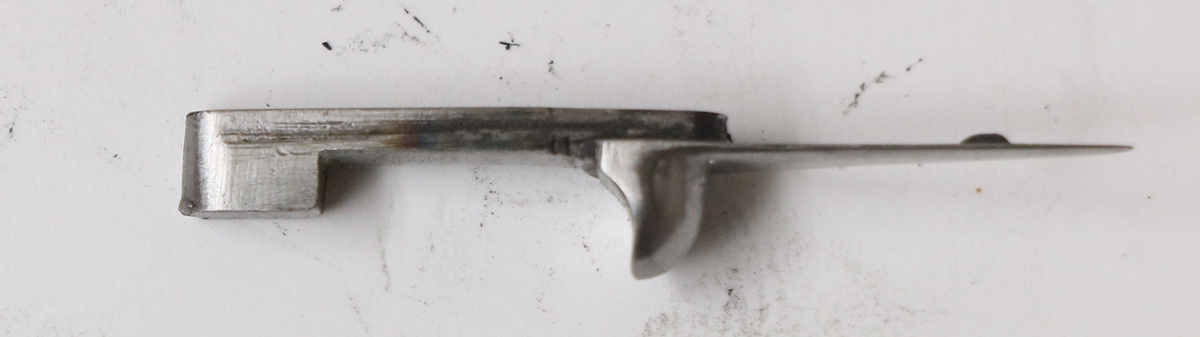
The lump that engages in the cock hasn’t been shaped to fit yet.
