Here are deleted diary entries for the title dates;-
30th June – Another month gone – we have probably had the best of the summer already! I’m afraid that I’m not going to have a lot of time to play with gun restoration in the next two or three weeks as I have a deadline to do the consultancy work I just took on, which will keep me busy for most of the time. I did manage to play with the furnace before I got the brief for the job sorted out – I put an ordinary cooker control in parallel with the digital temperature controller so that I could use the control to set the temperature with the digital control cutting in if the temperature fell. I got more stable control, but of course I had to do some fiddling to set the desired temperature. I think these problems will disappear with the proper PID controller . P I D stands for Proportional Integral Derivative, which means that it anticipates as it gets close to the desired temperature and turns down the power so that it doesn’t overshoot. I’m struck by how overpowered the furnace is once it has heated through so it really needs the PID. Mine is on the way from China!
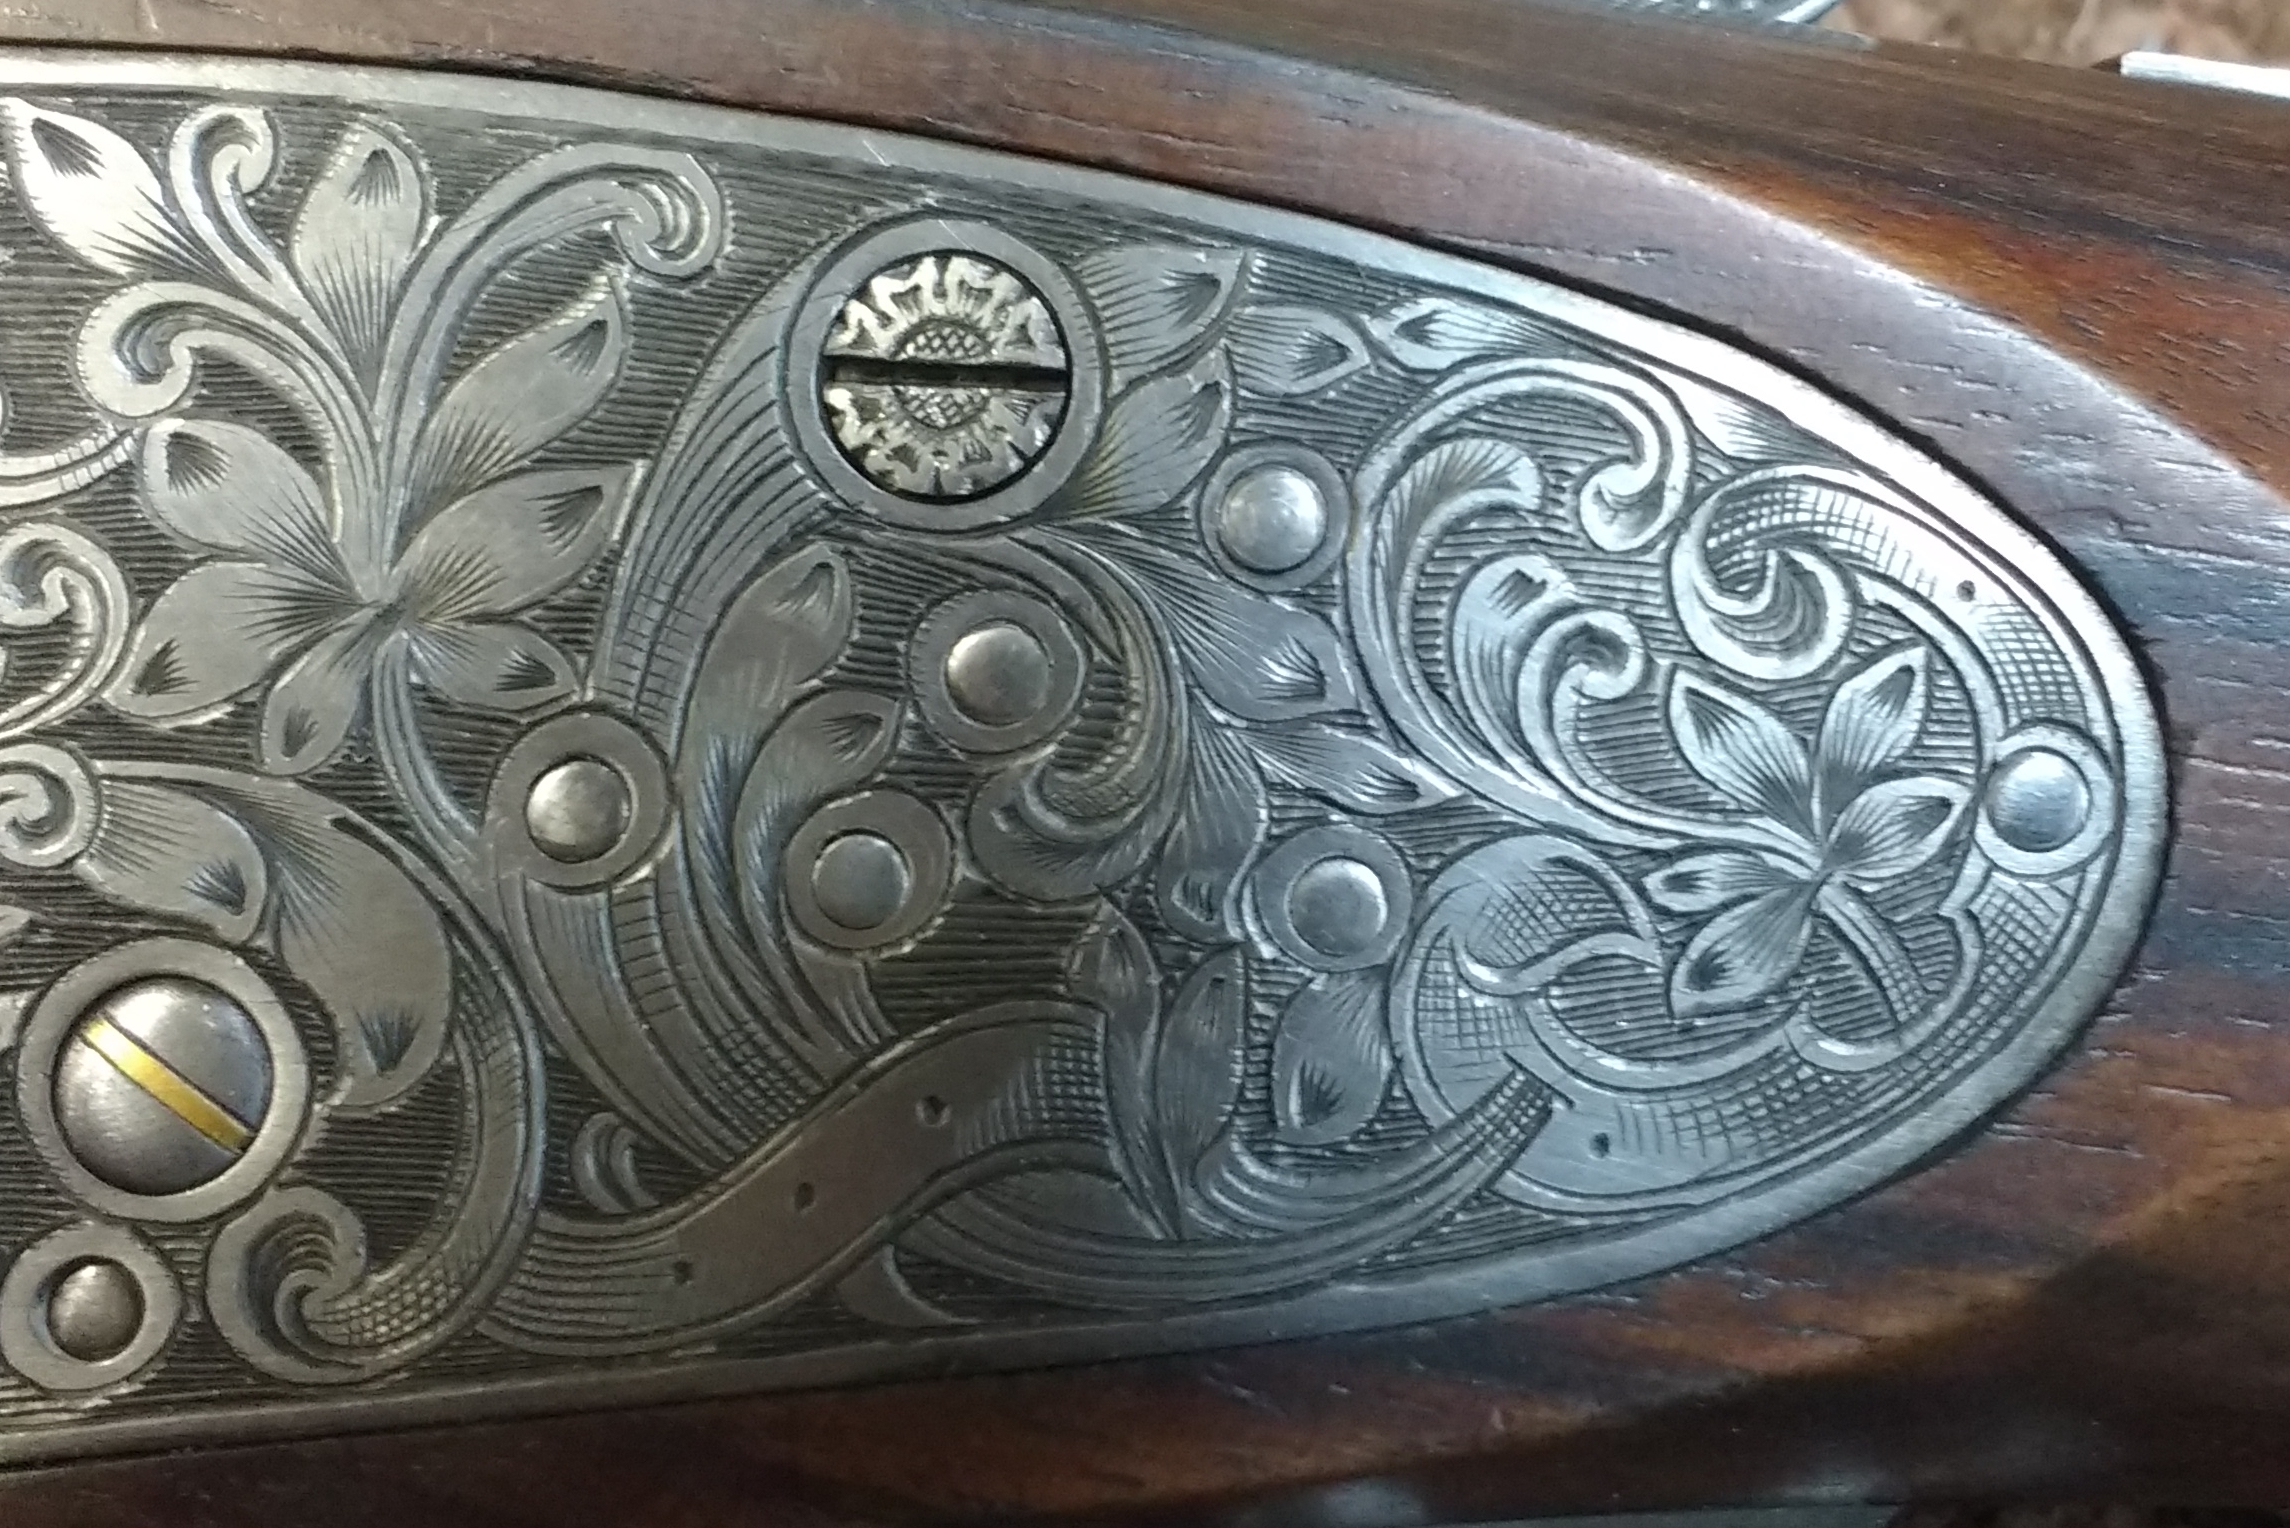
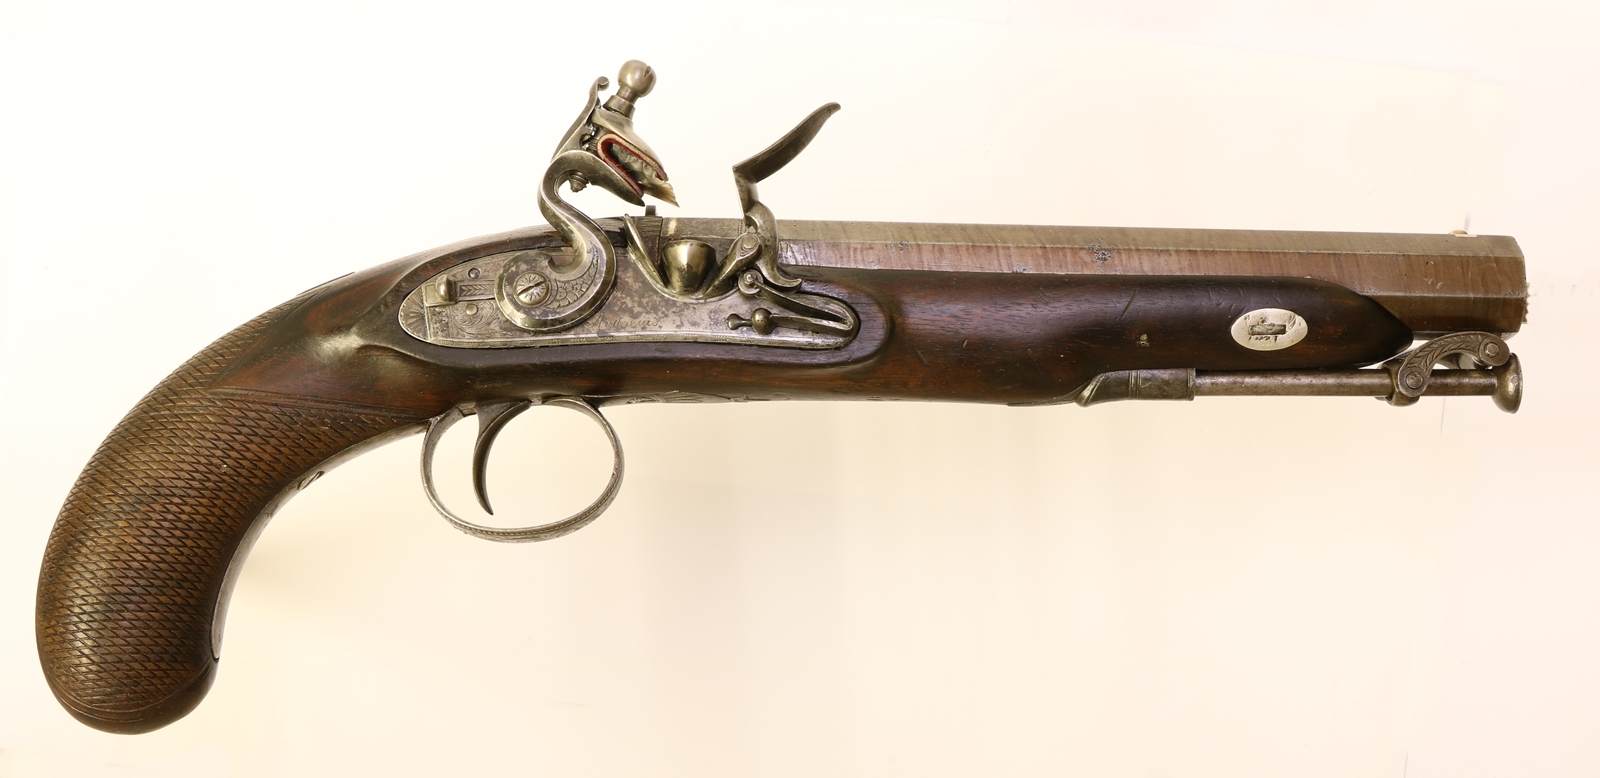
29th June – a lazy day – I felt like doing a bit of engraving and I’d taken a few photos of a modern gun Dick was making that had been engraved by Geoff Moore, so I thought I’d try imitating his design, but I just made a horrible mess of it – I’ll have to spend time with paper and pencil to get the style right first. I wired up a cheap 400 degree temperature controller on the furnace and tried it out, but its a cheap on-off controller not a P.I.D. and it overshoots horribly – going about 25 degrees over the set temperature after it turns off and then undershooting by 5 degrees before it comes back on. I guess a solid object in the furnace would be more stable due to its thermal inertia. It now looks as if I’m in for a busy summer as in addition to renovating Giles’ flat – whenever that completes – I am in danger of coming out of my third retirement in 16 years and being a consultant again – just when I thought I could ditch my VAT registration too. Back to planes and suits if I’m not careful – its unfortunate that I can’t resist it when people come knocking on my door with interesting projects! I ought to practice sitting in front of a mirror and saying ‘NO’ but its too late in this case. Maybe it will fund a nice cased pair of small flintlock pistols like the ones I stupidly failed to buy at Bonhams last sale ……………….
I’m NOT going to show my attempts to imitate this!
28th June – Dick & I went to look round the J W Evans die-sinking and stamping works in Birmingham, which was in operation from about 1850s (?) to 1990 and has everything still in place including thousands of dies and stamped parts. The works produced all the stamped metal parts that were hard soldered together to make fancy Victorian and 20th century silver plated tableware and other decorative household items. J W Evans output was the completed object ready for plating, or, in the case of a small fraction of the output made of solid silver or gold, ready for proof marking. The dies (female part) were cut in a steel block and the corresponding male part was cast in a relatively low melting point metal directly into the die. The cast part was then fettled to allow for the thickness of the metal. Very interesting trip – the works/museum is run by English Heritage and is for prebooked visits only – I could have done with a bit more specific information – e.g. what metal alloys were used for the stampings and the male mould part, but a good effort. Horrible journey there as the A14 was closed and we got sent all round the county but we arrived only 1 minute late for our slot and miraculously found a 2 hour parking space right outside the door – how unusual is that! When I got back I did a bit of touching up on the brass bits of the little turnoff pistol that I had engraved, now that Dick has fitted the two bits together.
27th June – Another session of the STEM club for children – we are still struggling with the Mindstorms software despite most of a lifetime spent computing – it is a pig! Anyway not much happened today on the gun front and I have to turn in early as Dick and I are off on a visit to J W Evans old silvesmiths workshop in Birmingham, courtesy of English Heritage. Not looking forward to the rush hour drive on the A14! And on Monday I seem to have agreed to go to London. Life was much more stable and peaceful when I had a regular job, at least I knew where I was going to be from day to day and didn’t need a diary to rule my life!
26th June – A bit more work making a panel to mount the control electrics for the furnace – I ordered a P I D temperature controller from Amazon but failed to notice that it won’t be delivered until mid July – I didn’t think Amazon did that sort of nonsense – one lives and learns! A well as refitting Gile’s flat, which seems to be on the horizon for a six week spell I seem to have got involved in another consulting job in the U.S. – I wonder how many times I can retire! I had come to the conclusion that in my activities the only noticeable difference between ‘retirement’ and work is that I get paid for one and not the other! Ah well, my idea of hell is playing golf, so I suppose I’m on the right lines! But I would like time to take the Samuel Nock rifle to the range again!
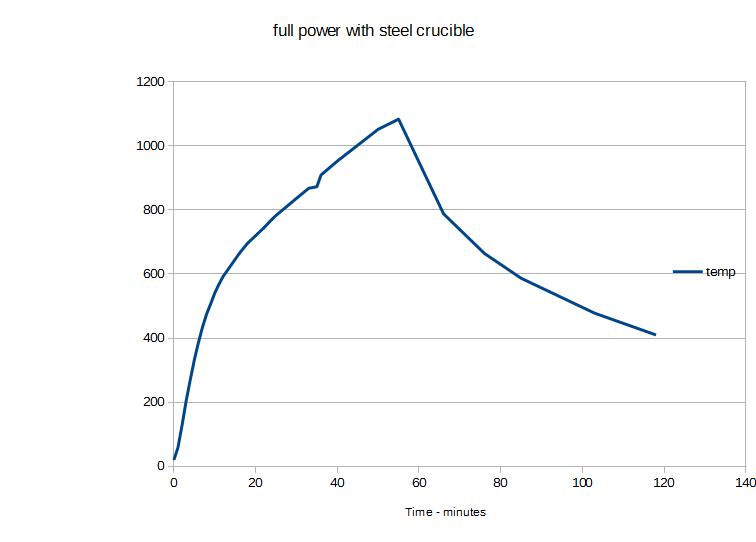
25th June – I made a steel ‘crucible’ for the furnace out of an empty disposable oxygen cylinder from my small oxy-gas set, with suspension points and a loop to tip it. I’ll post pictures later. I fitted the top closely and made a tube to hold the thermocouple so it is all now Ok and ready to get the electronic controller working. I did another run, recording the thermocouple voltage at intervals so I can plot the rate of rise of temperature and get some idea of what the input power is in relation to the heat loss. I picked up the wrong thermocouple data and couldn’t understand why it was taking so long to get hot – it crawled up to a calculated 600 degrees so I had a look through my peephole and realised that it was actually above 1000C – at that point I realised my mistake and turned it off- since I had the raw data no harm was done! From the plot of actual temperature against time you can see that the furnace has plenty of spare power – the curve is actually a bit odd but I’m sure I measured it correctly! Anyway it looks as it will do everything I want including melting brass. From the graph below I calculate that there is about 30% more power input at 1000C than needed to maintain the temperature. My mind is wandering off on the design of a slightly bigger front opening furnace with a bit more power, say 8 inch cube interior instead of 4 x 4 x 8 vertical – I reckon it would still work off a 13 Amp socket and reach 1100C.
I didn’t expect the rise above 600 degrees to follow such a straight line! Peak temp is about 1087 C
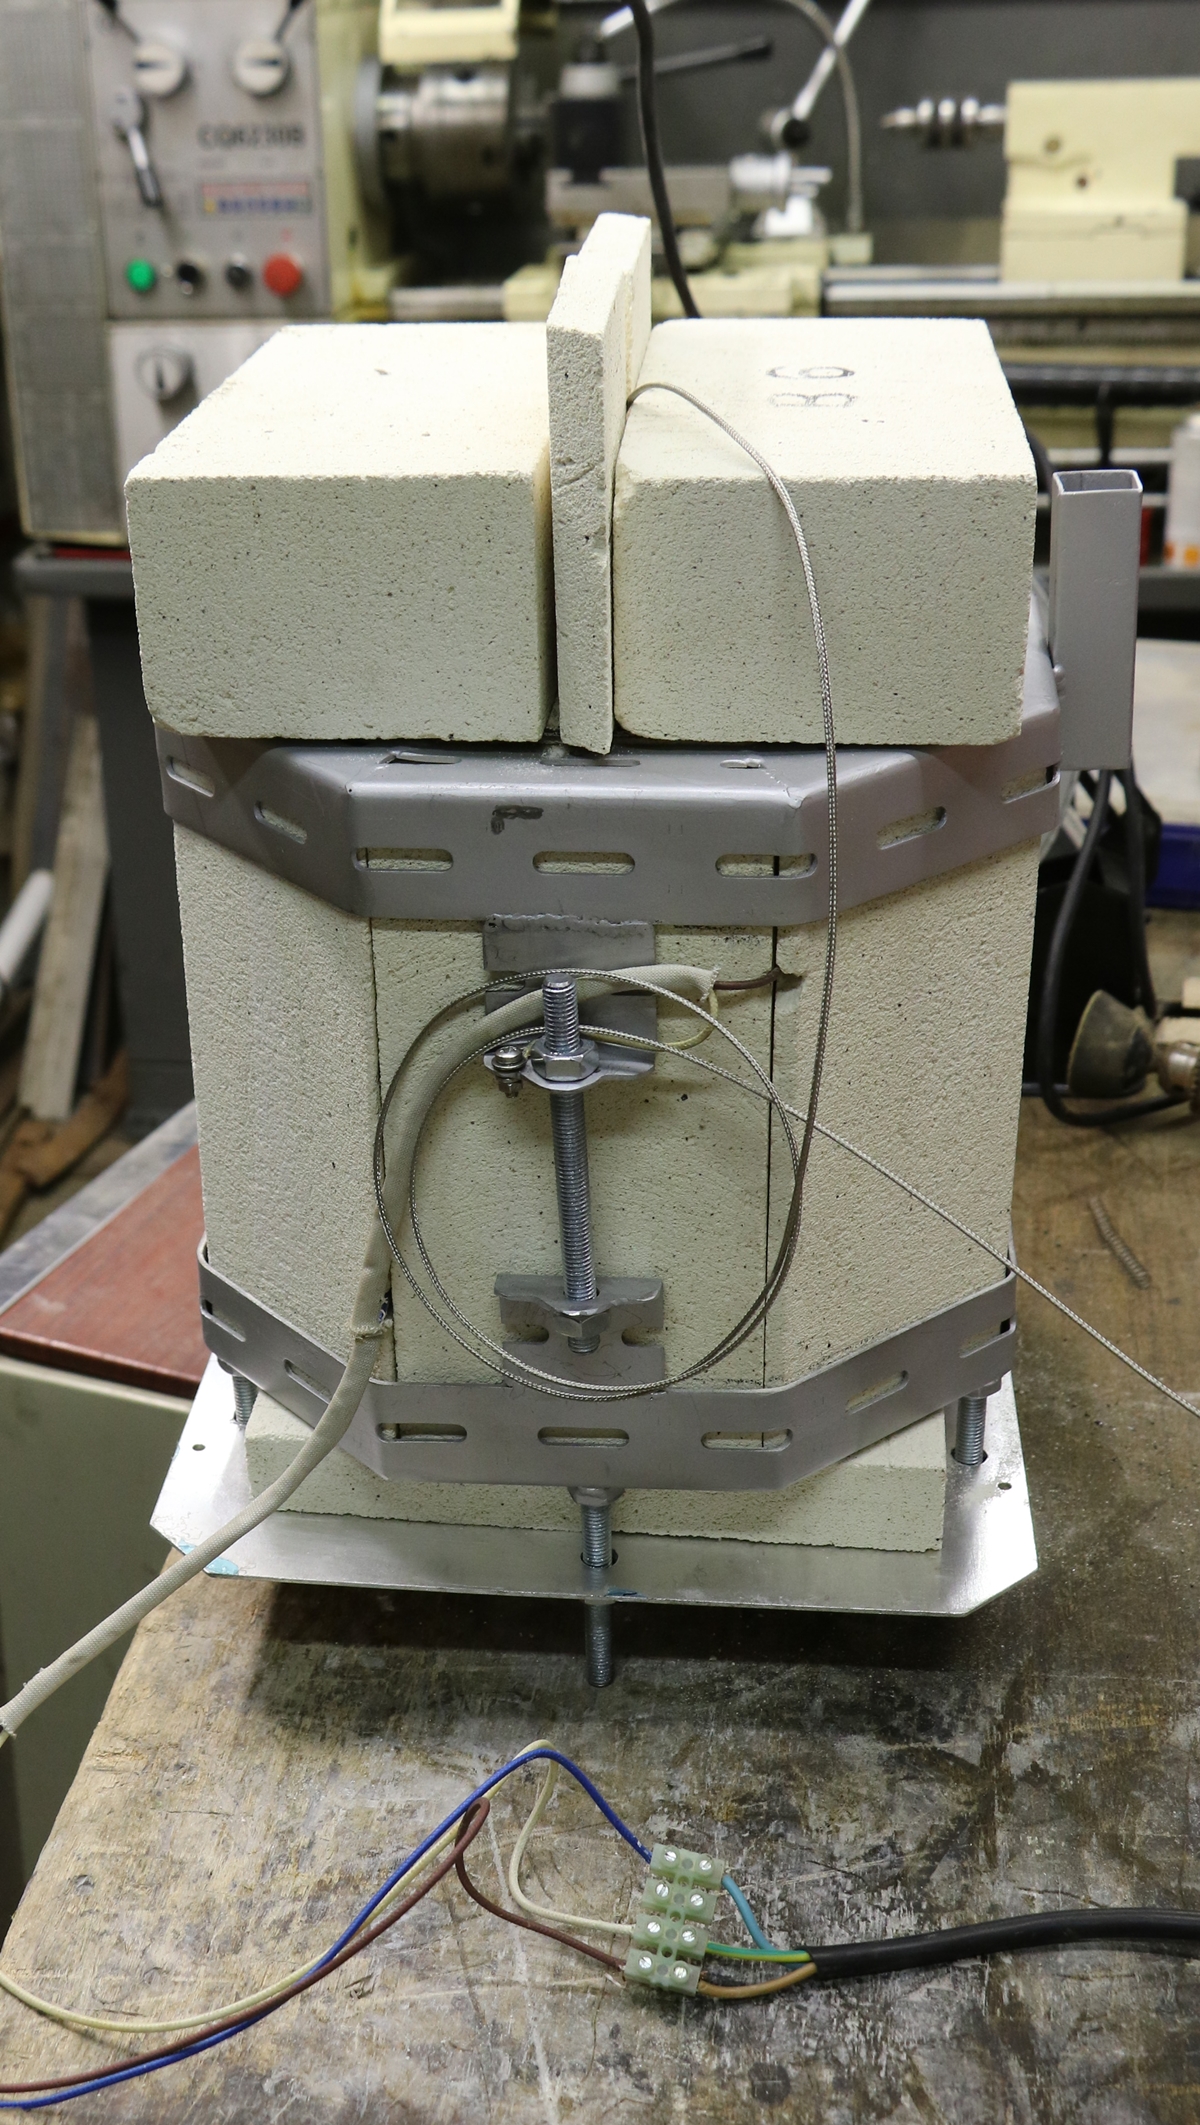
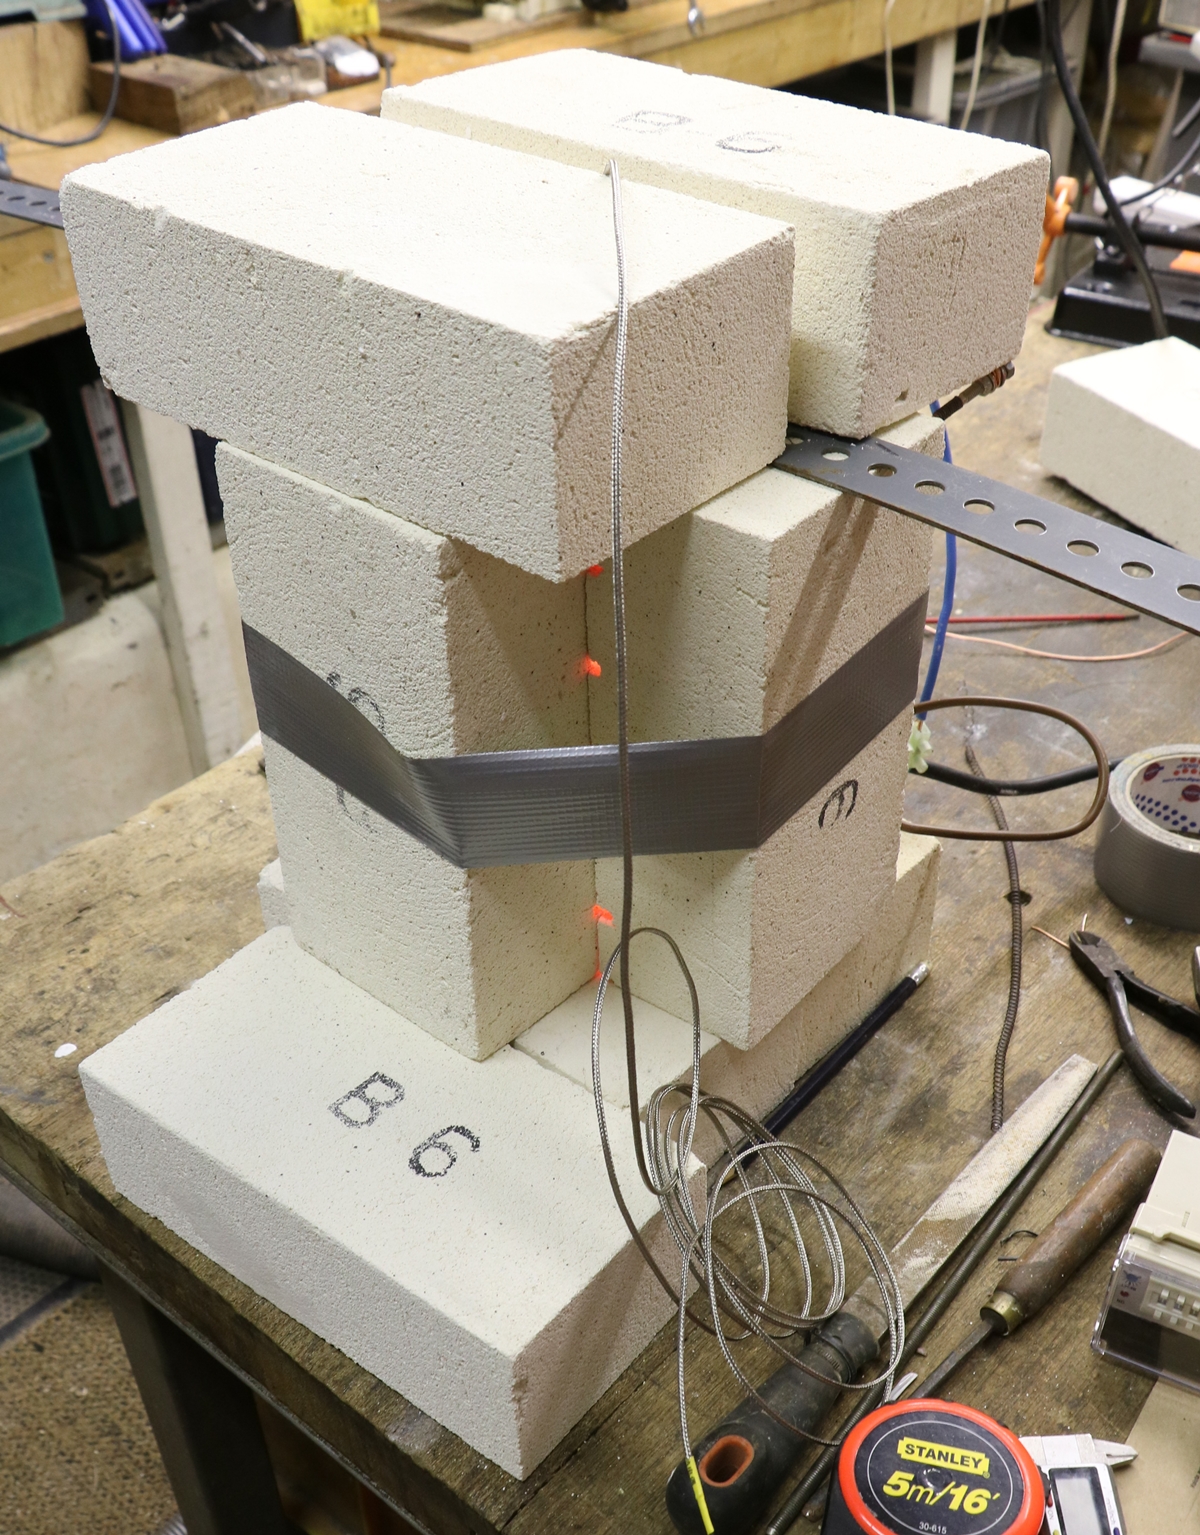
24th June – I finished making and TIG welding the two frames that hold the furnace together and put some 10 m.m. studding legs on the bottom frame to hold a couple of half thickness bricks as a floor. The whole thing has gone together pretty well so far – the Youtube design is well thought out by the author who says in the video that he is doing his GCSEs – so he is presumably still at school – a highly commendable effort. I deviated somewhat in my construction as I wanted to use up scrap materials I had around the workshop – which included a lot of M10 studding amd M10 nuts. I found a bag of 10 mm. Belville washers – they are the dished washers that act as a spring – I used them with the nuts that hold the bottm bricks in place – as I didn’t have any M10 washers I used two Belville washers facing each other. I found some high temperature wire I had saved from the inside of an old electric cooker and used that to do the wiring. This evening I finished the main parts of the furnace, but need to do a bit of shaping around the top opening to get rid of some 1 to 2 m.m.gaps that are letting heat out – it probably needs a proper lid. I did a test run with a temporary top in place, and the temperature gradually climbed over half an hour to almost 1000C ! The outside got a bit warm and the aluminium plate that holds the bottom bricks in place also got quite hot. Anyway 1000 C is not bad, and the temperature was still rising
The frames are earthed, as they should be. The furness will shortly be controlled by a P.I.D. (Proportional, Integrated, Deririvative) controller if I can get one covering the temperature range – otherwise I’ll just use a cooker control with its simple on/off regime.
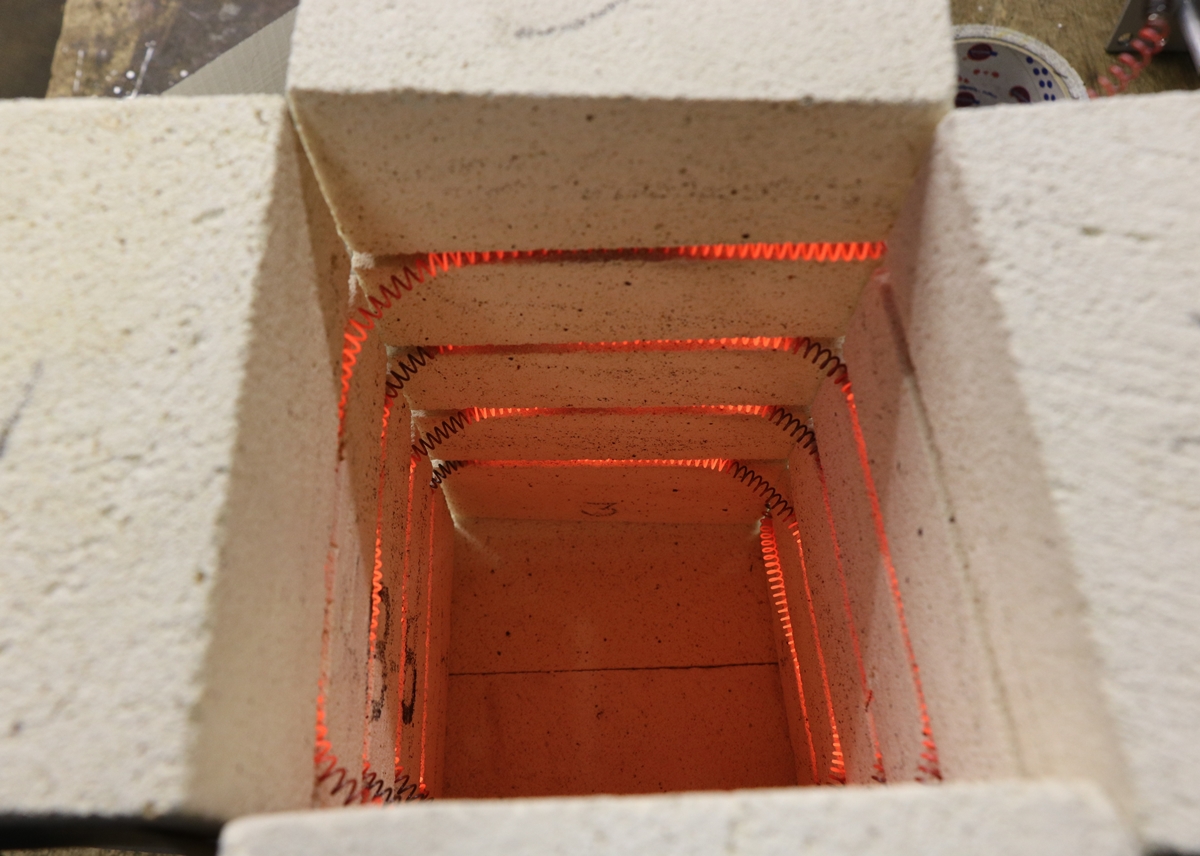
23rd June – Clearing out my ‘rough’ workshop left the big bench empty so an invitation to start a project I’ve had in mind for some time – a simple electric furnace, primarily for annealing and hardening, but alse possibly for colour case hardening and maybe brass casting. The design comes directly from a Youtube video (How to Make an Electric Foundry For Metal Casting – Part 1) , so I can’t claim any credit for what is a very elegant little vertical furnace. It uses bits from ebay – the most expensive part being the silica kiln bricks – 10 bricks at £26.00 for 5 inc. carriage. The heating element is a length of heating element from ebay – there are lots on offer, mostly from China, but I found one with next day delivery for a few pounds. I won’t go into the details as the video is comprehensive, but so far I’ve grooved the 4 main bricks for the element- they are very soft and fragile, and stretched and checked the element – its around 1.6KW, I had to cut around 200mm from the length to get the correct heating effect, and ended up with about 67 inches which equates to around 4 complete turns within the four brick enclosure. I bought a K type thermocouple from ebay for a few pounds – using a simple testmeter on the milliVolt range enables me to measure the temperature to within about 10 degrees – I put the 4 bricks together on another couple of bricks for insulation and fired it up with the thermocouple suspended in the middle and a couple of bricks on top and in less than ten minutes it had got to about 530 degrees Celsius – I didn’t bother to leave it longer as the corners are not very tight and have gaps at the ends of the grooves so there is quite a lot of heat loss that will disappear when the extra bricks are used to fill in the corners. I now need to cut the bricks for the corners and base etc and make a metal frame to keep it all together – I have some old Dexion angles that I’ll probably use as it will help clear some ‘junk’ from the workshop – thus killing two birds with one stone ( I’m not sure if the RSPCA prosecutes anyone who uses that saying – I think I’m safe as I understand they have seen the error of their ways and stopped being so litigatious – they are in a bit of a mess at the moment and the Charity Commission has put in its people!). I have a temperature controller that I will fit, but it needs a bit of fiddling as its meant for a K type thermocouple but only goes up to 400C so it will have to be ‘doctored’………..
The maximum temperature will depend on the insulation and I’m not sure that the elements will be good for much above 800 C.
The corners need filling in and a proper bottom shaped and the whole lot held in a frame welded from Dexion angle.
22nd June – My evening reading lately has been Cruddinton and Baker’s books on the British Shotgun – all 3 volumes. I am getting interested in old breech loaders in spite of my earlier resolution not to get involved in anything later than percussion, except for the odd modern over and under. Dick came up with an old hammer gun – a rather nice bar in wood to Smith’s patent with rebounding locks and a single bite snap action closure with a lever on the right side of the lock – it looks in excellent condition and is having a few bits of the wood repaired – it looks as if it was reproofed after 1955 as its stamped with BNP and 12 x65 on the underside of the barrel. It has a very fine damascus barrel. I guess this is the 1863 patent of J Smith although the opening lever doesn’t seem quite the same as the description in Cruddington and Baker. I’ll have to get a copy of the original patents from the British Library. I gather the gun is probably for sale, so if its within my budget (very low!) I may be interested in adding it to my growing collection of breech loaders! I’ll try to get some pictures. I didn’t watch the Holt’s Auction live as I was trying to get my outboard motor running ( it took 4 hours but its now good!) but it looks as if the auctioneers had a tough job getting the punters going – I don’t think I’ve seen so many unsold lots in a Holt’s sale before, and many lots sold a few bids up from the bottom estimate. There were one or two that beat the top estimate, but the best percussion shotguns – the Blissett and the pair of Beaties didn’t find a buyer. Several lots were knocked down at below the lowest estimate, which is not something you see often at Holts. I don’t know if the market is in a sulk over brexit, or the extreme heat of the viewing days kept people away. The ‘Manton’ I mentioned at 200 to 300 went for 340 hammer price, that’s around £440 to pay, which is probably a fair price – If I’d tidied it up I’d probably sell it at £550 – £600 but the next bid up on 340 would have been a bit close to the bone. Anyway not sorry I didn’t bother to bid, but it would have been interesting to have watched a bit of the action. One cheering outcome is that our Heavy Dragoon ( see Guns & bits for sale) is something of a bargain at £1200 – hurry before we think better of it and up the price – 1 went for £1000 + 300 and one for £1200 + 400.
21 st June – back from an exhausting day in London at the Holt’s viewing. Not sure what to make of the guns – there were a few really fine muzzle loaders if you have a lot of dosh – the pair of Beaties were very fine, as they should be at those sort of prices, and there was a nice Blissett but a lot of the less good percussion and flintlock guns have low estimates on them – I am in two minds whether to bid on a couple of items or go shooting instead! Difficult call! – There were one of two cheap percussion guns that might possibly make shooters with a bit of cleaning up e.g lot 516, the (possibly spuriously signed) ‘Manton’ at £200 -300 estimate ( that’s £260 to £390 cost), but I don’t really have time to do it, so I guess I will stand back! Nothing like as inviting as the Bonham’s recent sale in spite of the much greater volume! I din’t manage to find a single wooden antique gun case or anything else that really took my fancy. The sheer volume of stuff is overwhelming – the sealed bid sale for July has a pile, literally, of repro percussion revolvers, mostly in good condition that have to be on a F.A.C. so not to be bought on a whim- where will they all go? I guess for a collector of percussion rifles there might be more joy in the sale – one or two very nice offerings. As usual side by side non ejector shotguns by lesser makers can be had for a song – but a bit more expensive than Southams where many fetched only £5. But I think overall I’ll keep my hands in my pockets! It will be interesting to see what things go for but I have too much on to watch it on the web.
20th June – I don’t seem to have time to catch my breath these days, but I’m off to Holts viewing tomorrow to see what is happening to the market and meet up with friends. It seems there is a widening gap between good antiques and the indifferent stuff – good percussion shotguns are becoming more popular as the prices of fine flintlocks disappear over the horizon, and a decent gun by a good middling maker might make two to three thousand – and that is the hammer price! I was having a look at Holts selling commission, but their terms and conditions seems very coy about it! I have decided to pass on my almost new Pedesoli modern reproduction Mortimer 12 bore flintlock shotgun as I have a single ‘Twigg’. – I’m told its a fairly early one, but in mint condition – I doubt its fired much above a couple of dozen shots – it is of course a section 2 firearm and must be on a shotgun license – offers around £750 if you want it….. I’ll put it on the website later. I was going to deliver a gun to someone at Holts, but I don’t think I want to be wandering around London with a gun in a slip, things being what they are! Discretion and all that – it will have to wait…….. I’ll follow up the Holts sale with a trip to Birmingham arms fair on Saturday to see what goes there – I’m suspicious that there are one or two dealers who seem to shut guncases when I approach their stands – I can’t imagine why…………….As the Gilbert and Sullivan Opera goes…. ‘I have a little list’ – its growing!
I noticed there was a ‘Samuel Nock’ in Holts without a name on the lock and with the barrel name ‘recut’ – I shall be interested to see if its as bogus as the photo suggested – but then I am on old cynic !!
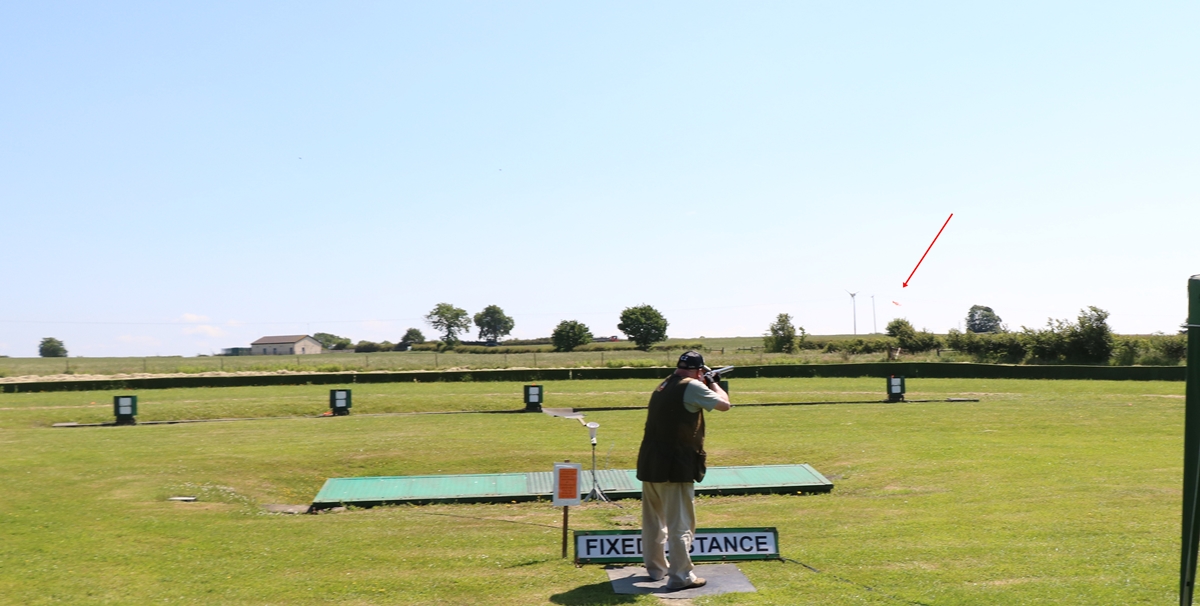
18th June – I’m sorry I missed posting yesterday – driving to Rugby and back without aircon and being out all day in the heat left just enough energy to clean my gun when I got home! I got a taste of things to come today as son Giles is buying a flat that needs complete renovation and muggins has volunteered, so today was a trip to IKEA in Milton Keynes to look at kitchen units – and another 3 hours of driving without aircon – the car showed 31.5 C so another ‘boil in the bag’ experience! I took some videos at the helice to see how easy it was to track shot – helice is not the best discipline to try the experiment on because you don’t know there the hit will be so need to keep a wide field and thus a rather low resolution, and you need to be fairly well in line with the gun which put you directly in line with the smoke with muzzle loaders – plus a lot of shots are with the bird not rising above the horizon – I managed one shot where you could see the shot going away after the impact, but the impact itself was obscured by smoke – so not much use. I haven’t looked at all the many videos yet but I’m not hopeful – the rabbit one I did previously was much easier as I knew where the impact would be, and it was shot with a breech loader so no smoke. I’ll have to set up a better trial of airbourne shots! I took a number of photos of shooting, but didn’t manage to get any of the moment of firing!
This is the helice layout – when ready the 5 traps spin up the ‘birds’ and oscillate the launch direction back and forth and up and down , and on the pull command one at random fires off a clay in a random direction – they have a more or less completely unpredictable flight path although in general they follow one of a number of familiar patterns. The object is to separate the white inner part from the orange wings – the white part must drop within the fence for it to score -one of my precious and rare hits took a long time to separate and carried over the fence – no score! Its a tricky target and you have to hit the ring at the centre of the wing to break them apart – probably easier with a breech loader with some choke – anyway our winner managed 12 hits out of 20. My score will remain a closely guarded secret! ( I think the photo above is a breech loader shooting between our details)
Helice is great fun and we are extremely lucky to be hosted by the kind folk at the Rugby club – one of only three helice layouts in the UK – explained by the fact that they are very complex and expensive installations to run!
16th Off early tomorrow to Rugby for the Helice Shoot – I will use by little Henry Nock converted percussion – probably with 1 1/4 oz and 2 2/4 Drams of powder if my shoulder stands it – when its hot I shoot in shirtsleves so no padding. We only shoot 20 shots, spaced over the day so its not very hard going. I have packed my best camera and tripod as I want to catch some videos of the shot pattern if I can – the camera shoots at 50 frames a second so given the success of the rabbit video there is some hope. I tried to buy a spare battery for the camera but it turned out to be the wrong type – I’ll pack the charger in case I can find a socket. We go to the pub for a meal after the shoot, so I’ll be late back – so the video results will have to wait until Sunday.
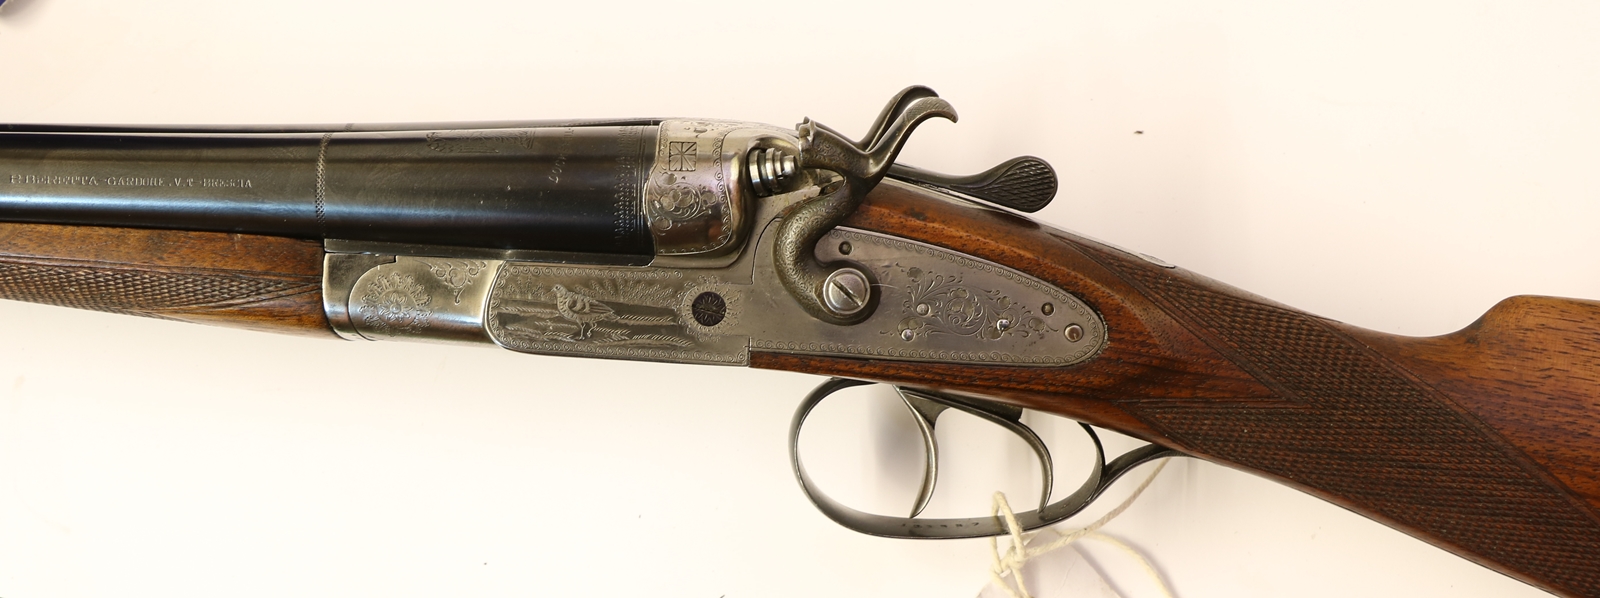
15th June A morning at Cambridge Gun club – I took along my Blair and Sutherland double flint 18 bore to see if I could get it going but I couldn’t get the ignition speed anywhere near fast enough for reliable shooting – Bev had a go and of course got it to shoot perfectly! I was using some fine powder I had for priming, maybe old FFF, not the Swiss OB that ‘proper’ flint people use, so that is probably at least part of the problem. Anyway I gave up and got out my ‘new’ Beretta hammer gun – by then I was really not in the mood and was trying too hard so I didn’t hit much – I should have gone for a few simultaneous pairs – that usually gets me going! The Beretta is nice to shoot – when I came to clean it I looked at the date stamp under my microscope and found it was clearly 1931 not 1951 – so IF that is the date its quite a venerable gun – a very early M401 Vittoria? – not sure when they came in. I showed it to Dick, who knows breechloaders and he thought it hadn’t seen more than 100 cartridges through it in its life. When I came to clean the B & S I poured water throught the barrels and used the bronze brush and wadding and tissue and got the barrels clean – although old guns always come out dark grey unless recently honed. When I put it away muzzle down, shot came out of the end of one barrel! It wasn’t fully loaded – there was no powder but I had been loading just one barrel for the last couple of shots and I must have put shot in both – just shows the need for care….. In the afternoon I had a meeting in the Engineering Department about STEM clubs in primary schools – currently a hot area – lots of interest and lots of support if one can think of ways to utilise it – the only problem is that the kids in my club REALLY like making things with cardboard boxes and tape and bits of string plus a handful of cheap components from ebay etc and that is very resource light! We are trying to use expensive Lego computers but its a bit of a struggle and they still manage to incorporate cardboard boxes into everything – I brought half a dozen in with me this week and they had been seized and carried off before I had walked across the room!
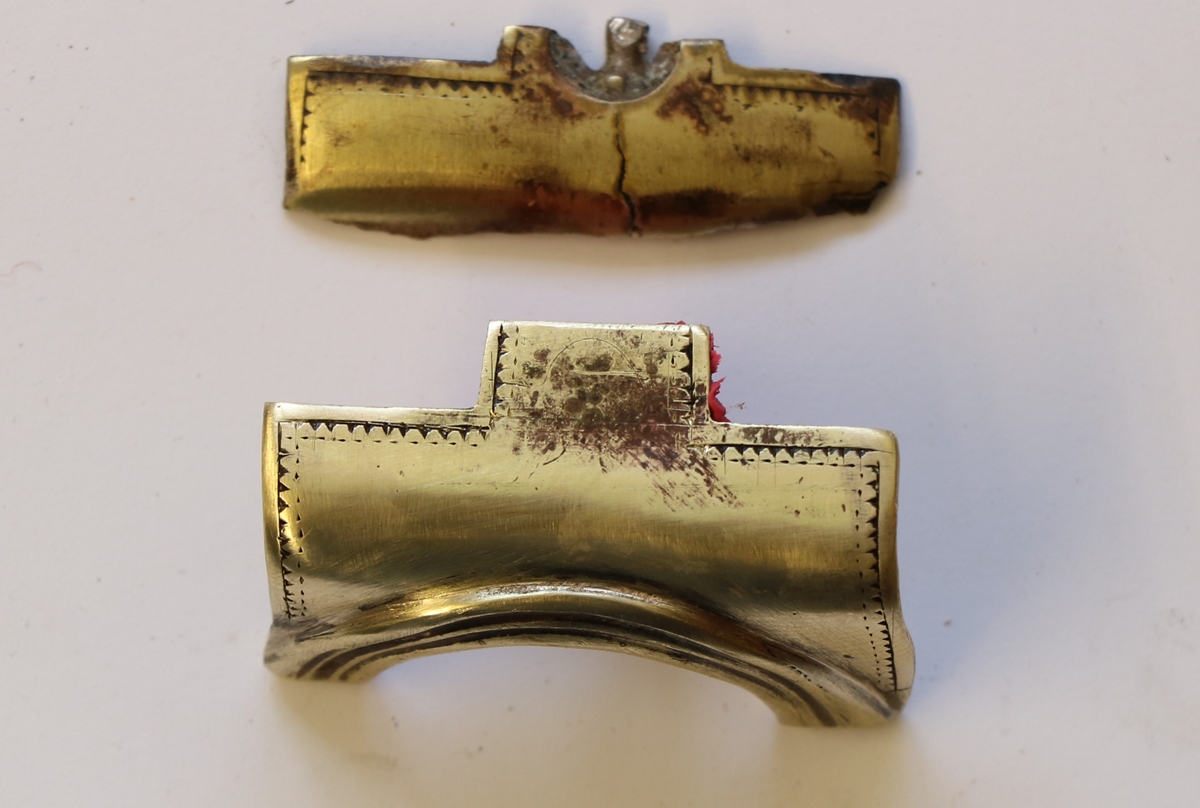
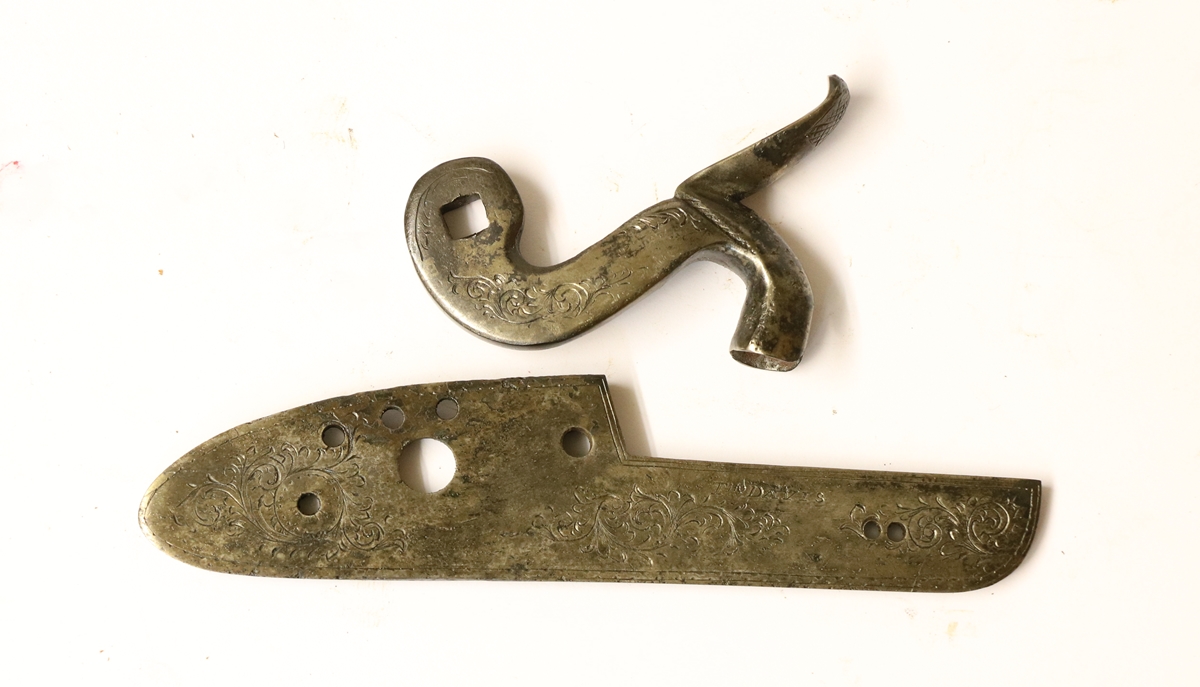
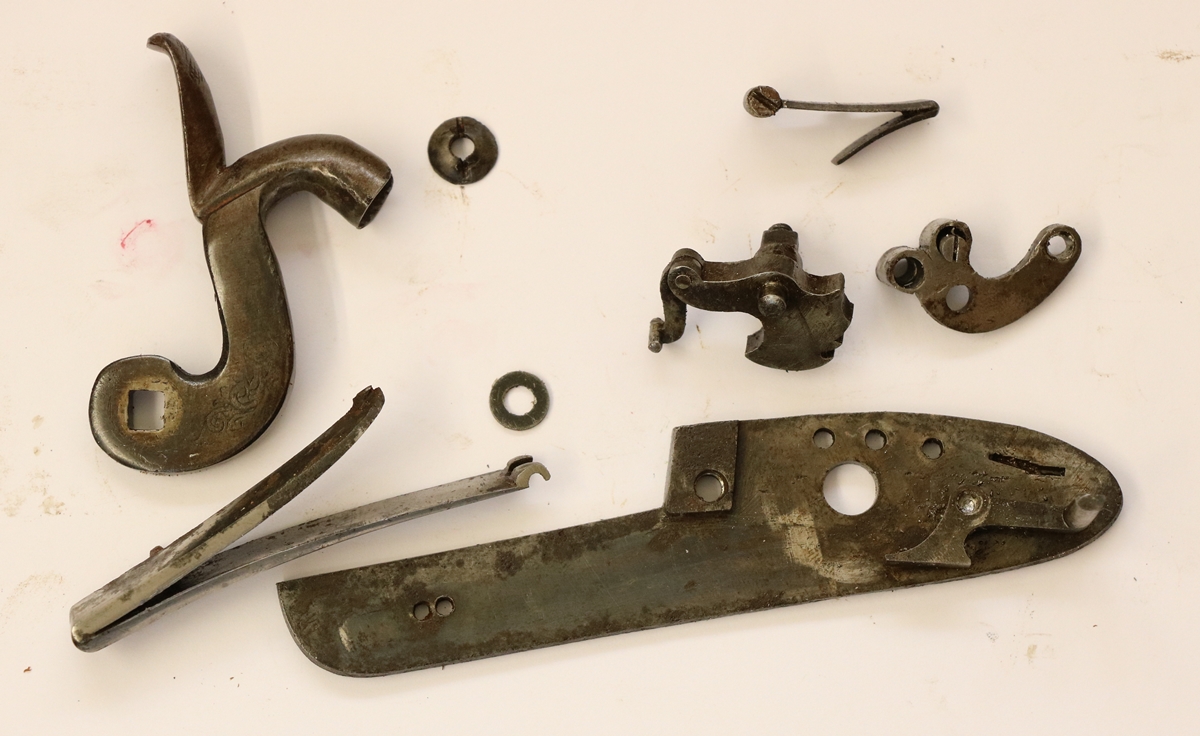
14th June – A small engraving job – Dick had an unusual Queen Anne turnoff pistol to renovate that had a brass sheet wrapped round the front of the stock under the barrel that continued into the long brass trigger guard. It had a crack in it but when he took it off to repair it fell into several pieces that had to be silver soldered together – when he was refitting it he dropped the brass piece on the floor and in stepping back to look for it, trod on it, whereupon it fell into numerous pieces – to numerous and too fragmented to be re-used. Anyway having a workshop full of bits he found a piece of brass the right colour and made a new one which I have now engraved a border on. Brass is a pain for not only can it be cussed to engrave, but it comes in many different colours, and old brass is usually what we would call ‘lemon brass’ – somewhat paler than modern brass, presumably more zinc and less copper. Strange stuff brass – it isn’t an alloy ( Bev says it is, but if so its a very funny one!) and you can’t change the composition by melting it and adding more of either component – it just doesnt form a homogenous material. I’ve also been fitting the cock to the other Lancaster lock, and filing them both to get rid of the outer skin left over from the casting process – it is possible to leave parts ‘as cast’ and many restorers do, but it looks a whole lot better to put a better finish on parts.
It needs to be silver soldered to the trigger guard and a countersunk hole added as per the top fragment
14th June – Bev pointed out that I was two days ahead of myself – I thought time was flying! I checked the Beretta hammer gun more carefully and its dated 1951 – in the US they seem to go for $1000 up so I probably did OK! They are not that common and went out of production in 1958 as the last model of hammer gun Beretta made ( maybe there was a retro line at some point?) so I’ll do a post on it later.
16th June – Collected my ‘new’ 20 bore from Southams at Bedford – it looks good and little used so I look forward to shooting it on Thursday. I have no idea when it was made, or why Beretta were making hammer guns, but perhaps someone will tell me. I’ll put a picture in the blog when the camera battery is recharged – I just ordered a spare as it doesn’t last long when you are recording 50 f.p.s videos as I was with the pendulum apparatus. One of the amusements of running this blog is looking at the Google search terms that brought visitors to the site – I can usually see a vague connection between the search term and something on the site, but I’m puzzled by one of today’s searches for ‘roofing services MOUNT HOPE’ – how that brought anyone to Cablesfarm.co.uk is a mystery – maybe I should enter the same search term and see where I end up! I tried but no sign of Cablesfarm, although I realise there is a very old post on renovating part of the roof of our house that might have got caught up in a search.
A bit of checking on the internet suggests it a Beretta model 401 Vittoria made around 1956 – it has a triple bite lock with cross bolt. I suspect that a 20 bore Vittoria in this condition is quite rare – maybe justifies the £300 I paid for it!
15th June – I spent today at the lab in Cambridge trying again to get a video of the pendulum gravimeter working – it was the original method of measuring gravity – prompted by the observation of George Everest in 1856 that his pendulum clock gave a different time when near the Himalayas than when far away. We have an original apparatus from 1926 that was used from that date until the early 1960s as the best absolute method of determining the value of gravity at any place. In the 60s it was used by the American military to measure the gravitational field of the earth so that they could calculate the orbits of satellites they intended to launch – if course once the satellites were in orbit their trajectory could be measured and a more accurate measurement thus made of the gravitational field affecting them. The method involves swinging two pendulums in antiphase ( to balance any forces) and timing the swings against a very accurate clock – and therein lies the difficulty! In it was a few years before radio time signals were available, but for convenience I’m using my Casio watch, so it won’t be an absolute measurement. Tomorrow I’m off to Bedford to pick up the 20 bore hammer gun from Southams – its always a slightly tense moment when you first get your hands on a gun you have bought, even if you viewed it before the sale. Dick and I see a lot of guns that people have bought at auction without seeing them – sometimes it turns out to be a bargain, but occasionally there is a good reason why it seemed like a bargain at the time!
11 June – Out at a party – friends have been having Elderflower wine making parties every June since 1981 – they used to make 60 gallons a year, but are now down to 20, anyway a very peasant day. I sharpened another batch of gravers when I got back and was going to do a bit of practice but started to look at the Holts online catalogue for the 22nd June sale – the website was driving me mad because I couldn’t get back to the catalogue after setting a track. There are lots of interesting guns in the catalogue, but I can’t help getting the feeling that the cheaper items are now being given deliberately low estimates to get more people interested – I’d be surprised if any of the low priced flint and percussion pistols and guns sold for anything near to the low estimates based on prices that Southams got. I don’t think it applies to the mid & top priced stuff, which I guess may fall within estimate or within a bid or two as usual, with the odd exception. The only factor likely to bring the price down is the sheer volume, but I’m not getting excited about bargains, although I might have a punt or two on spec.. I’ll see if I can get a sense of the pricing policy from an inside source when I view! It’s an interesting sale, and I’m tempted by one or two things – I wouldn’t mind extending my revolver collection to later types from the Adams and Tranters etc. and the last bit of the Bull collection is for sale. I’m puzzled by changes in the number of people visiting this blog – its usually pretty steady, varying by +/- 20% each day but pretty much keeping around an average number that varies slowly on a month by month basis. It went form about 200 a day in the winter to around 130 recently and then to 100 in the last couple of days until today when it jumped to almost 400, an unprecedented number. Before that happened I thought that the number of visitors was weather dependent, the better the weather the less time people spent indoors on their computers – but that doesn’t explain today’s jump. My only guess is that a new version of the software that does all the hard work of recording visits to this site, and which was loaded automatically today, has in some way double counted visitors…….. we shall see!
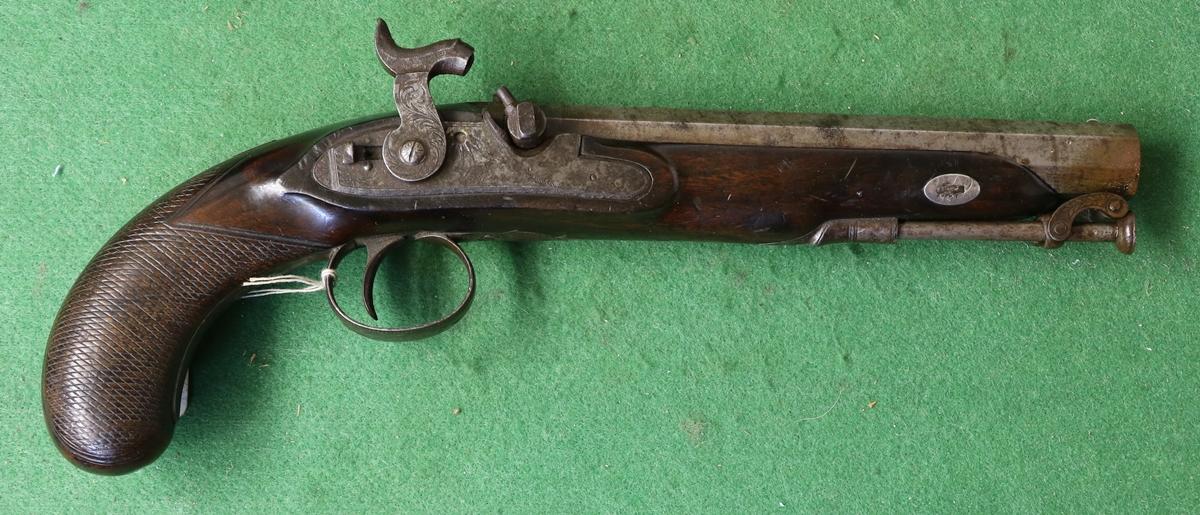
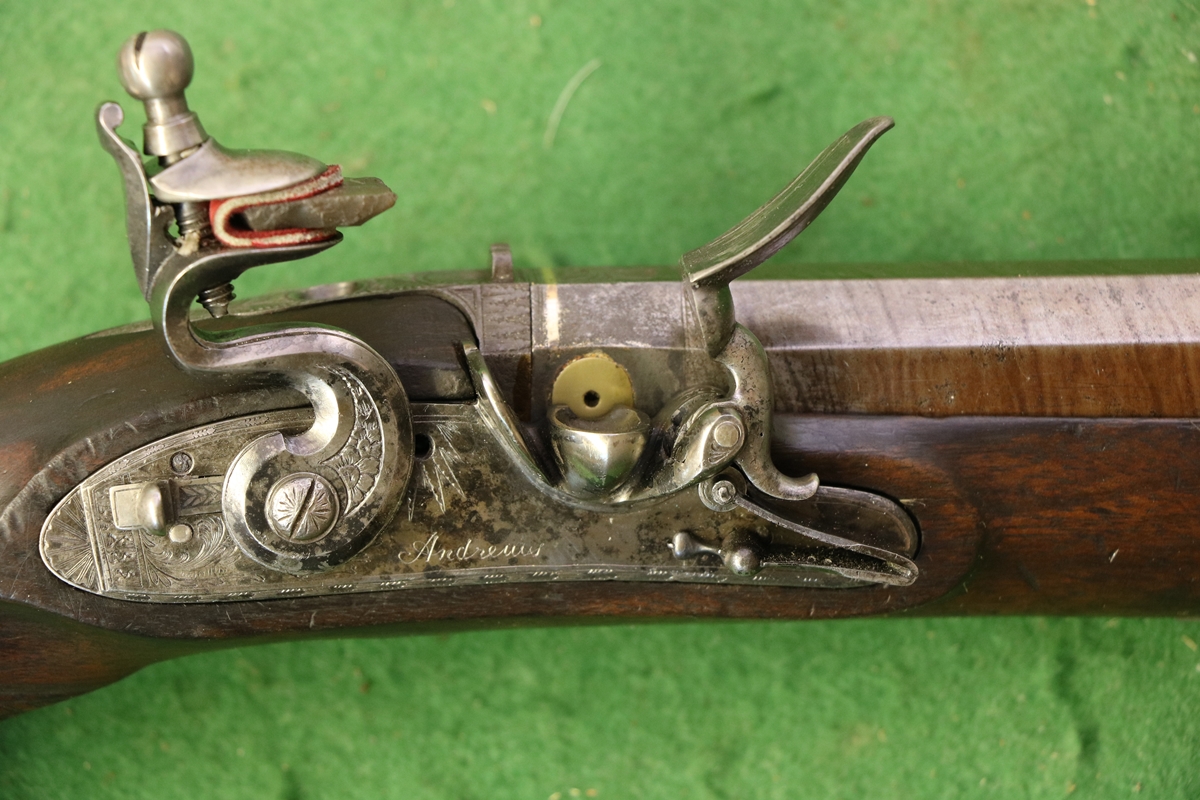
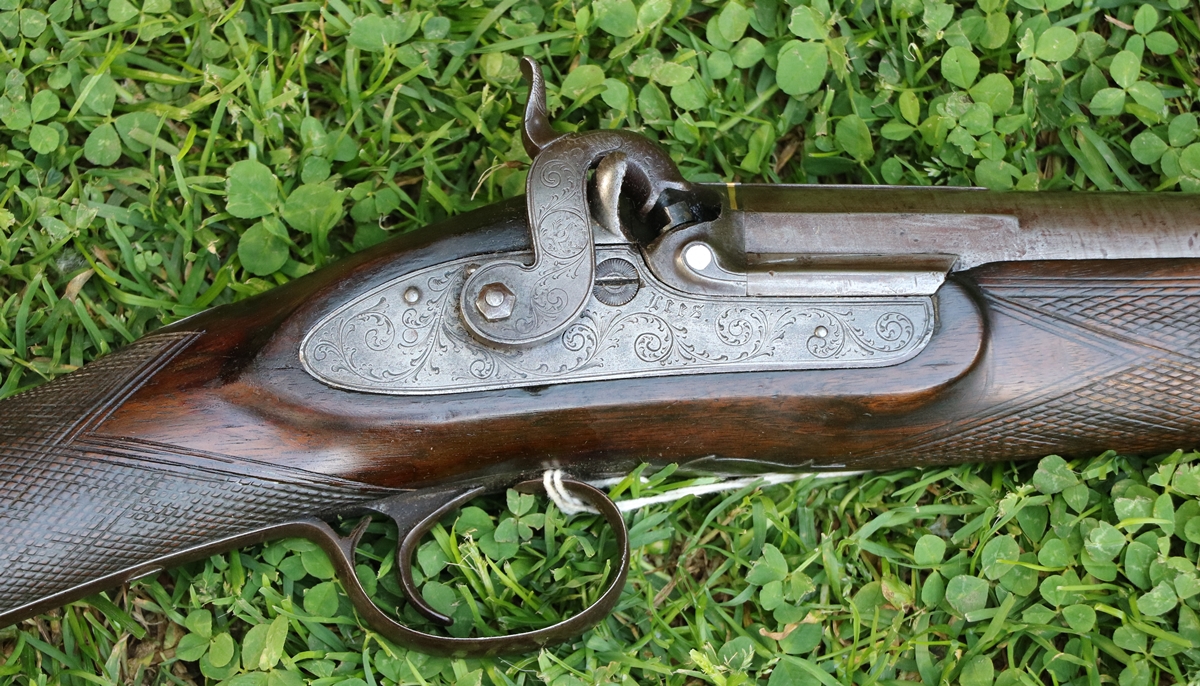
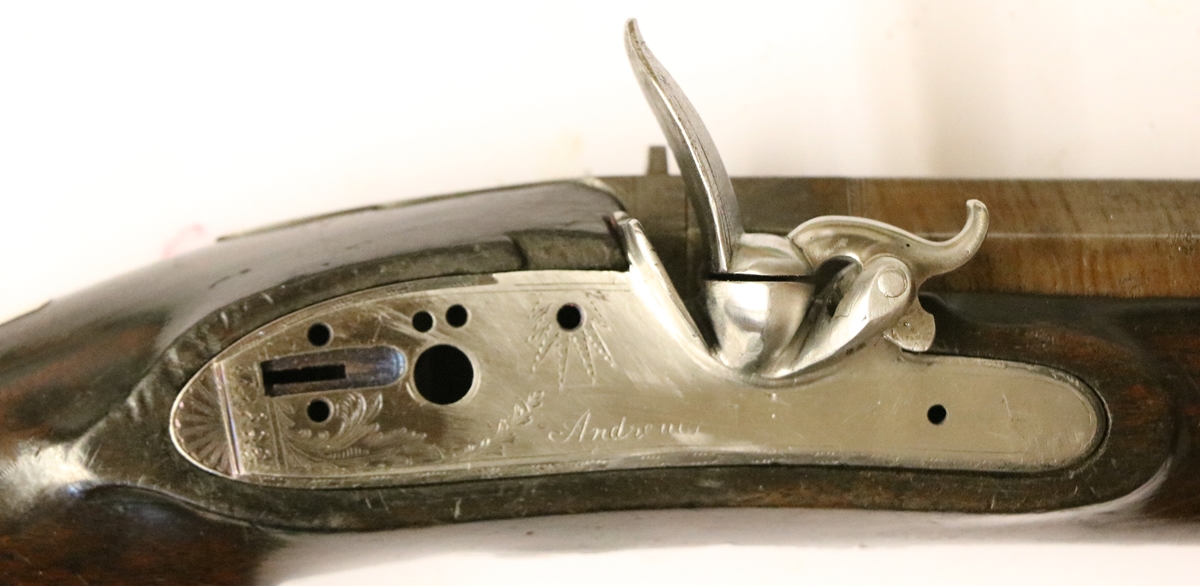
10th June – Our recession shoot at Cambridge Gun club – a beautiful sunny day to be standing round outside, and a fun shoot. A good range of targets for the main shoot shot as 30 singles with 1/2 oz of shot – I don’t know if it was the targets or the half ounce but the top 4 scorers only hit 16/30 – I manages a typical 10, but when you massage the figures they hit 53% of targets and I hit 33% so I was only 20% (1 in 5 targets) worse – for every 6 targets they hit 3 & I hit 2, which is a reassuring way to look at the statistics – the election results and commentaries should have taught you about creative ways to spin the numbers! Next weekend is the Helice shoot at Rugby which is always fun – I’ll use the same gun, my little 5 1/4 lb Henry Nock with a 13 1/4 inch pull – for some non-obvious reason its a lovely gun to shoot – as long as you don’t try shooting 2 3/4 drams and 1 1/2 oz of shot, at which point it gets a bit punishing after a few shots – I was using a shutter type shot flask I don’t normally use recently after my normal Irish pattern flask had run out and thought it was dispensing 1 1/4 oz as marked, which is just about OK with the Nock with 2 3/4 drams, but when I checked the flask after the shoot I found it was over 1 1/2 oz! I normally shoot 2 1/2 drams and 1 oz in it. As promised, here is the Andrews officer’s pistol finished (as usual, click on the picture for a decent image);-
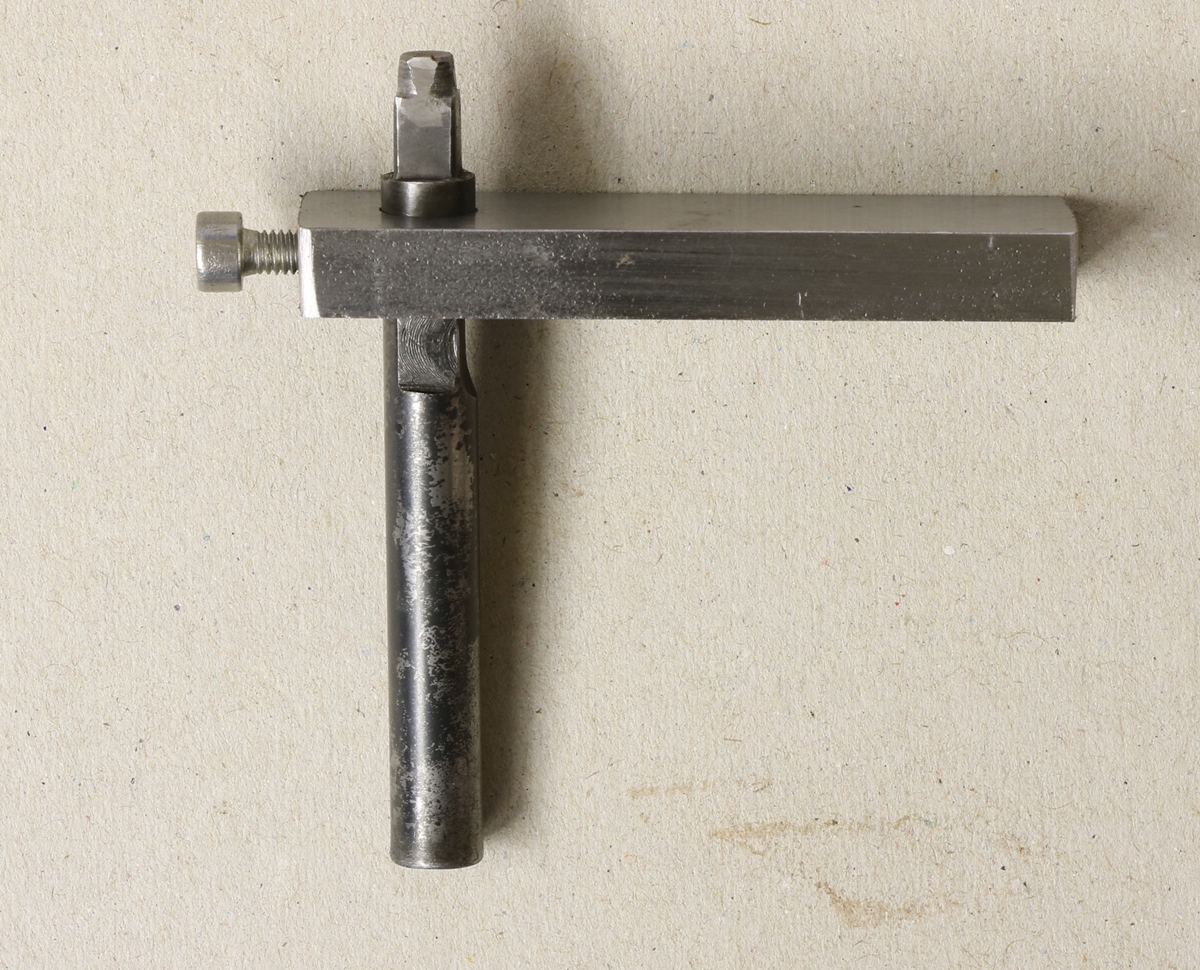
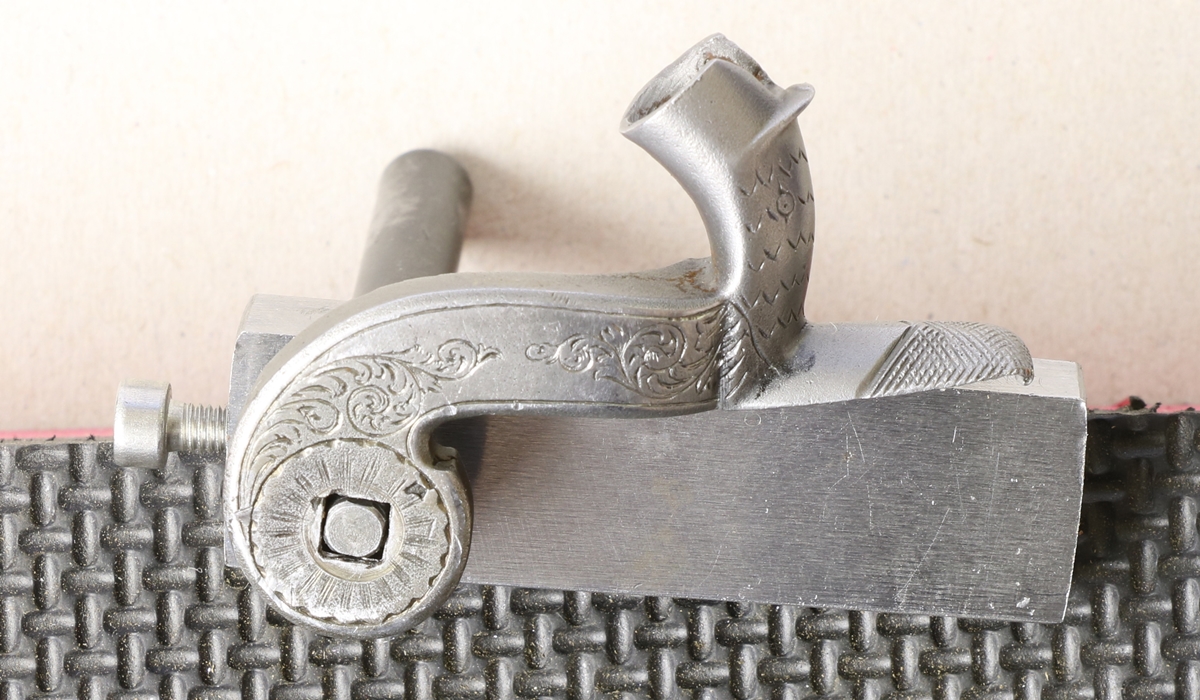
9th June – When I came to file the square holes for fitting the cocks on the Lancaster project I got to thinking about how interchangeable cocks are, and how standard the size and alignment of most English percussion guns is – for instance the original cocks off the genuine Lancaster rifle (c1840) have pretty well exactly the same alignment and almost the same fit as the tumblers in the locks I made that came from a breech loading hammer gun with Stanton rebounding locks (C 1864?). My Samuel Nock double with odd cocks took a pair of good John Manton cocks I happened to have without any modification at all. I guess they must have been jigged on more or less standard jigs, or all come from the same workshop in Birmingham! Anyway I decided that I would make a jig to mark and swage the holes in my blank cocks to the same alignment as the originals. I turned and filed up a squared rod and hardened it and fixed an adjustable arm to align the back of the cock against – the jig has a squared section and a 5mm pin for initial alignment. It seems to be working… time will tell………………… I’m off to Cambridge Gun Club for our monthly shoot tomorrow – this time its our ‘recession shoot’ where we are limited to 1/2 oz of No 8 shot – its surprising how little loss in ‘kills’ there is – As I intimated before, I’ve gone down to shooting 21 gram cartridges in my 12 bore, hence buying the 20 bore yesterday. A lot of the Anglian Muzzle loading shooters are shooting .410 and 28 bore breech loaders as its more of a challenge!
8th June – I was supposed to be off to Paris for a conference today but one of the ‘aged parents’ was admitted to hospital and that put paid to that plan! I thought I’d finally put the Andrews pistol to bed and so cleaned up the trigger guard screws on my wire brush – only one of them pinged off and I couldn’t find it anywhere – normally a quick sweep round the floor with a magnet on a stick will pick screws up along with a load of ferrous rubbish but no such luck so I had to make a new one – fortunately woodscrews into guns are more like pointed metal screws and have a thread that approximates to either UNC or Whitworth so can be cut with a die. The technique is to leave a long head and cut a temporary screwdriver slot in the top so you can screw it in tight and mark the final position of the slot on part of the screw that will remain (slots align fore and aft) – the excess is then cut off and the final slot put in the marked position and the head filed to the correct profile to lie flat on the metalwork it is securing – it takes a bit of trial and error. Once right the screw is hardened using Blackley’s colour case hardening powder ( it doesn’t impart colour but does tone down the metal . I then pop it on top of the AGA hotplate for 10 minutes, then melt a bit of beeswax onto it.
Having put the Andrews together it remains to put on a few coats of Slackum and then I’ll post a final photo and put it to bed. My next project is finally to fix the cocks onto the Lancaster I restored years ago – its worse with a double barreled gun as both cocks must be in exactly the same alignment – I am tempted to use Bev’s technique and drop an end mill into the back of the cock and make a disk to fit the end mill hole with a square hole so that you can rotate it and silver solder it into the correct orientation – the only problem with the Lancaster cocks is that they have grooves for the safety catch in the back of the lock that restricts the space for milling a recess. I think I’ll tough it out in the traditional way! If it goes wrong I can revert to Bev’s way.
I watched the Southams auction on the web on and off during the day – I had left 9 bids as I thought I would be travelling – most of the things I was interested in went for a lot more than I was prepared to pay, mostly guns as projects. I missed out on a few nice lots like a couple of very old horn flasks and a couple of patent shot flasks, but obviously I didn’t want to pay teh going rate! I did buy a set of brass case corners on the spur of the moment as they were cheap, and I bought a little 20 bore Beretta hammer gun as I fancy having a light gun and I’ve taken to shooting lighter loads in my 12 now. I paid more than I intended but what the heck, I have to collect the brass corners so I thought I might as well have something worthwhile to collect! The only things that are really cheap are the dozens of side by side 12 and 16 bore boxlock guns – you could pick up a functioning double 12 for £10 – £20 and something quite respectable for well under £100. A fair number didn’t attract and bids.
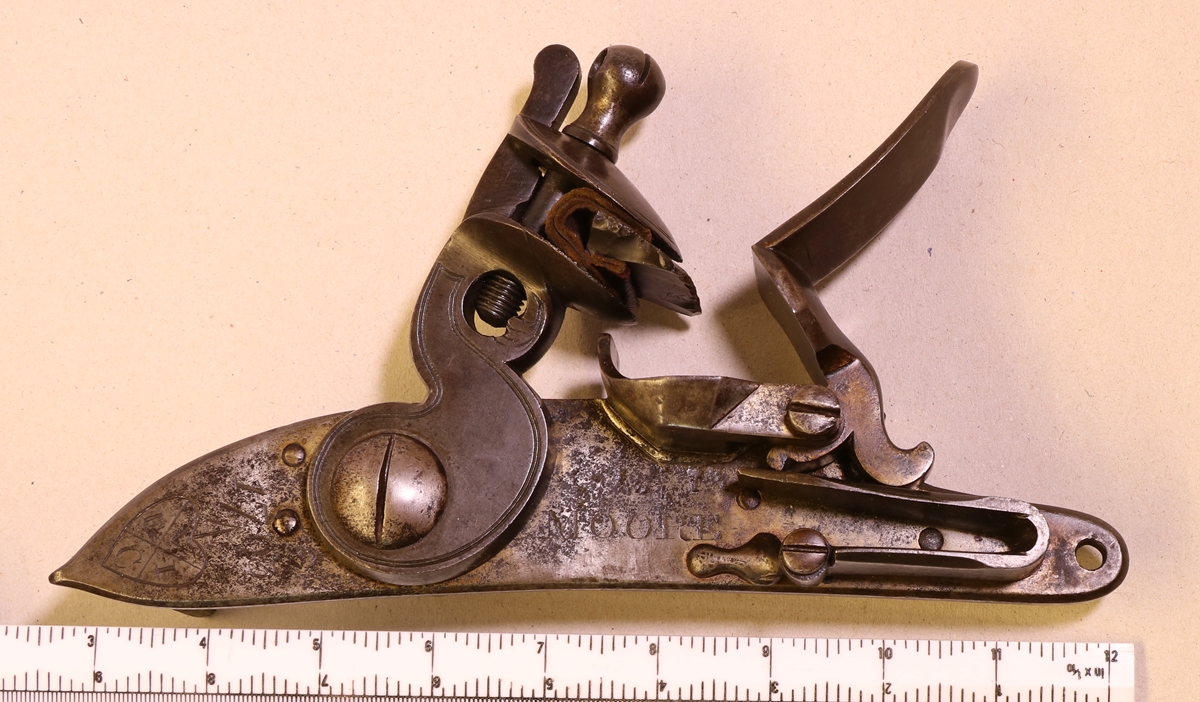
7th June – I swapped a couple of flasks for a giant lock this morning – its a massive flintlock from an East India Company wall gun. I have such a gun but converted to percussion and made into a punt gun – it was converted in a very crude manner so I wanted to put a flintlock in and tidy it up a bit. The stock has been cut down to half stock but maybe I’ll put it back to full stock if I can find a suitable piece of wood. I know it was an IEC wall gun from comparison with a very nice one that was on the Flintlock Collection website some time ago. I knew the I swapped lock had had a replacement cock – it probably isn’t quite the right shape, it should be profiled not flat – but a careful look convinces me that it is a back conversion from percussion. Apart from the cock – which could be a replacement, the frizzen has no marks on it, which means it was replaced too, and looking at the lock you can see a patteren of corrosion on the lockplate that corresponds to the deposits left by caps firing – the most corroded areas would have been shielded by the pan had the gun got to that state as a flintlock – but with a bit of work it will come round to being respectable. I’m sure that these re-conversions have been around for so long that they predate the current owners. See photo below.
I went over to Southams auctions and saw a few lots of interest and left a couple of bids, but most of the antiques were of junk status and nothing could have been made of them – I did spot one potential bargain, but probably others did too! I’ll report fully after the auction so that I don’t encourage anyone to bid on the same lots!
6th June – Devoted the morning to clearing out the workshop so that I could move in there! Then tackled the woodwork of the Andrews pistol using my usual sequence of operations ; wipe over with meths to get rid of any dirt or stain and take off a bit of the varnish (if its shellac), then brush in paint stripper and agitate with a toothbrush and clean off with white spirit and medium steel wool and toothbrush again. Then gently steam the whole stock over a kettle to raise dents. Then go over all the chequering with a tool I made with a sharp angle (about 30 degrees) with a point on one end and small saw cuts on the other – the point is good at clearing out muck and if you need to file the groove the other end comes into play. It took a bit less than an hour to do the butt of the pistol and it is much improved. I then repaired the edge of the fore-end – you can just see the joint – then coloured the wood to bring the new wood into line with the old and hide the joint. A final run over with 0000 steel wool and a quick wipe over with shellac varnish (diluted for the chequering ) to leave just a thin coat. I’ll give it a coat of wax polish tomorrow, maybe after another of shellac. I took off the tail pipe as it seemed loose – it turned out to be very rusty on the hidden side so that is currently being derusted. The trigger guard and trigger and false breech were all cleaned before, so I put them back having cleaned the pin for the trigger and applied a little KO-CHO-LINE leather dressing from an old pot that seems to do the trick! I paint all the undersides of the furniture with a flow coat of MetalGuard to prevent corrosion. The side nail is new – I forgot to harden/colour it so I’ll have to do that, and the ramrod and tail pipe need to go back too…… But its looking much better now!
The secret of any restoration you do is balancing the wear on all the parts to be compatible with each other so nothing ‘shouts’ at you.
The chequering look very crisp and you can see the figure of the wood – much improved.
In fact I don’t think I actually had to recut any chequering – just clean it out.
Here is what it started out like! (I still have the original lock plate, cock and drum & nipple so it could revert)
You can see the faint line of the repair above the bolt.
Teeth cut with a bit of hacksaw blade ground to a sharp V
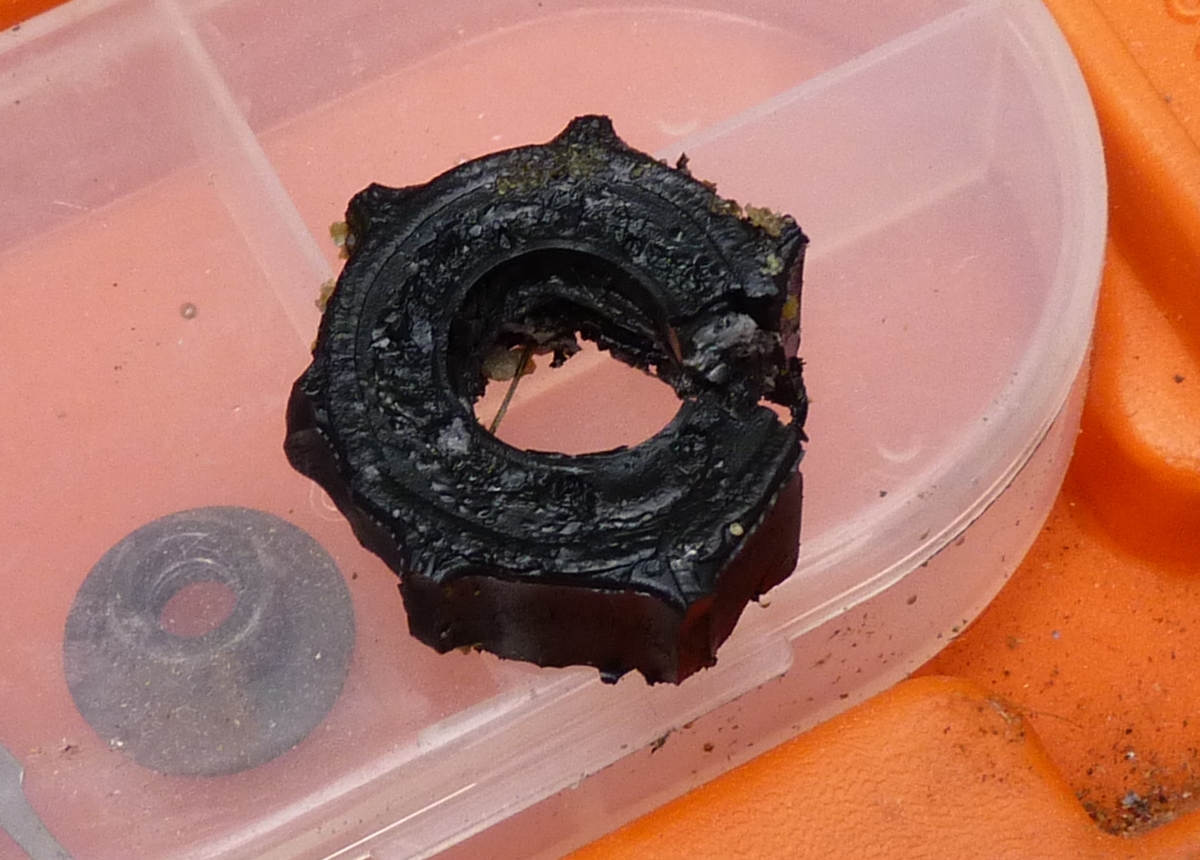
5th June – Sunday was spent sailing our Cornish Coble on the Orwell with Giles – we had a little problem with the outboard overheating and had to return to Wollverston to get the spare from the car but had a super sail down to Levington and back. This morning I stripped the leg down and found that the impeller was totally perished and disintegrated and the water passages under the water pump were completely full of salt – it looks as if the drain hole that lets water run out of water passages when you take the outboard out of the water had got bunged up so every time you used the outboard you left 160 ml of salt water in the cavity that then evaporated and eventually bunged it all up and caused an alloy part to split. Luckily the engine water path was clear as it was still able to drain – so I’ll get a repair kit and a new plate and hope it is all OK! I usually run the O/B in fresh water after use but obviously the previous owner had not, and had had it in and out of the water many times – a useful lesson learned!
All that is left of the impeller!
The passges on the right should be 20mm deep – they are the drain for salt water when the O/B is lifted!
5th June – I went to Dick’s for another look at the 1660 Blunderbuss – we are trying to ascertain how much is original – our conclusion is that any repairs and changes are likely to be very old – the gun itself is 360 years old and we think that any repair was carried out in the first 50 or at maximum 100 years of its manufacture, so it is all now part of its historical value. It has a sheet brass sideplate that is a rather poor fit – there is evidence that the three ‘nails’ that held the lock had individual washers originally – I think the right thing to do is either leave the sideplate as it is or possibly put back three individual washers as there are clear marks where they went, but not to alter the sideplate for a better fit. Dick thinks the client will want the gun to look ‘good’ but my response would be to explain why that is not the right course of action to preserve the value of the gun – principally the historic value. I checked the inside of the lock – it is an intermediate type dog lock in that it still has the cock pinned on from the inside without a cock screw but does have the sear acting on arms on the tumbler inside the lock, rather than the original system that had the sear acting through the lock plate directly on the cock ( the sear acts horizontally on a vertical pivot, see previous photo. )
3rd June – How the year flies – almost half way through and still not done most of the things I meant to! I finished the Andrews touchhole after a little messing about – I wanted a disc of silver so I epoxied a bit of sheet onto the end of a short piece of 10mm rod in order to turn it down – for some reason the epoxy didn’t hold, nor did the very low viscosity cyanoacrylate I tried next – in the end I got it turned down and soft soldered onto the plug in the barrel and filed down – I thought the silver was wrong, so I gold plated it – looks OK but the joint round the edge is a bit rough as it is an old tapped hole – I should have dropped an end mill into the outside of the hole! Still no-one looks at things in that detail except experts and they will find lots of other things to fault! I started to clean off the old varnish ready to clean up the chequering and steam out a few dings, but shopping, mowing the lawns and getting the boat ready for a day’s sailing tomorrow ( now today) took up the rest of the day and I had a set of circuits to get ready for the school tomorrow, and a powerpoint to accompany them……
Messing about turning the silver disk meant the hole was no longer in the centre, but actually it is a better position with respect to the pan and it doesn’t show!
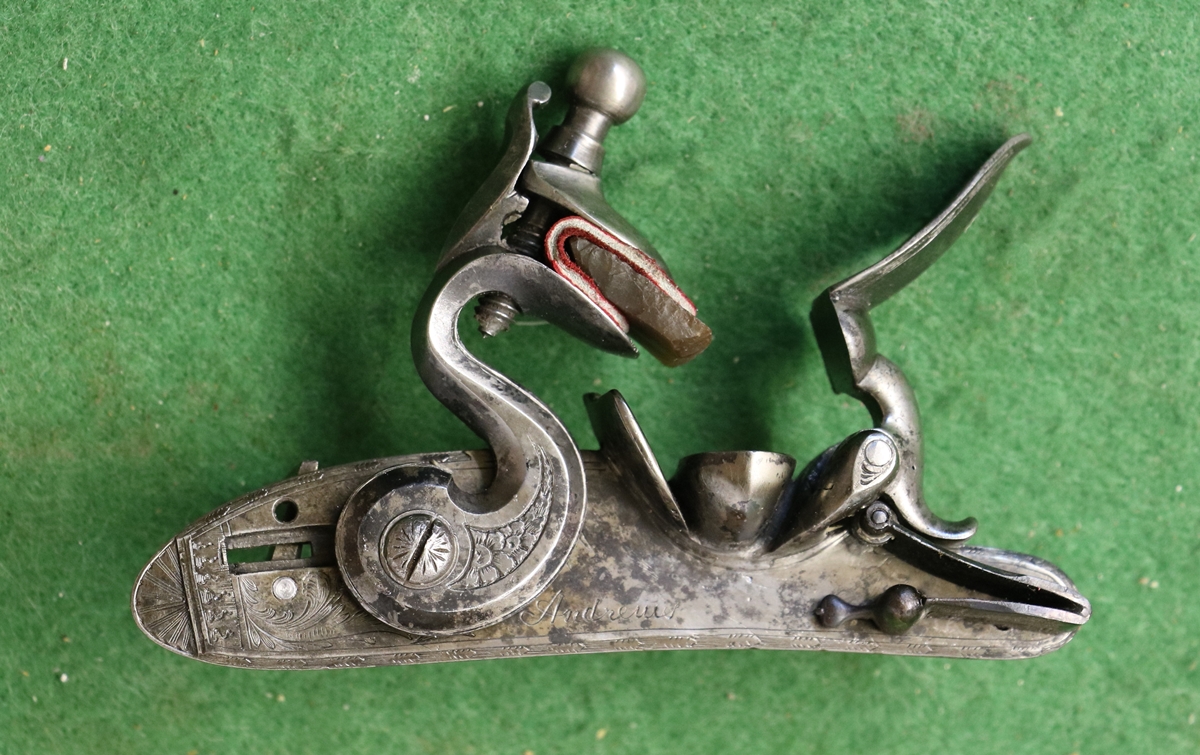
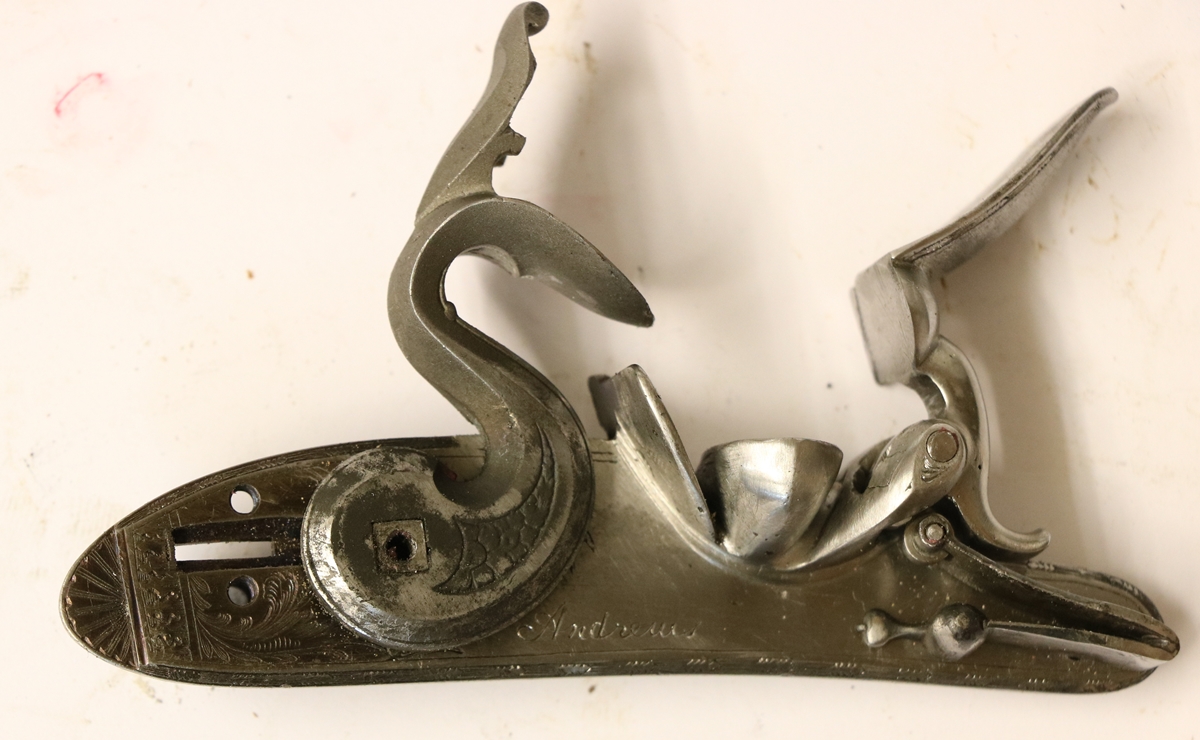
2nd June – More on the Andrews pistol – the new lock is now finished and working – I haven’t tried snapping it off yet as the trigger is still out of the stock and I pinched my finger when trying to fire the lock in my hand! I have now filed up the replacement safety catch and coloured it and fitted the safety assembly to the lock – the external slider has a tab that goes through the lock and is pinned to a boat shaped catch that intercepts a notch in the tumbler in the half cock position. The boat shaped bit sits in the V of the sear spring, which has a spring cover plate that presses on a lump on the boat to form a detent and hold it in either the locked or free position. I used all the internal bits from the original lock so I didn’t need to make parts, and it all went together just fine, although I did have to make all new screws to hold it together as the threads on my lockplate were not the same as the original lock. I also made a plug to screw into the hole where the drum and nipple were fitted – it turned out to be 3/8 in x 20 tpi – not a known thread, so I turned up a length of thread on my lathe and made a short plug – it was a bit of a fiddle getting it to fit as the hole seemed to have a sightly tapered thread – anyway I cut a slot in the plug and got it to the right length and it fits very snugly – I’d happily shoot it except that I didn’t bore out the reverse so it won’t work efficiently. Having got the plug in place and slightly recessed below the surface of the breech I will turn up a disk of silver in imitation of platina ( introduced around 1809) and soft solder it on top of the plug. I then need to see what needs to be done to the woodwork and put it all together and it will be finished at last! ( I have put picture of a 1660 blunderbuss from Keith Neil and Back’s book on the blunderbuss Post….)
Looks like I didn’t make the sear spring screw quite long enough – I think I forgot to allow for the little cover spring that engages the safety slide. There is always some ‘snagging’ to do!
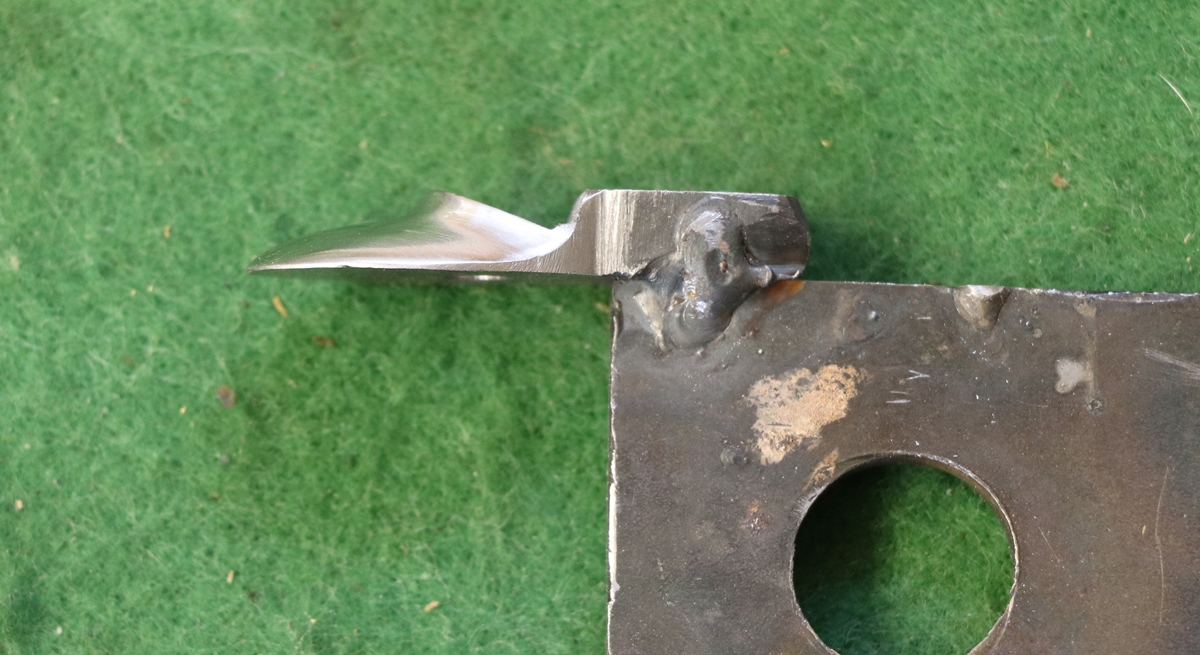
The back of the lockplate bolster is a bit of a messy weld but it doesn’t show! The cock is a little misaligned – the shoulder should be hitting the top of the lockplate – at the moment its the tumbler that is stopping it – not so good!
The touchhole will get a disk of silver soft soldered in place on top of the steel plug.
1 June – Spent a happy morning making the safety catch for the Andrews lock – not bad, although Dick pointed out quite rightly that I’d made the ‘knob’ a bit heavy looking and I’ll have to fine it down a bit as I agree with him. Photo when that is done! While I was at Dick’s he showed me a very interesting blunderbuss that he had to ‘restore’. It is probably pretty rare and of some historical importance as it looks to be dated from around the third quarter of the 17th century – possibly as early as the English Civil war (1649 – 1660) so I urged Dick to do the absolute minimum and not to add any bits that could be mistaken for original parts, or remove anything that he doesn’t think is ‘right’ – just repair the major cracks in the woodwork and leave it at that. I think the proof marks are Birmingham – if it was made under Commonwealth orders it would presumably have had a shield proofmark? The lock is in near perfect condition – I think its original along with most of it – but it would be easy to fake. The only odd bit is the trigger guard and possibly the side plate. Key features are a horizontal sear pivoting on a vertical axis, and the cock with a square peg secured to the tumbler with a pin on the inside, as well as the overall flat dog lock design with the ‘teat’ on the tail – all of which I’d guess put it before 1670 – that’s about 100 years before most of the guns one sees! I’ll put all my photos in a separate post – 17C Blunderbuss. I am jealous!
This is just the sort of gun that my warning in the header about destroying value was aimed at! Almost anything you do is likely to adversly affect its historic value.
See Post – 17C Blunderbuss for more photos.
29th May – I remembered that to shoot the William Powell I needed to put on a 3/4 inch leather butt pad – I had stupidly forgotten about it! Today I got back to the Andrews lock – I made a top jaw out of a bit of 1/4 inch plate – I always leave a tail on the working bit to hold it in the vice , then when I come to work on the back edge I weld the tail onto a scrap to get the vice jaws out of the way – see photo. I turned up a No 10 UNC top jaw screw and case hardened them and the frizzen and frizzen spring and tempered them in the Aga – the frizzen spring I tempered on top as its hotter and I wanted a blue spring temper. It all went together, but the frizzen cam got stuck in front of the roller and was difficult or impossible to shut, and also was a little loose in the fully open position – increasing the size of the roller on the frizzen spring from about 4.6mm to 5.8mm diameter sorted the problem. That part now seems to be in order, the next problem is sorting out the safety catch – the slider outer part is broken off in front and behind the bit you push, so I’ll have to try building it with weld – maybe tomorrow’s job.
Holding top jaws is a pain – in the later stages a screw through the hole works.
The slider of the safety is in need of some delicate welding – note the larger frizzen spring roller in this photo – it now works.
28th May – The Scottish National Muzzle Loading Championships were great fun and Tom and I enjoyed the shooting under light cloud, so it wasn’t too hot and the sun didn’t cause problems. There were 4 competitions – single and double in both muzzle loaders and hammer guns. There were a number of really good shots competing, so we were not really in the running for prizes although Tom did creditably in the double hammer gun. It was very interesting shooting more or less the same targets with 3 different guns ( I don’t have a single hammer gun so we used doubles as singles as did most people). My best shooting was with the Single barreled Henry Nock covert gun, which using the standard metric would be considered almost an inch too short in the stock for me. I did OK with the double Egg but had a problem with my beautiful William Powell – it is too high in the comb for comfort and the recoil was uncomfortable on my cheekbone. I swapped over to sharing the Bacon patent bolt action double 12 that Tom was using and had much better luck. I am afraid the William Powel is not a good fit, although it was only by shooting the same targets with different guns that made me realise – I’ll have to think about what to do with it – its a thing of beauty but I really don’t have space in my life for non shooting guns on certificate and I shall have to get another hammer gun that fits! We had a minor problem with the Bacon that will need attention before it is used again – we had 3 misfires on the left barrel as the cap wasn’t indented enough – the same cartridge fired at the second attempt in the same chamber, so either the force or the length of the firing pin is wrong or there is too much headspace due to wear in the bolt lugs – investigation due before next time its is used – I’ll get Dick to cat an eye over it.
26th May – Recut the Griffin – this is a difficult call – it’s an original Benjamin Griffin pre 1760 barrel ( Stamped F for ‘foreigner as he wasn’t free of the Gunmaker’s Guild) and it had enough faint traces of the engraving on barrel ( as usual the curves of Ds and Os – I do like it etc) to confirm what should have been there, but not enough to decipher if you didn’t know. It had been very badly rusted and then struck up, and as the previous photos of the woodwork show, it was in a pretty bad state, so the person who bought it wants the address recut along with all the other work. I checked out photos of engraving on similar early Griffin guns so that I got the formation of the letters correct and used the appropriate serifs – and noticed that they all used a small = sign between words. I think I made a reasonable job of it, and I hope that the poor original state of the pistol justifies the intervention for the owner- I do recognise that others may have a different opinion !
Sorry about the photo – had to use my phone!
25th May – I drilled the cock of the Andrews flintlock conversion for the cock screw in No 10 UNC and hardened and tempered the lockplate and cock. I bought a tub of anti-scale ‘paint’ from Brownells, so I painted a little in all the screw holes in the lockplate and the square and cockscrew hole to reduce the loss of metal through oxidation – in particular I didn’t want to loosen the fit of the cock on the tumbler. I coloured them a bit using Blackley’s colour case hardening powder – it doesn’t really colour, just darkens with splodges! I then tempered them in the top oven of the AGA at around 255 degrees C to give a bit of overall colour. It took me quite a while to get the cock ready for finishing – all the surfaces need to be filed to get rid of the cast surface and any small defects, and the cock engraving and border lines recut. I would put up a photo but I took the lock over to Dick’s to discuss a bit of it and left it there. While there I took some photos of a 7 bore percussion gun that is up for sale following the death last week of Mike Miller, a well known Essex gun dealer. It is a good working wildfowl gun, it has had a break across the hand that has been carefully repaired but appears to be in good condition. I’ll put the pics on the FOR SALE page. I picked up a couple of little engraving jobs – a scrap of metal to have a 1760’s style scallop and dot border put round it, and the barrel of a Benjamin Griffin officer’s pistol that has been sold but needs a few lines refreshed – it also has a very faint address on the top flat, which corresponds to the usual Griffin address – BOND STREET LONDON – The purchaser is being consulted as to whether he wants the address refreshed. And a couple of dog tags for Dick’s wife……… I used the GRS as I hate hand engraving hard brass, especially when plated.
I dug out a nice 9 inch pistol bore (.56 inch) barrel with all the right proof marks etc and in good condition – I had to repair the tang, but it is now a pukka barrel – I need to go through the books to find what it should be part of – I think it needs a 4 1/2 inch lock, and it will need brass furniture, but maybe the normal New Land will suffice? Another for the long line of projects……..
Here is the 7 bore by Lees – a medium quality gun that was someone’s wildfowling gun years ago, and could be again.
( having looked at the gun since I don’t think it weighs enough to be a wildfowling gun – they were usually about 12 lbs and this is less than 8 – probably a live pigeon gun)
24th May – I went with Yr 5 from school to an anniversary celebration for Bill Tutte who is something of a local hero – he was one of the Blechley Park codebreakers, and broke the Lorenz code in 1941. He came from a fairly humble background in a local village and now has a science and maths club and events run in Newmarket in his name – makes a change from fame for four legged inhabitants and kings and their mistresses which are the ‘normal’ Newmarket celebs! Apart from that I tackled the fitting of the cock to the Andrews lock- a job I dislike, and don’t usually do particularly accurately, although this time it does seem to end up a very nice tight fit and in the correct alignment!
There was a depression from the mould and the alignment wasn’t correct for the tumbler, I drilled a 2 mm hole through the centre of the square and then welded round it with piano wire and let it cool carefully in wood ash ( a good insulator of low thermal mass) – Dick had a nasty issue with welding on a .410 gun today as the weld had cooled too fast and hardened the metal so he couldn’t work it. Once I’d dressed off most of the surplus I drilled it 4.6mm and got the alignment with a layer of modelling clay on the back of the cock and started filing the square. I started a tapered hole from the back to get the initial alignment on one edge of the hole and corrected a slight misalignment as I enlarged and filed the square. A mixture of smoking the cock and pressing it on in the vice (gently) and filing in small increments secured a very good fit and alignment.
I now need to get a decent finish on the cock and drill it for teh cock screw and make a top jaw – I also need a set of screws to hold the lock parts on as my tapped holes in the lock plate are not the same thread as teh original plate holes.
23rd May – A busy day on the Bullard Archive, then I thougth I’d better sort out guns to take to Scotland for Tom and I to make sure I had enough wads and cards, so I checked the bores of all the guns I might take – it turns out that most are around 16 bore, although the Jackson is 14 and the single barreled Egg Tom shoots sometimes is 13 bore. So I spent a happy hour punching out circles of card! Some of the guns that we might shoot were taken off my shotgun certificate when I had a discussion with the firearms officer about the number of guns on certificate – now resolved. There is a slight problem for the police now as they seem to be using a computer system that doesn’t readily let guns appear from no-where and disappear to no-where and doesn’t like guns whose makers are not listed on its database, or that do not have numbers. It make it difficult for them to check antiques on certificate as they have been listing guns as ‘no name’ when they don’t have the name on the database, rather than adding it to the database. This is a problem for them when antiques collectors want to shoot antiques that qualify under section 58 of the firearms act and thus don’t need to be on certificate if not shot and for which no records exist. Firearms thus appear on certificates from no-where, and when one no longer wants to shoot them they disappear into no-where. I spent a good half hour explaining it all to the firearms clerk at my local office.
21st May – I thought I’d better get sorted to the Scottish Nationals, and realised I was getting a bit low on Black Powder after I’d finished making 100 cartridges for my lovely Westley Richards hammer gun (see post). As Tom shoots every class, as I do, we will get through a around 80 Cartridges plus extras for hammer gun (40 ‘bird’ each), and Muzzle Loading doubles (40 ‘bird’ each) and singles (30 ‘bird’ each). We’ll probably share the hammer gun but we will need separate muzzle loaders as the reloading takes time. – that lot amounts to quite a lot of powder (> 1 Kg.) and shot ( around 7 Kg). It also means I have to sort out around half a dozen guns – I’ll probably take a couple of spares as well – fortunately Tom can shoot most guns I can shoot, although he is quite a bit bigger than me! I used to shoot the Baker bolt action 12 bore (see post) – it was allowed to count as a hammer gun due to its very early date, but its getting a bit worn in the action (but still very safe) and deserves a quiet retirement – or perhaps Tom would like to shoot it one last time?
20th May – Out to a lunch party today that somehow seemed to sap my energy for work! I did manage to load 25 black powder 12 bore cartridges for the Scottish National Shoot next w/e, so not all wasted. I’m puzzled that the number of recorded visitors to this site has suddenly dropped from around 200 to around 150 per day – I do puzzle about the statistics but in this case I think its down to the way visits are recorded and in particular to the question of how the various catagories of rogues and hackers are counted or ignored – the software that guards this site and records users keeps getting upgraded, and I change various things to make it easier to keep a track of attacks, so nothing stays the same for long……. In reality I get the impression from emails that more people are viewing the site than in the past – I do get a pleasing flow of queries about antique guns that I do my best to answer as fully as I can – keep them coming……
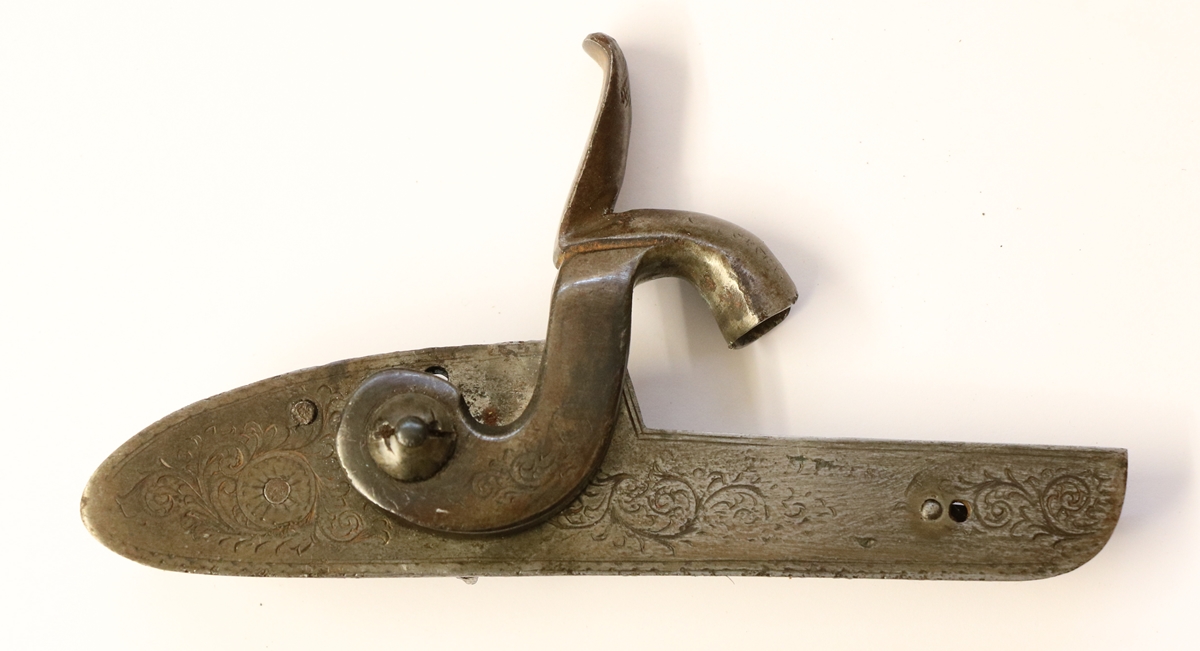
19th May – I finished off the Davis Lock below by making a stud and nut for the sear spring – it works fine – not worth a photo! I fitted a frizzen spring to the Andrews lock that Dick filed up for me – he had a casting that fitted so I abandoned the spring I was fabricating! I made an 8 B.A. screw to fix the spring to the lock plate, and then dropped it – I went over the floor with my telescopic magnet that is usually able to find any bits of steel on the floor, which is an old brick floor with lots of ‘texture’ but not this time – back to the workshop to make another – I didn’t mind too much as I quite enjoy making screws, and I had rather messed up cutting the slot in the first one. Made a roller for the spring – its a posh lock! and fitted it – not bad, I think it will work well – given how unpromising the castings for the pan and frizzen were, and how much weld had to be applied to make them work, I’m quite pleased. I celebrated finishing the functioning by refreshing the engraving round the border where it had got filed and bashed, and put a running leaf border round the frizzen to match the lock plate – I know its not how it was done, but I couldn’t ‘read’ the original engraving on the frizzen – there was some. That leaves the cock to sort out – I have a casting so its a question of fitting it – a job I hate! I finished work by personalising a de-capper for one of the AML shooters.
Andrews Lock: The frizzen spring doesn’t overlap the lock plate, but its a close thing!
18th May – Playing with bits of guns today except for a meeting at school in the afternoon and a trip to Dick’s. I tackled the Davis lock I re-engraved – it needed three screws made to hold the bridle and sear as the previous screws had no threads left – they are No 5 UNC with .125 inch shafts. I then ran into the problem that the sear spring screw hole has the same thread, but a No 5 UNC screw is too big to go through the eye in the spring – its a case of sorting how to hold the spring on with a smaller shaft on the screw or making a new spring with a bigger eye as I don’t think that one can be opened up easily – I will opt for the former and make a stud with a 5 UNC thread at the bottom and a .118 shaft with a No 4 UNC thread on top and a nut – bit of a bore to have to go to that much trouble just to put it back together again!
T Davis lock: I should have plugged the spare mainspring peg hole before engraving it! But I didn’t so it will stay – its only from a fairly ropey old blunderbuss
The screws are perfectly good, but for a high class gun I would make sure the heads stayed dead flat.
I went to Dick’s to take him some water buffalo horn to make a fore end tip for the Witton and Daw and collect the lock for the Andrew’s pistol that he has very kindly filed up in his very skilled and patient way – it certainly looks good – now I have to finish the frizzen spring and tough up the engraving that has got a bit battered in the welding and filing – I’ve also got to do something about the touch hole which is currently a void where the drum and nipple came out.
Once the frizzen spring is sorted I’ll touch up the engraving and I might try colour case hardening the lock – I have stainless foil on order from Brownells to do the job properly – I need to think about the furnace. Then the woodwork needs a bit of a going over – the chequering is rather coarse and is filled with gunge or varnish, so probably it will be a paintstripper job, after which a short steaming will get a few dings out of the wood. ( The frizzen does fit tight to the pan, but it’s without the spring and is where it was left.
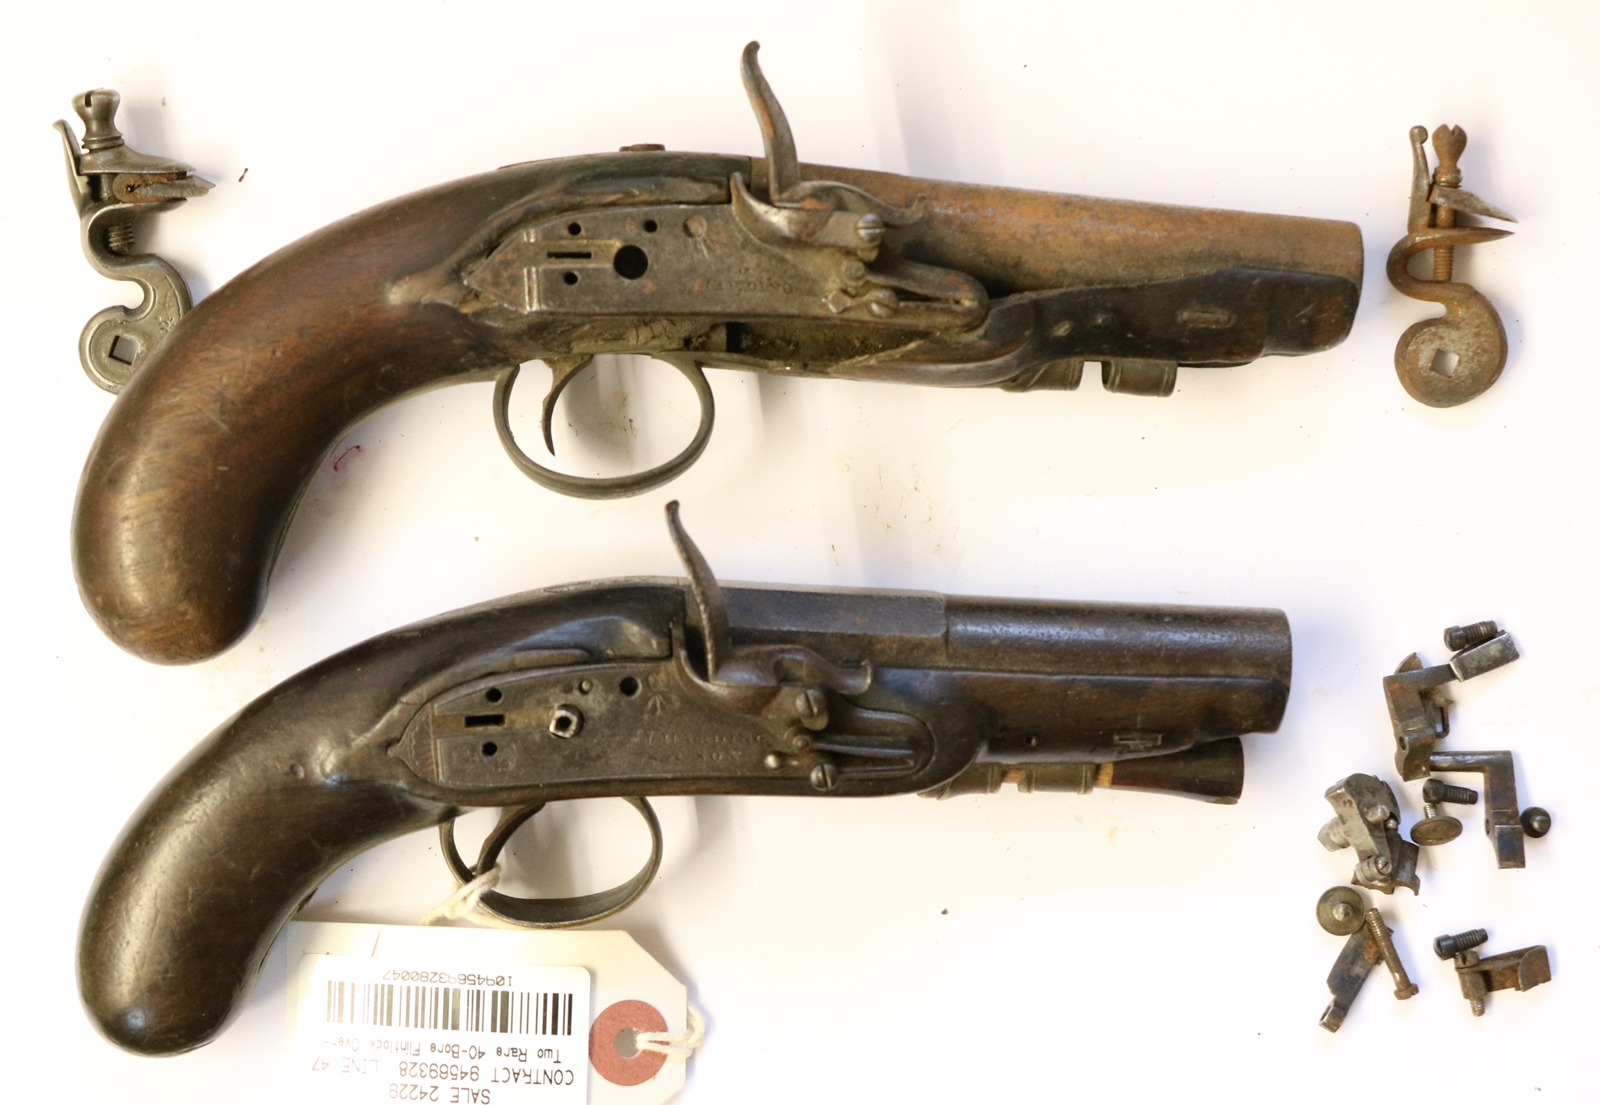
Here is a photo of the pistols I bought yesterday – they are sad looking and will take a lot of work to get right, but it will make a good project with all the elements of restoration present – not in any sense an economic prospect but they will make a pretty pair – although they are not actually a pair, there are some differences, and only one is marked for an inspector of mail coaches. I am not sure when I’ll start that project – probably in the autumn, although I might de-rust them sooner. I will have to spend most of the summer refurbishing a flat in Cambridge for Giles, if the purchase goes through.
They are quite similar, but the barrels have different lengths of octagonal section and the butts are slightly different shapes – one cock is a horrid replacement – the locks are slightly different – see the safety slot positions.- I’ll have to find a suitable replacement cock, or if that fails, get Kevin to make a mould of the good one and copy it. Given the damage to the stock of the upper pistol I might make a new stock to the pattern of the lower one – that would be fun & the old one would still be intact for its historical significance!
17th May – an exhausting day in London at Bonham’s auction – since viewing and auction are on the same day I have to leave at 8 and didn’t get back till 8, and sat in the auction room this afternoon for 4 1/2 hours non stop as all the lots I was interested in were spaced out. I and a friend were interested in a couple of boxes of junk estimated at £300 so we thought we could buy them both and have a lucky dip! The first lot went for £1400 hammer price and the second for £1000 – that’s without the 25% buyer’s premium and the VAT on that! So much for that idea… Somewhere along the line I must have dozed off when a somewhat ragged Durs Egg double flinter went for £300 – I only realised what I’d missed when I saw it being wrapped by the happy purchaser who was gloating over his luck! I did get a little pair of rare Post Office overcoat pistols in dreadful state in bits in a box for £650, which was a bit steep to say the least, but they will do very well for a Blog project – the sacrifices I make for Blog readers know no bounds..(photos when I recover my energy………….). I was disappointed to miss out on a beautiful cased pair of officers pistols by Ryan and Watson in stunning condition – (lot 340) I took it up to £4000 hammer price but stopped there and it went for one more bid – you never know if another bid would have got it, but with the additions I thought it was enough, although I kicked myself all the way home! One thing that was evident is the power of a ‘name’ in pushing up prices – very good Birmingham guns like the Ryan and Watson go for half or less of something no better, or possibly more worn by a London ‘name’ that was in any event probably mostly made in Birmingham anyway ( that’s the cynic in me talking). There was another pistol I went after, but it also just escaped my price – a little double pistol by Wilkinson (lot 313) that has a single trigger that I wanted for my collection of unusual guns, so I could check out the mechanism – they don’t like you taking guns to pieces in the viewing room for some reason. It went for £1200 + extras./ A lot of the better stuff went well above the top estimate – the pair of John Manton percussion guns looked really fine – the catalogue had them as rebuilt from flintlock, and the Keith Neils book lists them as being rebuilt in Belgium, but apart from the case which was obviously originally for a pair of flintlock guns (Manton’s cases for flintlocks always had spaces for the locks to be stored out of the gun on the assumption that they would be removed each time for cleaning anyway) , they don’t show many signs of rebuilding – they have new locks and and breeches – they went for £7500 hammer price. A Forsyth ‘scent bottle’ sporting gun sold for the top price of £23000 – I’m always suspicious of Forsyths as there was an exceptionally good modern forger who made almost indistinguishable guns – another Forsyth -a blunderbuss- in the auction made much less – but it did look a bit too good to be true and the catalogue said ‘ inscribed Forsyth & Co.’ rather than ‘by Forsyth and Co’ as it did for the sporting gun….as always caveat emptor! I am told that even Keith Neil himself shows one of the forgeries in his book and didn’t spot it. At least today gave me an insight into the current market, so that I can better price things…. And the owner of the heavy Dragoon pistol I restored recently is delighted, so that is a result.
16th May – Having recut the engraving I hardened the Davis lock – sprinkling a little case hardening powder on it to give it some texture, then tempered it in the top oven of the AGA to a pleasant colour…. After that I realised that the holes for mounting to bridle and sear spring were pretty much without threads, and I should have sorted that out before hardening! Luckily for me it turned out the I could get a No 5 UNC tap through them all and the pitch was exactly right so I’ll have to make a set of new screws as the old ones were either missing, stripped or had to be drilled out. If I only had one set of taps and dies it would be UNF/UNC as they fit old guns most often – I use B.A. or Metric once in a blue moon. It is probably enough to have sizes 4,5,6 and 8, and 1/4 if you want to make nipples – I guess UNC is a bit more useful than UNF, so you don’t need many taps and dies to do 90% of jobs. I’m off to Bonhams auction tomorrow, so I hope I’ll have something to show for it tomorrow evening! Lots of possibilities on offer, but probably a few other people with the same ideas – drat.
Sorry, the engraving doesn’t really show very well, but it is there!
15th May – I finished yesterday with the Tho. Davis lock plate cooling after annealing so that I could recut the engraving. The problem with simply heating the parts up with a torch is that they build up a layer of hard scale, and my de-rusting won’t get rid of it, so it has to be sanded off, and even then all the engraved cuts still have hard scale in them. This makes it difficult to engrave with a push engraver as there is a tendency to slip and the graver gets blunt, so I have started to do the recutting with the GRS air graver, which makes it much more controllable and since I’m following the original engraving my usual objection that I don’t like the style that comes from using the GRS is somewhat mitigated. We shall see how it goes. At the Northern Shooting Show I was discussing annealing with another restorer, who told me about a stainless steel and titanium foil that can be used to wrap parts in – like a pasty with the edges crimped and hammered – so that the oxygen is excluded – the titanium absorbs the oxygen in the pasty – and the whole operation can be done without the production of scale – its ideal for annealing and hardening and for colour case hardening using a mix of wood and bone charcoal and it seems likely that it will need much less charcoal to make the packet. When its had its soak at the required temperature a corner of the pasty is cut off with shears and the contents dumped into the water. All this saves having to have a gas flush furnace. I just have to try it – it is available from Brownells in the UK as well as in the US. Brownells also sell a paste to paint on for straight annealing and hardening. I probably ought to buy or make a furnace with temperture control if I’m going to do much of this – I did fish a whole pile of 2KW elements out of a bin recently with a view to making a furnace. – I’ll need a high temperature thermocouple too.
14th May – Last months AML shool left me with 2 locks – one to engrave for a gun being built in memory of Richard Morris, and the other that I couldn’t really remember what I was supposed to do with, or for that matter whose it was – what I believe is called a senior moment! – only mine last a lot longer than a moment. So I didn’t do anything with the second lock. Today I found out what I was supposed to do and for whom! So it needs teh name re-engraved, we think it looks like T Davis but could be almost anything! So I need to anneal the lock plate – I’ll probably recut the engraving so I’ll anneal the cock too. It turned out to be a pain to disassemble as the screws holding the bridle on had mostly lost their thread, and been riveted over on the outside. The sear screw had a very mangled slot too, so I had to drill out the head, and punch out the one remaining bridle screw from the outside. So that’s probably a couple of screws I’ll have to make! Anyway its now annealed and I’m waiting for it to cool down… There are lots of newcomers at the AML shoot, – muzzle loading shooting is getting very popular, so I thought a few hints on loading and cleaning were in order – I’ll start a new post forthwith – LOADING & CLEANING.
Apart from the screws it is probably OK – there was a washer under the cock screw – not where you would want a plain washer
14th May – Update – I am reliably informed that the matchlock is Northern Indian, possibly Uttar Pradesh & the numbers are police registration numbers. Another informant says that Westley Richards imported a vast number of miscellaneous guns from India i
