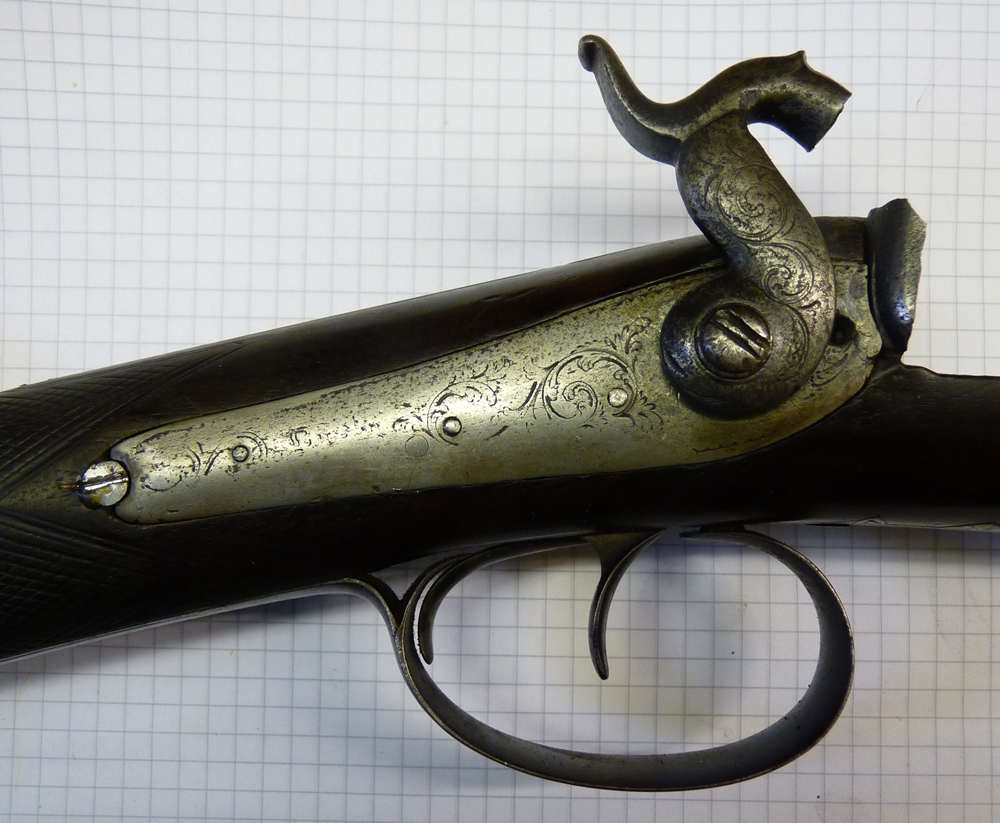
Bev Keeble, one of the Lakenheath Muzzle Loading members and a mean shot with a muzzle loader, had a 18 bore double percussion gun that had the RH back action lock replaced by a gash lock that had had most of its engraving filed off and was a bit of a mess.
Here are some before and after pictures of the work I did last weekend on it as follows;- Remove and strip the RH lock. Anneal the lock plate in the woodburning stove, electrolytically reduce the resulting fire scale to make it soft, file off the remaining engraving and polish the plate to 1500 grade, photograph the LH lock and laser print out a black and white reversed transfer onto baking parchment. Mark and engrave the border to the lock (after a short practice on a scrap of steel to get the cuts right), transfer the B & W image to the lock using Dammar varnish diluted with Hammerite brush cleaner and then varnish it over the top. cut the main arcanthus lines to the transfer pattern as far as possible. Clean off the varnish and complete the foliage, balancing out the weight of the lines to match the existing side. Mark and engrave the maker’ names – Hilson, Labron & Mabson – in letters 0.75 of a mm high, then draw and engrave the rabbit and the pheasant to fit the appropriate spaces. Lightly polish the engraving with 1500 paper and with a very fine wire brush on the grinder. Harden and colour the surface with Blackley’s case hardening powder at dull red heat, with a water quench. Temper on the second hob of the Aga at around 200C. Clean it and smoke it and take a pull onto wide clear tape for the record, and re-assemble lock parts. Clean off and re-engrave the rear retaining screw for the lock (I couldn’t get it out so did it in situ). The cock was fixed by a badly mauled tumbler nail while the original side had a threaded insert in the tumbler and a domed nut, so I made a screw insert for the tumbler with No 4 UNC thread and turned a domed nut to match the other side, then engraved it and case hardened and coloured it with Blackley’s powder as before. Its now back together.
The next job is to make the R.H. cock match the original L.H. one as follows;
‘Let down’ the RH cock by heating to dull red and allowing to cool very slowly. fix it in a bar in the lathe chuck by a M4 screw through the tumbler hole and turn the concave boss with a round ended tool. Remove and file the outline and contours of the tumbler area and body of the cock to match the LH one. Polish it with 240 grade and on a fibre wheel. Engrave the boss and body. Build up TIG weld around the nose and side of the lock as it doesn’t have enough bulk to match. File the nose into a ‘brow’ and do final shaping – it took a couple of iterations of welding to get it right. Engrave the dolphin marks on the head of the cock – the scales are cut with a chasing chisel and hammer as its easier on the rather fibrous steel of the cock. I tried to reverse electrolyse the cock to age it a bit as it was a bit shiny but it didn’t work as all – last time I tried it, it worked a treat. Anyway, I hardened the cock, putting a bit of case hardening powder on the weld material for good measure, and tempered it on the top of the AGA so it wasn’t too brittle. A few rustings with Blackley’s slow brown, steaming it when each coat of rust appeared to make it black rather than brown, and it is done. See pics at the end – you can tell which is the new one, but if in doubt its the R.H. cock ( on the left in the picture)!
Right Hand Lock before restoration – note elegant tumbler nail!
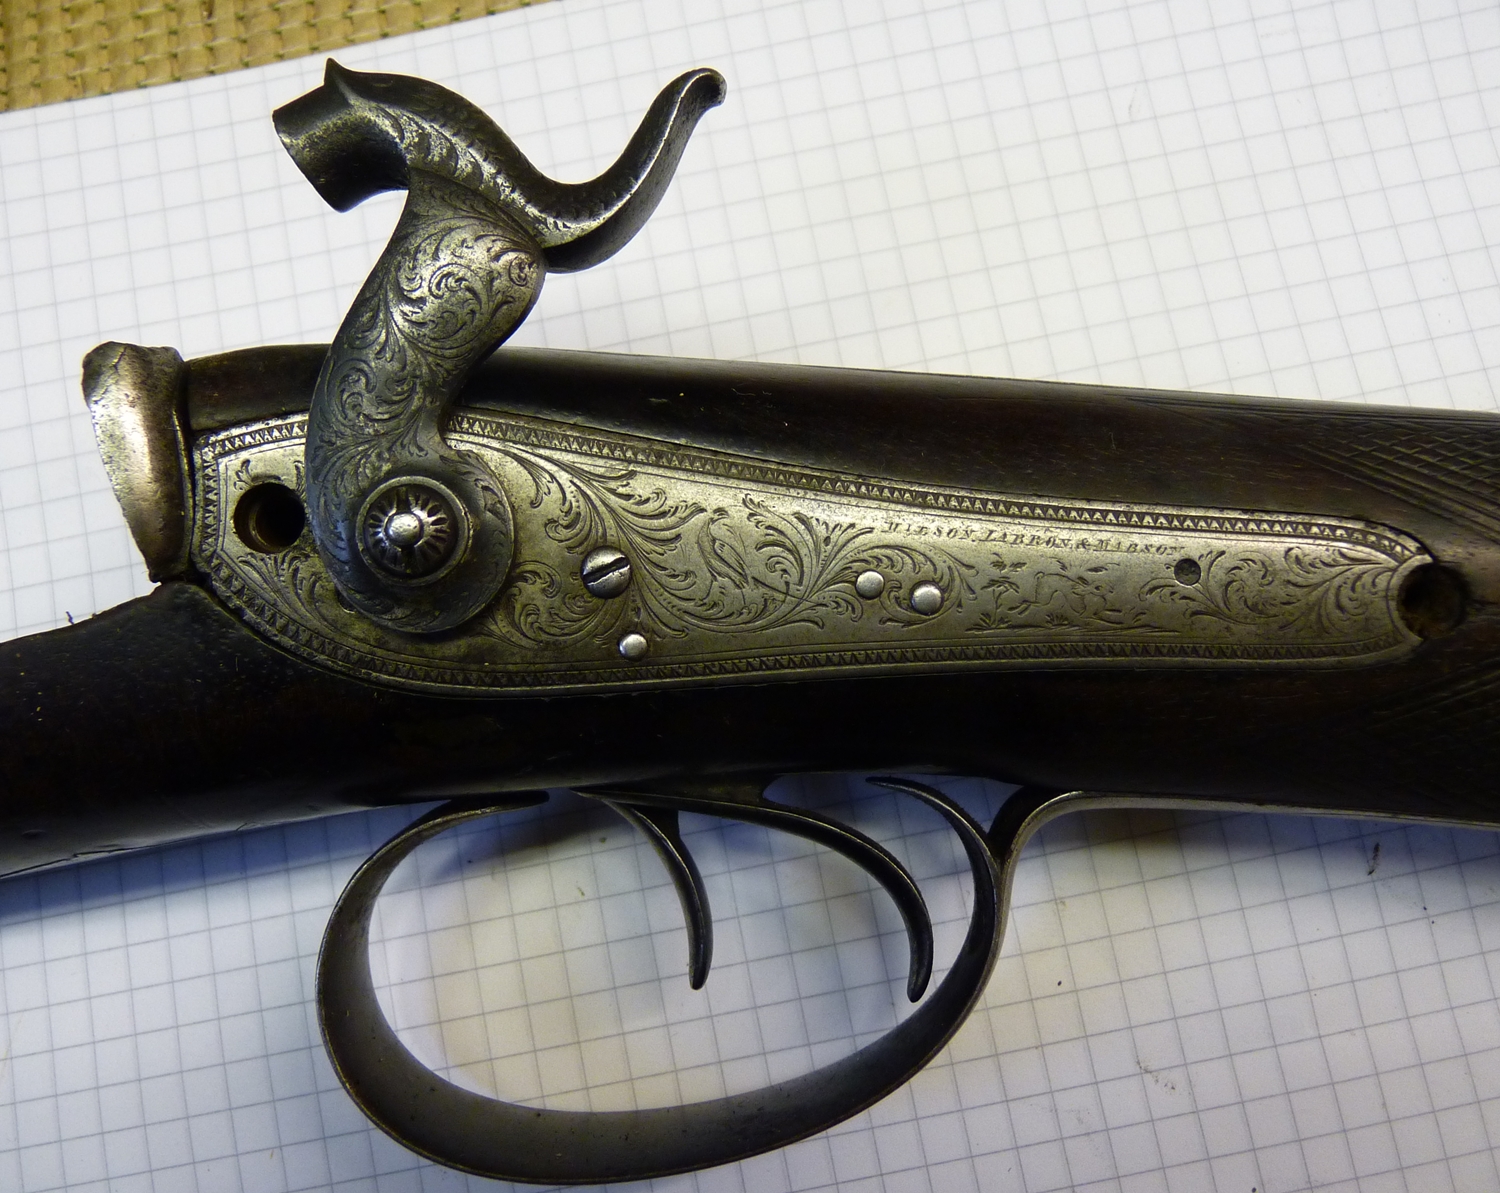
Original Left Hand Lock
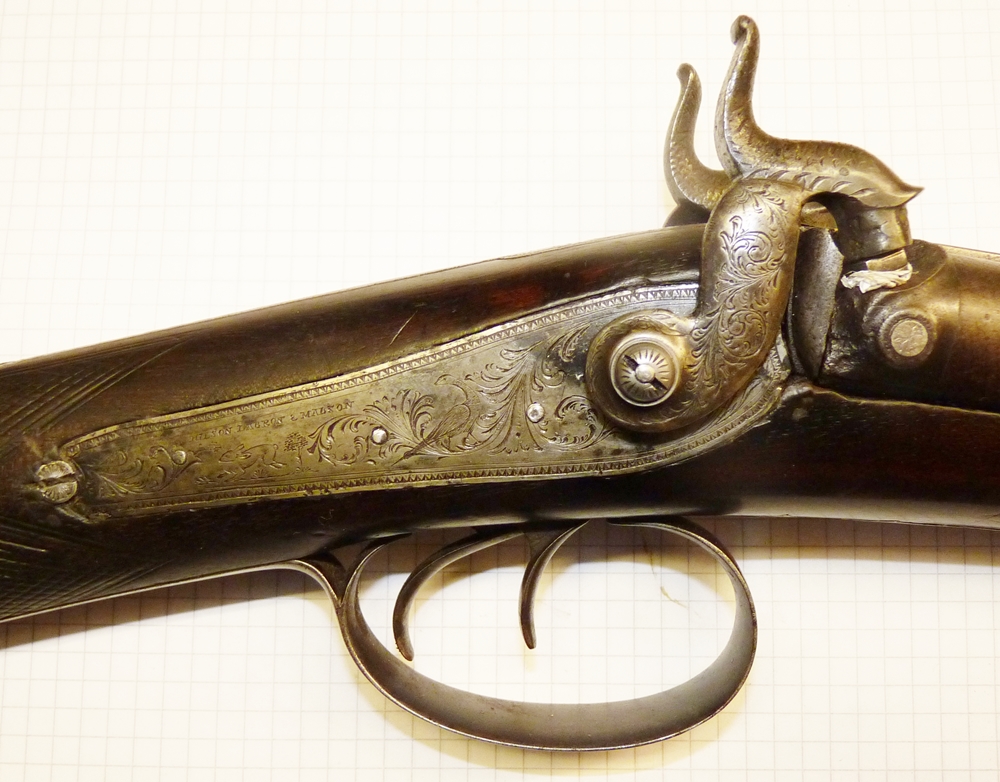
Completed RH Lock – the engraving on the original has worn so the cuts look wider than they probably were originally.
The lettering is pretty small on account of the multiple names – its usually bigger and a bit easier to engrave – I really need to use neater gravers than my squares for such fine work, but they are a pain to keep sharpening – its bad enough keeping those sharp on slightly rough steel like this lock plate anyway! I still need to work on getting the weights of the lines balanced – trouble is I only see what needs touching up after I’ve hardened and coloured it.
Here are the cocks for comparison;-

RH reshaped cock is on the left