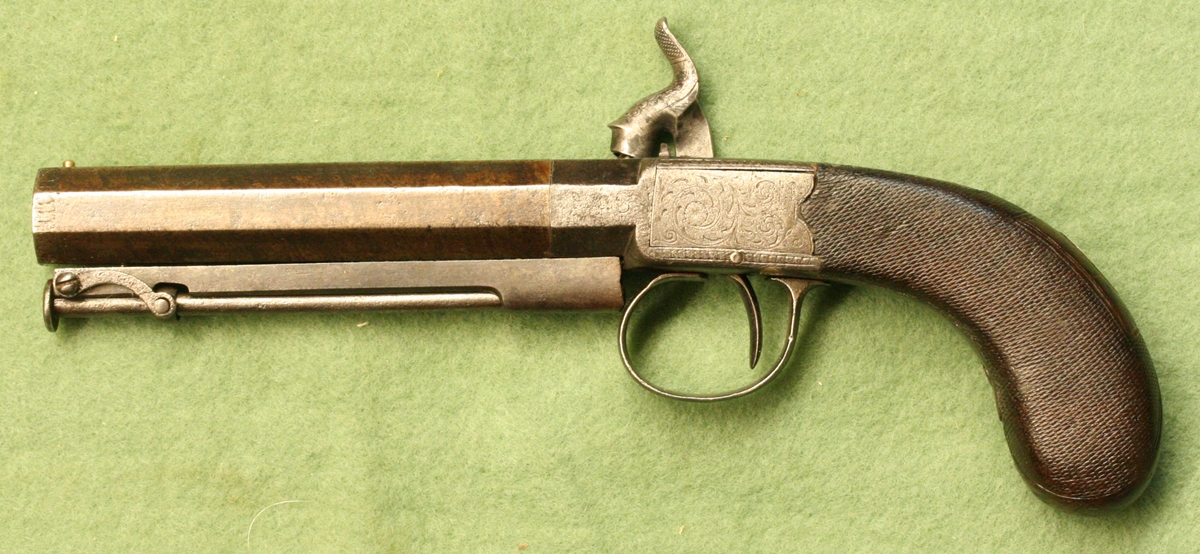
I found this old pocket pistol in my collection of miscellaneous bits and pieces, and somehow found myself starting to spruce it up, without having ever thought it was a job worth doing – but I’ve started so I’ll (probably) finish , at least some time….
I still can’t make up my mind about the cock – I can’s see a trace of the line that is created in the mould when it is cut open and it looks like an original, but I can’t quite reconcile the surface finish – anyway it fits perfectly so it will stay!
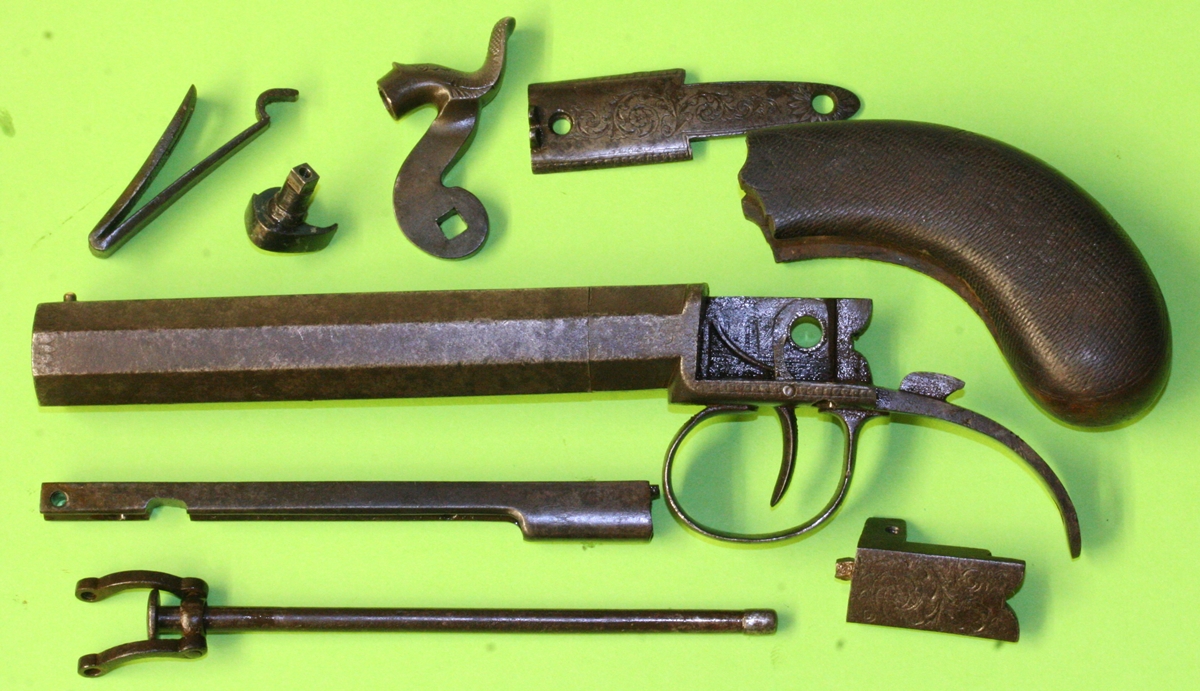
I’ve started to go over the chequering, although I think I should have gone at it with paint stripper first – may be I’ll do that …. I stripped it down to work on the various bits, and I’ll unscrew the barrel to rebrown it. Taking the screws out of the metal bits is always tricky in an old gun – but one tip I learned is that Plusgas and other rust release oils are not the best penetrating oil – use a very low viscosity, usually volatile, solvent and add a little oil to it – for instance acetone and a little mineral or olive oil – say one part oil in 4 to 6 of acetone. This will penetrate much better!
When removing screws choose a screwdriver that is the same width as the screw head diameter – a narrower one misses the bits that ought to do the most work. Get as near in thickness to the slot width as you can while making sure it goes almost to the bottom of the slot – old gunscrews slots were usually cut tapered, sometimes quite strongly so. When I came to strip the 7 screws on this pistol I had a choice from at least 6 small and medium screwdrivers with thin or medium thick blades so I could use the right one for each screw. When you come to undo a screw you need to have the gun very firmly on a support so that you can put as much weight as possible on the screw to keep the driver in the slot. Don’t just try and unscrew the screw straight away, but try force in both directions – you may not be able to see any discernible movement, but you may be moving the two parts against each other by enough to be breaking the bond. Be very sensitive to what is happening with the screw head and stop immediately if it looks as if you are damaging the head, try the screwing in technique again – old screwheads are often messed up on the unscrewing faces while being unmarked on the screwing in faces so take advantage of this! I managed to strip the Blanch without damaging the screws more than they were, after leaving them for a few minutes with my penetrating mix.
Take the butt off first. Put the pistol on half cock before unscrewing the top plate screw and removing the top plate Then let the cock down and you can remove the cock and mainspring. – A small or medium Mole wrench with masking tape round the jaws makes an excellent spring clamp for pistol mainsprings and also frizzen springs and sear springs – i fact for almost all springs… Unscrew the screw in the bottom that holds the sideplate on, then you can remove the sideplate and tumbler. The ramrod rib is held on by 2 screws – on this pistol they were very mangled, but they did come off without adding to the damage.
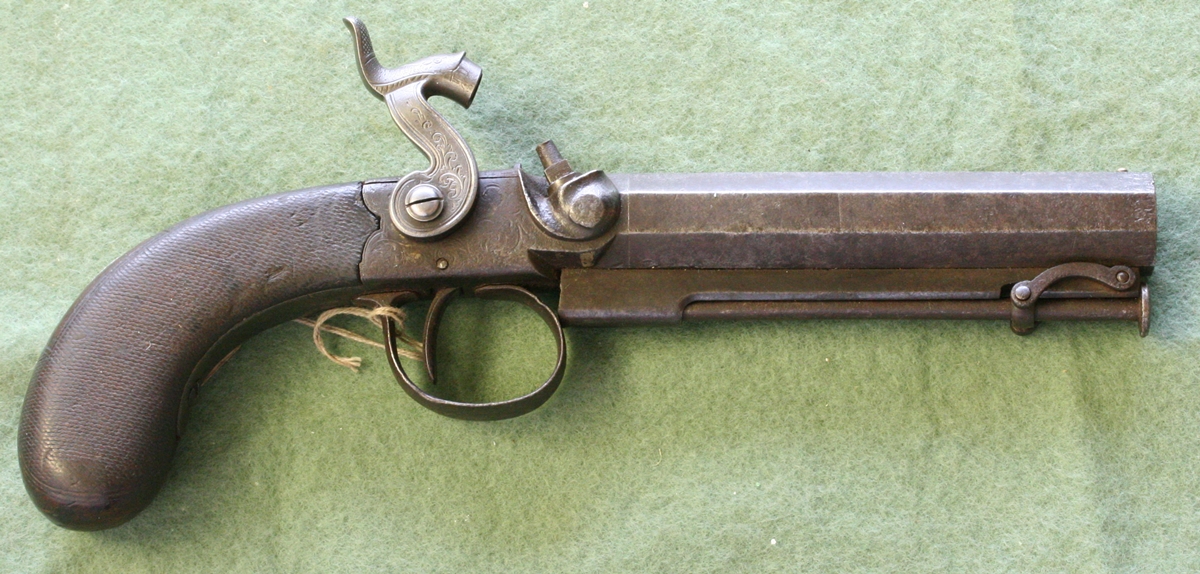
You can see its all in good working order and worth a bit of a cleanup, although I don’t suppose it would be economically viable!
When you think about the purpose of these pistols you realise that they were probably carried around a lot, almost never fired in anger – presumably the owner would have fired a few practice shots early on, and I guess that to be sure it would work when needed he (or she) would need to fire it off and reload it from time to time. The muzzle loaded pistols like this one were not as good in that regard as the turn-off pistols, where you put a ball into the breech that was slightly oversize for the bore and then screwed the barrel on, effectively sealing the charge and ensuring that the ball could not work loose and fall out of the barrel. It probably took longer to load a turn-off, but the chance for a second shot must have been very rare!
I’m about to derust it all – here is a ‘before’ picture;-
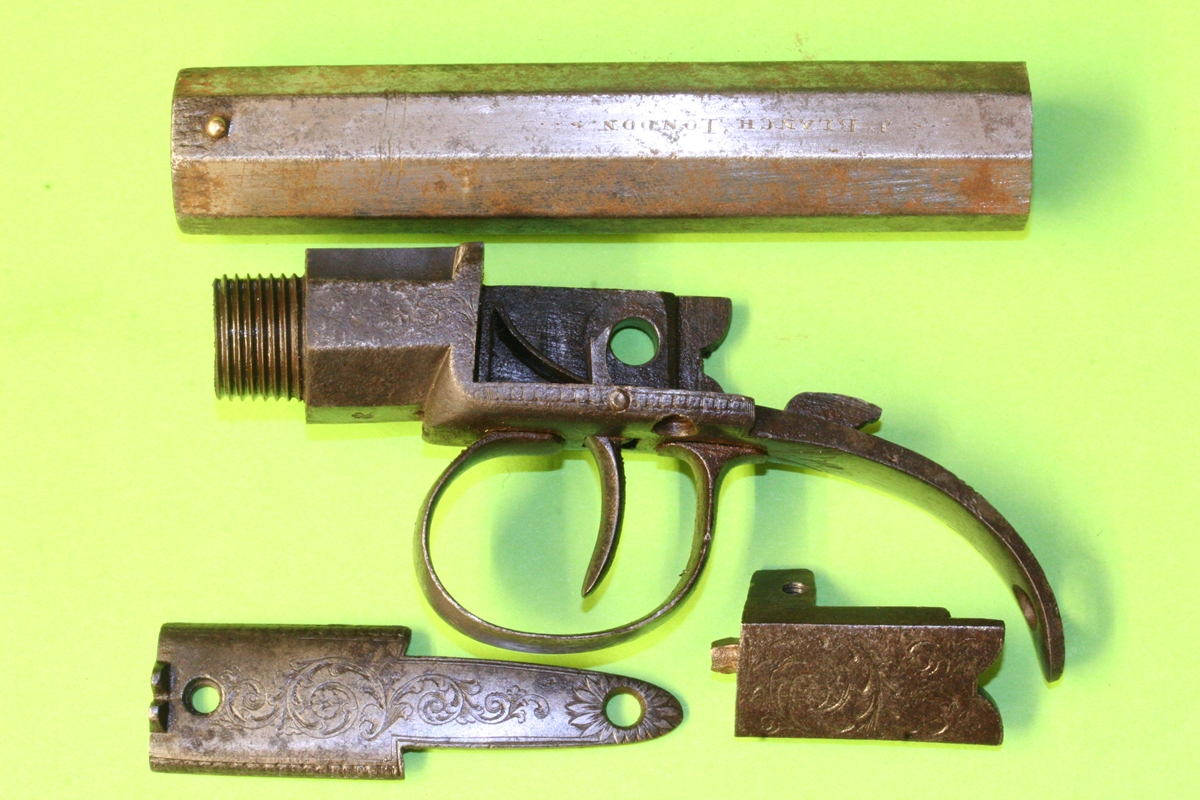
I have very lightly recut the barrel lettering and will gently strike up the barrel when it is derusted. The other parts will probably not be re-cut as they are all hardened.
I’ve now finished tidying up the Blanch. It was in reasonable mechanical condition and it was not really worth trying to make it look too new – jus a bit more cared for – here is what I’ve done to improve it;-
Lightly re-engrave the name on the barrel then derust it and everything else too. I lightly drawfiled the barrel – with no intention of getting the pits out, just to give a slighly less rusted look – then I derusted it again and, got rid of the filemarks ( it was a no 6 flat needle file so not many marks) with 600 grit paper on a hard former, then polished the barrel very lightly on a fibre wheel taking care not to round the corners Chalk degrease, then alternate Blackley’s and my browning solution without steaming – about 6 rustings in all with one steaming at the end.
The rest of the metalwork was in reasonable state, although the sides of the lock are rusted, the top is very clean. They all got a good derusting and a brush off with a very fine wire wheel.
The cock was definitely a modern casting, albeit a good one – probably from E J Blackley some time ago – but looked like what it was, so I recut the ‘engraving’ and filed off the face of the cock to make it less obviously cast, then heated it to red heat and dipped it in Blackley’s colour case hardening powder and reheated it, then quenched it. I would have tempered it on the AGA but its turned off for the summer – anyway it came out less obviously a raw casting. I also engraved and treated the cock screw.
The butt was a bit of a problem as it had a number of defects. I scrubbed it all off in paint stripper and went over some of the checkering with a 70 degree graver. I then dyed it with brown suede dye and gave it a thin coat of shellac dissolved in meths. (button polish or french polish) It now looks better than it did, but not perfect – I couldn’t see how to do much more without disproportionate work. I fixed the butt in place with a very small amount of hard black wax to fill the worst of any gaps.
Here are some pictures of the result;-
Before
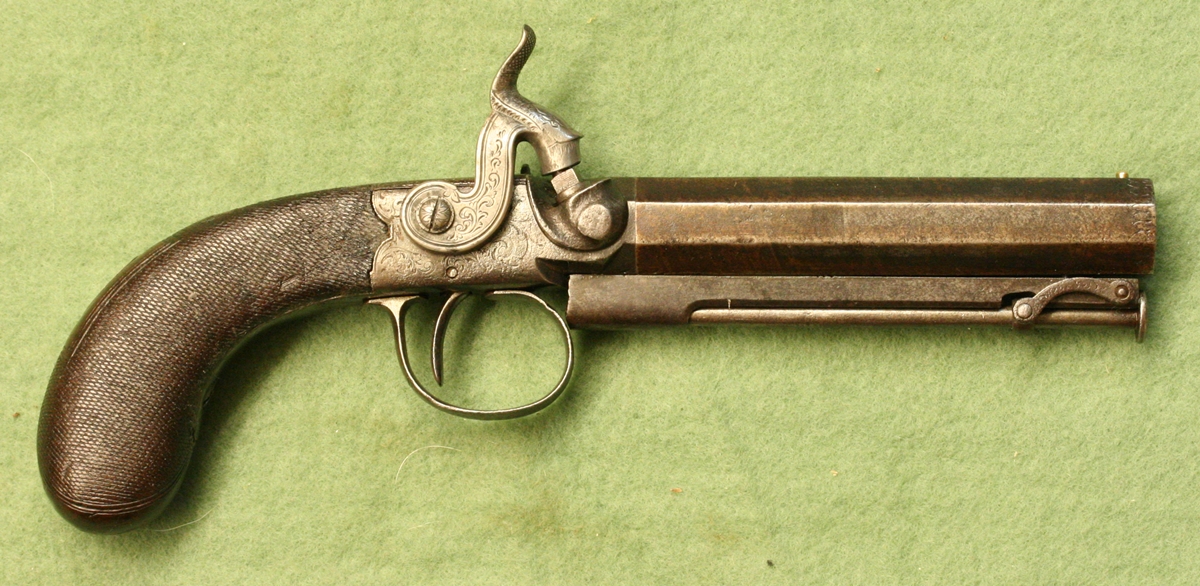
After – not a big difference – just looking a lot less neglected in the flesh…….

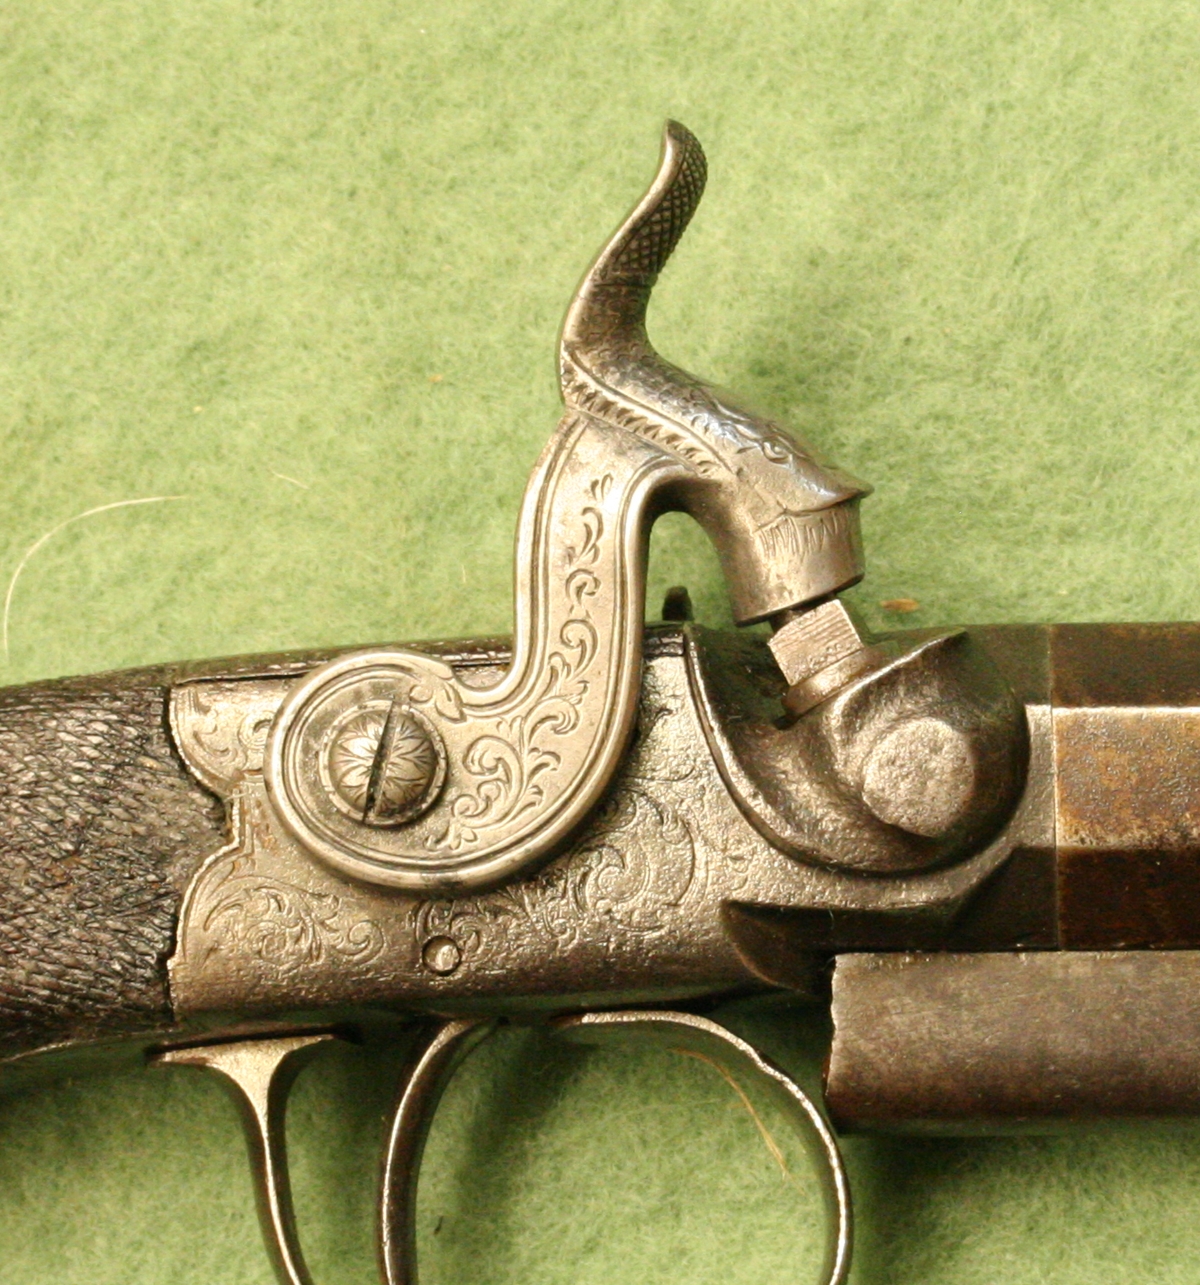
The cock tones in a bit better now, although the engraving isn’t fine enough to match ( it often wasn’t on original cocks)
I’m not sure that this kind of restoration would be commercially viable – the difference before and after market value would barely cover the half day or more spent fixing it – but I’m determined to work through the sad and neglected guns amongst those I inherited so that they no longer haunt me!