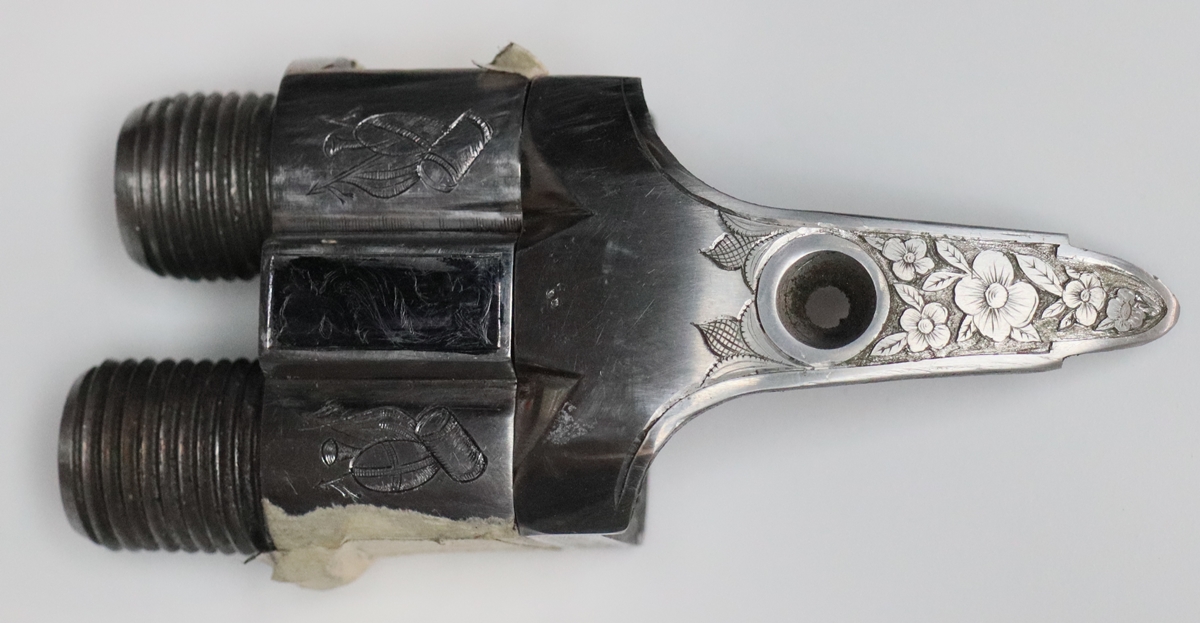
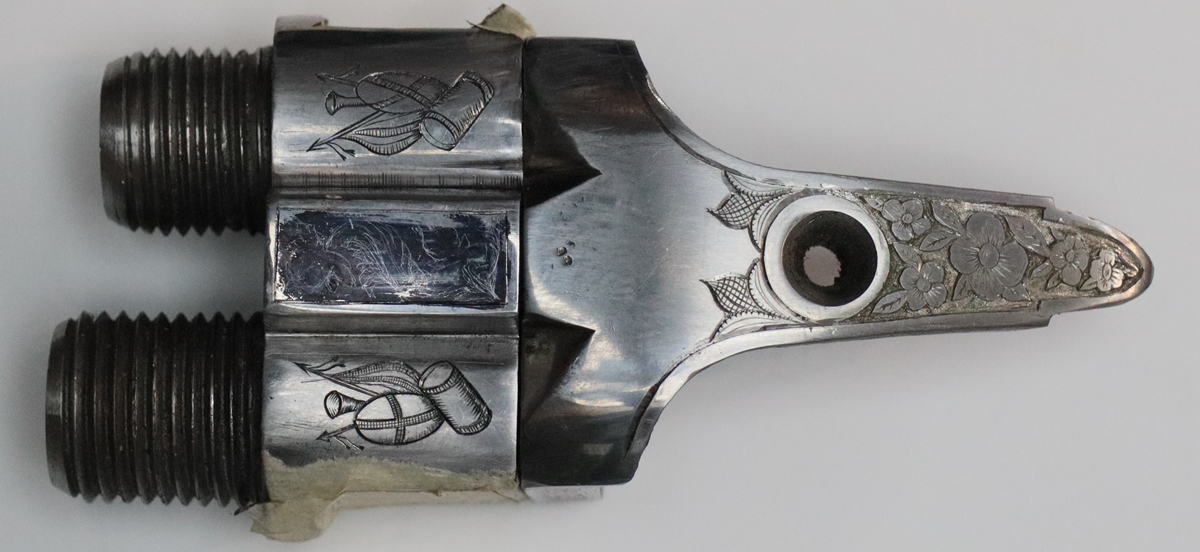
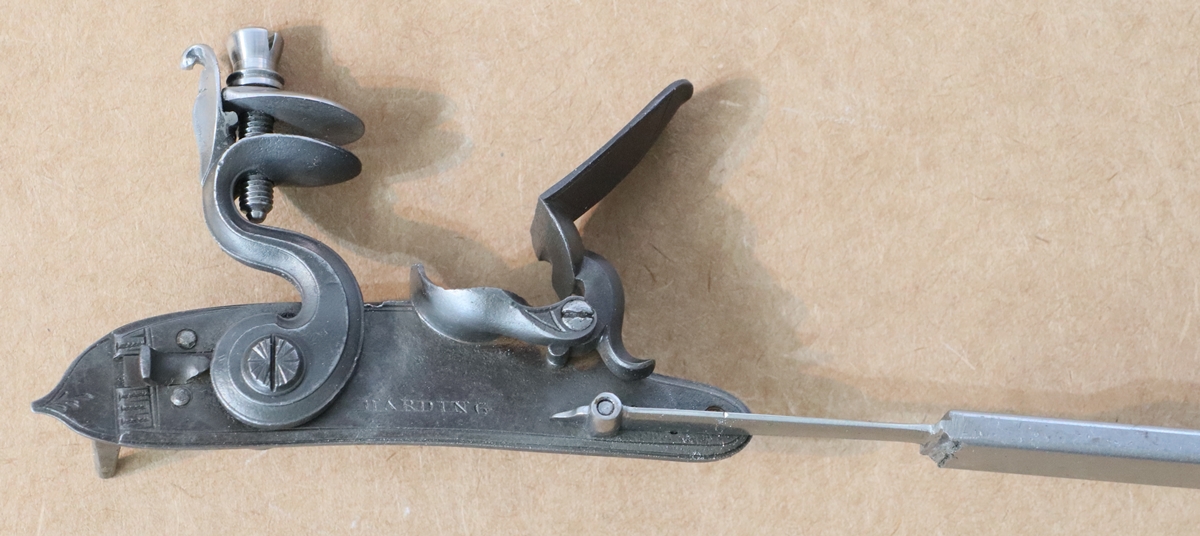
13th January. I am at last getting round to engraving Fred’s parts for a flintlock Cape gun (one rifle and one shot barrel). Its taking me a while to re-awaken my muscle memory and get myself into an engraving frame of mind, so lots of playing about with test plates. Fred is keen for me to engrave a bit deeper than I usually do, as my light engraving gets lost in the colour case hardening that he has done on his guns, which is pretty dramatic. I have been using my GRS air graver to try and dig a bit deeper, but its not quite as precise as push engraving, although I’m getting better with it. So these are a combination of push and air engraving. I did think of buying a Lindsey air graver – I’d looked at them a few years ago, and when I looked the other day the prices had doubled and I can’t justify that sort of expense ($3000 + Tax and carriage). On the standing breech I’ve been doing the traditional thing and using a cut out background with the pattern raised – its more work because its fiddly cutting out the background – I have been using the air graver like a little pneumatic drill with a fine rounded point to stipple the cut out background, which seems to work quite well and should stand out however it is case hardened. I have one more bit to sort out – the bit of rib between the barrels, so I tried a couple of ideas on a test plate – I’ll talk to Fred about what he wants. Then I have to engrave the locks – the tail ( stand of arms) is OK, but its always tricky to put names on the centre of the plate as the pan gets in the way and you can only effectively cut verticals from the bottom up, and for small lettering its very difficult to get clean starts to strokes, so doing it in a single cut makes it difficult. The name will probably end up about 2.5 mm (0.1 inch) lettering, and the location, which is 10 letters long will probably be around 1.5 mm or so – also the location (Shrewsbury) has a number of tightly curved letters – 2xS, R and B that are a struggle when the lettering gets small. Why can’t gunmakers have names and live in places that are made up of letters that are all straight lines, possibly with the odd O or C ?
When I need a break from engraving – about 2 hours in every 3 – I’ve been playing with a number of Raspberry Pi computers as its time I re-learnt how to write code and run systems – its a struggle at times! I was slightly heartened that when I got stuck on getting one computer to connect to the internet – my son Giles, who now is a professional programmer in Vancouver, gave up after half and hour. I later partly got there!
If you are interested in green energy I found an app for my phone that lets me see at any moment where the country’s electricity is coming from. For most of the last month or so we have been importing around 25% from half a dozen other countries, wind has varied from 2% to 70% (I think on a very windy late night) but is has mostly been around 35 to 45% – the app is ENERGY WATCH GB. It is a strange and unfortunate fact that UK electricity prices are pegged to the price of gas when over half our electricity comes from renewables (a bit over 40% at the moment) and nuclear (16% at the moment). Electricity is significantly cheaper in Europe! Anyway the wholesale price of gas has halved in the last month or so…….. A lot of energy companies are raking it in!
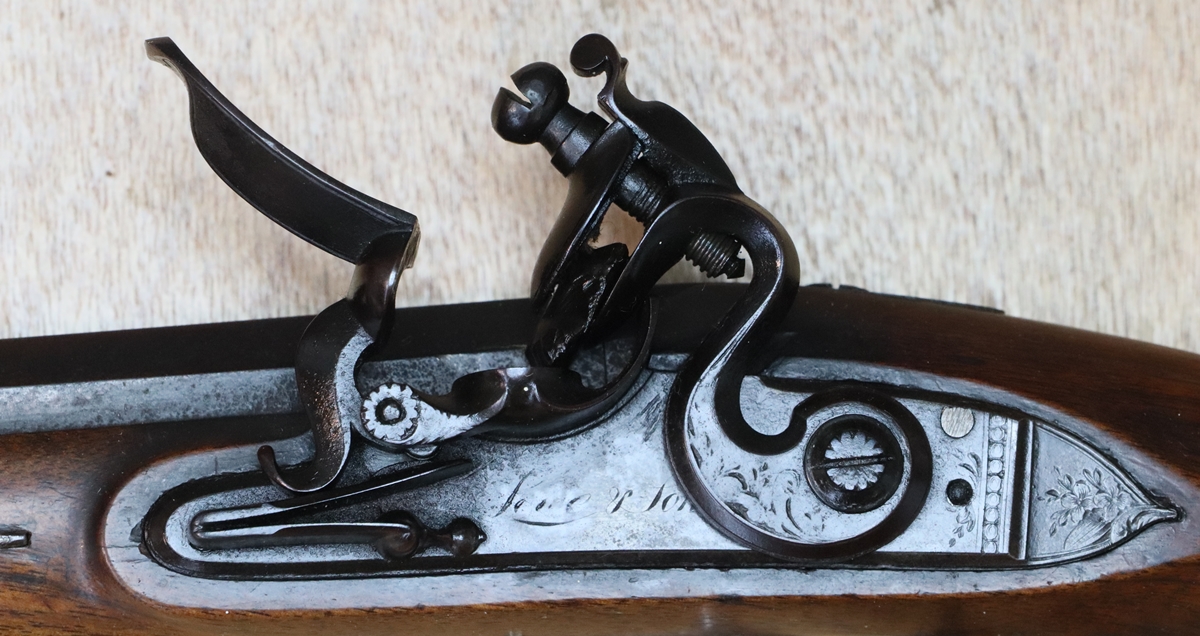
 Notice that the tail of the tang is curved to the left – must have come from a cross stock for a left handed, right eyed shooter.
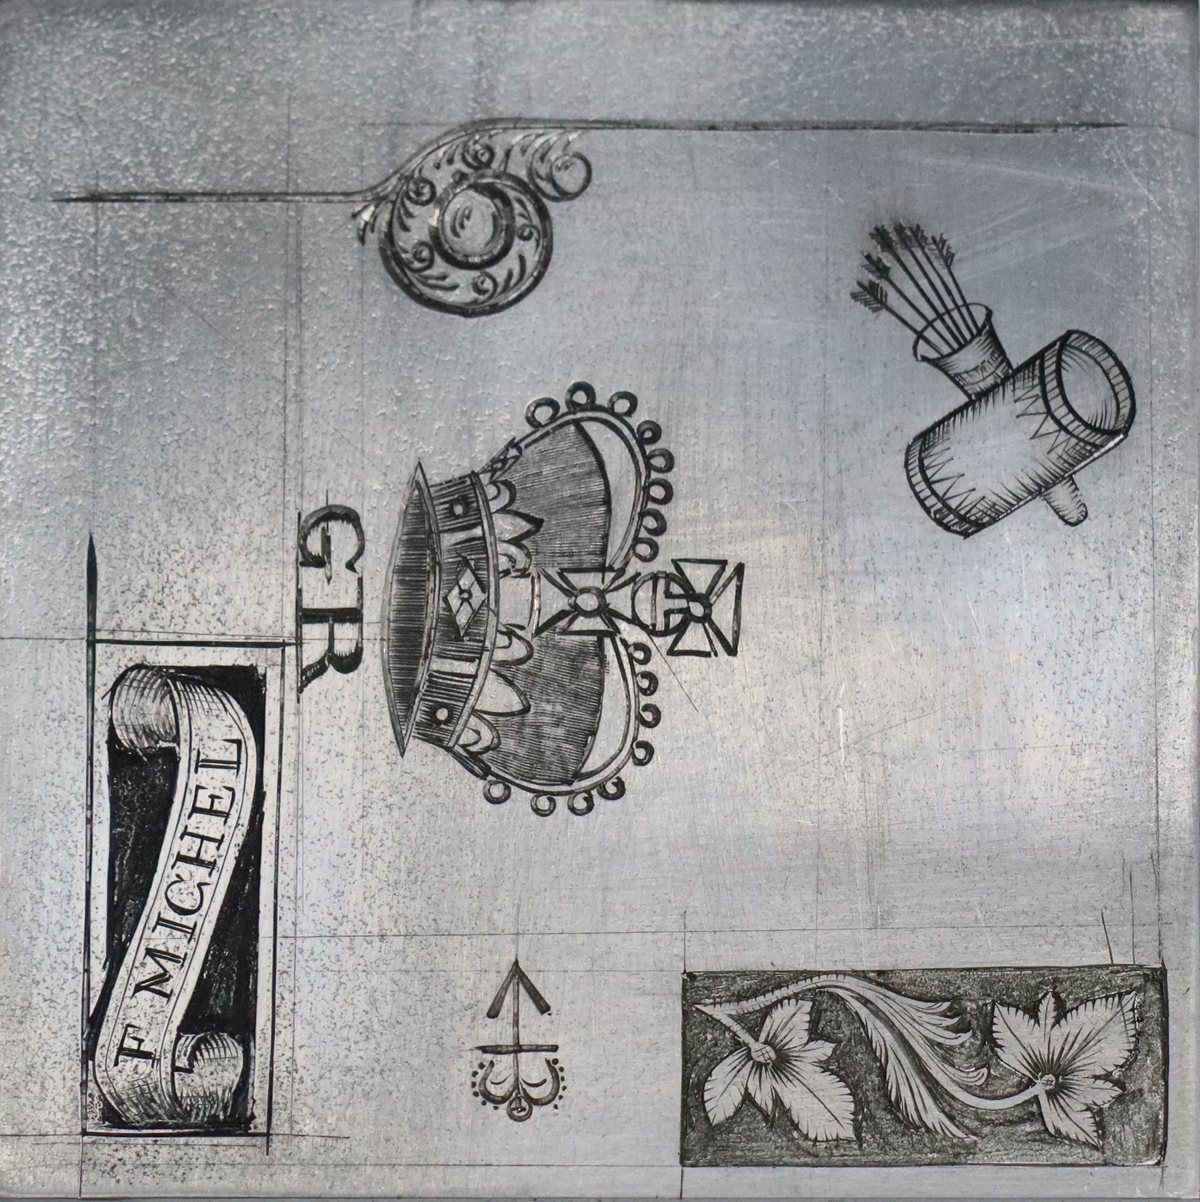
Crown is for a military pistol – boxes are possibles for rib.
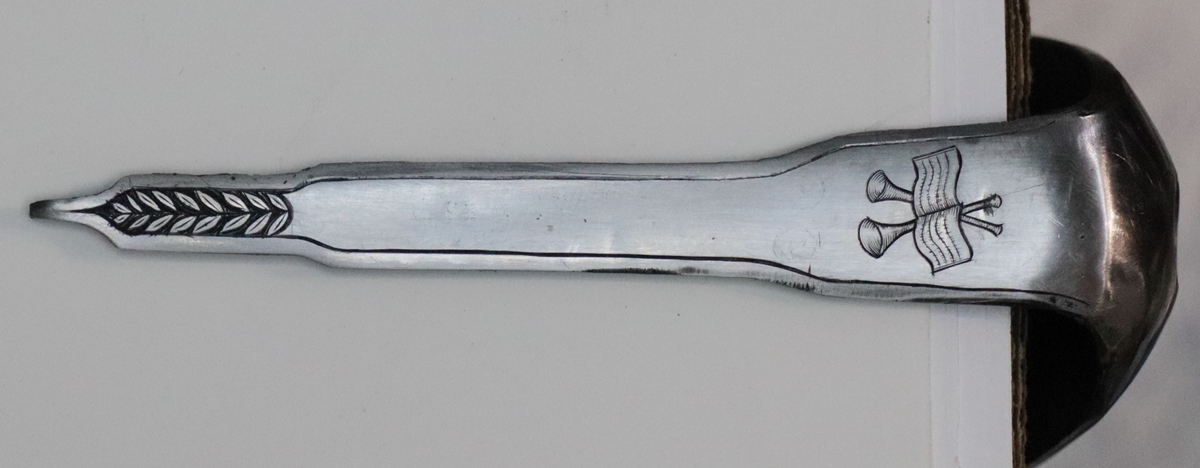
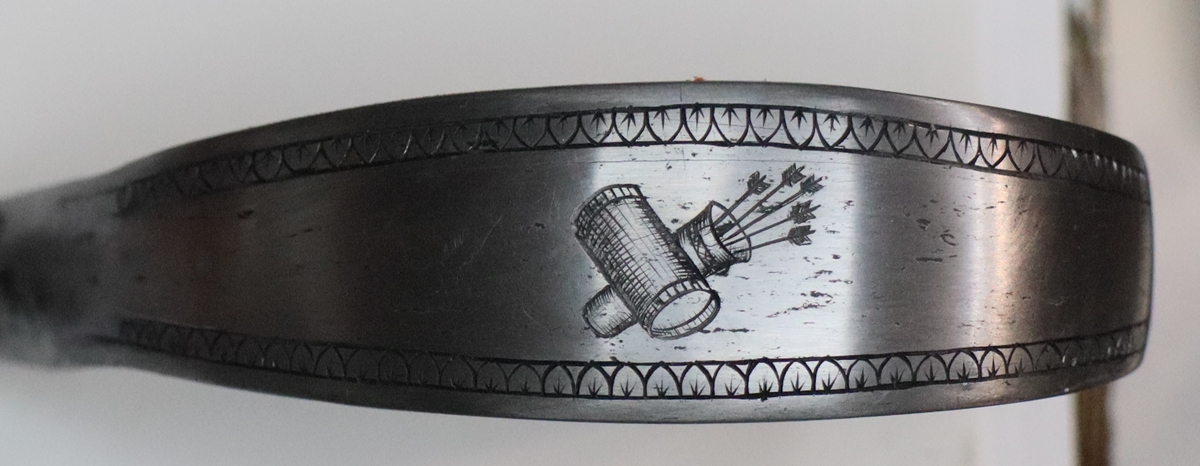
28th December. Well, my good intentions to restart my blog at the beginning of November didn’t get far! Still busy with the secondary double glazing, which I just got done in time before the temperatures went below 0C . It has made a huge difference to the kitchen and living room, considering that our external walls are flint and chalk rubble about 12 – 15 inches thick. Anyway I’m now doing a gun encraving job on a set of furniture and locks for a Cape rifle that Fred has built – he has been waiting months for me to get in the frame of mind to do it – I’m now tackling it having done a few days practive on test plates. One problem is that test plates are nice, uniform, soft steel that cuts consistently and easily, whereas the bits for the gun are re-used bits form other old guns and are much less kind to the engraver! I’ve done the trigger guard border and a drum and quiver of arrows on the bow, and it was sort of OK metal but with nasty pockets of ‘rot’ that leave a bit of a hole if you hit one, and patches of harder metal – I am now doing the trigger plate, it has some original engraving – if you can call it that! Its hard metal and was from a very cheap gun so there is no finesse in the original engraving. I can’t do much more than dig our the rust and try to plough a few replacement strokes on what is already there – it will look better, but remember the saying “you can’t make a silk purse out of a sow’s ear”. I haven’t tried to cut the locks or cocks or the breeching, so that another treat to come! Quite a lot of my time before Christmas was taken up with sorting out the 3D printing of the Christmas decorations the school children had designed – that meant I had to go over all 30 designs to make sure they were printable, and then print them all, plus another 30 or so to sell at the school fair! All done in time, I’m pleased to say!
1st November – Very heavy hail and rain storm today – out of the window I saw a great torrent of water streaming off the roof and over the gutters which were full of hail – fortunately it only lasted a few minutes. I got another secondary glazing window in at the weekend with Tom’s help installing it – 4 down, 2 to go. My STEM club has started again at school on Monday nights – there were 5 children, all keen on crafts and making things, and very keen to get involved with 3D printing. Dave, who helps run it, and I are very keen that whatever we do has a tangible outcome, so we introduced the children the the 3D design software Tinkercad and more or less left them to it, with a bit of occasional help. By the end of the hour they had produced plausible name plates, and most of them carried on with the software when they got home. I find it the difference between learning and teaching quite intersting – I saw the teacher’s lesson plan for teaching them to use the 3D software in 6 lessons, whereas our ‘plan’ is to show them how to start and then let them get on with it – children very soon work things out and just get on with it if they are motivated – I wish I could pick up things as quickly as they do. I guess the problem for teachers is the ‘if they are motivated’ bit – they have to cram it into the brains of those that aren’t as well as those that are… Glad I don’t have to! The ‘tangible outcome’ of course means I have to print a whole lot of bits on the 3D printer…. Dave’s daughter and her partner have just bought a 1904 house and as an ‘expert’ on old houses I went over and had a look to give my view on the work they were planning – I can’t supress the scientist in me, so I think I’ve set them off looking in detail at insulation values and trying to optimise the way to spend limited renovation resources in a sustainable way against a potentially large and permenant rise in the cost of energy – its an issue that concerns me here too! My simple answer is insulate better than you think you need, and put in as many solar panels as possible, and maybe a battery of 40 kW.hrs – then at least you can take electricity from the grid when its cheap. There is a tarriff from one supplier (Octopus) that lets consumers buy their electicity depending more or less on the spot rate on the wholesale market in 1/2 hr chunks – in 2021 that varied from 2p to 100p per unit, i.e from 1/20th to 3 times the current price, so with a decent battery system (cost ~ £6000 ?) you can survive throught the periods when its expensive and charge when its cheap. There is even some suggestion that the spot rate will go negative. Given that the battery system will probably last up to 10 years, that could be a win – you would need to use around 2400 kWhrs. a year at half price to break even. Needs looking into and the sums done properly – but I think thats the way things will go for many users – if you don’t have batteries the use of things like car charging will be linked to spot prices – actually it already is for some systems .
28th October – The warm weather continues here – up to 21C today – wish I hadn’t lighted the AGA but if I let it out it will suddenly get cold! I went to take back the gun with the repaired nipple and have a look at the gun with the cleaning jag stuck down the barrel. I could screw the rod onto the jag. but the thread wasn’t secure enough to turn or pull the jag out, so I secured the (double) barrel on its own in a cleaning jig and fixed that in a vice with the blocked barrel upward, and poked a small pinch of Swiss No 1 powder into the ‘touch hole’ – it was a tubelock so I’m not sure that’s the right name for the hole that the tube fires through. Applying a lighter to a small heap of powder on top of the hole produced a small puff and drove the jag to within 6 inches of the muzzle – now, what you mustn’t do is try to put a charge in when the obstruction is part way down the barrel – that’s when burst barrels happen, so it was a case of either getting the jag out from there or pushing it back to the breech and using a bigger charge. Fortunately there was just enough thread on the now looser jag to pull it out, so job done. I did wonder if firing a tube on its own would have shifted the jag, but the gun was already stripped down so it was easier to do it the way I did. The jag was made of white plastic and the thread had partly been stripped – it went in the bin. I don’t use plastic jags in muzzle loaders – they are OK for breech loaders as they can’t get stuck – stick to brass ones!
26th October – I’m getting back into the late night habit – curtailing my after dinner siesta! I got the Locktite 270 and put the sleeve in the Manton – I’ll deliver it tomorrow and have a look at the friend’s double that has the broken jag down one barrel. Like many people I’ve been conscious of the increase in the cost of all fuels, but particularly electricity, so I decided to do a thorough check of our energy consumption – the weather is still unseasonably warm – I think it reached 20C today – so we haven’t got any heating on. I did a check on all our electicity uses by turning off all circuits and devices etc until the smart meter said zero watts. I have a monior system -Efergy- that records peak and off peak current but I’d turned off the necessary computer for the experiment so I relied on the smart meter. switching things back on one by one gave me a pretty good idea of where the power was going, and I was able to account for all the consumption except for 30 watts – after a bit of head scratching I found that I’d left the loft light on since I’d finished the bedroom 6 months ago! That may not seem like a lot of power, but at today’s price it is around £40. The biggest surprise was our 20 year old fridge freezer – I bought a cheap plugin monitor from ebay that records the consumption of any device on a 13 Amp plug which showed that it was consuming around 2 kWhrs per day or £260 per year, Our kitchen lights, all LEDs, would cost the best part of £300 p.a. if left on all year. Looking at advice and figures for electricity consumption on the web I’m shocked that when they list appliances in order of power use they get it all wrong – putting high powered devices like cookers and washing machines at the top, whereas in reality its the things that are on for a long time and often that eat up the power. We are trying to be green, and looking at how we heat our house, but comparative figures for the cost of heating by different methods make depressing reading – we currently use oil in the AGA – that is currently costing about 12 p per kW of energy, and a coal burning stove that is currently costing around 5 or 6p a kW hour as we bought extra fuel before the price went up. We looked at an air sourced heat pump run on eletricity, but to be efficient it needs to run at a low water temperature so, as we can’t fit underfloor pipes means very big, ugly radiators. Even assuming an efficiency of around 250% it will still cost more than the oil and much more than the coal = and the capital cost will be around £25000 plus = so it just doesn’t add up. Thats the real dilemma in home heating = the only thing things that make sense are fitting solar panels – with the increase in price of electricity, with more to come in the spring the payback time for solar panels is now probably less than 10 years, and it will probably now pay to fit a big Tessla battery to juggle power and of course adding insulation if you can do that reasonably. Its really unfortunate that electricity is so much more expensive than any other source of domestic heating, especially now that over 40% of our electricity comes from wind and solar, neither of which is that much more expensive now than it was a year ago.
While I can see that we might be carbon neutral up to 100% of our current electricity load by 2035 if we can find some good storeage methods, I can’t see how we can replace more than a fraction of our massive overall energy use with green alternatives on that timescale, let alone find substitutes for all the petrocarbon feedstock! Having said that, we really have no alternative but to try…………..
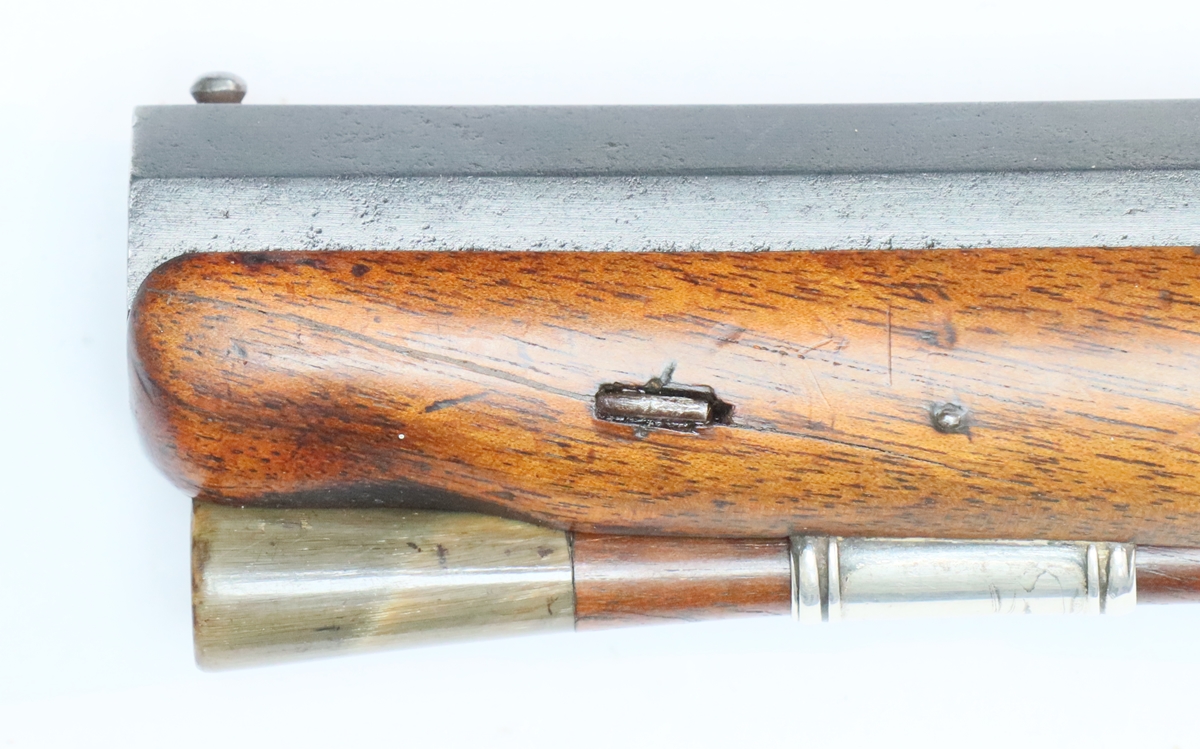
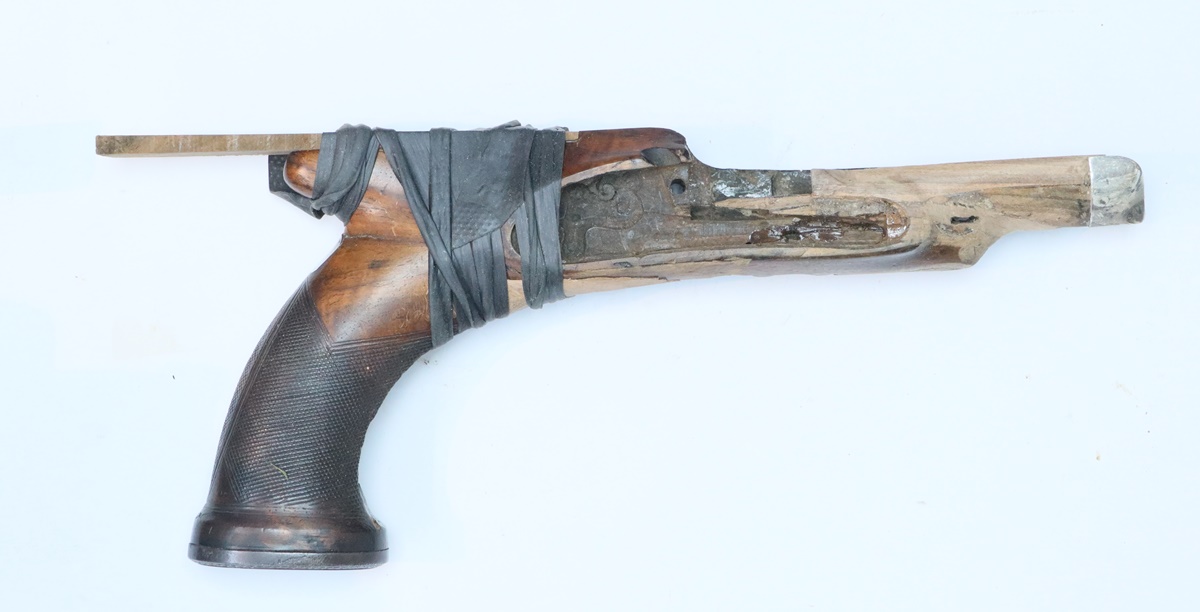
24th October Busy making the frame for the next secondary double glazing – I bought the oak in the form of 50mm x 200 mm kiln dried lengths and am machining that down on my old radial arm saw and planer surfacer. Mostly its going well. except that one length of wood I wanted to use for the 850 long uprights had a mighty shake up the middle that I didn’t discover till I got it down to size, so a bit of remaking was called for. I can’t imagine how anyone could do any woodwork without the means to convert timber – although I did buy this timber specially, mostly I can make things from reused timber or some old oak gateposts I bought many years ago. We’ve been trying to clear out some of the junk that has accumulated over Covid and which is effectively clogging up a whole large room – I managed to sell a couple of old computers on ebay today – thats a start! My Haematologist offered me an Evusheld antibody injection against Covid – apparently its available if you pay but not from NHS or the medical Insurers – on balance, given my impaired immune system and the fact that I am going back into school to run our STEM club and help in class this half term, I bit the bullet and opted for it – tomorrow. I’m also having a meeting tomorrow to sort out with Dave what we are going to do with the children in STEM club – be great to get that going again. Talking of school remined me that last week I had fixed with other people to take the boat round to Ipswich on Thursday, and on Wednesday we got an urgent email from the school saying that the ‘expected some time‘ OFSTED inspection of the school was taking place on Thursday and we had to attend – I couldn’t as too many people were depending on me so I really couldn’t change my plans – we haven’t yet heard the result of the inspection, but people thought it had gone well. Here are some (rather poor) photos of the insert I have made for the Manton – still waiting for the Locktite.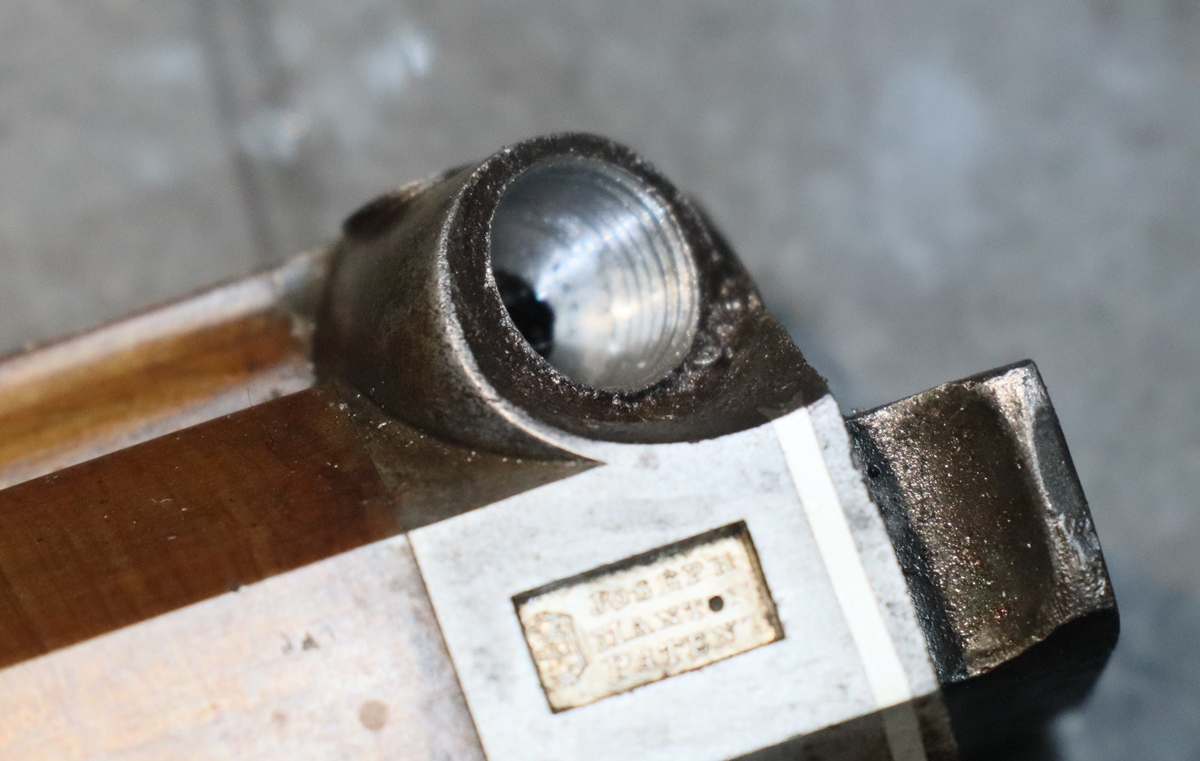 Drilled and tapped 3/8 x 32 M. -The thread is much better than it looks here!
 part way in…. I don’t want it to get stuck before it has the Locktite – 1/4 BSF x26 nipple thread
22nd October – I’m back after a bit of a long break, for which I apologise! I seem to have been quite busy, although I’m not sure what was occupying me most of the time although I’ve done a fair bit of work on the boat that we are going to base in Scotland from next spring. We sailed it from North Fambridge to Ipswich to get some work done at Fox’s Marina on Thursday – actually sailed is the wrong word as we don’t have any means of putting up the mainsail at the moment as there is a problem with the inmast furling gear, so we motored all the way – when we got to the River Orwell the engine started to play up, but we managed to limp up to the Marina – so the engine is another problem to sort out. I have started to make and install the frames for the secondary double glazing for the leaded windows in the old bit of the house – the result is fantastic. as I mentioned in this blog before, I discovered a firm that made a revolutionary form of double glazing using two panes of glass separated by a near perfect vacuum in a very thin layer that provides better insulation values than triple glazing, which conventionally fills the much larger space between the panes with gas, usually argon, that still conducts quite a lot of heat. The vacuum windows need some means of stopping the glass bending inwards under the external pressure, and has tiny dots on a 1 inch grid that keep the panes of glass apart. |The panes have to be specially made to size and finish up at about 8mm thick so are easy to incorporate in more or less normal frames. I’ve made oak frames to go behind the leaded windows, with a fixed panel either side and a sliding panel in the centre over the opening casement. I’ve done two in the kitchen and one in the living room so far and it has definately raised the temperature in both rooms. The thing that strikes one most when you put them in is the reduction in outside sounds and the slight change in acoustics near the windows – the vacuum is an almost perfect sound barrier – check out the glass, its called Fineo – as you might expect its expensive, but as a fraction of the overall real cost of the job its not too bad – costing my time etc I guess it accounts for 30% of the cost.
I have recently had a few days with a gun for the first time since the last shooting season. I took the Nock and a Beretta o/u to shoot some clays and surprised myself (and others) by managing to hit lots – must have been due to the long absence from shooting, because next time I couldn’t replicate that level of success. I have had one game shoot, last week, at Partridge and Pheasant on a glorious warm and sunny day in Suffolk. It looks like it may be my only game shoot of the season as with Bird Flu now virulent in the area and several shoots packing up during Covid there are not many opportunities for Black Powder shoots, and anyway the costs have escalated – last year’s £33 per pheasant has turned into £50 now.
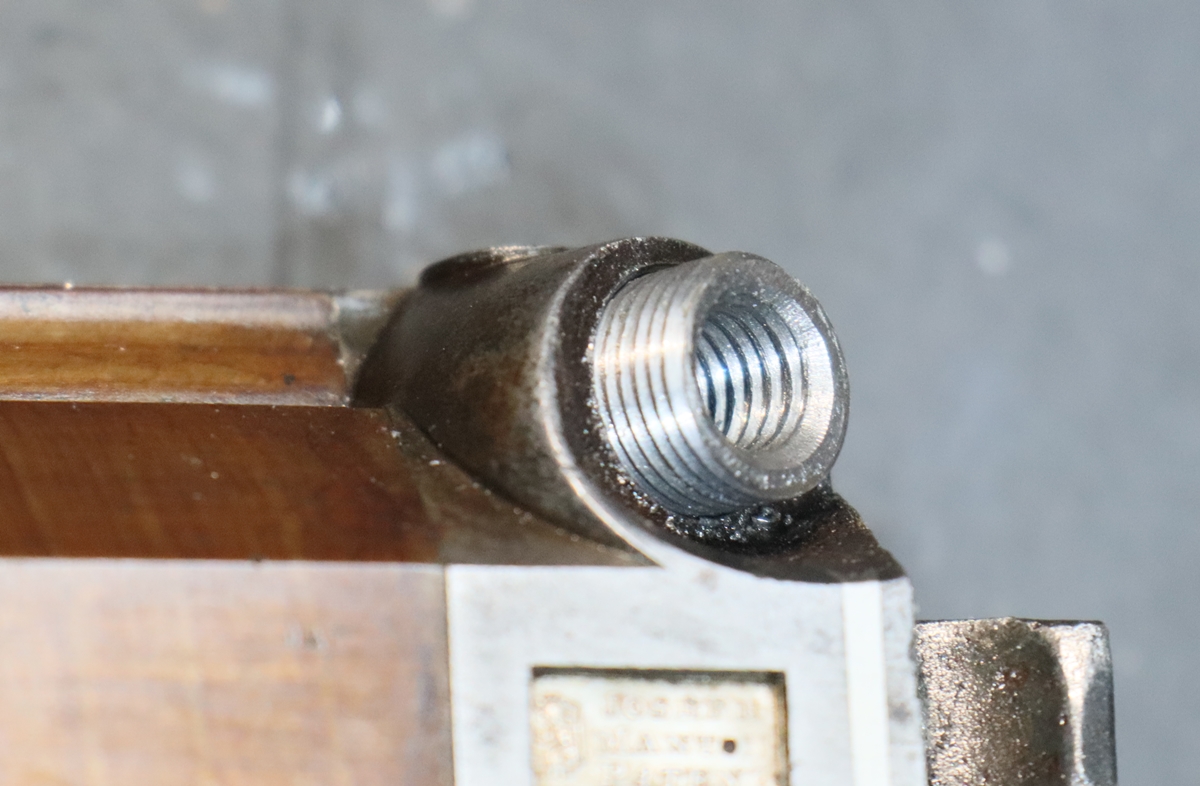
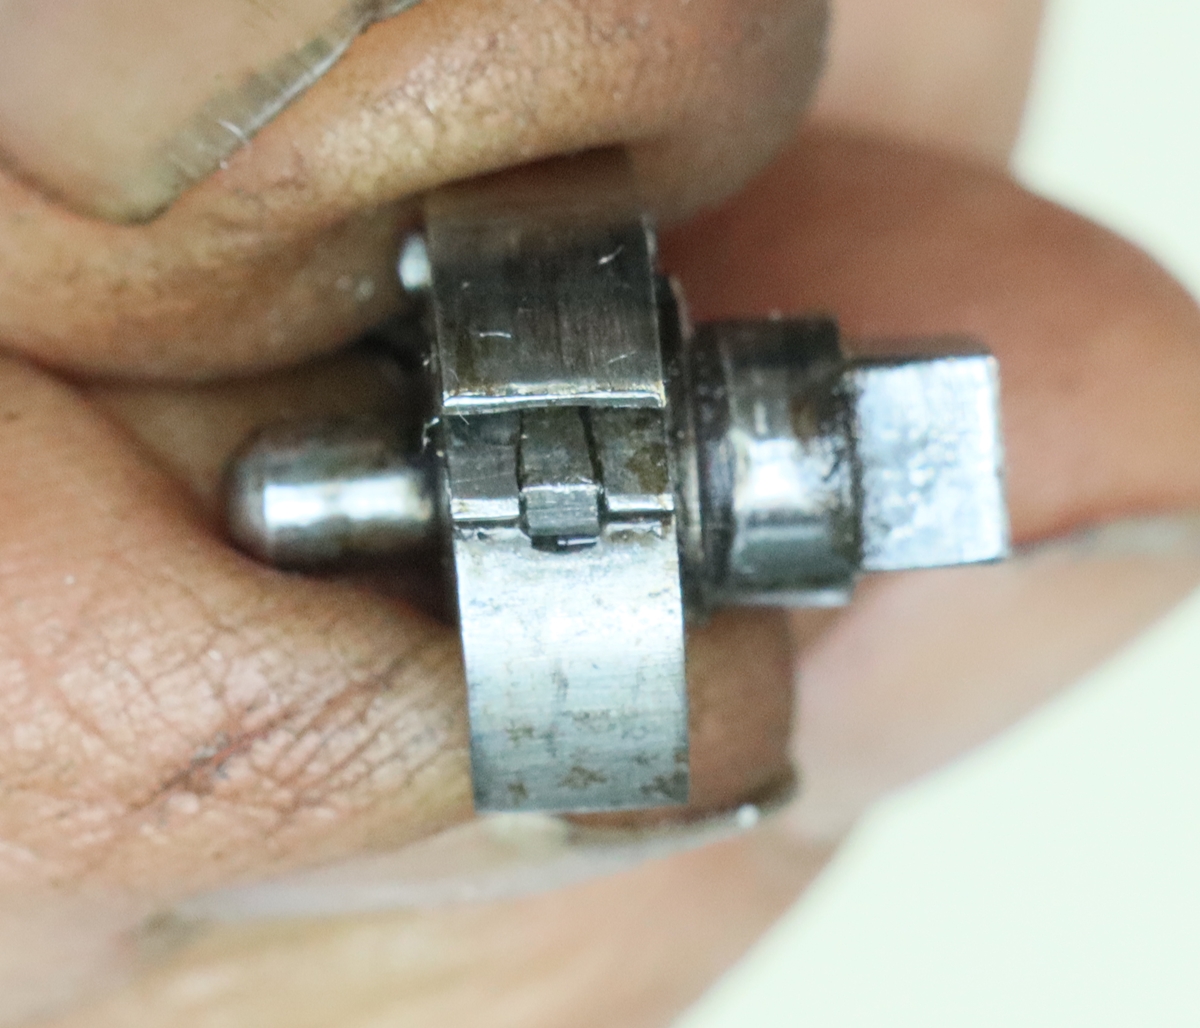
I havent had any gun jobs over the summer – except for an big engraving job that I’ve yet to psyc myself up to tackle, but recently I was brought a nice single barreled percussion sporting gun by Joseph Manton that had blown out its nipple – luckily without any injury .. The gun was brought to me to ‘sort out’, of course minus the wayward nipple. The nipple hole looked much larger than a normal nipple hole and the thread finer than usual and quite messed up. Looking down the nipple hole with the microscope you could see that someone had screwed in a nipple with a different thread pitch than the one tapped into the hole – screwing a piece of sharpened wood into the nipple hole didn’t yield a clear pitch for the thread, but a piece of modelling clay pressed in showed that the pitch of the thread had been cut at 32 t.p.i but a nipple of some other thread had been inserted. Measuring the thread diameter showed that the nearest thread size was 5/16″ x 32 t.pi. which happens fortunately to be a standard M.E. (Model Engineers) thread. Quick shop at my favourite tool store Tracy Tools got me a 5/16 x 32 plug tap (£3) and die (another £3) by return post. I managed to get a decent thread in the bottom of the nipple hole, and if I had been sure the gun was never going to be shot again I’d have left it like that and made a new 5/16 x 32 nipple, but I can’t bring myself to do things like that! I quite liked the look of the 32 t.p.i thread so decided there was just enough metal in the breech to drill the nipple hole out to take a 3/8 x 32 thread ( another order to Tracy Tools for 3/8 x 32 taps and dies – total £12). I set the barrel up in the vice of my milling machine (with suitable packing) and with the 5/16 tap in the nipple hole aligned it with the axis of the milling machine and took the plunge and drilled out the hole. I kept the barrel set up and put the taper tap in the chuck and started the thread with mole grips of the tap body, then second tap. after that I took the barrel out and used the plug tap to get as far as I could, then ground the end of the plug down to cut as near to the base of the nipple hole as possible. result a very nice thread. Then turned up a sleeve with a 3/8 x 32 thread on the outside and a 1/4 BSF x26 hole in the centre, coned the end a bit to fit the bottom of the nipple hole and parted it off – result one nice sleeve – now waiting for some Locktite 270 to stick it in place – that is a very strong adhesive and will stand up to 180 degrees C so I think it will stop the sleveve being unscrewed when the nipple is taken out. I’ll post some photos when I have time to take some – I’ll have to change my habits now I’ve started to post here again – I always used to post late at night and go to bed very late – a habit I’ve got out of over the summer, snoozing on the sofa and going to bed around 11 and waking ridiculously early.
I have another job pending – someone has lost a plastic jag with wadding at the bottom of barrel and can’t shift it – its a tubelock so its not as if you could take the nipple out and pour in a bit of fine powder and blow it out – might be able to get enough through the flash hole to blow it out, or I’ll have to invent a way of drilling it out – I don’t like having to remove breech plugs in a double as there is always the chance of breaking the solder joint between the barrels. I have come across the problem of the cleaning rod and its load getting very tight in the bore – there is a technique for avoiding disaster- first always wind any cloth or paper or tow etc on by turning the rod clockwise as seen from the handle – then when its in the barrel turning the rod clockwise both tightens the cloth etc around the jag and screws the rod up. Now NEVER pull the rod hard without turning it clockwise at the same time – clockwise turns will tend to wind the cloth tighter on the jag and make it an easier fit in the barrel. It’s much easier that way! Similarly if you have to use a screw to remove athe jag’s load that you’ve left behind in the barrel, keep turning it clocckwise as you withdraw the rod.
Re 20th August – It turned out that the chap who serviced the engine this year had used the wrong replacement impeller when he serviced the cooling water pump so it wasn’t circulating the cooling water properly. It wasn’t obvious that the impeeler was too small as the position of the watr pump stops you looking straight into it, but I spotted that the O ring supplied with the impeller wasn’t the same size as the mark on the cover plate of the pump and that it had been pinched in one place. A proper Sole replacement is now in place and the ‘wrong’ spares disposed of. Years of using O rings for very deep water (4000 meters and more) has taught me that you have to inspect O rings very carefully and I’m always suspicious if things are not perfect!
20 th August – Still enjoying the good weather here – a couple of days with a bit of much needed rain, but not enough to do much good. I had a day down at the boat on Wednesday – I hadn’t realised that it was the first time it had been used since launch. Anyway we set off under engine and within 5 minutes it overheated and had to be shut down, leaving us drifting amomg the moorings – the skipper called up the marina launch and we were duly towed back to our mooring for a bit of a post mortem. I hadn’t been involved with the engine side of things, but the seawater side of the cooling had been modified and serviced, but I think the problem lies in the closed circuit coolant system – I suspect that 2 years of lying idle might have siezed the coolant pump – the system had been filled properly and checked, so it wasn’t lack of coolant. A trip next week is scheduled to sort it out.
15th August Been busy keeping cool! I’ve worked up to 100 lengths of the pool = I think Ill stick at that for the rest of theyear!. There was an article in the Sunday Times saying that the recommended daily intake of protein is half what it should be – recommending 100 gm per day – I checked out the calculations I did when I was trying to put on weight – mucsle specifically, after Covid in early 2020 and I came up with 85 gm to maintain weight, and more to build muscle. That’s quite a lotto put away – meat is around 1/3 protein or less, and to get that much protein from vegetarian or vegan diet without supplements is very hard work. I’ve found that its very easy to loose muscle – a couple of months back I noticed my calve muscles were quite reduced, and I was struggling to lift things that hadn’t been a problem a year ago, like my outboard motor (20Kg) – anyway I made an effort to eat more protein, including a cooked breakfast, and it seems to be working – the swimming probably helps, and I do a short burst of weights most days. I was quite conscious that my sense of balance wasn’t really up to clambering around on the moving deck of a of a sailing boat at sea, so I’m practising that too! Problems you never really think about until they hit you as age creeps (or rushes) up. I’ve been busy making bits for the boat on the 3D printer – I’m addressing the issue that there is nowhere in the cockpit to put down a cup while sailing – an important facility that most boat designers ignore! The boat is due to be launched today and put on her mooring – I’m scheduled to be sailing next week, but there are going to be a lot of family on board, including baby and dog, so I might just leave them to enjoy it without my getting in the way! I’ve sent the Lowe pistol back – the client was happy for me to leave it as it was, and not attempt to get the set trigger firing to work – I’m convinced that if it ever worked, which I assume it must have done when made, it was, as they say, by the grace of God the design being, in my view, fundamentally flawed.
Before cleaning
 Finished

 The crack running from the barrel bolt now looks much less obvious
9th August (2). I had an order for a couple of gravers and sharpening jigs, so got that out of the way before I got down to sorting the Lowe Pistol that I’d left in mid air, so to speak. I had decided the barrel needed to come out as I suspected that there was a fair amount of rust underneath, and particularly at the junction of the wood and barrel, which is where its mostly a problem. I had a bit of a scrape around on the upper surfaces and found that they had a very thin black coating on top of a suggestion of rust. Getting the barrel out of an old pistol can be a tricky job – in this case the barrel bolts seemed set in their slots, and the visible rust along the edge of the wood raised the possibility that some of the wood might come away – there was already a split at the muzzle end suggesting that someone had tried to get the barrel out, and there was a lot of damage around the bolts where people had tried to prise the bolts out. My technique for removing the barrel is firstly remove the lock as the rear side nail is probably notched into the barrel hook. Then lay the pistol with the bolt heads down on a pad of bubble wrap or something else with a lot of give, and using a screwdriver that sits on the thin end of the bolt, tap very gently, checking that you are not lifting the wood around the bolt head end. Once the bolt has moved a few mm you might be able to pull it from the head end but DON’T lever against the wood of the pistol without putting something under the lever to spread the load and only lever gently. On this pistol the barrel bolts were very firmly in place and I had to make a 25mm long strip of metal to go into the bolt slot and drive the bolts out, which I managed without any damage. Getting the barrel out proved a little tricky too, although by this time it should be free and just lift out, this one didn’t want to come out, and I was worried it would break off some wood so I ran a razor blade between the wood and the barrel. I put a dowel in the barrel end and tapped it gently and eventually the barrel came free. It was, as I suspeted, quite rusty and certainly justified taking it out. I thought about trying to get the rust off, and leaving the barrel finish, but decided that it really needed to go in the electrolytic derusting bath for an hour or two. After washing and rubbing it down with tissue I put it to the fine steel wire brush on the ‘grinder’ and got a very good clean finish with a suitable dark finish that will do for the final surface, Before refitting the barrel I cleaned up the barrel bolts as best I could without removing them form the stock, and put some leather grease in the slots to ease the next removal. I also glued up a previos split at the muzzle. Looks good now! Then back to the lock – which I admit I’d been putting off ! With the lock back in ( you need to ‘cock’ the set trigger to put the lock in by pushing the trigger forward till it clicks ) I tried to fire the pistol with the set trigger, but it was not reliable so I stuck to manual trigger pulls to fire it, which worked just fine. I debated whether to take it all to bits and do some more micro filing on the detent, but decided that the whole system was so impossibly fiddly that I might easily end up with a pistol that wouldn’t fire at all. It made me think about why the system is so fiddly and difficult to set up, and I think I eventually understood what was wrong with this method of detenting a lock. In a normal detent the detent itself is not involved in the instantaneous release of the tumbler when the sear is raised out of the full cock bent – the detent is free to move a little and the additional work involved in raising the sear up the detent to clear the half cock comes entirely from the mainspring, not the trigger plate / set trigger. With the Lowe detent the sear has to lift the detent as well as climing out of the full cock bent, and as far as I can see also has to provide some impetus to climb to the height of the half cock notch, given the angle to the pivot of the detent – this additional force to lift the sear and detent must come in part at least from the trigger plate, or the set trigger if this is set. Since the set trigger works by inertia and has no other force driving it, it is perhaps not surprising that it is marginal. To me this explains quite clearly why this was not a common form of detent – as well as being very fiddly to make and set up, and prone to wear, its just fundamentally unsound in principle. Perhaps this drawing will help explain how it is supposed to work;-
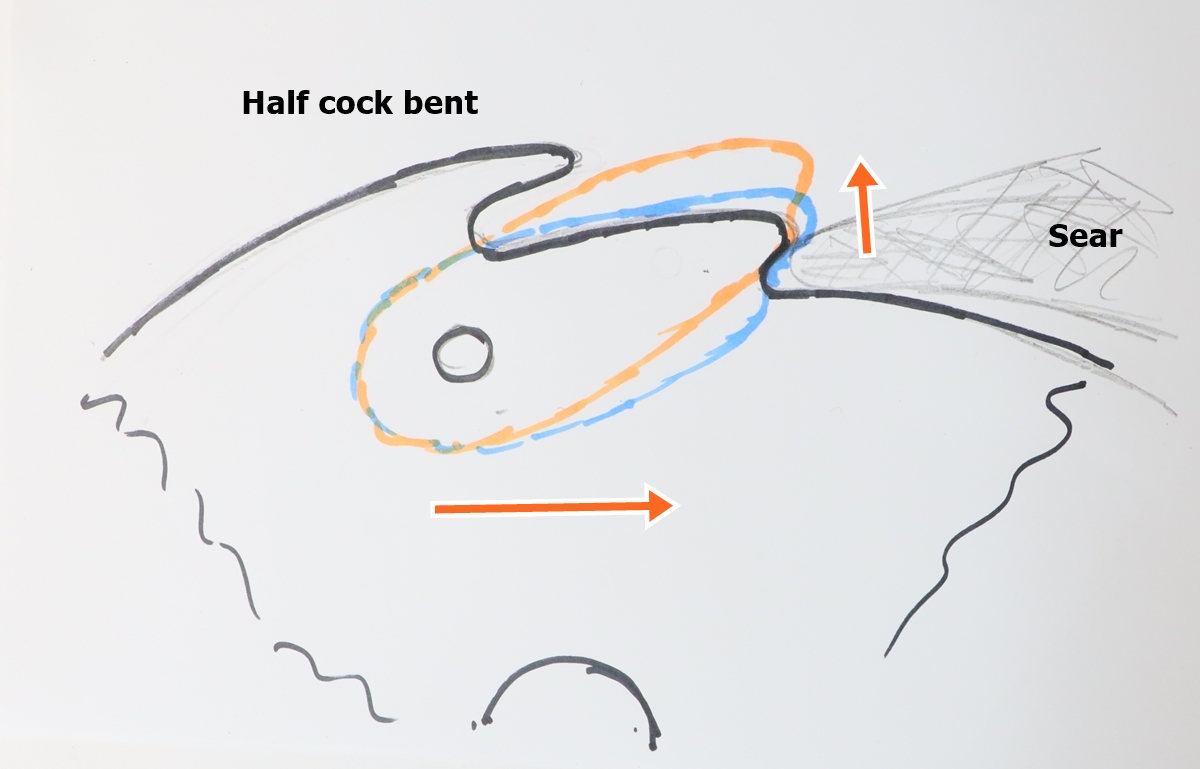
sear in pencil – detent in blue is ready to fire, orange is in position to guide sear over half cock notch. Sear needs to do work to raise detent and climb over it.
I have to admit that the proper shape for the end of the detent is conjecture on my part, but somehow the sear needs to get on top of the detent without pushing it down?
9th August. I could have sworn I posted a new post yesterday, complete with a couple of photos, but I must have forgotten to click on ‘publish’ I suppose. I’ve been down in Cornwall, part sorting the cottage, and part holiday. We towed our 16 ft dayboat (Cornish Coble) down and parked it at Mylor Yacht Harbour and had several sails around the Falmouth Estuary in lovely weather, and chopped down the encroaching vegetation round the garden – the rate things grow, particularly sycamore trees, in Cornwall is something else! By the time I’d finished cutting back enough to be able to see out of the garden I’d generated more than we could fit onto the available space, so I had to go and buy a shredder to compact it – I got a £66 one at B & Q which is the same as the one we have at home – its fantastic and shreds branches up to about 45mm which is about 2 or three years growth, so ideal. Cornwall continues to get better as a holiday destination – its now much easier to get good food from farm shops, and there are three or four good bakers producing artisan sourdough bread that is really worth eating – which makes a lunchtime diet of sandwiches quite bearable.
At anchor opposite Falmouth for lunch
We even had a swim at Lamorna Cove!
22nd July I was having another fiddle with the Lowe pistol this evening, trying to reshape the little detent that I hardened yesterday as it was getting worn by the sear and I wasn’t sure it would keep its shape. I did a trial fit again but this time it was exactly like the original problem – no full cock. I think I spotted where I need to take off a bit of metal ( with a diamond file as its now hard) and was removing the pivot pin with a pair of fine long nosed pliers when the pin pinged off across the workshop, never to be seen again. It was about 1.5 mm diamete and 4mm long and slightly tapered – very fortunately I have a set of hard steel clockmakers blanks for shafts including one a fraction too big for this job, so a few minutes holding the rod in a drill against my diamond hone put a slight taper on the rod and reduced it to the required diameter. I had to use a diamond file to nick the rod deeply and then break it, and held the little bit in a micro chuck of a dremel while I honed down the ends to fit. – all in all it only took me about 35 minutes to recover from the loss. I need to try he revised shape – assemble the lock AGAIN etc etc. I’m not sure I’ll be able to give much time to it in the next week or so as I have some family business to attend to that will keep me occupied – plus I need to go down to the boat a few times to assist getting it ready to launch……… Just put it all together for the umpteenth time, and it worked, even to the extent that the set trigger fired it and it sparked up nicely in spite of using one of my home-made flints. I only tried a couple of times, but I’m optimistic that it will go on working (I hope!). I certainly wouldn’t want to try it too often, because even with my hardened detent there is still some wear and in my view the whole design is pretty marginal – I think I probably need to do a bit more to the pistol before I return it – I think the barrel really needs to be taken out as there is likely to be some rust underneath and I think it will require care to remove the barrel bolts as they are likely to be rusted into the wood. I removed some more hard black rust from the lock with the back edge of the modelling knife and 0000 steel wool and the signature now shows up well. I would put up a photo of the new detent, but actually it doesn’t look that different from the original and I don’t have a good enough macro lens on my camera to show it well.
20th July The owner of the Lowe pistol suggested that this particular design of detent might have been rare because it was so fiddly to make – I’d go along with that, and add that it would have been susceptible to wear that, like this example, would render the pistol useless for anything other than scaring adverseries! By comparison, the ‘normal’ detent on the side of the tumbler is much easier to make and much less critical and less susceptible to wear. I didn’t get a chance to do any more to it – I hope I can get it to work, but I’m not sure yet! I did a bit more on the boat, fitted the second jib sheet car, fiddled around with a new lock on the hatch board and fitted a bit of trim in the saloon. I also took down my little wooden dinghy that has stood in the shed unused for 20 odd years. I built it about 40 years ago as a challenge after aquiring a few sheets of 1/8th ply from a bankrupcy sale (“take as much as you can before the bailiffs come in this afternoon, and drop me a few quid in cash” – even included a nice BMW coupe that I couldn’t afford to insure so didn’t take – to my everlasting regret!). My challenge was to make an 8 ft dingy light enough to carry on ones back with the building taking less than 24 hours work. I stiched together a model from card and a needle and thread and then scaled it up to stitch and glue full size. I got it made and one coat of 2 part polyurethane in the 24 hours, I’m sorry to say that the secod coat over-ran! It is a fine boat – the seat ( ‘twart’ – obviously the wrong word as that implies across) runs fore and aft so you can always slide to balance the boat. The aim is to launch Sepiola in the next couple of weeks onto her mooring. Going from here to the boat I use Google maps. It offers you a choice of 3 ways that are almost the same time, but the one I use most often varies in detail from journey to journey and I often take a wrong turn, whereupon google routes me through many tiny roads because it won’t tell me I need to turn round ! Strange thing is that I always get a different route when I ask for the return journey – a slightly flakey routing algorith that I’ve noticed usually starts off on major roads and descends into back roads as you near the destination, When returning it takes you straight to a main road and then descends to smaller roads. Annoying!
19th July One would almost say it was a hot day, I had to retreat to my workshop that stayed at about 25.5C so I was able to work on the Lowe pistol. Our house its pretty cool as its old and solidly built and has most of the accomodation in the North part, but if the heat lasted for many more days the advantages would be lost. Playing around with the detent, I concluded that the reason it didn’t work was that a vital bulge had been worn off so the sear could slip out of full cock without activating the detent to block the half cock notch. The only way I could see to try to make the lock work was to make a new detent, which is what I was doing today. I started with a bit of 2 mm spring steel and annealed it – that way I can harden it when I’ve finished if it works. Making an accurately shaped bit just about 4 mm x 2.6 mm is OK as long as its still attached to a bit of metal you can hold, but once you get to the stage of fitting and trying it you have to separate it, and then the fun starts – for one thing I am terrified that I’ll drop it, and I’d never find it on the old brick floor, then to file it you have to hold it so you need a small high precision vice. To get the shape right I threaded the old one and my version on the same axle and checked under a X15 microscope, then took a few strokes with a very fine file while holding the part in the vice, then checking again. When it came to getting the bit that engages the sear, I filed it under the microscope with my finest file. I’m still working on it – of course to check if it works you need to put the whole lock together, mainspring and all, and also put it back in the pistol as you need the trigger blade. I must have done that at least half a dozen times so far, and taken the detent in and out about 20 times. I think I could strip a flintlock with my eyes shut now! I’m not there yet – I have now got it so that it will hold both half and full cock, and fire from full cock with a firm pull as the sear has to climb up a bit of the detent – it won’t yet fire by the set trigger – at least that is an improvement! It’s by far the fiddlyist job I’ve ever had to do, and of course I don’t really know the correct shape for the active face of the detent – I just hope I don’t take too much off and have to remake it! I did manage to get a swim in – 50 lengths, the pool is getting a bit green in this heat despite the chlorine – probably needs an algicide. I finished the sear spring yesterday – I carelessly forgot it was a left handed lock and bent the spring the wrong way, so I had to straighten it out and rebend it – I didn’t close the joint fully up as I didn’t want to overbend the metal twice – its a bit wavy too but it works just fine. Off to do a few jobs on the boat tomorrow…..

1 mm graph paper – critical surface marked by arrow.
17th July – Quite a warm day, at least up to about 3 p.m. – every nice day I’ve planned to have a swim at about 4 p.m. and every day it’s clouded over about then. I did get up to 60 lengths yesterday so not doing badly. Still messing about getting the boat ship shape, and doing odd jobs outside while its so nice. Today threatened to be too hot so I moved to the indoor workshop for a bit of work on the Lowe & Son pistol. Actually all my workshops are pretty cool in summer – probably the evaporation of all the damp! Anyway I thought I’d try Bev’s suggestion and turn the little detent up the other way, so I knocked its pin out to release it. Tip;- if you have to knockout a pin rest the object on a bit of lead sheet folded 2 or 3 thicknesses and hammered flat – that way the object is ‘dead’ and won’t bounce around and the pin can sink into the lead and doesn’t get lost – it even works for driving the barrel pins out resting the wood on a lead block – it avoids accidentally driving out a chip of wood. I found a pin punch that was the same size, more or less, as the pin so I could easily put the detent back in and inspect its action. So, sad to say, that doesn’t seem to be the answer – put in the other way up the detent wont go down far enough to let the sear into the half cock bent, although from the point of view of the full cock bent, things seemed a little better – so original orientation half cock works but full cock wont hold, reversed I havent tried assembled, but it looks as if the opposite happens – full cock works but it won’t engage half cock……There are some signs of wear from the sear on the detent, which might suggest that it did work once, although the ‘nose’ of the half cock bent does appear to have been impacted by the sear and burred over. That is a bit of a mystery too, as would probably have stopped the gun being fired – why do that enough times to burr over the top of the bent? So I’m no further forward on that puzzle – I am still trying to believe that the gun has worked with the parts that are there now, but my faith is wavering! I decided more evidence was needed – I need to make a new sear spring so the I can see the gun in action properly, so I got a bit of 5 mm spring steel and milled it down for the blade – its now ready for final fitting – I need a UNC 3 die to cut a new screw to hold the spring – I managed to get the old rivet out of the lockplate, and the original thread in the lockplate was intact, and a slightly loose fit to UNC 3, so I’ll have to expand the die as far as possible.

Tumbler and detent on 1 mm squared paper – arrow points to slot in tumbler for the detent.
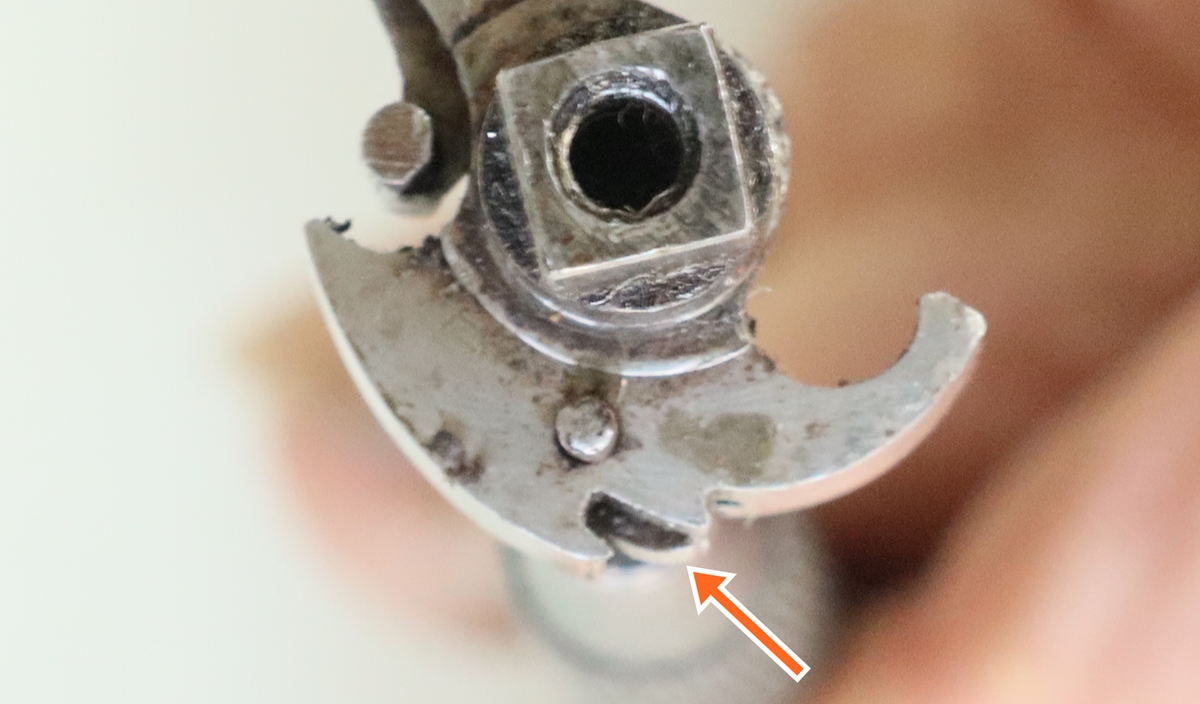
This is how it was – you can just see the detent in the main bent – see arrow, the perspective is a bit unhelpful!
Here the detent is reversed and is visible blocking the half cock bent it won’t go down any more.
Reversed – this is a s far down as it will go, so stopping hte half cock bent.
![]()
Part made sear spring.
13th July Decided to strip the carburetor of the 4 hp outboard for our dinght as it will only run with the choke out, suggesting that the fuel isn’t getting to the engine. I seem to remember checking the fuel pump some time ago and it was OK, the fuel filter is OK too. The dependence on the choke suggests that one of the jets is partly bunged up or some other part of the carb after the float chamber. Anyway I had a look on YouTube for an idea of what to expect during the job and took it all apart – a bit of muck in the float chamber but not much evidence of bunged up jets. I remembered that I’d ‘inherited’ a small ultrasonic cleaner when Giles emigrated so put all the parts in that and got quite a bit of muck in the bottom of the cleaner that must have come from somewhere. Now waiting for the new gasket etc set. I had a problem with it overheating when I last used it, and stripped and replaced the water pump, which was completely solid with salt, and took the head off to clean out all the water passages. It still got too hot even with the thermostat fully open, so I removed it altogether and it was better. Now I’m trying to get it all right! Saturday is the Helice Shoot at Rugby – I’ll be there! Just got another two of the kids’ keyrings to print for tomorrow morning, unlike most of the 3D printing which will run unatttended to the end, these require the filament to be changed to give a colour change just for the text, so it has to happen at exactly the right point.
New sheave and axle assembly
12th July Busy printing 29 keytabs for a class at a Haverhill school where a friend teaches – the kids designed them, so one or two needed a bit of remedial work. I’ve been gently working on the dinghy to get it in shape for taking to Cornwall later in the summer. Bev left a comment about the detent on the Lowe and Son pistol suggesting that it has been removed and mistakenly replaced the wrong way round as had happened to one of his locks. Makes sense as no amount of wear would explain why the sear hits the detent when its trying to engage the full cock bent to cock the pistol. I’ll try reversing it when I get a moment. Its not the sort of job an amateur would undertake, so I guess it might be done by someone who had never seen this type of detent – but why would they leave it in place the wrong way round? And why for Bev’s lock too? Mystery….. We’ll see if it works when reversed…. watch this space. I’ve been gently cleaning off a few bits of rust on the pistol – my preferred tool is the back edge of a modelling knife blade, very slightly polished to make sure it isn’t scratching the metal – it scrapes off the rust without damaging the patina underneath, then a very light rub over with the 0000 steel wool and oil stop more rust and leave a good surface. I guess it really needs the barrel taking out as there is bound to be rust underneath at the edge of the wood. Its a fine pistol and I’m trying to avoid doing too much to it as its originality is important. If its something like the Rigby wreck I did recently, anything is an improvement, but the better the gun, the less is justified in my book. Oh and I finished turning a new sheave and bearing for one of the ‘cars’ on the track that adjusts the angle of the jib sheets on the boat — not the dinghy ( sorry about the jargon!). (makes me realise that I jump around from one hobby/pastime/job to another at a dizzy pace – perhaps that why I’m not really an expert in any of them!)
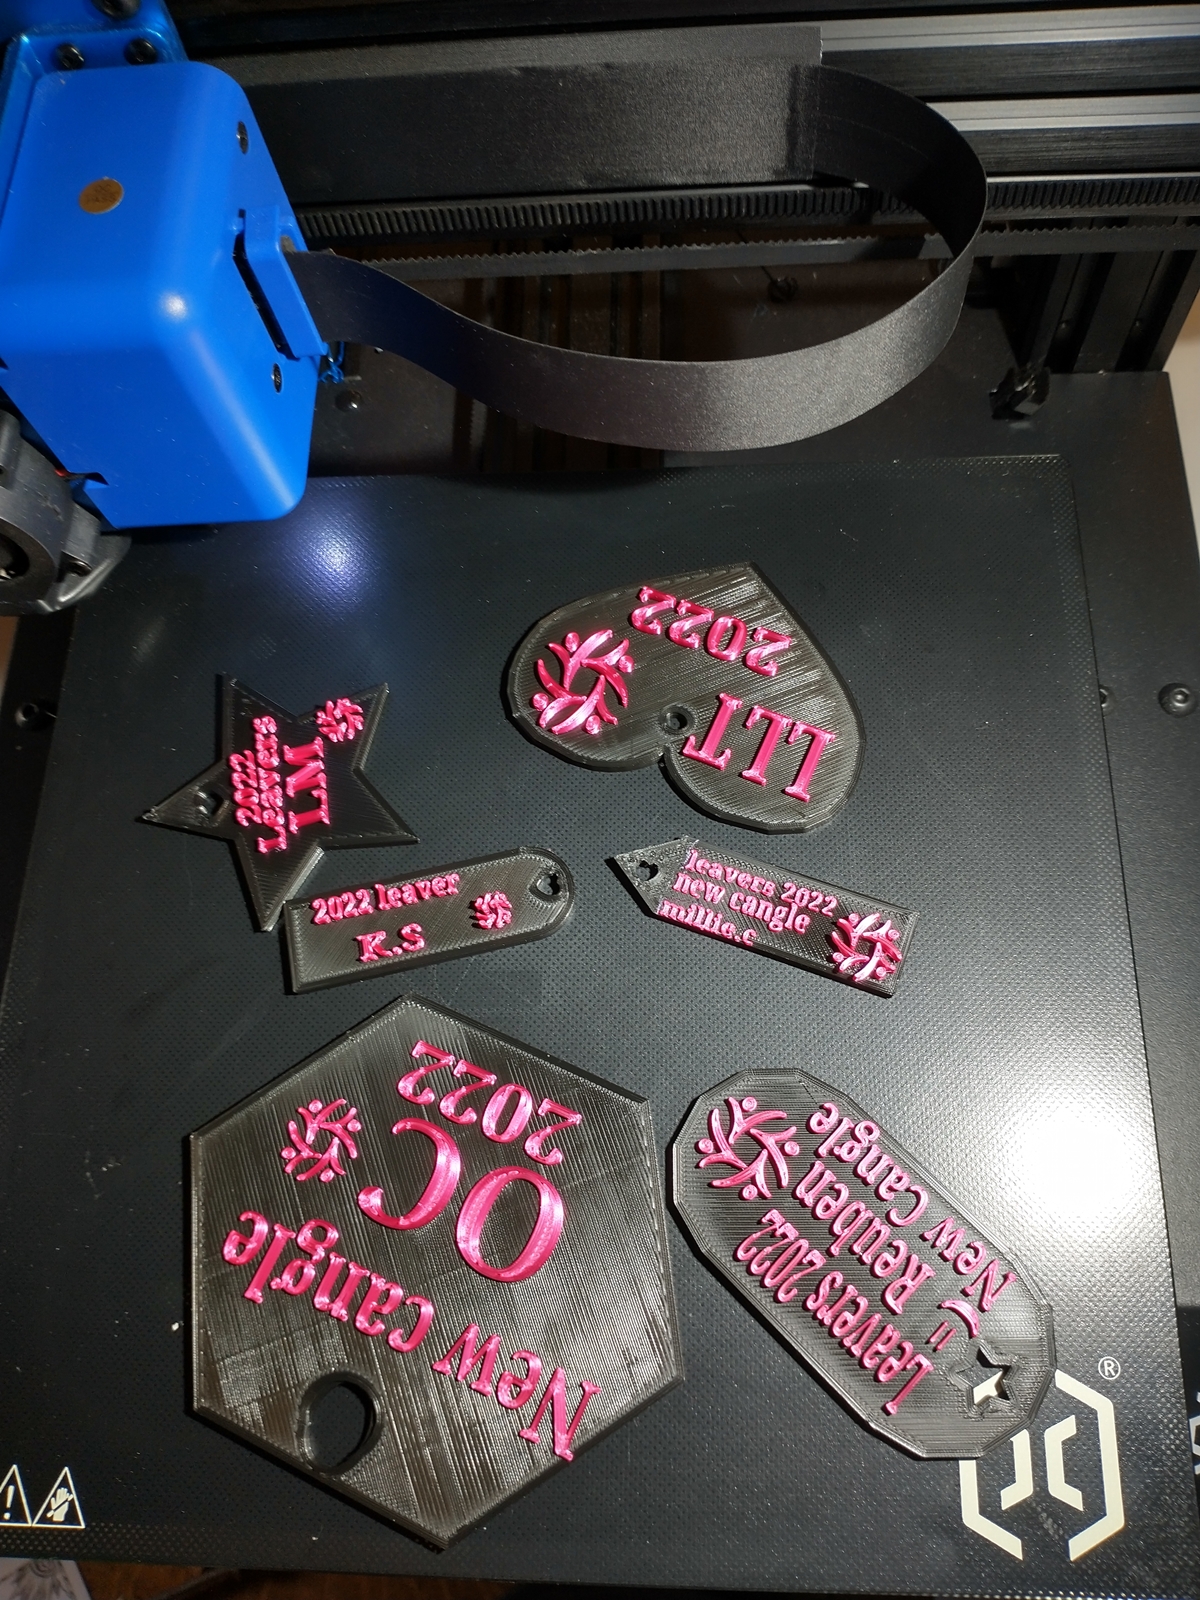
Keyrings designed by the 10/11 year olds using CAD software – pretty good effort.
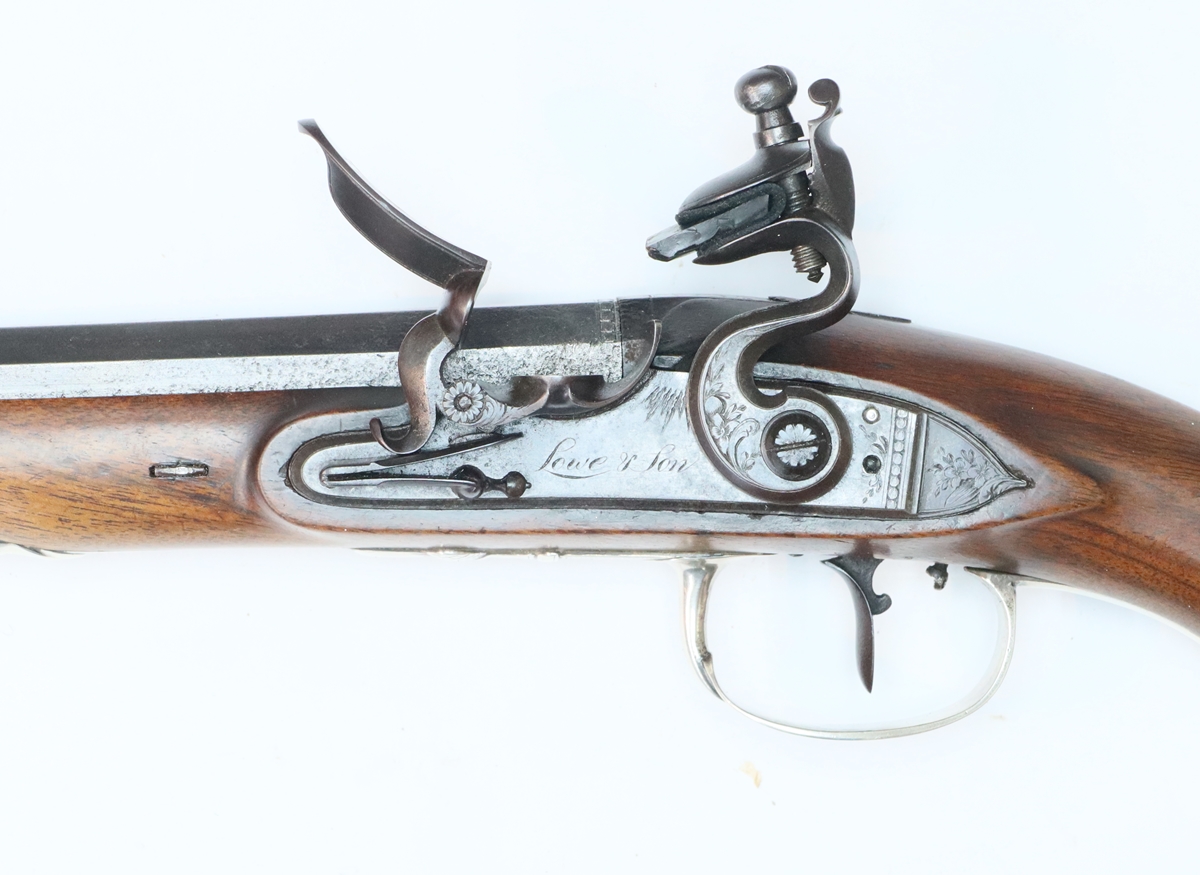
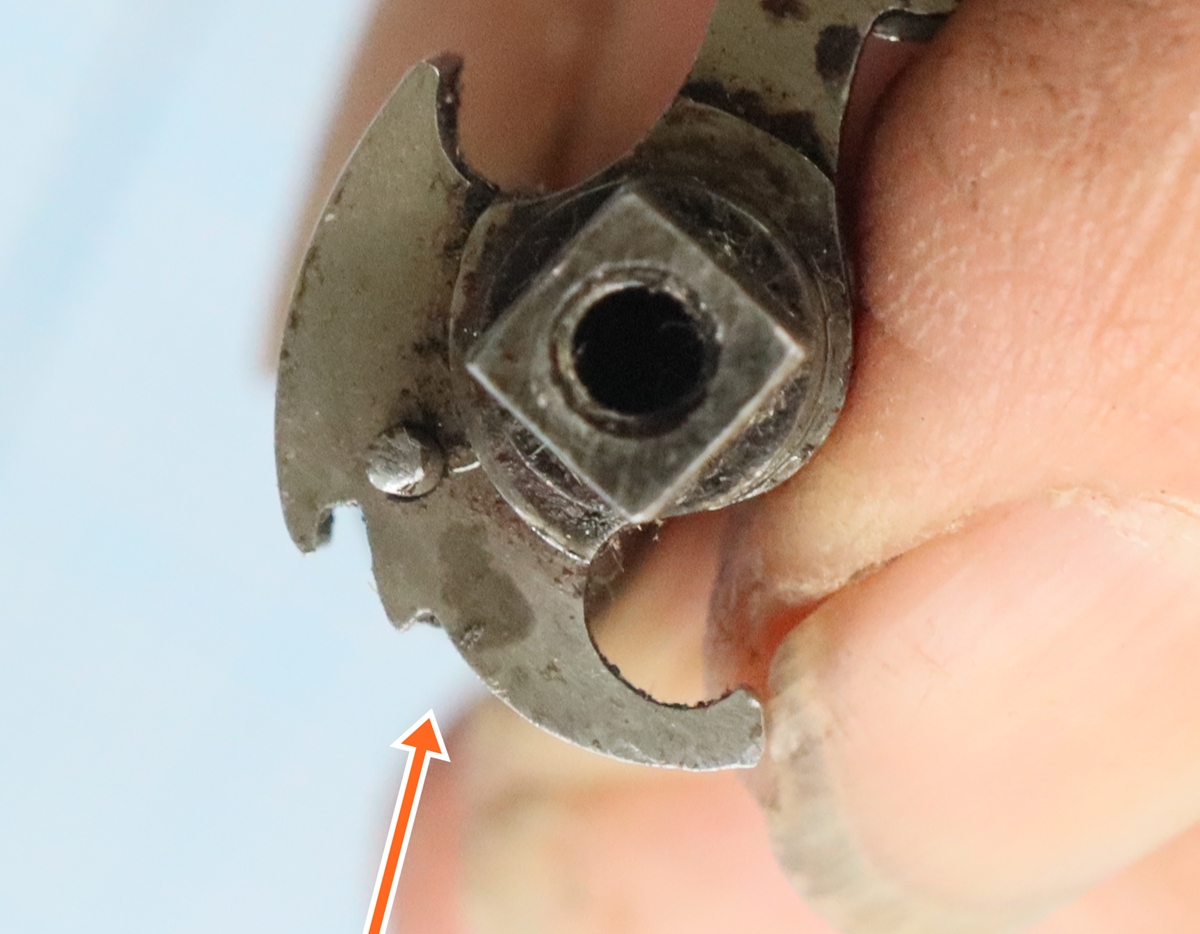
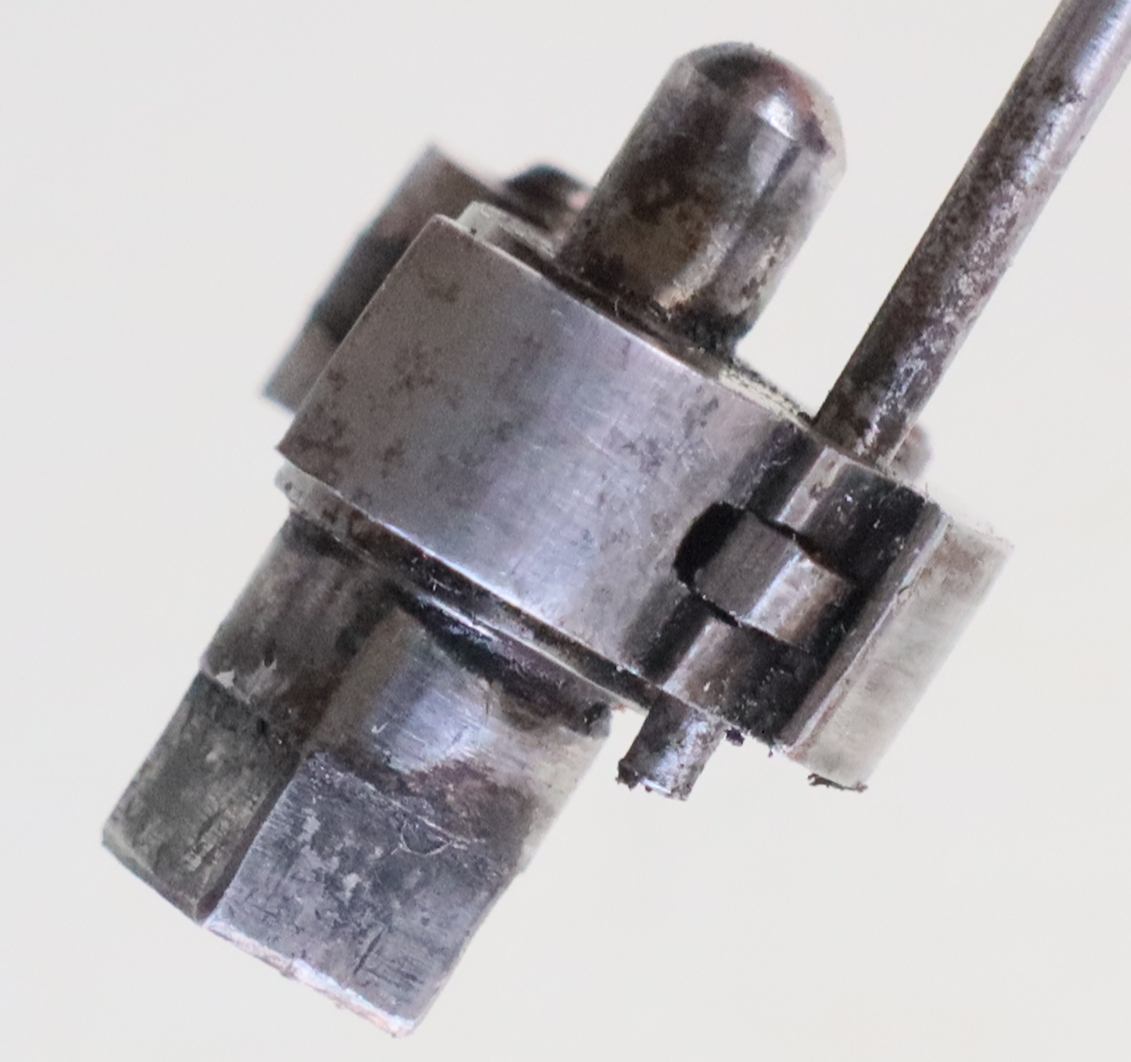
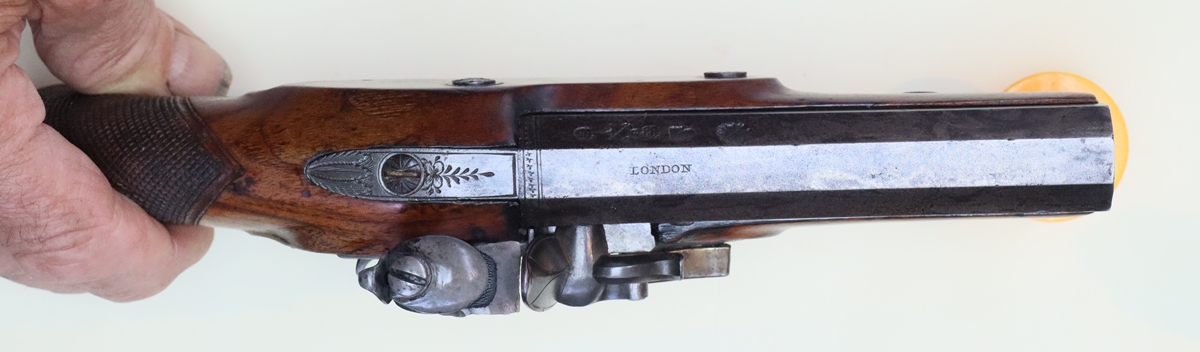
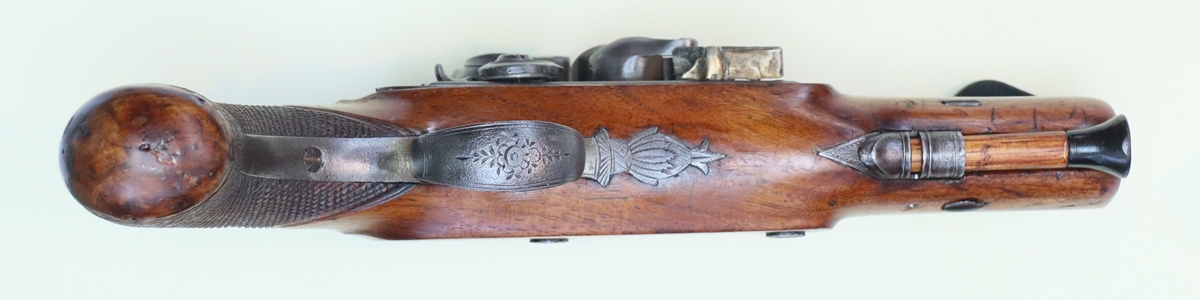
10th July Received a nice pistol to work on – Hermes left it on the doorstep of next door, who were away – they are terrible (Hermes, not the neighbours)! Anyway now have it and its quite unusual – A silver mounted pistol, not hefty enough for a duelling pistol, but I suppose what you would call a ‘horse pistol’ to be carried in a holster in front of the saddle – a pair that is. Anyway its unusual because its a mirror image of a normal pistol, with the lock on the left side – its a complete mirror image, the barrel bolts even go in from the right side – they usually go in from the left side like all pins etc. Made by Lowe and Son of London with hallmarks on the silver for 1787 and the maker’s mark for Moses Bent, a fine silversmith. It is in good condition, there was some superficial rust on the lock etc that was hidden behind some sort of blacking, but the engraving, which has very fine lines, is still sharp, and its cleaning up OK. The faults are that the sear spring has broken, and somehow the lock fails to engage full cock. The inside of the lock is in very clean condition with only a trace of rust around a few bits of the edge. There is one very unusual feature of this lock – it has a set trigger, with adjustment behind the trigger, rather than in front as is usual, so it needs a detent to carry the sear past the half cock position – the seat only gets a tap from the trigger blade if the set trigger is used, so will fall into the half cock bent without the detent to guide the sear past the half cock notch. This pistol has a form of detent that I’ve never seen before – I havent seen it described either. The tumbler is quite wide and a tiny detent is pivoted within the tumbler. It looks as if its meant to lie flat when the sear is in the half cock bent, but then when the sear is in the full cock notch it catches the detent as it climbes out of the full cock bent and the detent deflects it over half cock bent. The trouble appears to be that the detent gets in the way of the full cock bent and the sear engages it, causing it to pivot up and carry the sear over the half cock bent rather than fitting properly into the full cock bent. I suspect that the detent is worn or damaged – I dont see that it could have had a spring within the tumbler. Anyway, I will sort out the sear spring first – some bodger has made a rivet and rivited it through the original screw hole – Anyway a nice pistol and a nice mysterious project for the blog…. In the meantime I’ve got my small outboard motor running and started to varnish the spars of the dinghy that we are taking on holiday to Cornwall later in the summer. I had fun with the 3D printer – I bought some new filament called PLA + and found that if I followed the specified setup for PLA+ the print of my mug holder took 28 hours instead of 16 for normal PLA! I tried both settings, but the slow one is definately best, so I’m now watching while my printer chunters through that job…. Oh and the awimming pool has come into its own – I manage 40 lengths – about 350 meters today, I’m trying to increase by 10 lengths a day up to 100 lengths…. And here are some photos of the Lowe & Son pistol – they worked in London and had premises in Westminster from 1796, not sure where they were before this. Blackmore’s book lists them as in business from 1792, but they were clearly working earlier that that on the basis of this pistol.


Notice rivetted head of Sear spring fixing
 Tumbler with the mystery detent – I’m not sure in detail how it should work – as it is it won’t let the sear engage full cock
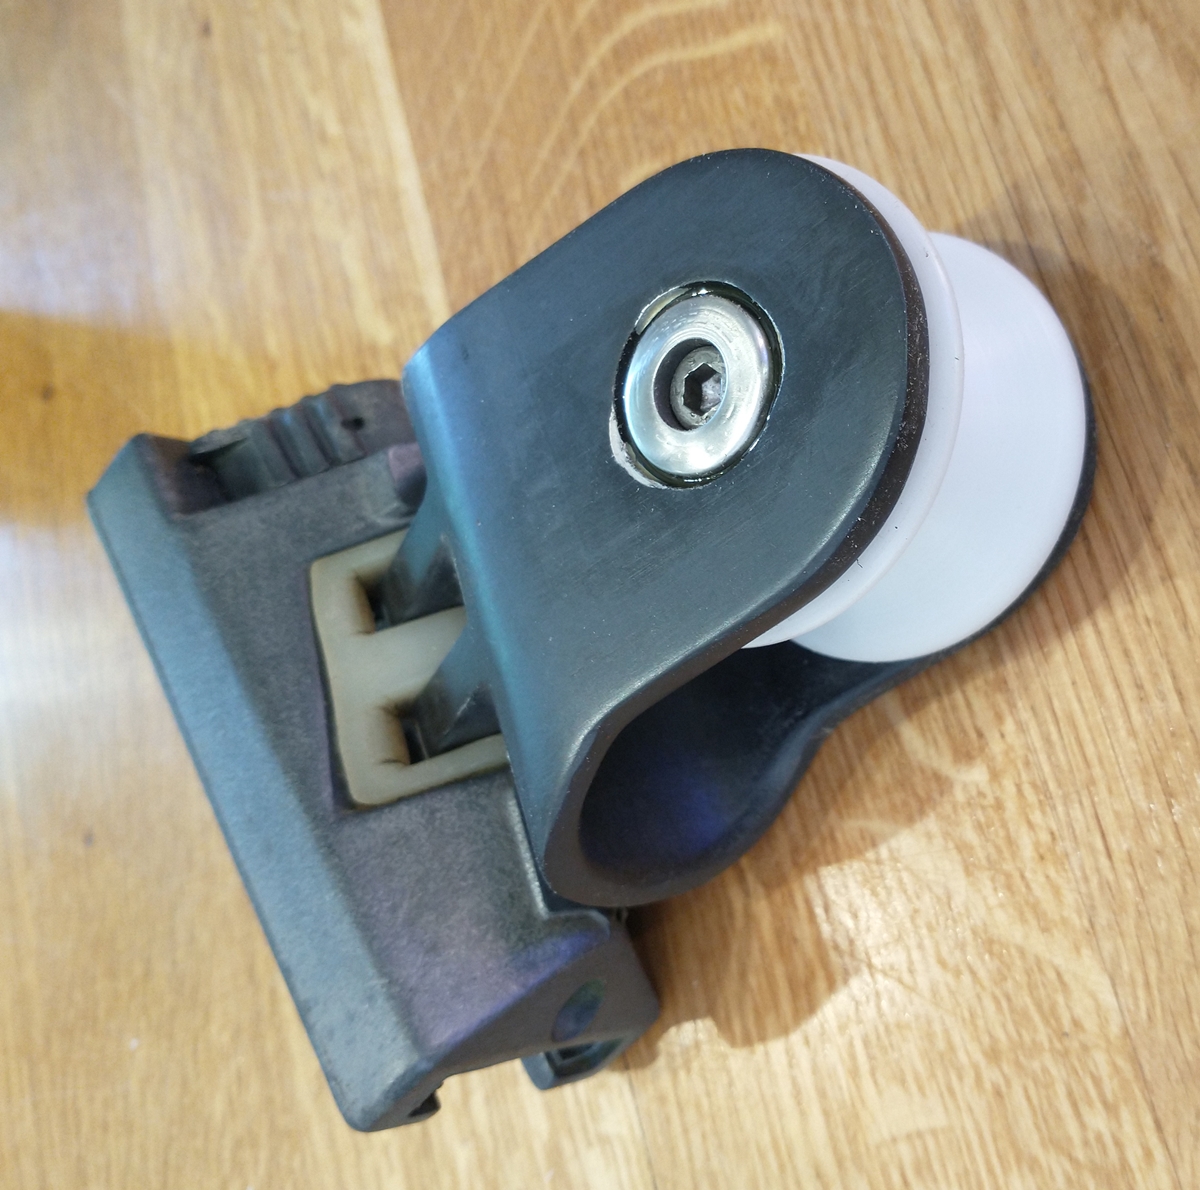
6th July Guns are a bit neglected at the moment, although I am going to the Helice shoot on 16th at Rugby Clay ground – its a great sport and the Anglia Muzzle Loaders make it an annual event (Covid excepted). Its really tricky shooting – I’m not particularly good at it but enjoy it – son Tom only shoots about once a year but is pretty quick – last year he just missed out on the shootoff. I’ll need to get the dust off my faithful Nock. I’ve been down to the boat several times – I spent Monday lying on my back with my head in a cupboard fitting new hoses to the loo – not my favourite job, then on Tuesday I was helping Tom plumb in a new sink – lying on my back with my head in a cupboard……. getting a bit boring. Being in the boat mood, I will have to recover our dinghy from the farmer’s field and check it out – maybe use it once more and then sell it – I’ll have to fix the outboard first. Bit of 3D printing – clips and bits for the boat – I’m also making mug holders to fix somewhere on deck – in Scotland in particular, hot tea and hot soup are essentials for the helmsman, so they need somewhere to put a mug down that won’t slide off when the boat heels – I think if I 3D print one with walls with air spaces it will help to keep drinks hot – little creature comforts are important !
3rd July – months tick by – perhaps we’ll have a bit of proper summer, its been a bit miserable for using the perfectly functioning but cold swimming pool. We’ve given up shooting over the peas, the pigeons have migrated to the wheat and our farmer doesn’t have any so that game is over – I’m still sitting on 200 No 6 catrtridges. I’ve been busy on bits for the boat that friends kindly let me work on – I had to remake one of the blocks (pulleys) that fit on the deck to take the sheets (ropes) from the jib (foresail). It was a bit of a puzzle as to how to take it apart, although a post on a website helped, so I made a short video of how to do it. I’ll put it as a post on this website so a google search will find it – its also on You Tube @ https://youtu.be/rTFfx7-J-7w. A regular client is sending me another flintlock pistol to work on the lock – it looks a little unusual from the photo, and has a couple of faults – the sear spring is broken, and then fired from full cock it gets caught in half cock. I quite like fiddling with lock mechanisms, so that should be a bit of fun and will provide some proper gun stuff for this blog – at the moment I’m not working on my own guns, and not shooting the muzzle loaders, so not much to report.
27th June – I can tell you confidently that the wood pigeon has become almost extinct overnight in our part of the world, and not because of our success in culling them! On the previous occasions when I’ve been out I get through 40 or 50 cartridges in 3 or 4 hours and see hundreds of birds over the pea fields, even if not very many of them come our way. Tonight I managed 4 shots in two hours, and that only by taking anything vaguely possible – The two of us managed one pigeon each! Not sure why – I think maybe the pea leaves near the ground, which is what the pigeons are after, are getting a bit dry and yellow, also it was overcast and the wind was quite variable – we didn’t even see many in the distance. Maybe we left too early, but one feels a bit of a fool standing idly in a field all evening. We’ve been trying to work out what the pea crop will be used for – the peas are clearly not for the table although about ‘eating’ size now, – the farmer says they wont be harvested for another month by which time the foliage will all have died back and the pods dried out, maybe a fodder crop.
26th June – Sorry about the void in blogging – last week was hectic – Dave and I did a class on Earthquakes at school that required a lot of preparation, and we also did STEM club. On Wednesday I had another Covid jab and went down to see a friend’s boat (Moody 37) that we may be able to sail in Scotland next year – by happy chance it is similar to the type I was looking to buy a month or so back, so I am glad I didn’t! I will help with working on the boat a bit to get it ready to sail up there, and probably help sail it there. By the time evening came I was reacting to the jab with flu like symptoms that laid me out for a day. As part of our STEM club I’d 3D printed a set of parts for the children to make SAFE boxes, but stupidly left the safes in the back of my car in full sun on Tuesday, forgetting that the PLA platic I used is not very heat resistant – anyway nett result was 2 sets were warped out of all possible recovery, so had to remake them – 10 hours printing each plus a few hours assembly – all done now but I feel stupid! I haven’t done any more gun stuff as its really too nice to be indoors – the swimming pool turned out not to be leaking noticeably if I shut off the pump, so we are now swimming – its quite chilly in there still, but pleasant. I went pigeon shooting again on Monday using my multichoke Berretta 687 and got on with it Ok – I think at the end of 4 hours I was getting my eye well in when the pigeons tailed off! I’m going again tomorrow so we’ll see how my eye is! This gun has a hard butt plate, and I only had a thin shirt on, and used around 40 29 gm 1450 fps Superfast Pigeon cartridges so I’m thinking that I might slip a sponge butt cap on ! I could get away with a little longer stock as the comb is a tiny bit high and it would slightly depress the barrel end – we’ll see – I also have to remember to take my specs with a bit of sellotape over the top of the left lense to stop it mastering – if I’m not careful I end up rifleing if my eyes get confused and that is not good – I need to keep both eyes working, just enough haze in the left to let the right eye dominate – its amazing how the brain and eyes work it out.
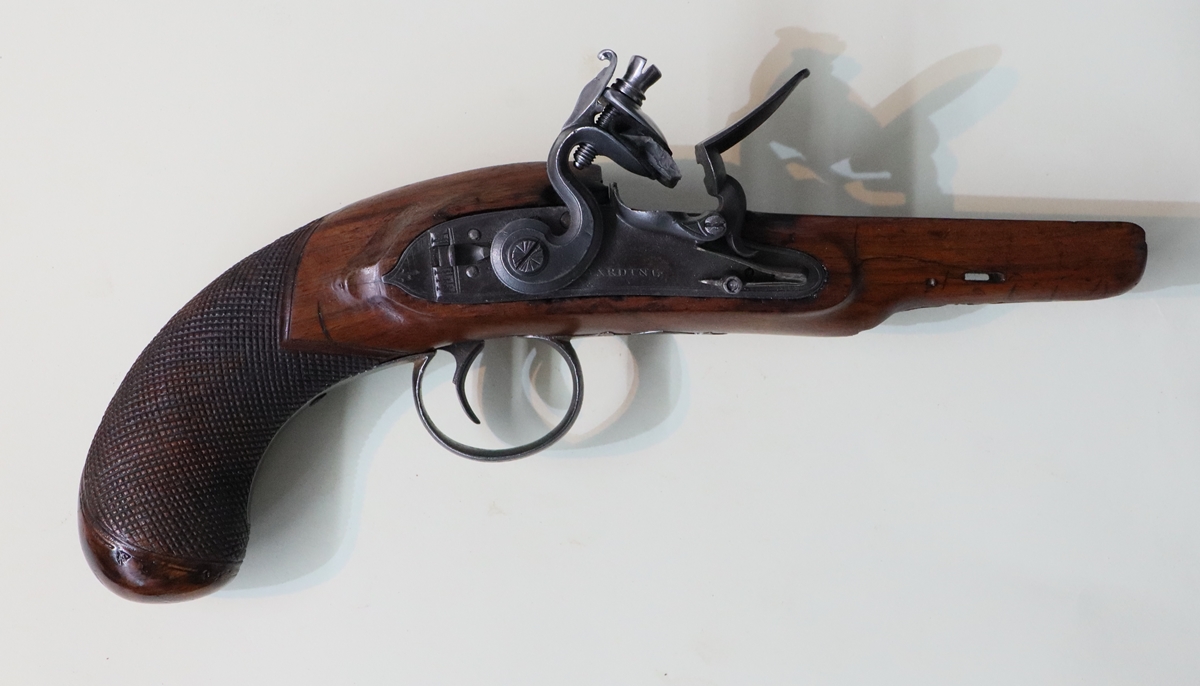
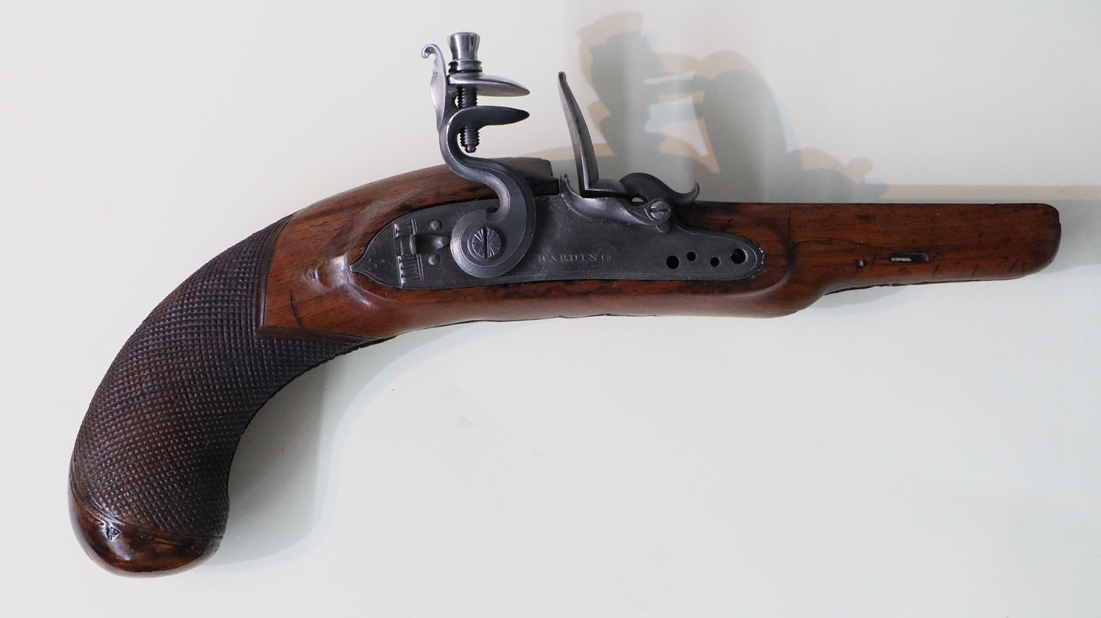
17th June My optimism concerning the swimming pool and leaks was not justified! It is leaking at a rate of around 500 litres/day. I spent a couple of hours today injecting red dye near any possible leaks to see if it would be drawn in to the leak – the loss amounts to around 1 litre a minute, which should give a just about discernable flow rate close to the leak. So far no success. I decleared an end to the browning of the harding pistol, and put it together – it is now officially finished, at least until such time as I feel energetic enough to remake the frizzen spring with a roller. I spent a happy few hours yesterday late afternoon standing in a pea field shooting pigeons on a flight path with my o/u 12 bore and an odd assortment of cartidges – some heavy loads for high game, so I never knew what recoil I’d get – I am lucky in that I’m not particularly conscious of recoil, and can happily shoot full loads with only a light top. I was shooting with Pete, who has now had around 170 pigeons off that field – there are hundreds of them feasting on the peas – unfortunately some of the ones we shot fell amongst the peas, and its not really possible to get them without doing more damage to the crop than the pigeons do, so they are left for the foxes, red kits and buzzards. Here are a few pics of the Harding;
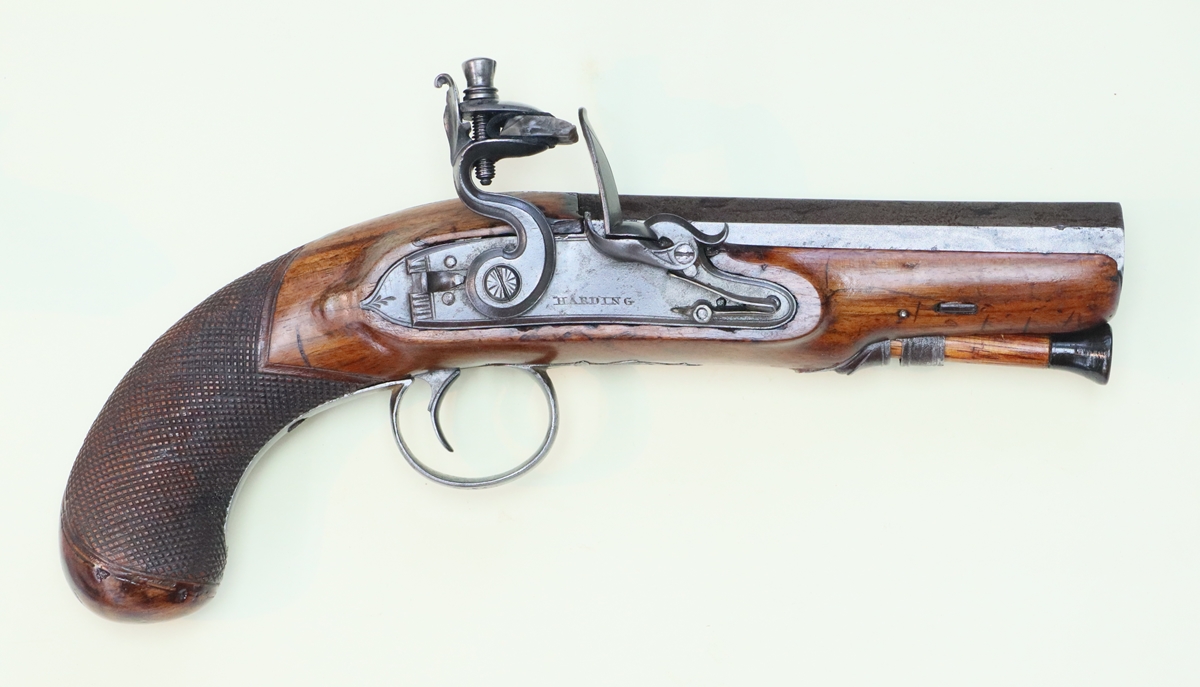 Complete with working home knapped flint!
14th June – We are having a few hot days, so will be trying the swimming pool – miraculously it doesn’t appear to be leaking, or only very slightly – not bad for a 14 year old plastic bag! I’ve been in and out of school this week as the year 6 are having their leavers trips etc – a group of 8 are doing a MasterChef week cooking a starter, a main meal, a dessert and then some canopes and I’ve been the main judge – quite a responsibility. but the children have done pretty well – Their main courses were all well cooked and appetising – I helped one pair with their main – they had a sirloin steak and wanted it medium rare so I had to tell them to half the cooking time given in the recipe – I dread to think what would happen to a fairly thin (1/2 in) steak if you cooked it 4 minutes each side – not so nice! Anyway I offered to make some prizes on the 3D printer – which I am doing at the moment. Starting in black and changing to flourescent raspberry for the lettering is quite pretty, so thats what I’ll do.
 Test 2 colour lettering.
12th June – the pump on the swimming pool filter was seized when I came to test it, so a couple of hours spent stripping it and freeing the rotor – not sure what was stopping it rotating, probably rust between rotor and stator – anyway now seems Ok. ( Thinks – thanks to WD40!) – I guess being in the garden all year round for 14 years is bound to take its toll – I’m amazed that any of it works – last year I had to patch a rubber hose joint – using self amalgamating tape and hose clips as the rubber had more or less perished and I couldnt find a replacement. I wonder if in future I might be able to print a flexible pipe on the 3D printer? I decided to use the frizzen spring without a roller, as I want to put the job to bed for the time being. Bit of a problem tempering the frizzen spring as I’d just let the AGA out as it was pretty hot in the kitchen and its summer! I just about managed a dark straw temper… I knapped a small piece of flint that fitted the cock and put the pistol together – minus the barrel that was in the cellar being browned. To my great surprise the flint produced a healthy shower of sparks – twice…. so my wobbly flints do work, at least twice! I do need to replace the copper washer behind the cock as it shows – I’ll have to turn off a thin steel washer on the lathe and file a square hole in it.
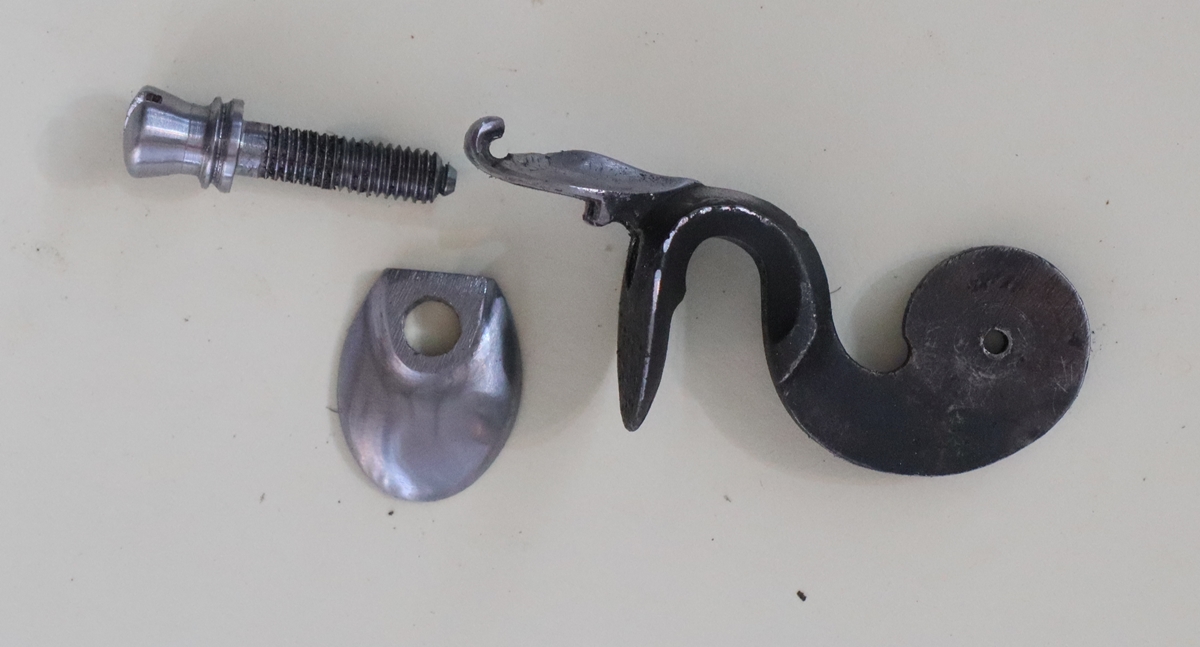
11 June – Started to fill the giant plastic bag that is our summer swimming pool. Tom (son) came over to help struggle with the bag, which is a massive and heavy object about 30 ft long – I’m dealing with 3 Toms at the moment – all about the same age, and am reminded that in his year at school about 1 in 8 boys was called Tom! A bit more work on the frizzen spring for the Harding. I’ve got the fixing done and made a new screw (No4 UNF) to hold it in place and filed up the peg to go through the lockplate.. I now have a dilemma – I was planning to make a simple spring that just bears on the heel of the frizzen without a roller, which is the easy way, but when I went through my collection of small pistols I found they all have rollers on the frizzen spring. That means that a) the end of the frizzen spring with the roller must be in exactly the right place, and b) that I have to do a bit of blob welding technology to thicken the spring enough to get the roller pivot through it, which will be tricky with my crude welder and welding. If that doesn’t work I’ll have to start over with a new blank and leave the end thicker…. bother! Annoying because if I’d thought of it in the beginning I could have left a thick bit to finish off.
 I always leave a ‘handle’ on any small part I’m making until the last minute as it makes holding much easier.
10th June – Summer rushes by! Wasted a morning trying to get my 3D printer to pause in mid print so I could change the colour of the filament, only to discover that there is a bug in the software and it doesn’t do what its supposed to. Oh well, think of something else! I filed the square in the cock for the Harding pistol – the cock is quite slim and the square on the tumbler is longer than the thickness of the cock, so I have fitted a washer behind the cock to take up the extra space. the only thin metal I had was copper sheet, so I used that. The safety catch is one of those that works on the ace of the lock and slides into a notch on the back of the cock, so that has been cut. All works fine now – I am now in the middle of filing up the blank for the frizzen spring – I found a bit of 4.5mm thick spring steel, that’s thick enough to make the boss on the spring, so I milled down the rest of the thickness to around 2mm and am filing it into shape – looking OK. I’ve done quite a lot of work on the wood of the pistol – there were a few pits and a couple of visible cracks so I have put a coat of shellac over the whole pistol, and then put a build-up of layers of shellac over dips and the crack and sanded them off each time – it takes a while for the shellac to harden so its not a fast process, but it is giving a good result and the defects are slowly disappearing. The barrel is starting to brown. I’ve just finished getting a decent brown on the barrels of the Nock pair and just need to put a final finish on the wood and they will be ready to return to their owner.
 The horrible cracks at the back top of the lock have now been replaced by an inserted repair – quite pretty now, just got to brown the barrel….
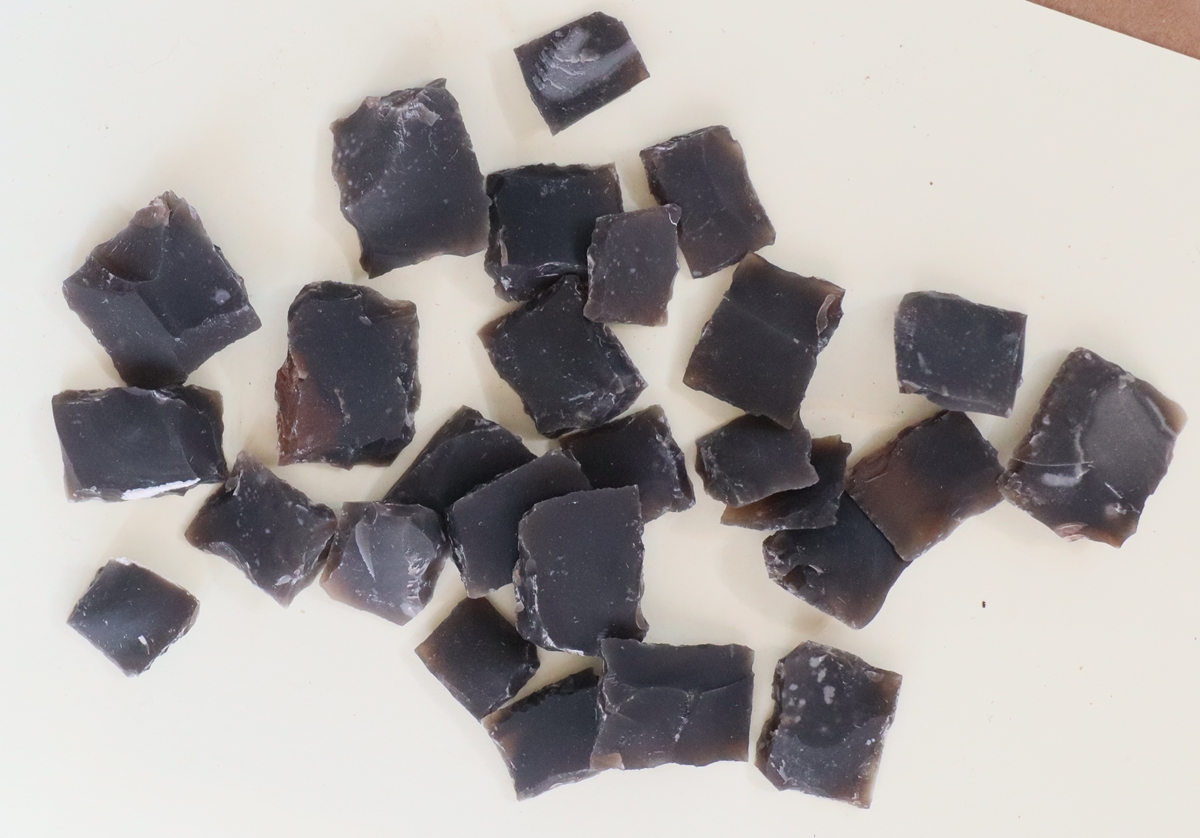
7th June Made the harding top jaw and top jaw screw today – about 3 to 4 hours work, but looking OK. I might have to thin down the top jaw as the cock I have looks very light, and my top jaw may look a bit top heavy. I was messing about for an hour or two trying my hand at flint knapping having watched a couple of videos. I sort of got the hang of it and at one point I did maage to knock off a series of flakes that almost looked like proto gun flints! I took the flakes that looked most likely and trimmed them into rectangles, and got a whole pile of ‘almost’ gun flints. I guess if I was marooned in a flint rich part of the country with a flintlock and a supply of powder and shot I would be able to make flints that would last a shot or two.
6th June Cracking on with the Harding overcoat pistol – I got the last wood repair finished off – not too bad! I’ve started to refinish the stock – a coat of red oil followed by a coat of sanding sealer or two, then polish with 0000 steel wool and more red oil. Along the way a few strokes with a walnut coloured wood touch up pen to blend things in a bit – hides a multitude of sins! I hsve managed to get it a fairly light colour, as I didn’t want another dark old pistol! Did a bit of filing on the replacement cock – it was a Blackley casting that had had the tip of the spur re-welded, difficult to reshape as its mostly a concave surface, but I think it will do – I need to make a top jaw and top jaw screw, and fit the square, then make the frizzen spring……… meanwhile the front hedge cries out to be cut!
5th June Splendid party making Elderflower wine (indoors as it was a bit damp – fortunately not the heavy rain that had been forecast earlier) It was so nice to meet up with old friends we hadn’t seen for over 2 years – one begins to feel like a member of the human race again. I’ve done a bit of work on the overcoat pistol – I’m sorting out the woodwork – very carefully sanding it off without rounding off the corners or changing the shape – quite a challenge – the repair I made first is bugging me a bit, so I may just cut it off and do it again – not sure at the moment. There were a series ofgaps and cracks around the top backof the lock that were not going to be easy to hide – in places the wood was below the proper level. In circumastances like that its always best to take out a big chunk of the bad area, and replace it with a single piece and reshape that. I have a fine Japanese saw with a kerf of about 0.3mm that I can cut into the stock with and leaves a very clean edge, so two cuts and chisel out the bad stuff – its always best to make the cut out bit in the form of a wedge so you can push the new bit in tight – now I’ve mislaid the proper wood glue, and I am a bit put off instant glue just at the moment! Having cleaned off the surface of the rest of the pistol with 400 grit I was left with a number of black stains, mostly along the edge of the steel furniture, particularly the trigger finial. As its basically an iron stain you can mostly get rid of it with a solution of Oxalic acid in water – a few grains and a thimble full of water will do. There are a couple of small stains left, but most have gone. The chequering was a bit dirty so I scrubbed it with a toothbrush and Nitromors paint stripper which did a reasonable job, but some bits werefilled up and I had to go over the chequering with one of my home-made chequering points – now looking OK – its in pretty good condition. So just the block to glue in now, then apply a finish, (but what?) and re-brown the barrel and fit a new cock and frizzen spring…. It’s getting near the time of year when our big plastic bag has to be errected and filled with 30 tonnes of water to become a swimming pool, so thas a job for next week…………………….
 It will need major surgery to remove the damaged area!
4th June – A session of lawn mowing called! We are into peak grass – not enough to support a sheep, but the idea is nice – I did once borrow a goat – that was when I discovered that goats don’t eat grass, they eat anything that grows above the grass – including garden flowers, hedges and anyhing else in between. It took a year for the garden to recover from a day’s goat! I decided to ‘strike off’ or file down the barrel of the overcoat pistol, which I more or less have don
3rd June Anotther gorgeous day – We are going to an outdoor party on Sunday and its forecast to rain heavily, the only day in the next two weeks that won’t be fine! Such is life. Well, I did put the Rigby to bed with a nice foresight. As I was packing it I realised that the trigge guard tang wasn’t fitting very well, so that had to be sorted, but its all paid for and ready to post on Monday. In the background for the last however many days Ive been browning the pair of Nock barrels – still not got where I want to be, but coming along. I started on the little overcoat pistol – there isn’t any major woodwork damage, but I’ve never seen a stock with as many small cracks and splits – most won’t move but are very slightly open, some can be closed up – anyway Ive been going round with superglue trying to stabilise it, then there are a couple of places that will need a small new piece of wood let in. I steamed it to get some of the dings out, which has raised the grain – its a sort of dirty brown colour – I’ll have to see if I can clean it up a bit. Also the chequering is filled up with something quite hard in a couple of patches, so I’ll have to work on that. The lock is not too bad but needs a new cock – I have one that will fit, more or less – and a new frizzen spring, which will be a fancy bit of construction – either filed from solid or a bit of weld-blob technology, we shall see. I think the barrel might look good if it was struck up fairly thoroughly – I don’t usually like to do it, but I’ll see when I’ve done the stock what the overall aim needs to be. I’ll start the post on LOcks and Detents while I have the photos to hand.
1st June – Missed a day and didn’t put up the photos I was going to as my access to the website went funny and I couldn’t edit or save any changes and so couldn’t do anything. I came back to it this evening and it wouldn’t even let me look at the website! I tried another website and that got the same impenetrable message. I remembered I’d installed a new VPN and ‘threat protection’ a few days ago, so I deleted them all and I think its now back to normal – I hope! I finished the Rigby today, or at least I thought I had until sitting on the sofa playing with it I realised I hadn’t put a foresight on it. I spent a good few hours fixing the half cock bent- I’ll put a separate post on Locks and Detents and describe it in detail, but in summary I stuck a couple of tiny blobs of weld on the broken ‘top’ to the half cock notch – a really tricky job as I didn’t want to weld up the whole half cock notch and start again, then filed it to shape – it has to be just the right shape as I’ll outline in the post for the detent to work. The detent consists of a small ‘flag’, the ‘fly’ that pivots through about 10 degrees in a recess on the tumbler and stops the sear from falling into the half cock notch when the gun is fired, but allows it to enter when you want half cock – on a ‘normal’ gun or pistol you pull the trigger hard enough to keep the sear out of the way when you fire the gun, but that doesn’t happpen with guns or pistols set up for very light trigger pressure, or those fitted with a ‘hair trigger’ so you need the ‘fly’ to guide it safely past the half cock bent. Getting the tumbler, sear and fly to work together is about the trickiest job in setting up a lock if you have remade any of the parts. Anyway that is done and works well, I’m really pleased to say! I made a new barrel bolt escutcheon out of copper sheet and silver plated it (quite thinly using my little brush plating kit, and also fitted a finishing escutcheon or ramrod pipe, also out of copper, silver plated – its a very small object and I couldn’t think of another simple way of doing it. The barrel bolt was another job – in the past I have had a job cutting a neat slot in the middle for the pin that stops it being lost – I cracked it this time by marking a line of holes by sliding my centre punch along a straight edge as I tapped the marks – they came out perfectly in a straight line, and my Dremel with a cut-off disk joined them, then a small flat needle fire finished the job. For the ‘knob’ on the end I used ‘blob technology’ with the welder again and filed it up, then heated it to red heat and sprinkeld on Blackleys case hardening powder and quenched it, then wire brushed it and popped it on the AGA for 10 minutes at about 280 C (I didn’t bother to check the tempreature, but its usually about 280 at that place on the second plate.)
I wAs thinking about why I do some of these jobs – some are obvious – nice things in reasonable nick with a single fault that needs fixing where you can charge a reasonable rate for the job and it is still viable. Others, like this Rigby I do because I don’t like to see a salvagable pistol get discarded – I can’t make a silk purse out of a sow’s ear (although I’m working on it!) but I can make something that is worth hanging on to and will give pleasure to someone. Even if, as in this case, I take shortcuts and don’t do as thorough job as I could, I end up taking many more hours than I can reasonably expect a client to pay for so I revert to thinking about it as a hobby that earns enough to pay for the tools and materials. If I were to do a thorough job on the Rigby from start to finish it would probably run to well over £1500, which is well above what the pistol could ever be worth, and its still only a poor conversion of a nice pistol.


30th May 2022 I’ve had to restart my diary here as I couldn’t get the old one to work – I couldn’t put any more on the blog as it wouldnt let me publish it so I’m guessing that its full. Now I just have to find out how I make it appear first on the ‘front page’. Well sort of – bit of a mystery so for the time being this will just sit in front of the other one and I’ll hope I can at least save and publish on this post – who knows!
Probably divine intervention becasuse I missed a few days of the diary! Actually I had a bit of a problem with the infection I got – my GP surgery didn’t listen when I explained which antibiotics worked, and so gave me the ‘wrong’ one, by the time I’d collected the prescription and saw it was wrong, then managed to see a GP in person and get the right meds, the infection had got out of control and I ended up in A&E with intravenous antibiotics for a couple of days – no lasting harm done, I hope, but not best pleased with the Surgery for not listening to what I said. So back in full swing, and I hope no more sofa days or half days. Trying to finish off the Rigby – its more or less done, now put together and looking pretty good compared to what I started with – shame about all the old irreversible repairs or it would be reall good. I’d welded up the mouth of the cock fairly generously so it took a while to file it to shape and mill the cavity. The first replacement nipple I put in was too short for the hammer, but I found an old one that was about right, and it will now ‘cap off’ in a satisfactory way. I’ve put the re-etched barrel back – there is currently no barrel bolt so I made a quick and dirty ramrod out of dowel to hold the barrel in place – works fine. So there are a few more jobs I could do if the client wishes – there is no ramrod pipe, barrel bolt, one barrel bolt escutcheon and the half cock bent needs welding and filing as its broken out and won’t catch. All in all its an improvement of several orders of magnitude
26th Sorry about the missed post yesterday – I have a nasty infection and a mostly sofa bound. I did manage a bit of gun work in the mornings. The Rigby is coming on. I more or less finished the woodwork, and etched the barrel in ferric chloride which seems to be what the damascus knife makers use, then gave it a soak in hot logwood to blacken it. Now bad! I welded up the mouth of the cock – just have to file it into shape. There are still some issues with it -; no barrel bolt, no foresight ,no ramrod pipe, no ramrod , and the half cock bent is damaged so it won’t hold half cock. I’ve already spent a lot of time on it so I’ll have to see what the client wants.
24th May Mix of heavy rain and weak sunshine. I’m spending more time on the Rigby than its really worth, but its a challenge and I think it will look good when its done. I had done the basic wood repairs, just needing finishing, but I didn’t like the look of the top of the projecting saw handle bit – it had a large hole, off centre and filled with plastic wood (remember the stuff?) and just detracted from the look of the pistol as it was the first and most obvious bit you see – I toyed with the idea of renmoving the plastic wood and putting in a wooden plug , but there was also a smaller hole with a plug, so I decided to bite the bullet and cut a slice off the top of the projecting bit and glue on a piece of walnut with a more or less matching and interesting grain. I’ve oscillated on this job between using instant glue and proper wood glue. Instant glue is obviously fairly fast, so if you keep a can of activator handy you don’t need elaborate clamps to hold things, but on the other hand if you need to position and clamp the repair, wood glue gives you time to get things right. Mostly my instant glue gives me a few seconds to position the pieces, but one bit I stuck on today set instantly before I had even a couple of seconds to move it – luckily it was just OK. I had a look at refreshing the engraving on the Rigby barrel – its one of their pistols that have the name in Olde English Lettering – I had never done any and I couldn’t quite make out from the worn letters how some were made up – anyway the web came to my rescue and google images produced a pepperpot revolver with the right engraving. I think if I put the barrel in for etching I had better protect the engraving somehow mmmmm- I’ll think about it….

Good self-amalgamating tape as a tension binder.
23rd/24th May Busy with gun jobs – stripped the Rigby and glued a couple of blocks of walnut into neatly reshaped cavities – one more piece to add when I’ve shaped those two. Someone had been messing about with the pistol fairly recently – there were cracks glued up with a very hard glue – unfortunately they didn’t close up the gaps before the glue set, so I’ve had to try to remove the glue. I’m hoping that it will all go together – I can’t reverse some of the repairs so it wont be perfect. The barrel needs re-etching – Rigby pistol barrels were almost always of etched fine damascus, this one could do with a little refreshing of the etching if I can find out what to use ?Copper Sulphate? Nitric Acid? I’ll have to do some research…………………. I’ve started to brown the two Nock barrels – lets hope it goes better than the last pair of pistols I browned, which took 14 rustings and were a bit stripy for my liking.
22nd May – Out to lunch with a couple of expert antique firearms friends – they had a very very nice cased and minty double 8 bore tubelock wildfowl gun (all of us are tubelock officianados) made in East Anglia in 1845, the second period of tubelock popularity – the first being much earlier when Joseph Manton patented the idea. This one looked perfect, with a Lancaster style sprung holder for the tubes. Our interest centered around the touchholes – there was a short gap between the tube holder and the face of the barrel and touchhole – maybe 2 mm – that the tube had to bridge as it sat against the face of the touchhole. Our concern was that the face of the touchhole and barrel had only the small hole for ignition – around a mm in diameter or less whereas all the other tubelocks we have encountered have a recess in the face of the touchhole to take the end of the tube. Why hasn’t the Marham got a recess, which we thought was necesary to ensure the fire was directed accurately into the touchhole, even if the hammer distorted the tube on firing? We speculated that the barrels may have come form a flintlock, or the gun originally made as a flintlock and then new locks made, but everthing looked of a piece as the saying goes – and that is always important when you have some experience, which we all do. My conclusion was that the maker, or whoever put the ensemble together could easily have recessed the touchholes or fitted new ones ( a standard repair at those times) and the fact that they didn’t suggests that they didn’t know it was the usual way, or didn’t think it was necessary. Anyway an interesting half hour after a splendid lunch in the garden. Apparently according to my American friend my leaflet perporting to tell how Joseph Manton made tubes for tubelocks is being circulated – so I think it is time I put it on this website, of course I can ony do that if I don’t believe anyone would be so stupid as to try making tubes………………………………………… Being out most of the day, and it being a weekend, no gunwork was done!
21st (2) Loads of attempts to hack into the site today – about 500 from ip addresses scattered round the world, each a slightly different attack – either one person using loads of different vpn addresses or a botnet used individually. I wish whoever it was had better things to do!
21st May – Out shooting clays at CGC all day with the Anglia Muzzle Loaders – I took the double Nock percussion in the end and hit about half the clays – must work on my psycology and I’d do better. I went with a few friends on a mixed breech loader, percussion and flint round, and we did shoot a few simultaneous pairs – I was shooting my 1955 Berreta 20 bore hammer gun – loads of choke but I can hit a few clays although I do better with the 12G o/u if I want to shoot breech loaders. I shifted a few cappers and a card dispenser so a small start to paying off my investment! I’ll now put the rest of the bits and pieces in this websites SHOP and on ebay and see how they go. It appears that there is a major shortage of percussion caps – maybe due to manufacturers working all out to make cartridges for Ukraine, in which case I don’t mind a bit of inconvenience! I started to very gently strike up one of the Nock barrels – very gently using a No6 file along the barrel, followed by a small sharpening stone, followed by 1000 grit paper. I don’t like to go finer than 1000 grit, or to do too much with it – my aim is not to make the barrel shiny – almost all barrels originally had at least some file marks where they were struck up. It did get rid of most of the staining – I didn’t need to take of much at all and I was careful not to round off the edges of the engraving – indeed I was careful to leave all the arrises as sharp as possible. I will try to unscrew the foresight when the penetrating oil has had time to work as its easier to brown without it – foresights always penetrate through to the inside of the barrel as its too thin to tap a blind hole. I got another repair job today – the Rigby wreck – such a shame as it was once a fine gun but it obviously had a major break in the butt that has been repaired with nails or pins and a screw, so one presumes that it was done before strong glues became available – at least before WWII. There is also some obviously more recent damage to the woodwork. The dilemma with such damage is whether to try to undo the repair and redo it better, although in this case I think that approach would leave an even worse result. The barrel is typical Rigby deeply etched true damascus, but with varying degrees of wear and damage -its a conversion from flint with a new breechblock. I think it will clean up OK but I won’t attmpt a reconversion!
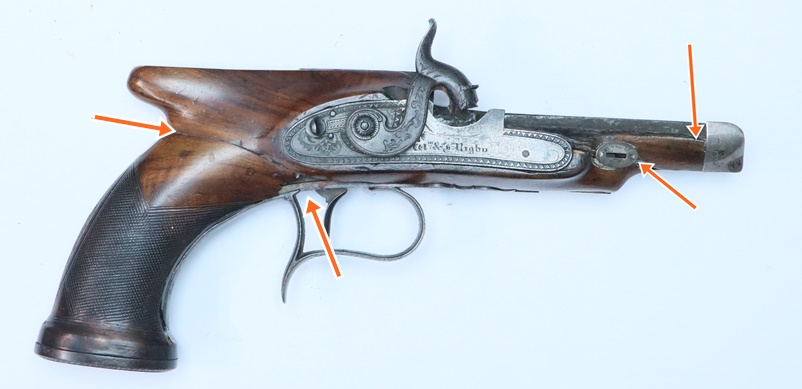 Major break right across the butt and extensive fore end damage
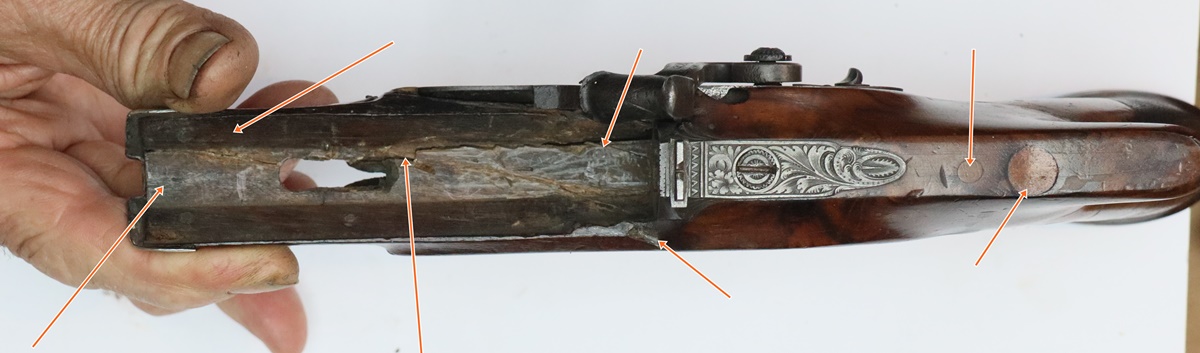

I think with a bit of work it will be much better = I’ll try to sort the barrels, maybe re-etch them – but I’ll derust it all first.
20th May – Bit of gun work today, along with the week’s shopping. I stripped the other Nock pistol of its barrel – they seemed to have coating of something, but I couldn’t touch it with alcohol or acetone so used Nitromors paint stripper which got off a ginger mess – no ides what the barrel was coated with (over the rust!). Popped both together into the derusting tank at about 3 Amps for a couple of hours which turned the rust black and let me rub it off with 0000 steel wool and a very fine wire wheel on the grinder – the metal is pretty clean with just a few patches of shallow corrosion, almost just staining. I’ll very gently rub them down, probably with a piece of sharpening stone so as not to round the corners – we’ll see. I also stripped the little Parker pistol I bought – it has the usual splits under the barrel, so the first job is to see what can be closed up, and then work isocyanate glue into the cracks and set it off with activator after binding it up gently with self amalgamating tape – I got quite a lot of glue into the cracks so I’m happy that it went in a decent way and should hold it all together. n The metalwork will all go in the derusting tank and get cleaned up. The basic repair needed is replacement of the cock – I think I probably have a suitable casting. the mainspring was loose when I got it, I’m sure I put it somewhere! I usually put all the small bits of guns in zippy plastic bags and label them, even if I only take them off til tthe next day as I’m always afraid of loosing bits of client’s guns – I just got another 1000 small bags (about a tenner!).

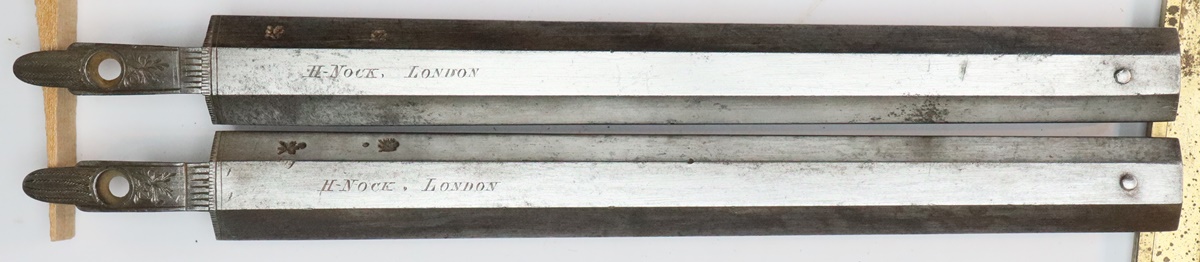 Electrolytic derusting and 0000 steel wool and a very fine wire wheel ( avoiding the engraving)
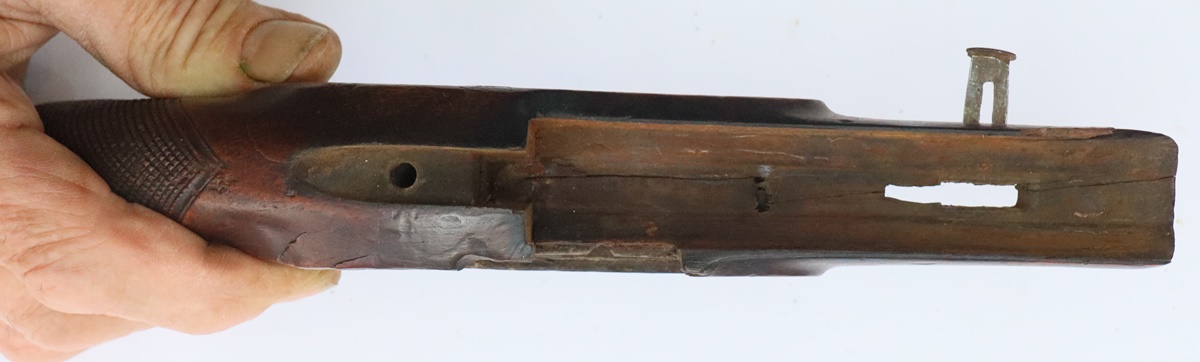
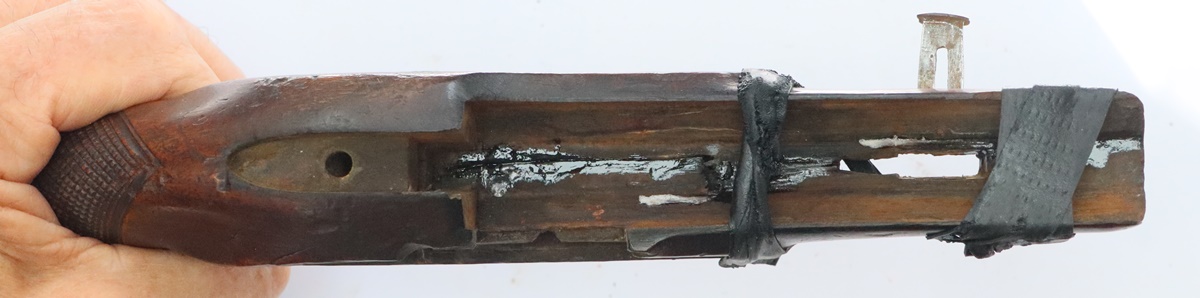
19th May (2) – just been checking the statistics that my server keeps of the visits to the site – quite an increase in visitors since I started posting every day again, and a lot of searches on Google and suddenly a lot on Bing too. The Russians are back – hi Guys! – after disappearing for a while, My software blocks anyone trying to access bits of the site they are not supposed to, and if its repeated attacks I make the blocks permenant instead of 30 days. Most of the attacks are from bot nets – computers that have been hacked and had programs installed that relay attacks – the computer user being unaware his computer is being hijacked. There are a couple of botnets that I can track that target this site, because when they attack they always repeat the attack a fixed number of times from each computer, and it stands out in the blocking statistics – one botnet always tries 21 times, so every day I get a different IP address (hacked computer) that tries 21 times to access something it shouldn’t. I did once track down the IP address of the botnet master and get him stopped by his service provider, but that is unusual and he had a particular pattern of deploying his bots. There must be many hundreds of hacked computers round the world that are banned from this site permenantly. Its amazing what you can find out from message statistics without knowing the details, as law enforcement knows well. I’m reminded that in warfare you can, or at least could, predict enemy action simply by the volume of traffic without being able to read it, presumably that is now avoided by dummy traffic. My blog has had almost half a million visitors since I started it, and they have made over three and a half million clicks on things! 7 clicks per visit is reckoned good for a website – retailers would be envious!
19th May – Most of the day pottering about outside filling the skip as it was really too nice to be indoors. I finished off fitting the link – it fits perfectly and when the cock is completely down it leaves the spring about 1 mm above the bottom edge of the lock – identical to the other lock, so I could pack it up for posting and send off a Paypal invoice – I use Paypal for all my invoicing because it allows clients to pay by card online without an account and then lets me buy postage and print an post paid address label and keeps a record of it – seductively handy! If it fits a post box I can then drop it in, otherwise I have to go to the local P.O. which is 5 minutes drive or 20 minutes walk away. I do feel guilty about not putting the money through the local office, but it does save fussing about with labels and addresses. I have now got to finish the job I started on the Nock pistol – I have its mate now and have to de ding it and then sort out the barrels – the engraving is very sharp but there is some rust – there appears to be a layer of varnish on them too, but it might just be oxidised oil. When I took the first one out of the woodwork there was a little red rust along the edge under the wood, and a few pits. I’ll run the barrels through the electrolytic deruster, then see about gently rebrowning them. I need to think about Fred’s engraving, but I have to be in the mood and at the moment I’m not really there! I’m also expecting a Rigby pistol in a terribly smashed up condition, only just not a bin job, and only because it has a famous name on it – I took it on as a challenge to see if it was possible to make something of it. I’m still fidgeting about the possibility of buying a boat to keep in Stornaway for Hebredean cruising when Penny retires, the trouble is that any boat I buy in the South of England is about 3 weeks sailing from where we want it……………….
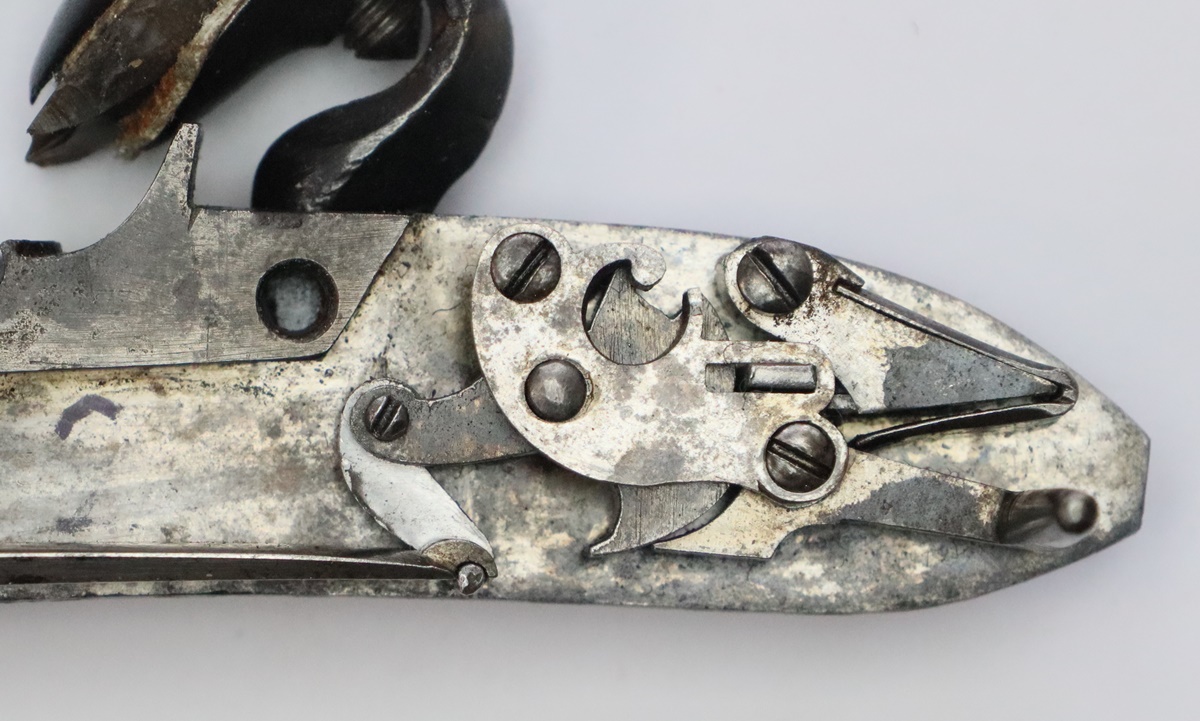
18th May – Odd job day! Sorting out a few outside jobs that needed doing in anticipation of summer – clean up the barbeque and garden furniture for example. My skip arrived so happy days filling it – they always look so big, but somehow they get filled in the week they are on site. Did my STEM club yesterday – the kids came in having spent the afternoon outside in the sun at a racing stables and hot and excited so it took a while for them to settle, but they got into computing eventually! I printed up a few more cap dispensing ‘stars’ yesterday – when I came to look at the progress they were still printing but were a mess – not sure what happened but it looked as if the top layers were displaced relative to the bottom. anyway when I tried again it wouldn’t get the first layer to stick to the printer bed as the extruder nozzle was too high off the bed – not sure how it got that way, but it took me a while to sort it out – in the end I only managed to sort it out by following the handbook exactly – not the sort of thing I normally do! The Anglian Muzzle loaders have a shoot on Saturday, so I might go – its a double barreled competition, but I could take my single and do my own thing – not sure yet which it will be – I will take a pile of my cappers etc and see if there is any demand – I will print up some covers with Angla Muzzle Loaders on them! Then I think I’ll put them on Ebay and on the SHOP on this site. I got as far as drilling the hole in the link casting, but haven’t separated it from the sprue yet as its easier to handle while attached
17th May Just typed in a whole lot and lost it! I got the go-ahead to do the link on the lock that was wrong, and with great good fortune found an old link casting I got from Dick a couple of years ago along with a load of rusting junk and some lock part castings. I took out the old link, not only was it a bit too long, but the hole for the pin holding it to the tumbler is very worn. My casting is slightly longer than the link in the OK lock, but with luck will do the job – I’d very much prefer not to have to machine and file up one from solid! I managed to give away our old trampoline yesterday – a relic of when the boys were at home, and cause of two broken wrists! I have a skip coming tomorrow – always a cause of excitement, so I’ll see how much rubbish I can dispose of……..
T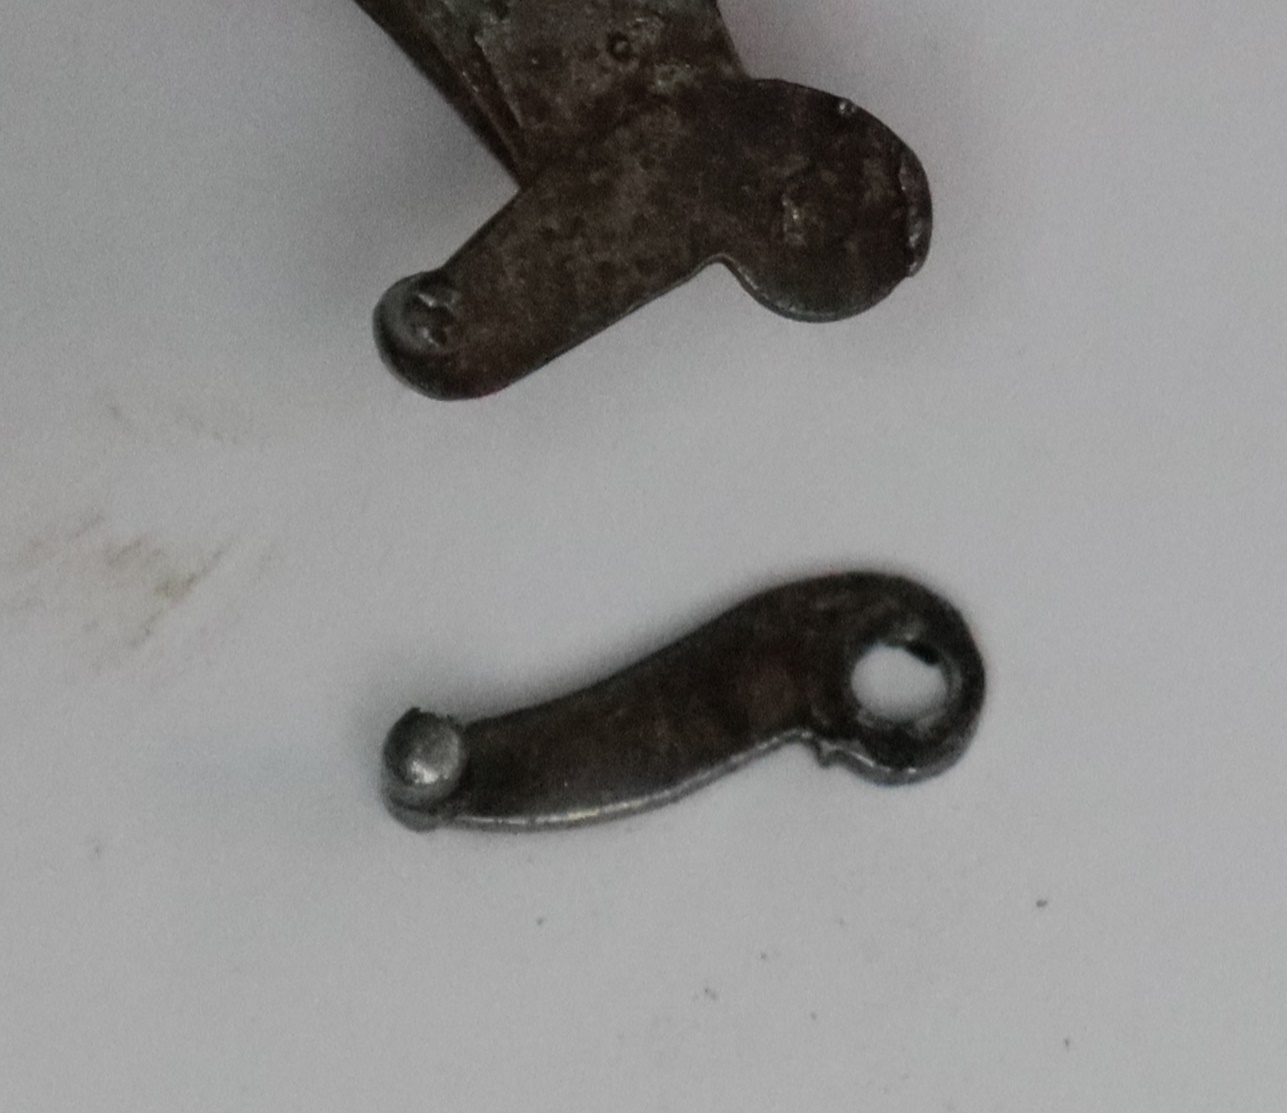 The mainspring is very strong, I’m surprised the worn top hole on the old link didn’t break.
15th May Finished the safety catches after hours of filing – then trial fitted and drilled peg hole, then engraved them and coloured them down – first at red heat with Blackley’s colour hardening powder then clean up and pop on the AGA hotplate at around 260C till the colour looks right, then put it all together – it worked. The little detent on the spring that pops the safety slider from one position was a bit strong, so I eased it a bit – that aspect now works OK … BUT when I finally put the locks together, including the springs, the spring and link of one hung below the edge of the lock, meaning it would rest on the woodwork if installed. The other was fine. My initial thought was that I had got some component swapped between the two lock, but that was pretty unlikely as I am always meticulous in keeping all the parts from each gun separate and in zippy plastic bags. Anyway I figured I might possibly have got the springs swapped, so I swapped them – that seemed to make no difference – the spring of one still gaped – however in the swapped state the cock wouldn’t go to full cock on the ‘gaping’ as the link on the spring was fouling the tumbler – looking carefully one mainspring is slightly longer than the other. But that didn’t explain the spring hanging low on one lock. Carefull measurement on each lock showed that the link between spring and tumbler was very different on the two locks – 9 mm on one lock, 11 on the other, gaping lock. I assume that the long link was a replacement because the original broke. It needs fixing if anyone is going to fire off the pistol or it is likely to break out the wood
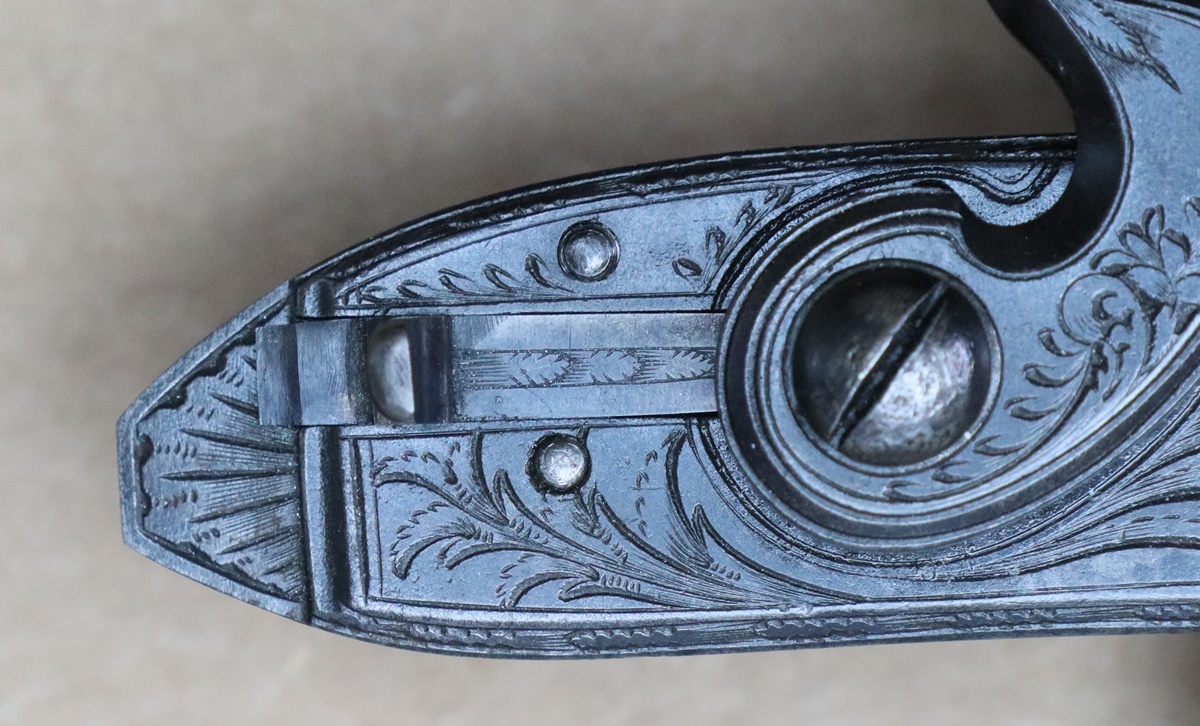
 Cocks against stop on edge of lock plate – tumblers are in about the same position. Bottom spring overhangs badly.
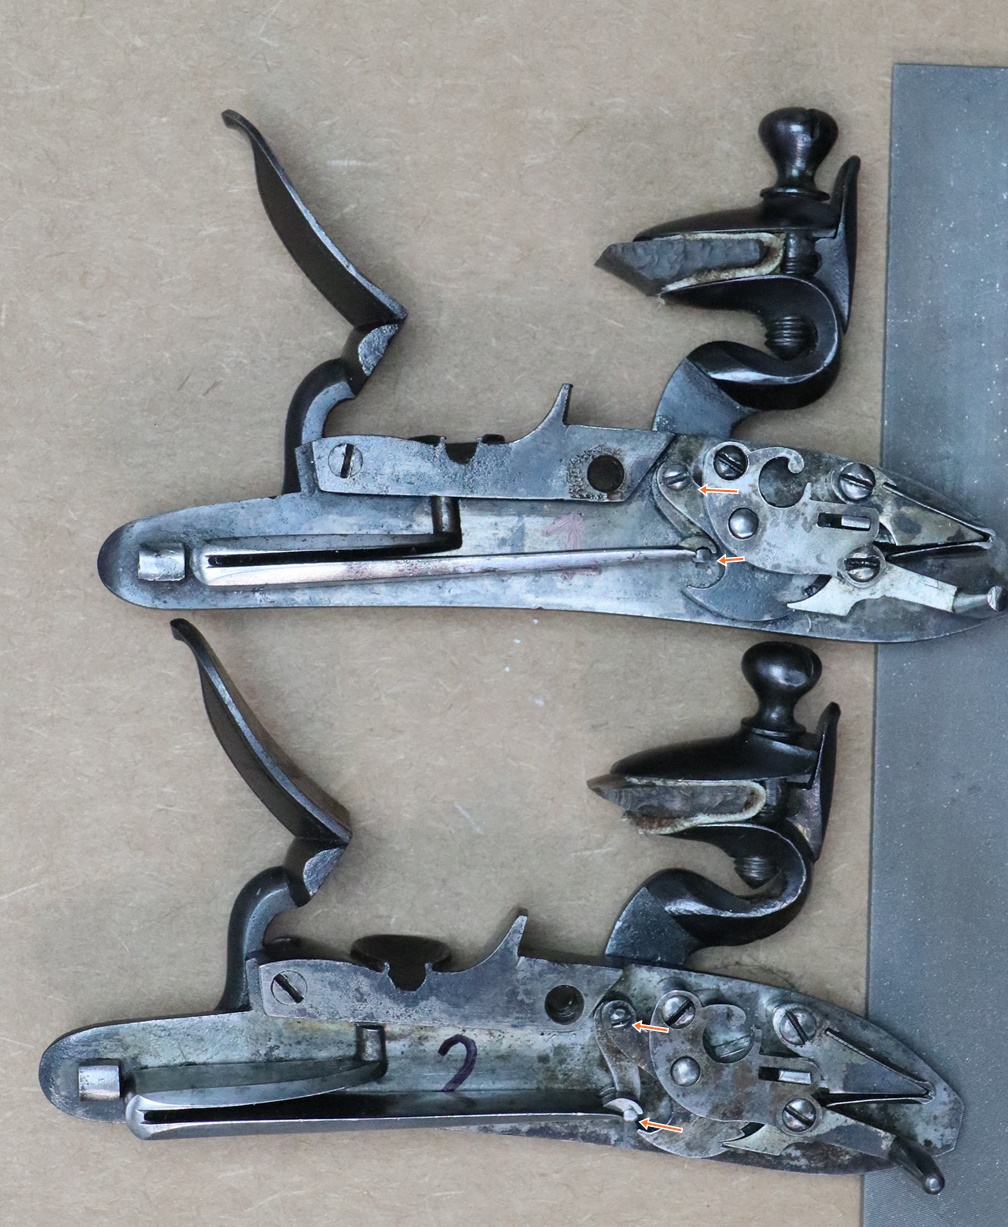 The springs are slightly different lengths. The different link lengths mean the top lock spring has much greater tension. Both at half cock.
14th May – Beautiful day. Bit of excitement in Waitrose car park – a woman was trying to collect samples of people’s signatures and , I think, credit card details on a bogus petition – She was asking for ‘something that could confirm your signature’ which I think she hoped would be a credit card – I suspect she may have had a micro camera too. Anyway the Manager and security man and I checked out the car park and saw someone who looked like her from the back getting into a car and driving off – I got a photo of the number plate – police notified, although whether they will follow it up is another matter….. Anyway the sfety catches are moving on – one is almost complete – I don’t have enough of the broken one to know what the ‘handle’ looks like, although obviously the original wasn’t strong enough as it was very thin where it joins the sliding part and had broken off. I had a look at a few flintlock pistols and came up with a compromise pattern, see below

20 mm overall length – quite fiddly to make… still a bit of finishing to do, and the engraving – a couple of lines of running leaf pattern, so small they just look like lines until you look with the microscope.
13th May Went for my regular visit to my oncologist – his cheering thought for the day was that once you get to 80 it means you are a surviver, and actuarially your risk of dying levels out – all the unhealthy individuals having dropped out already! I made another card dispenser – slightly modified – its so easy and cheap and prints overnight, so its easier to make another for each improvement, rather than spend a lot of time with the designing. I am working on the stock of the Nock pistol – its looking OK so far – now I think the barrel looks a bit sad………. I started work on the safety sliders for the Parkers – it is a very fiddly job and my milling machine is pretty rickety, plus the digital readouts are prone to jumping, so I don’t dare to get very close to the finished sizes. The key to making small bits like these is to have a handle to hold the work in a vice, and cut it off when you are almost finished. In this case I have left a full, deep ‘keel’ that will be cut down to make the tabs that passes through the lock plate when the external parts of the sliders is finished. I rang about the other Moody this morning but it was already under offer, having been on the market for only 5 days – clearly they are in demand . I’ll have to widen my search. Looking through the countries of origin of visitors to this site, I see that it has got a lot more visitors since I have been posting every day – I also saw only one visitor from Russia today – they used to make up around 1/4 of all visitors
![]() I should be able to make both out of this, but not much to spare.
I should be able to make both out of this, but not much to spare.
12th May – finished my SATS invigilating and etc. The only downside is that I ought to write a Governors report on the activities for the Board of Governors -I hate writing these reports! I did the repair to the butt of the Parker pistol, and now need to take out some dings and dents by steaming it. In preparation I took the barrel out, probably a mistake (or a good thing depending on your vantage point) as I dicovered a bit of rust around where the barrel and wood meet at the edge. It looks like at some point the barrel, and probably most of the gun got a thin coat of shellac – the barrel could really do with stripping down and refinishing…. but |I’ll take a rain check on that! I have finished rendering my overshot card dispenser in plastic and it works just fine. I did have to resort to gluing two parts to get the slot where the cards come out right as slots don’t print very well, but I am quite pleased with the design. I found another Moody 36 on the web today, so I’ll try to go and see it ASAP. They are old boats, made in 1980, but they made them well in those days! And of course they are much cheaper than a modern boat of the same size. We shall see….
 Needs colouring to match and refinishing
 Holds 50 to 100 overshot cards
11th May – I havent been doing much this week as I’ve been in school invigilating the SATS exams, playing at being the Black Knight for the 5 and 6 year olds, and running STEM club. I do have a 3D printing project on the go – Some time ago I made a fancy dispenser for overshot cards for my 16 bore Nock etc. It was very fancy – brass, and leather covered, and worked a treat, but too costl to offer for sale ( about £100 each?) so I am working on a 3D printed card dispenser on the same lines – its going OK, I did get one printed but one of the components was a bit thin and broke, so I am beefing it up and also making it suitable for any cards up to about 11 bore. Watch this space…. I have started a couple of gun jobs – a pistol stock with bit out of the butt – a neat chip off along the grain that will be straightforward, and a couple of safety catches to make as replacements for a pair of pistols by William Parker. To my amusement, but not surprise, I found that the side nails didn’t fit if you swapped them – I did it as an experiment – and the sliding safety catch was 4.5 mm wide on one and 5.25 on the other , so no chance of quickly making a couple to the same milled dimensions. Safety catches are always a bit of a fiddle – they are by far the smallest components in a lock, and the pin holding the inner part to the slider is about 1.5 mm long and about 0.4 diameter, so VERY easy to loose. Replacing the chip shouldn’t be too bad as it broke along a fairly flat bit of grain – one tip with small repairs like that is to slightly hollow the middle of the area so you get good contact round the edges – its particularly useful if you are using epoxy adhesive as that ‘likes a certain thickness of glue layer – I I used astandard D3 Gorilla wood glue as it makes a thinner glue line. I had a bit of a disappointment today – we had decided that we might buy a yacht and keep it in Stornaway. I’d found a nice 36 foot Moody 36CC only a couple of hours away and was going to view on Friday, being busy in school till them, but alas it sold in the meantime – he who hesitates looses! So I’ll have to look around – trouble is, its probably a sellers market at the moment. Oh, and my first capper system is on the SHOP page at the top. The rest of the system will follow when I get a moment – I’m waiting for boxes at the moment.

The grain is quite curved, but the missing bit was sheared along the grain fairly flat – you can never tell if it is going to match til you finish!
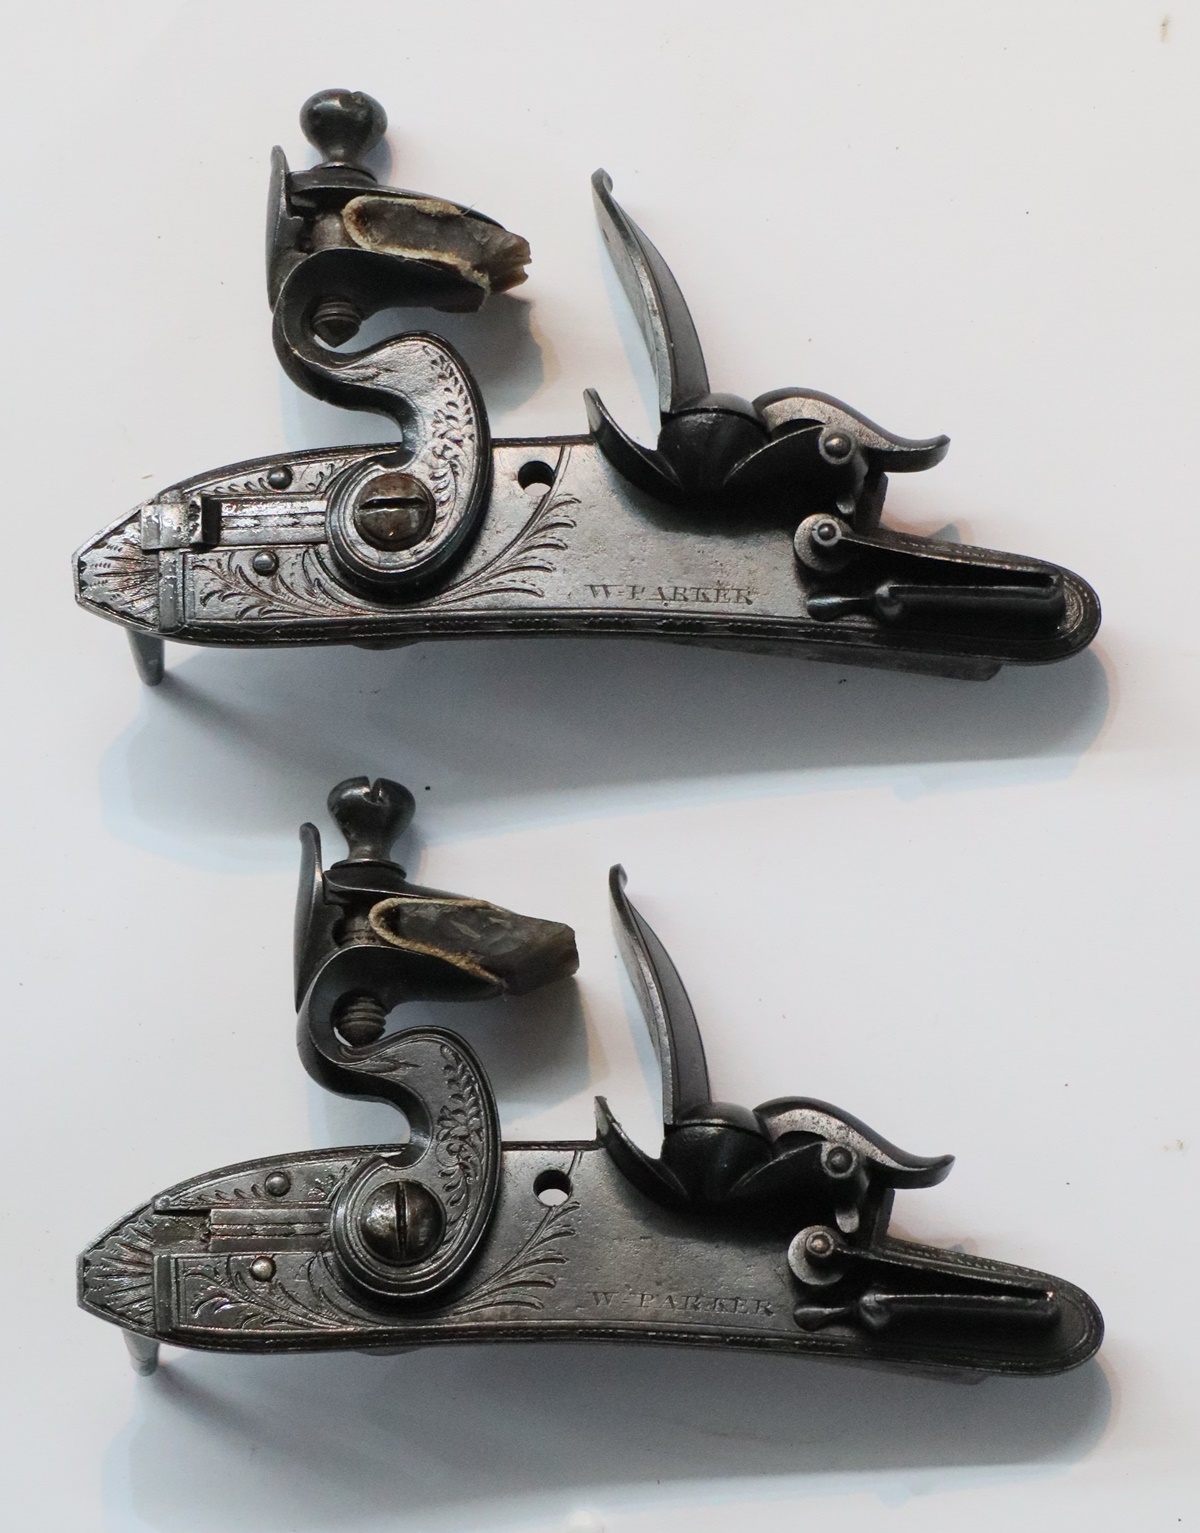
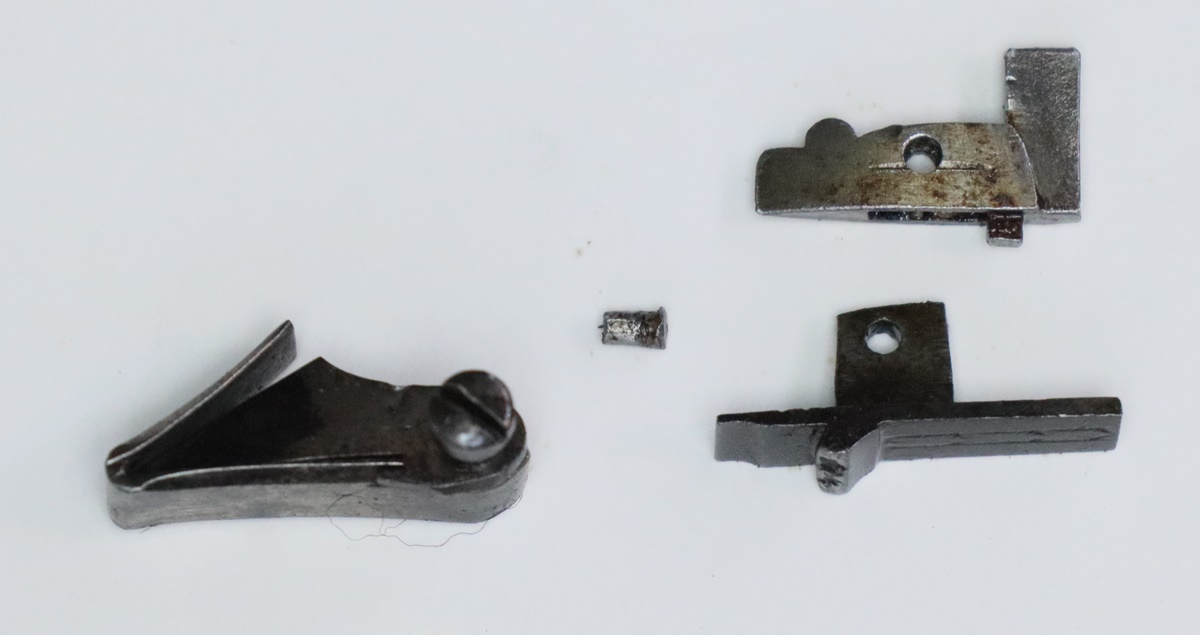 Making the new sliders (bottom right) will be very fiddly! might try welding this one.
7th May – Maybe we are into the warm weather here now – it will be warmer next week. I got another gun job today, a small piece of wood to put on to repair a butt of a Henry Nock officer’s pistol. I looked at Freds ebgraving and felt guilty that I hadn’t begun – any hope of doing it next week was out of the door as I will be spending most of the week in school – its the national SATS exams and I’ve been recruited to invigilate, plus doing Tuesday afternoon as a Knight, and later in the STEM club. I’m hoping to wrap up the cappers by the end of the week – I have built up a bit of a stock and got the packaging sorted, just need to print up some labels and start selling them – I worked out prices on the basis of printer time for the various parts plus material cost (not much) plus a postage and handling charge – I won’t get rich but it might go some way to paying for the printer!
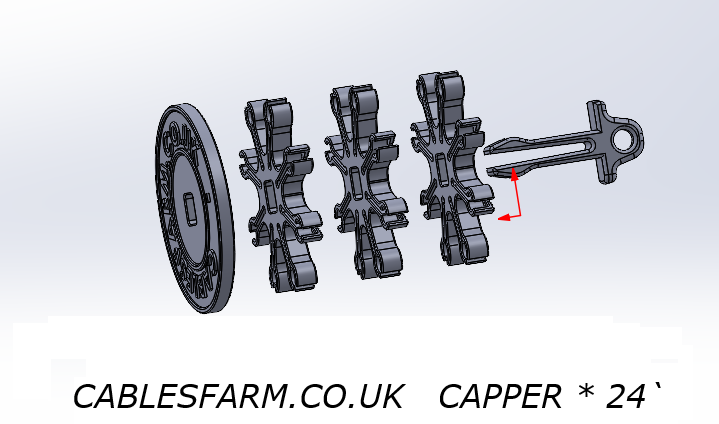
5th May – Lovely day shooting at CGC – I used my little Nock and hit a few clays that I was really pleased to get, and as usual missed some that looked easy – it was ever thus! I took my Cablesfarm capper system to show our regular group and immediately sold two full sets, so that was good. I’d printed one up with Cambridge Gun Club, and I think when I’ve got into production they will sell them – they are quite into muzzle loading and are planning to sell black powder so that would fit. Pete commented that he’de like a loop on the tub as he likes to hang everything about his person – so I’ll obligue… I’m just in the process of working out how to price them – it reminds me of the school activity that got me involved in primary school STEM activities – I was asked by Suffolk Education Dept if I would be a Dragon for a primary school Dragon’s Den for 7 and 8 year olds. I offered to help with the run up to the activity and got heavily involved in making things in class, any way the point of the anecdote is that when we came to judge the event the children had to explain their business plan, including costs and selling price – one lad gave a figure for his unit cost that was higher than his selling price – when asked how he was going to make any money that way, he said he would just sell more! A lot of people in real businesses seem to think that way too! I am not one of them….
3rd May – Did my STEM Club at school today – great to be with the kids – they are getting involved in the programming and had fun running around tha school testing out the range of the radios built into the Microbit computers – I reckon they work to at least 100m on the default setting, which is enough for boats and cars, although probably not good enough to use them to control model aircraft! Next week we will take in the 3D printer to show them and set them to printing name plates – their teacher and the head are both coming along to see the technology at work! I’ve been playing around with different sortware for ‘slicing’ – making the model shape into instructions for the machine to move and push out plastic in the right places. One program produces perfect bottoms in contact with the baseplate, but slightly scrappy top surfaces, the other is the opposite – I’m sure that with enough expert tinkering ( there are around 50 or so variables to tweek!) they can both be made near perfect, but fiddling with a lot of variables gives an enormous number of possible options, only a very few of which are what is wanted – how to find them? My current plan is to put my capper system on this website when I have got it sorted – I’ll start by selling a simple option and add my fancy bits in time.
1st May – Happy May Day – whatever it is that happens on May Day, possibly the official start of spring? I made the perspex case to fit round my 3D printer to keep little fingers off the works when I take it into school. Only problem was I didn’t measure the backward projection of the printer bed when it was in the back position accurately enough and the case is about 2 mm too short so I’ll have to cut a slot for the bed to go into – not a problem, just a bore! I’m quietly printing more bits for the capper system and refining bits so they don’t need any tinkering with once they are printed. Might make a turnscrew tomorrow for fun. It would be good to have a nipple key too – I’ll have to think about that, the space is a bit limited and it would need to be pretty strong – still, as the whole point of the exercise is to have fun doing mechanical design and making things, that isn’t a reason not to have a go! Might make a titanium one, not sure if I can TIG weld titanium, must have a look – almost certainly involve buying more tools – making things always does! Getting near to engraving Fred’s gun etc – the workshop is nearly warm enough to work in and I can probably find some old floorboards to cut up for the woodburner – need to check that I haven’t inadvertently left any black powder lying about! And time to order a skip to clear out the muck from renovating the bedroom, and I ought to do a car boot sale soon to clear out the attic and the lawns are now approaching max growth rate………… No peace for the wicked – makes me tired just to think about it.
30th April – The frost took out one Courgette plant and two runner bean plants last night – not best pleased! I finished off the nipple jobs today – I managed to get the total time to make one down to 55 minutes, which, allowing for tea breaks, means I am probably almost on the minimum wage now if you ignore equipment costs! I did make one improvement over the last few days – I turn up and tap the thread in the lathe first, then screw it into a bit of bar with the correct thread, and put the bar in the lathe to turn the nipple end – I now mill a flat on the bar with a step at the nipple end so I can locate it in the vice in the milling machine and put both flats on accurately and quickly. I also saved a few minutes by drilling both holes from the nipple end – first the 2.1 mm hole nearly through, and then the 1.2 mm hole through – that way you only drill the necessary bit of 1.2 mm thread. The reason I didn’t do it like that before was that it puts the 1.2mm hole as the last operation, so if the drill breaks you have to throw away the whole job! My 3D printer is still working overtime – making hinges and bits to put a cover on itself. I should finish the cover tomorrow, then I really need to think about engraving Fred’s locks and furniture – a good deal of practice will be needed…….
29th April Another 3 nipples today – I didn’t screw up any of them this time, but I had a small battle with Pete’s gun, which had had one nipple tapped out to M8 x 1.25 and the other sleeved to 1/4 BSF 28t.p.i. I happened to have the M8 taps and dies from my previous engineering exploits so that was no problem, The 1/4 BSF was a bit tight in the insert, and eventually unscrewed it ( it was Araldited in) when I tried to get the nipple out to recut it a bit. I was able to separate the nipple and the insert with some trepidation and a big pair of pliers*, and glued the insert back in and ran a very sharp carbon steel die down the nipple. I use carbon steel dies and not HSS. HSS are about 4 times the price, at least they are from Tracy Tools, and actually don’t cut as well – they are less brittle, and for lathe tools stand much faster cutting speeds, but for hand cutting of threads heat is hardly a problem – as for wear – its much better to buy several and discard them after a dozen nipples of so. I reckon it takes me about 1 1/2 to 2 hours to from start finish to make a nipple on average, so at the price I charge it would hardly pay the minimum wage, let alone the living wage! Lucky I don’t depend on it for anything other than paying for the odd tool or material. My evening project at the moment is fixing a Perspex cover round the 3D printer so I can take it into school and leave it running in class. Ive designed a set of brackets and hinges to hold the panels and they will print overnight tonight so I can finish the job over the weekend. I also need to print out several sets of my cappers before I put them on Ebay – each set will take around 12 hours to print so my maximum output is 2 sets a day – I’m not going to get rich at that either! (it might just pay for the materials and wear and wear on the printer). But then when you look at a lot of fast growing businesses they don’t make a profit for years and investers pour millions into them in the hope that they will hit lucky and one day the company will actually make money – its all about building a brand – Cablesfarm.co.uk – any investor wishing to pour millions into growing my brand will receive a free set of cappers (maybe). *One lesson I’ve learnt in this game is that you need to hold things very firmly to avoid damage = half hearted gripping does the most damage.
28th April – back to being a bit chilly, especially evenings and nights, after the warm spell in March. I did do some gun work today – in fact I spent half the day making a couple of nipples – I sometimes wonder why I insist of making them out of titanium as its a real pain – very easy to work harden it if you don’t make continuous cuts – I got the end of the parting tool so hot by not noticing that it was not cutting that it flashed the titanium – fortunately only a quick flash, but a reminder that titanium is quite inflamable when in the form of fine swarf, and mixed with cutting oil is a potent fire risk that water only makes worse. Anyway I trashed two nipples, one by taking too much off by not thinking, and another by busting off the 1.2 mm drill – drilling such fine holes in titanium is really quite tricky as you need to keep up some pressure on the drill to keep it cutting and avoid work hardening, but too much and it breaks – I can guarentee that when I get back to making nipples after a long break, I screw up a couple before I get the hang. I buy the 1.2 mm drills by the 10, partly because I break them but mainly because they only stay sharp enough for a few nipples. Mostly I use lathe tools with replaceable carbide tips, but that doesn’t work for the parting tools or for the modified parting tool that I need to undercut the shoulder of the thread. Beware that taking very fine cuts is very hit and miss – the metal will either cut or burnish – its particularly true of thread cutting – you have to get it right on the first cut – if you try to run the die a scond time closed down, it invariably burnishes and will be very tight – and when you back it off it will be just as tight as no metal has been removed. I did a bit more playing with my capper system – I made a box and lid to fit in the housing to carry 50 or 60 spare nipples – mostly to see if I could get the opening and locking right – it works on the third attempt…… I’ll tackle Pete’s nipples tomorrow, if I can remember what the problem was! I’ve still got a list of outside jobs to finish and the hedges are starting to burst forth, and the lawns to grow rapidly…… Penny is now able to drive again after her hip transplant, so that means I will have the house to myself in the daytime.
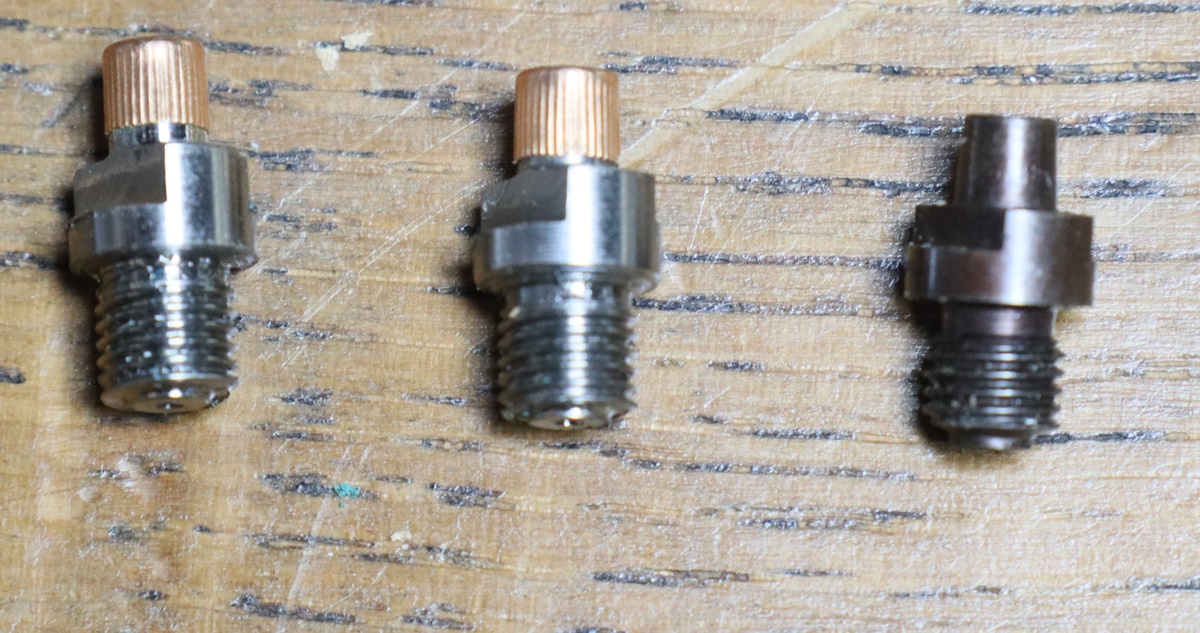
Two new + sample
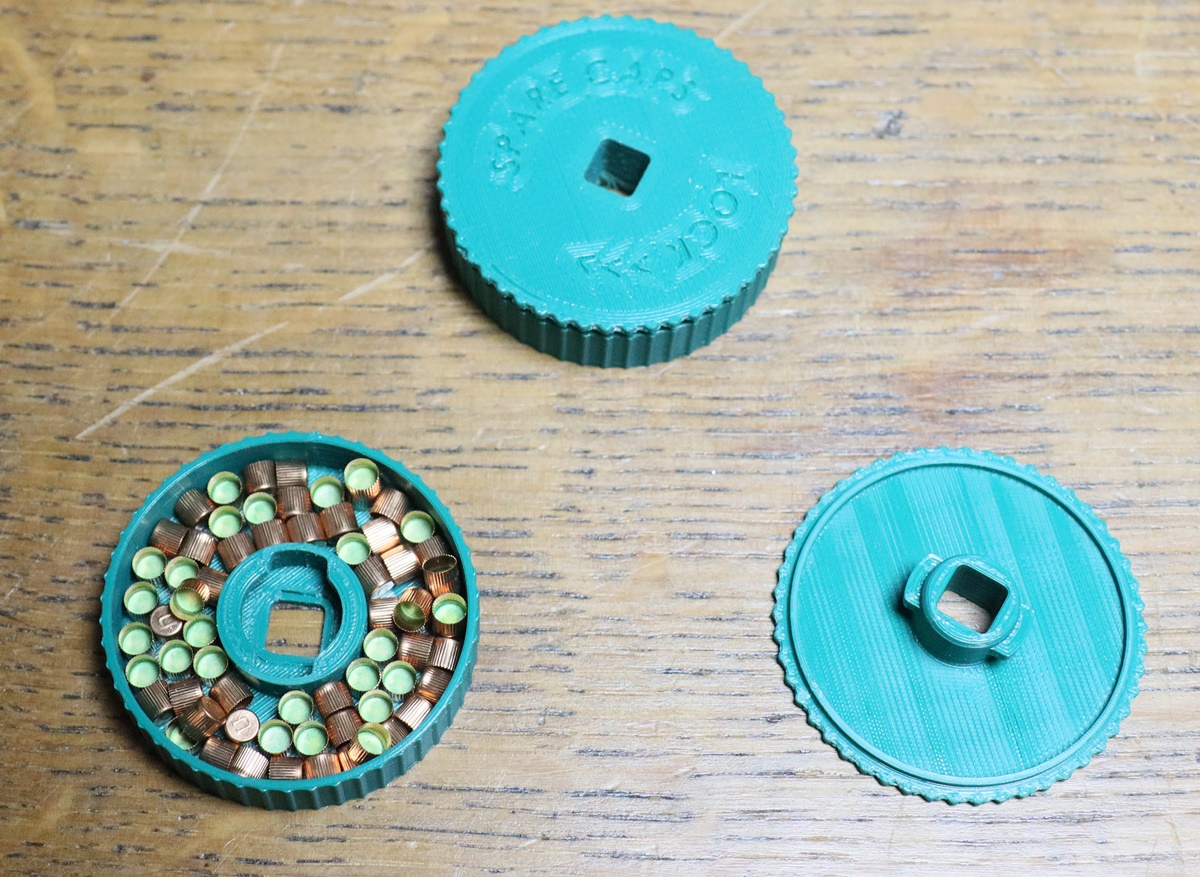
Really an exercise in design for 3D printing – my printer is working overtime since I bought it!
27th Did my first STEM club at school for 2 years – great to be back with the kids. On the way out I got clobbered – to bring my suit of armour into the little ones class and play the part of a knight for their history project – promised to be fun – I have a couple of helmets and they all get to try them on (its all repro, probably late Victorian?). I am busy refining my cappers – its turning into a system – I do enjoy engineering design – Dave, my STEM buddy, said it ought to have a cover – quite right! And I was going to supply my decappers with it, but redesigned them to fit within the cover – now I’m designing a container to be part of the system for spare caps, then I need to design a nipple pricker. Only possible because I spent several years gainfully employed doing CAD design work in Solidworks quite a few years ago! Tomorrow I start the gun work in ernest – I have quite a queue, so I owe it to my clients to stop playing and get working!
 Gets more elaborate by the minute!
25th April – not such a nice day today. Busy finishing off my STEM project for the school club tomorrow afternoon. My friend Dave and I have built a model safe with a door opened and closed by a servo motor, all controlled by a microbit computer – a complicated bit of 3D printed engineering and software. We have now added a remote control to the project! We have 8 children from years 5 and 6 taking part – basically aged 9 and 10. We dream up these projects and do our prep and homework, but until we get started with the club we really don’t know how much they will be able to understand or do – so we always end up flying by the seat of our pants! I just bought a wreck of an overcoat pistol by Harding, the maker of the Post Office pistols I restored – it has a broken cock and frizzen spring, and need general sorting, but they won’t be too bad when finished, although with a replacement cock and spring they won’t pass as fully original. The source of supply of good castings for the cocks of small pistols has more or less dried up, but I probably have one that will do at a pinch, It’s always tricky to put a price on things like this as very few people can source the parts and do the restoration, and overcoat pistols, even originals in fair condition don’t fetch a lot, I’m not sure why but they are worth considerably less than larger pistols of comparable quality. A quick look through the auction catalogues indicate estimates of around £250 to £350 for reasonable all original overcoat pistols. Given that the cost of restoration will be £200 to £250 or more including the parts at my incredibly reasonable rates, it doesn’t leave a lot to pay for the pistol as is. On the other hand, I need to feed my blog with restorations occasionally or all my visitors will desert me, and I do have a soft spot for Harding’s utilitarian output! I figured the estimate at auction would be £80 to £120 – I gave a bit more than that for it as I don’t need to pay myself for the work. One blog visitor thought that my red cappers I showed yesterday were a bit garish for a basically historic sport – I had the same thought and had ordered a spool of dark green filament – I also have black. I looked to see if you could buy camo filament, mainly just out of interest – you can, but only carbon reinforced filament that is a bit tricky to print, expensive and unnecesarily strong. Probably what people in the US use for 3D printing bits of firearms – I’ve never quite understood how much of the pistol you can print, and whether you need any metal tube. I think you can only get a couple of shots before the thing is unusable? I would go searching the internet for designs in order to get answers, but goodness knows what level of surveilance we are all subject to – and not just from Google. I use a VPN (Virtual Private Network) portal for connecting to the web but that doesn’t completely isolate you.
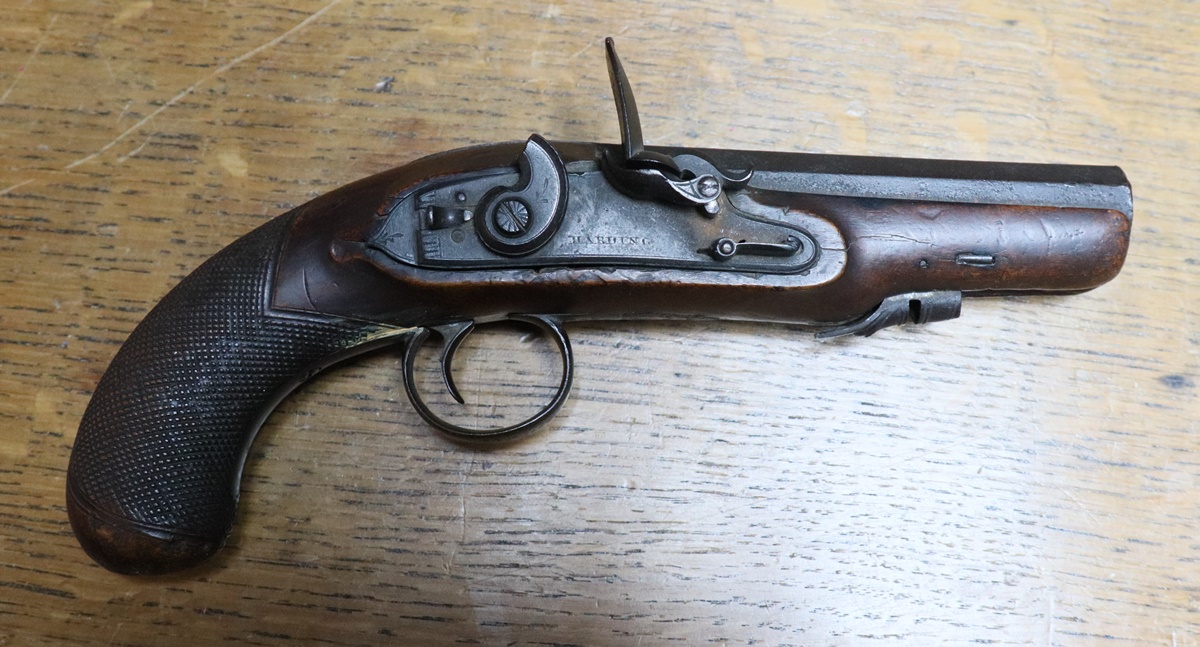
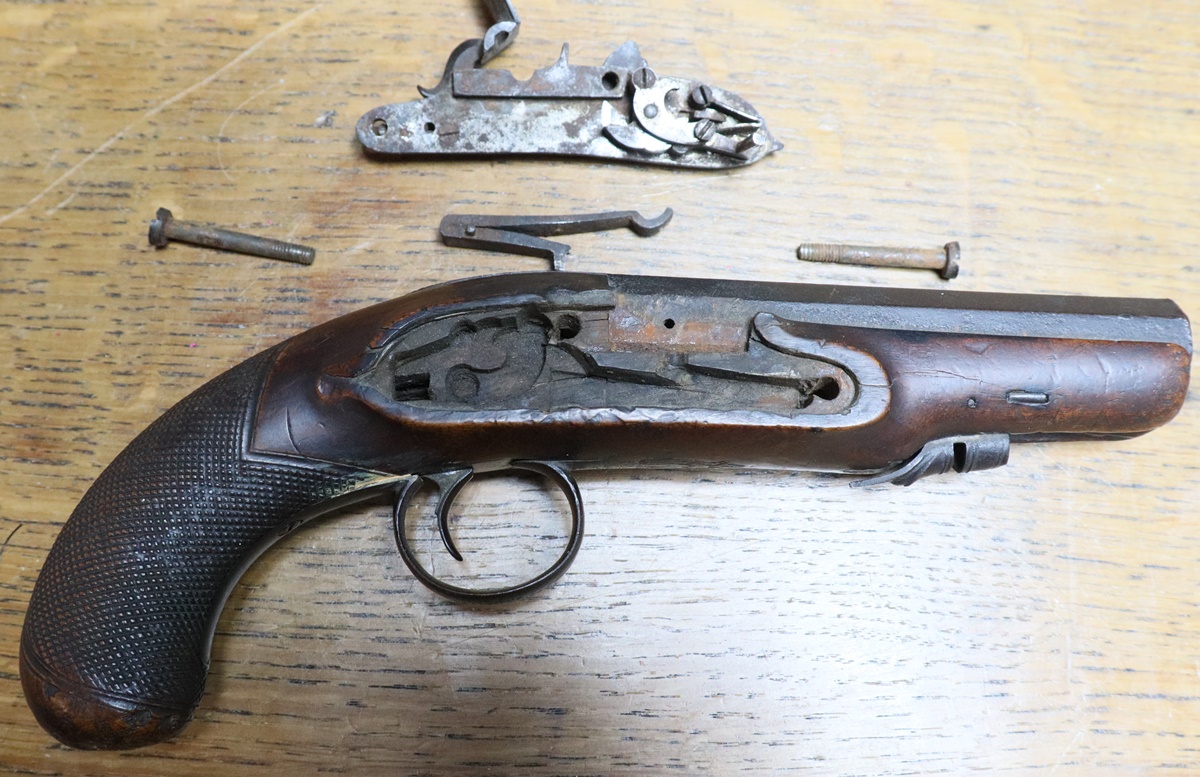
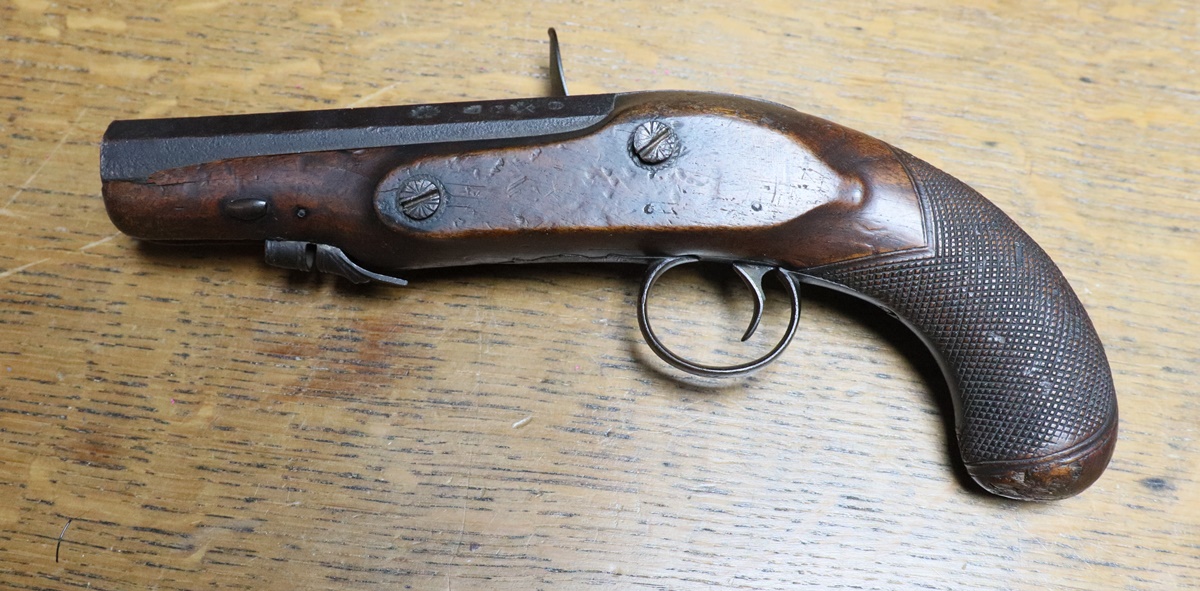
24th April – Enjoyed a pleasant clay shoot on Thursday with the lads – I reverted to using my little Nock single, and convinced everyone, myself included, that I shoot better with that gun than any of my others. I still need to educate myself to shoot slow clays effectively – the longer I can see them coming the less likely I am to hit them – if I don’t spot them until the last minute I am a much better shot. Its particularly noticable with the little Nock as its rather too easy to wave it about in the air if the clay is in sight for too long, whereas my big old o/u 12 is a bit steadier for those clays. The only exception to the long wait/poor result is fo incomers or crows where I don’t shoot them until they are falling fast. I used to find that I did well at simultaneous pairs, but that is not an option with a single barreled gun! I’ve been busy getting our tomato and runner bean plants in, and setting up the automatic watering system – I have a small reservoir that is filled from the clock controlled tap control, and then drains into the grow bag via a perforated tube. I needed to make a bung for the resevoir and a couple of mounting brackets – an hour doing the CAD design and it was ready to print on the 3D printer and four hours later they were installed and working. The technology is really transforming making things. I more or less finalised the design of my percusssion cap dispensers – I settled on using ‘spiders’ with 8 arms as its handy not to have to keep changing them, and designed a double ended sprung shaft so you can have loaded ‘spiders at one end, and put the empty ones at the other end, with a disk separating them. I tried an earlier design on Thursday, but it had nowhere for the empty spiders so I put them in pockets etc and it was not easy to find how many caps I’d used. A shaft has room for up to 7 spiders, giving you up to 56 shots, which ought to be enough for any muzzle loading session/shoot. + I used a square shaft as it works out better for printing, and it keeps all the caps in line so they can’t fall out. I’ll put them in the SHOP on this website and also on ebay when I have worked out a price and made a few more sets.
The ‘frills’ on the top spider are an optical effect due to the somewhat flourescent plastic
 Maybe I should make them in a more sober colour, only these are easily spotted if dropped.
19th April (just) I had another look at the Manton to see if I could find the reason it double fires once in every hundred shots or so – I put a smear of modelling clay on the wood where the sear arm might touch if it didn’t have enough clearance, but that just showed there was a clearance of 1 mm or more – so still no nearer a solution – I was pretty sure from looking at it that it was OK, before the clay check, but its best to measure these things if possible. Still busy with the 3D printer – the pile of almost right designs grows by the hour!
17th April – I remembered I needed to look at a bit of a problem I had with my flintlock at the clay shoot on Thursday – On one occasion I fired the right barrel and the left cock came down and fired immediately – apparently on the recoil. It had happened once before to Bev trying my gun for the first time, and once to me out of perhaps 200 shots. On this occasion I just swapped to firing the left barrel first, but in the past I didn’t bother to do this. My first thoughts were that the full cock bent on the left lock must be worn so the engagement was poor. When I stripped the gun to clean it I checked the bents and they looked perfect and identical on both locks, with the sear making a good engagement and as far as I could tell with the lock out of the gun, requiring a definite pull to fire – in fact if anything I would have said that the pull was on the heavy side. The other potential cause of this problem is that the sear arm is stopped from falling enough to fully engage the sear in the bent – this can be because the sear arm is stopped by the wood of the stock, or because the trigger plate stays in contact with the sear arm because the trigger can’t move forward enough. Either of these causes might indicate that the sear arm is bent too far down. In this case there was definitely still play in the trigger on full cock, and no sign that the sear arm was anywhere near the wood. So I’m none the wiser – I suppose my finger could have slipped onto the second trigger on recoil but I’m not sure that is very likely, I also wondered if it was possible to cock the gun without engaging the sear fully, but playing with the bare lock, that seemed unlikely . It’s a good John Manton with the locks in excellent condition inside and no suggestion that anything has been tinkered with on the locks – it even has neat little rollers on the ends of the sears to reduce friction with the trigger plates – I think I replaced the left roller, but its exactly the same diameter as that on the right and I don’t think the sear arm was bent to compensate for a missing roller. I’m still playing around with the 3D printing, and getting frustrated because the fluorescent filament isn’t as strong as I’d like. I’m also still nursing my damaged finger, but it seems to be on the mend…. Just checked the statistics for visitors to this website – very interesting! Almost all the Russian visitors have gone, some of whom were probably trying to hack the site – Russians used to be about the 4th or 5th most frequent visitors. I did have one visit from Kyiv today, so someone had time to look at a couple of posts – my thoughts are with them in their terrible situation.
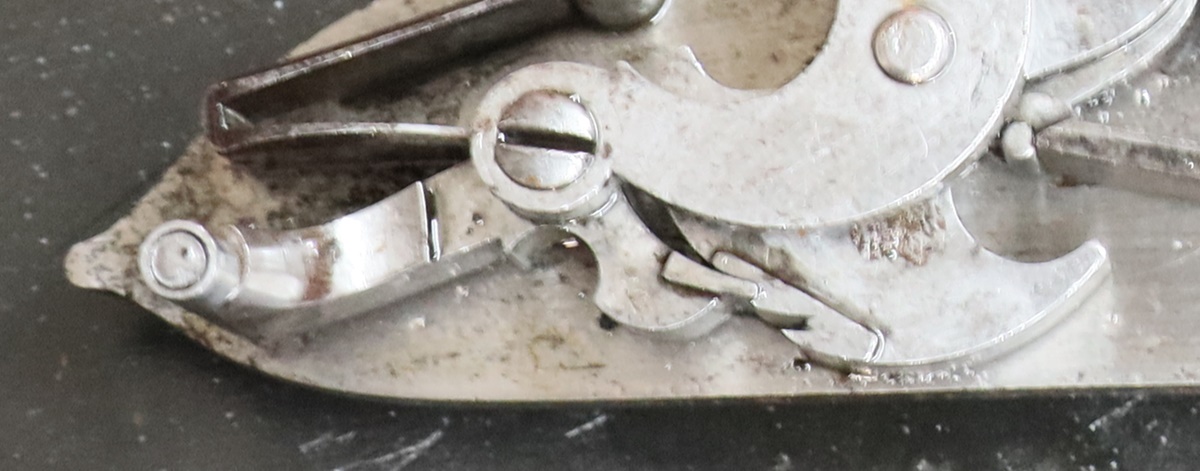
Perfect bents and sear – not sure why it all looks so mucky in the photo – its actually pretty clean with a few spots of old discolouration.
15th April Had a shoot yesterday and distributed 75 Kg of the shot I bought from Clay and Game – I could have got rid of 200 Kg instead of the 100 I bought. It was a pleasant all flintlock morning, not that I hit much! In the afternoon I had Tom’s Barreta O/U 12 to see if I could still heave it around as I mostly use a light side by side 20 bore now. I did hit a reasonable number of clays, including a few snap shots that convinced me that I could swing it fast if needed – I got through 50 cartridges with no ill effects, so OK. I have been using the 3D printer for various bits of the school STEM project, but I decided to print a copy of a plastic star shaped cap dispenser I had seen- I’m not sure where the design came from but its pretty simple to make, I think a chap in Poland sells them. Anyway I made a 6 armed star, and then decided that an 8 armed star would mean you only needed 5 stars to cover a 40 bird clay shoot so I am printing a peg to store 5 on. They are currently being printed in flourescent raspberry red, which actually proved its value on our wander round the shooting ground as I dropped one of the prototypes and it was very easily spotted. Unfortunatel you can’t get the really tough plastic filament in nice colours so the plastic I’m using isnt as strong as I’d like. I can probably print 10 or 12 stars overnight, including pegs etc. I’ll put them in my Shop when I’ve sorted the peg etc and worked out a price – next project will be to print an overshot card dispenser. I’ve more or less finished the window, just got a bit of plastering to do and, for fun, reinstall the little rotating prism device with its solar cell that has been faithfully turning when the sun shines for around 20 years – it causes little moving rainbows to project onto the walls.
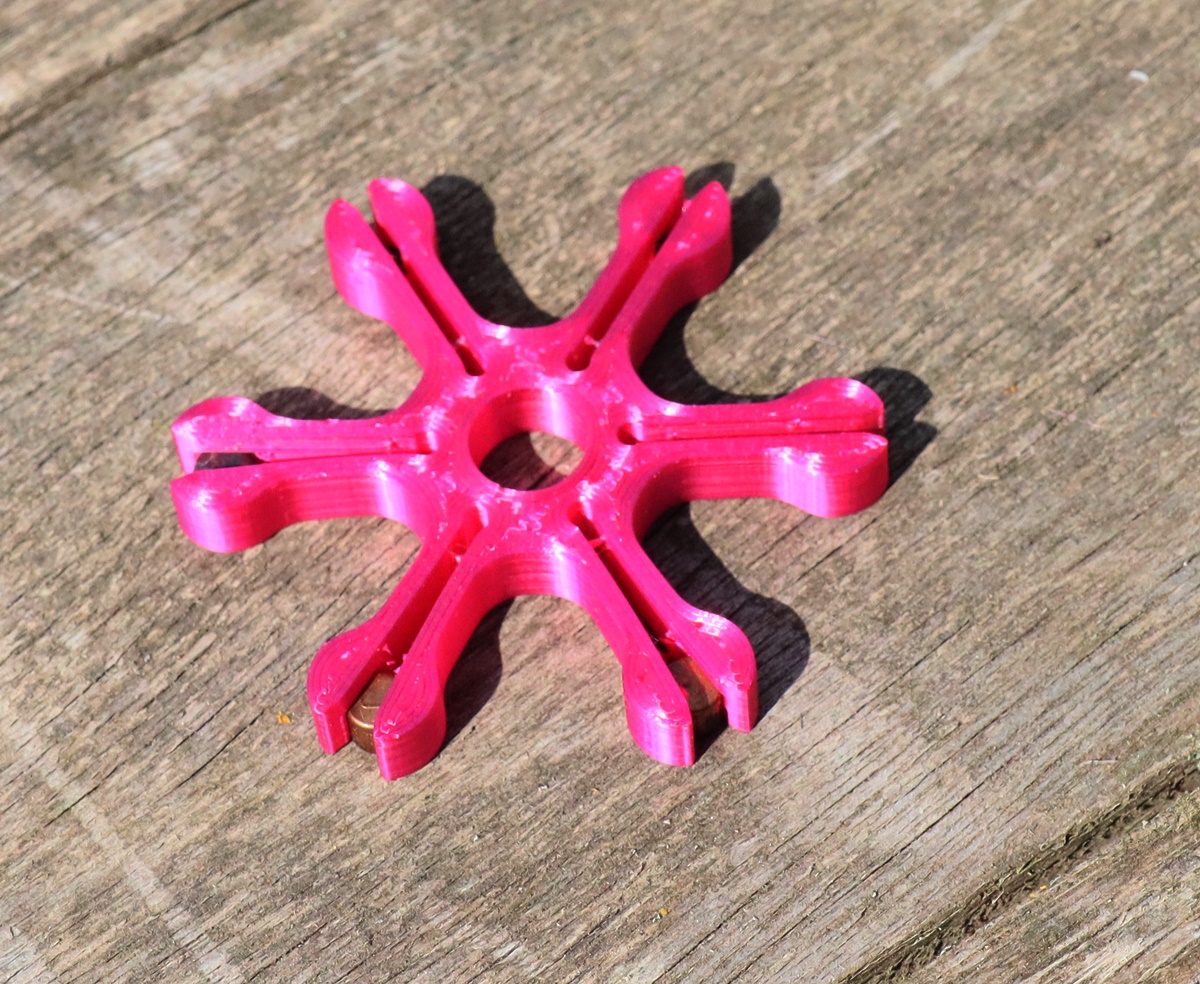
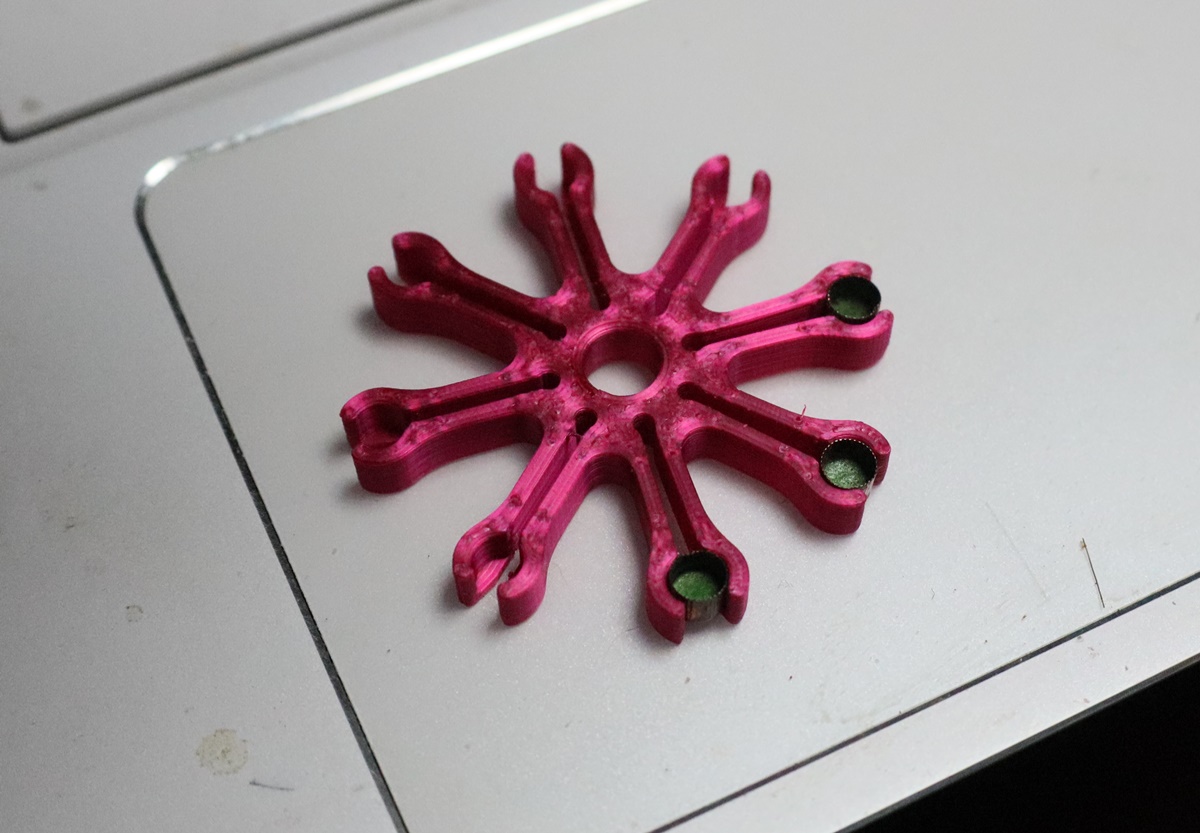
12th April Busy finishing and installing the new window – in the course of fitting the pintles into the frame I hit the frame with a 7 lb club hammer and my finger was directly underneath – right across the top of the nail – not nice – fortunately my left hand! Anyway ithe window is now in, just a bit of sealing round the edge and a couple of plugs to fill the screw fixing holes, and I can get back to guns again – I now have a queue – Fred’s locks and furniture to engrave, a couple of safety catches on a pair of pistols to make and a pair of nipples for a repro with metric threads that I’ll have to buy a die for as its too fiddly to set up the lathe for metric and turn a thread. The 3D printing is coming on well, it is a pretty amazing tool, and the parts look good and are strong and quite accurate in size, and the way it does holes is fine for tapping threads – which reminds me, I broke off a M2.5 tap in one hole, so when I buy the die I’d better get another 2.5mm 2nd tap. I was thinking yesterday that it was ages since I’d shot any clays – I’m itching to take the flintlock out again! Next domestic job is to build a big bin box under the new widow, and then get on with making the frames for the secondary double glazing – I’ve left it too late for any benefit this winter, which does relieve the pressure a bit although every time I see the £2000 pile of Venio vacuum glass I feel I should get on with it. Oh, and I’m glad to report that the owner of the sea service lock I engraved is very happy with the result.
3rd April – still a bit chilly, especially in the shed where I did manage to finish getting the glass and cames assembled for the second window opening – ready to solder now. I have been trying to make a video, but its difficult to find a good palce to put the camera to get an interesting view of how to do things. I finished making the design for my first useful 3D printed model – a part for the next STEM project at school. I’m mighty impressed by how straightforward the process is, and how good the finished part is. The printing can be a slow job – this part took about 9 hours to print, and it saves time and plastic by making all the solid areas as a thin shell with a web inside – it is, however extremely rigid and strong – apart from being a bit lighter than you would expect it is not immediately obvious that it isn’t a solid lump of plastic. The plastic for this 180 x 90mm part was £1.50, so not even very expensive of material -even at retail prices, and of course no wastage. You can see why it has the potential to be an important process in the future – commercially you need hundreds of printers all wired up to a control system with automatic collection of parts etc, but that is all possible with very little human intervention.
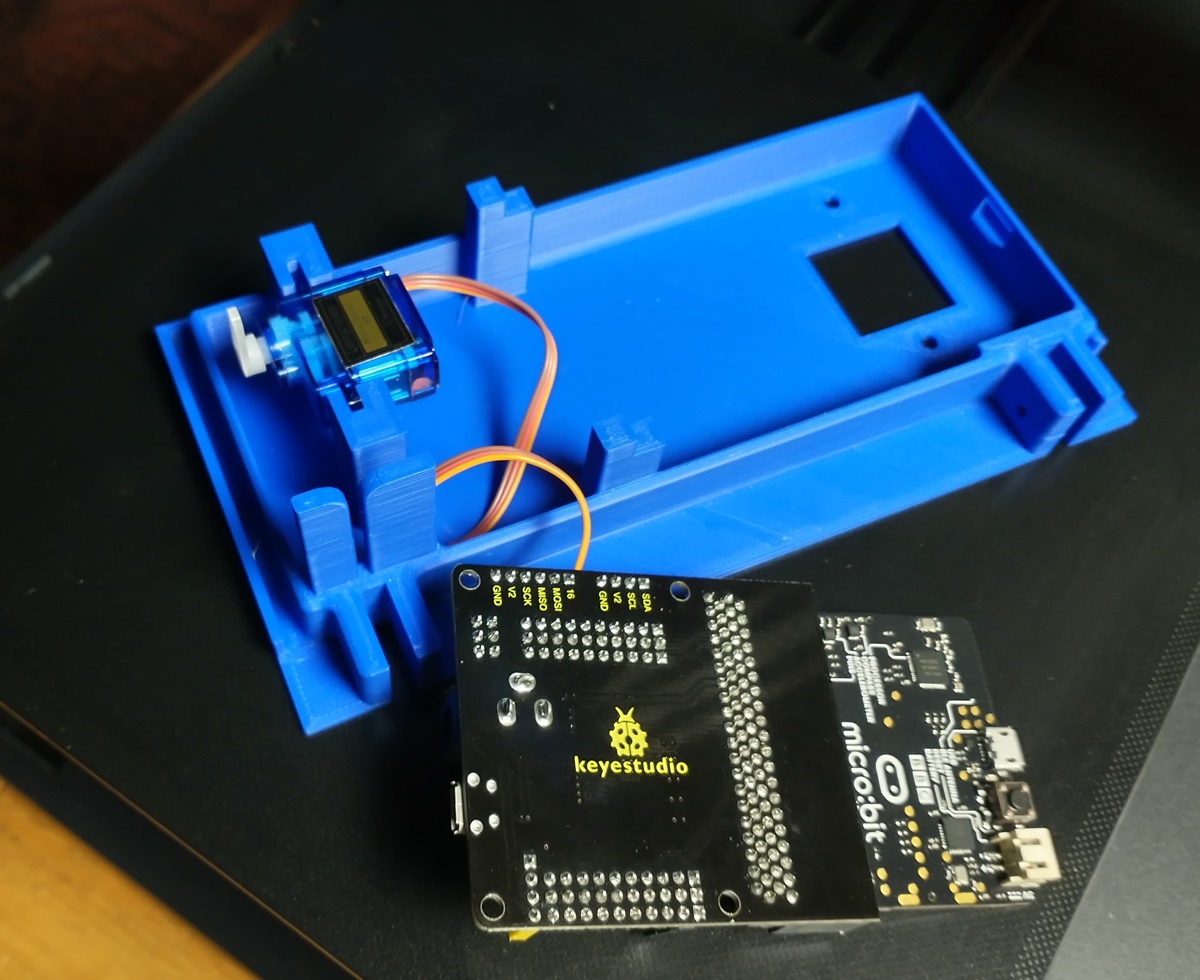
2nd April -Cold weater and a bit of snow strike, just when one thinks that spring is arriving ! Having finished the bedroom I have started on making the new leaded window, but that involves working in the unheated shed, so it has to be done in 2 hour bursts or I would freeze to death. So time for other things – I got my 3D printer on Friday and assembled it, and printed the demonstration piece that they give you the G Code for – a sort of small vase. Printing is quite slow as its in layers of 0.2 of a mm, so it takes a lot of layers to get to a sensible size – the little vase is about 75mm or 3 inches high – that is 375 layers – and there is an inner shell and an outer shell and a web of reinforcement between the two – it took 1 1/2 hours to print. I will get on to something useful when I get a moment. Giles pointed out to me that one can now get access to Solidworks – a fantastic piece of CAD design software – for an annual subscription of £107 as an amateur ‘maker’ – that compares favourably to the £3450 it costs per year for commercial use! I used it a lot when I was a consultant engineer – it is by far the best program of its kind, so I subscribed. I have been really surprised by how easy it is to get going on the 3D printing – the only hurdle is doing the designs in the first place. I have some projects lined up in conjunction with my STEM club at the school, and I wil probably take it into school and have it running – the children will be fascinated. To guns;- When my father died 10 years or so back , my brother and I shared his gun collection, which we bought out of the estate. He managed to bag a pair of Griffin and Tow horse pistols that I didn’t know about, and as he has now died my sister in law wants to sell them – I have got a couple of estimates for them, and will probably buy them from her. I was expecting them to be worth more than they seem to be, I will get another valuation before I decide. I had had a good look at them under the microscope, I would have expected the cocks to be engraved but they appeared to be original, and certainly not made from modern castings – the two tumbler/cock screws are different on the two pistols, both look as if they could be right, – one resembles those in the book. I was surprised that the side nails and tang screw/nails had plain domed heads, but checked against Keith-Neil’s book on Griffin and Beale that appeared to be right for his pistols although unusual except in military arms. I noticed in the book that a number of the pistols had tang screws with the slots not aligned fore and aft – quite unusual in my experience. When talking to Geoff Walker he pointed out some faint marks on one cock that could be a welding repair – I might be able to check that by taking the cock off – probably worth doing anyway. One of the pistols has a repaired break right across the wrist that has been glued up (therefore not contemporary with the period of the pistol) but leaving a visible glue line – the pistols have been refinished over the repair – I havent checked if its a shellac or oil finish ( or possibly a modern varnish – heaven forbid!) so it looks as if they have been restored – so almost anything could have been done to them, but mostly pretty well. Anyway here they are;
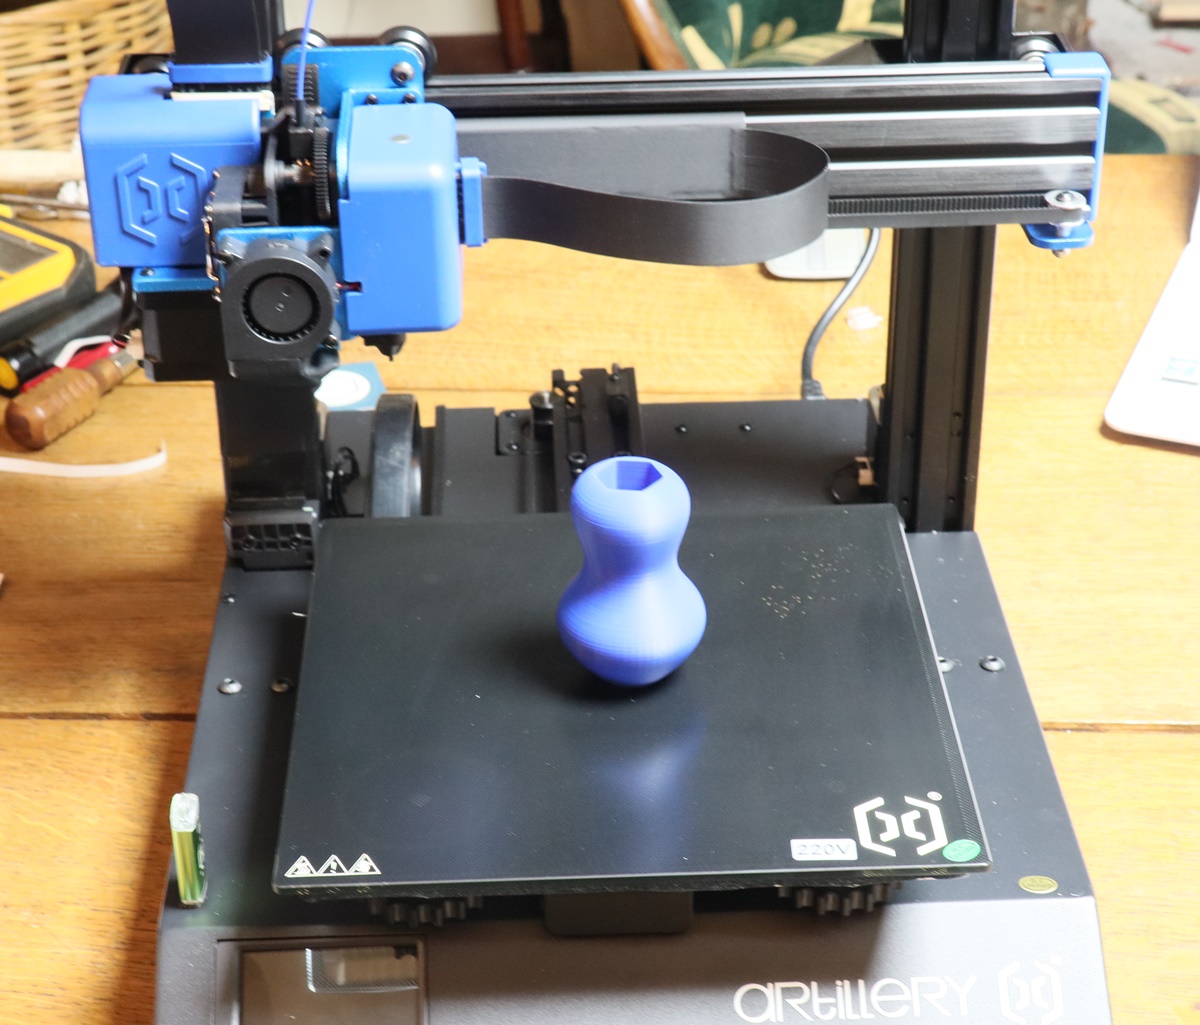
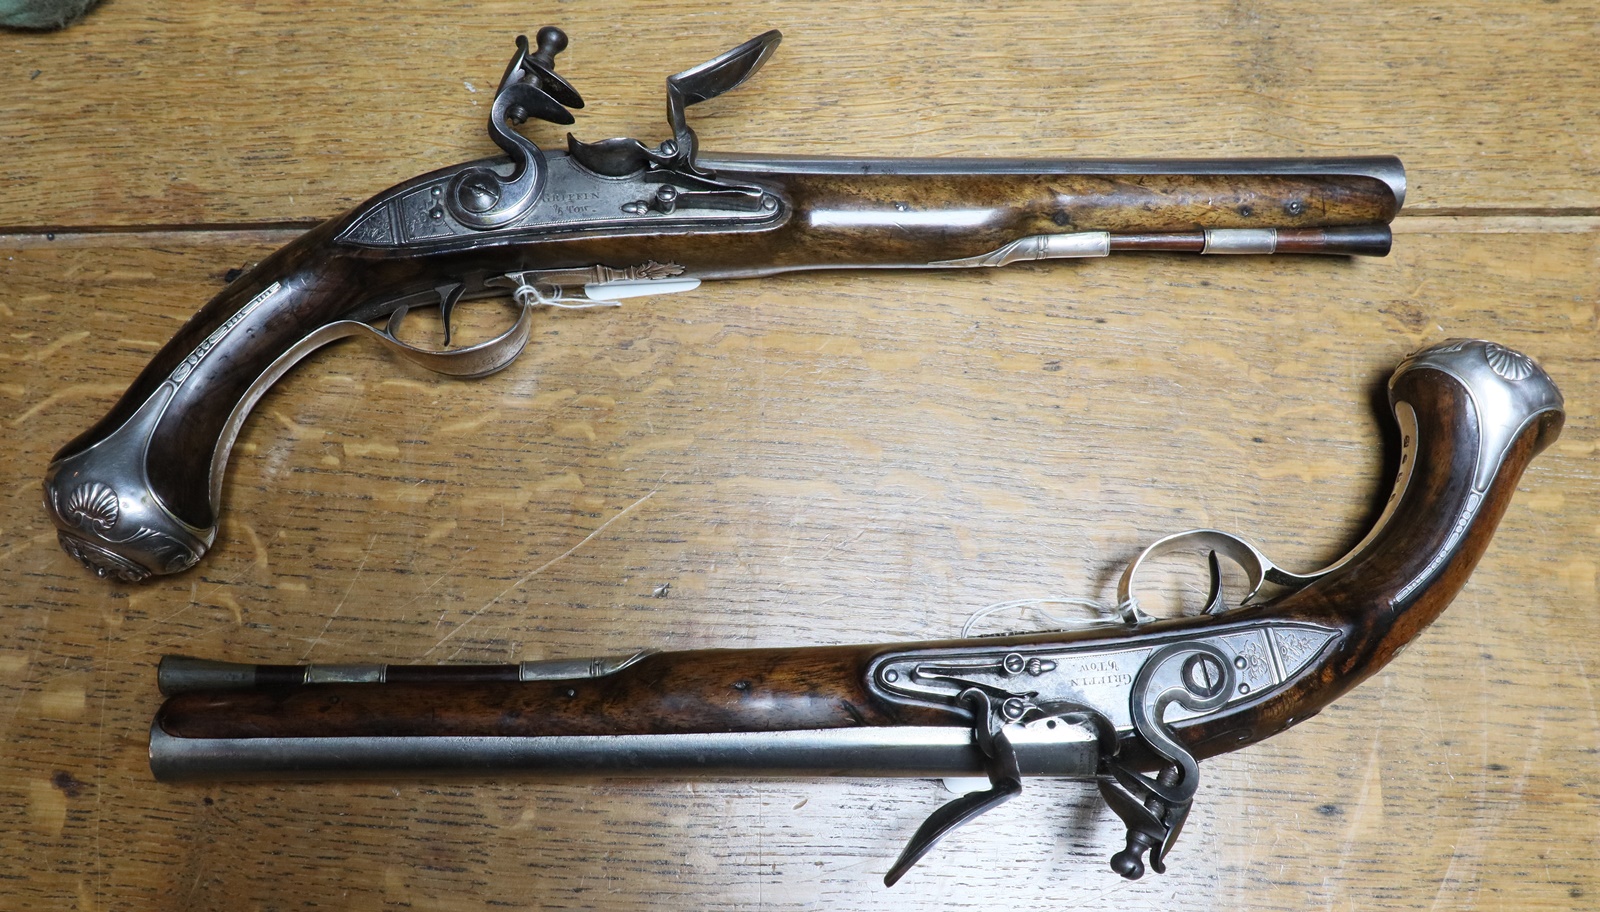
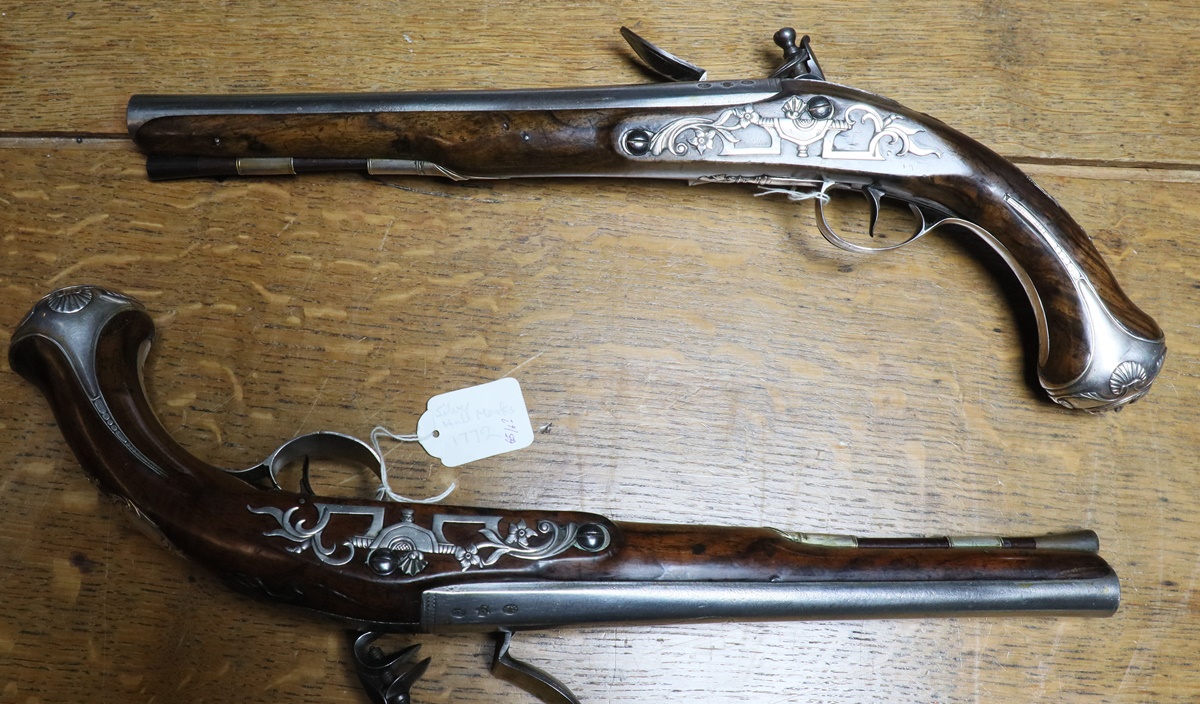
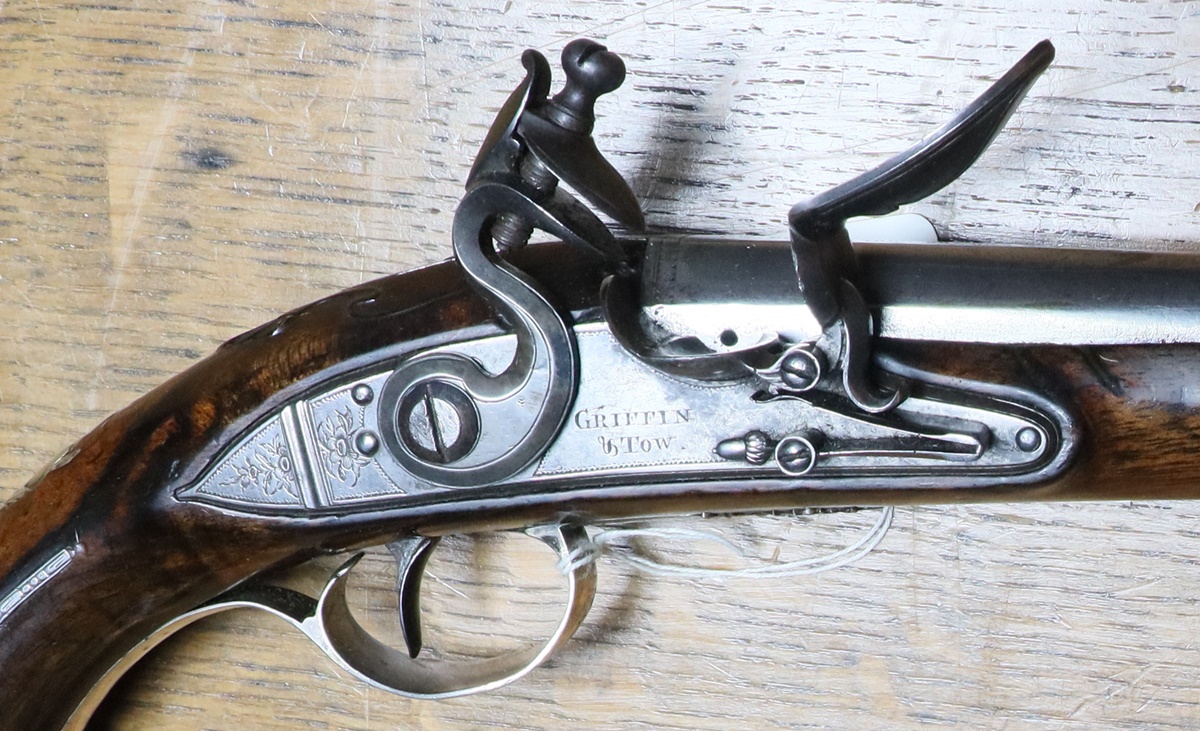
31st March: I don’t know what is happening to this website! I lost the main post with all the latest blog the other day and couldn’t find any trace of it! Today I went to edit it and it was all back so I hastily copied most of the recent blog to a new file – then went back to get the rest, but it had diappeared without trace! So a new header, and the restored latest diary should be on here. I think I have actually lost about 6 months
25th March I finished the Sea Service lock engraving using the air graver to get a bit deeper than I usually go with a push engraver. The lock plate is quite pitted and worn but some of the old engraving could still be seen so I was somewhat constrained in what I could do, but I found a photo on the web (see below) that resembles what I could make out on the lockplate, even down to some assymetry. When I had finished engraving it all looked a bit raw, so I gave it a quick go over with my fine fibre wheel to round off the edges of the cuts a little. That did the trick, but left the lock looking a bit patchy and bright, so I gently heated it up with a propane torch until it turned grey, which looked much more comfortable – it can now go back to its owner for putting in the pistol. I can now think about Fred’s gun parts, which I haven’t yet unpacked. It was a lovely day here- probably all we’ll get for a summer- so I wandered around the garden and realised that I’d intended to replace the last of the old windows last summer, but couldn’t as our superb crop of tomatos was growing in front of it. So I really need to replace it before this year’s plants go in shortly. I made the frame about 20 years ago, and got the iron casement made, so I just have to make up the leaded light panels and fix the glazing bars and my security bars and put it all together, I haven’t done any leaded light making for years, but once I relearn how to cut old glass reliably, I’ll be away. You can’t really use modern float glass in leaded windows as it looks all wrong – the options are to buy modern hand made glass at a high cost, or to reuse salvaged window glass from before the invention of float glass (?mid 20th century) by Pilkinsons. I still have quite a collection left over from my major window building era, although quite a lot of it is almost too flat to use. Penny had her hip replaced a week ago and is going round on crutches – makes me think of Long John Silver whenever I hear her moving around.

This example matches most closely the vestigges of the original engraving

24th March – A bit busy the last week or so with Penny’s hip, but I got the bedroom finished, even as far as putting up a cafe curtain on a nice brass rod, and putting in some furniture – just waiting for a guest to occupy it! I have now got time for a few gun jobs – I had a pair of very nice pistols that the owner wanted me to take the furniture off so he could sort out the finish on the wood. The screws all came out perfectly without a sign of rust except for on small spot on one screw. The ‘nails’ were quite stiff to unscrew, all the way, as the grease, or whatever they had been put in with had gone quite stiff over the years (about 180) since they were made. Being high class pistols the holes for the nails were a pretty exact fit. In the end I didn’t take out the trigger plate and its finial as it didn’t come out easily, there was no obvious way to pull it out straight, and I was afraid that the very fine wood between the bits of the finial might break off if there was any adhesion or rusting on the edges. It will hve to be masked in situu. Anyway they are now done and delivered. The next job was re-engraving an old very worn sea service pistol lock of about 1777 or so – I hadn’t touched a graver for about 3 months, and as well as this job I have all the funiture for one of Fred’s creations waiting to engrave, so time for a bit of concentrated practice. The Sea Service lock needed to be engraved quite deep, and Fred is concerned that his lock and false breech are deep so that they will still show up if fairly brightly colour case hardened, so I had a few practices, and got out the Gravermax air graver – I can’t get quite as much control over it as I can with push engraving, but I did get good enough to do the Sea Service lock, which is not meant to be fine engraving – the originals were done for twopence each – a few years later Palmer was charging that per letter! So the Service engraving wasn’t particularly fine! Anyway I did a few practive engravings on 2″ x 2″ test plates that I bought some time ago, and then did the lock – there was a trace of bits of the original engraving, particularly the little circles ( which I think on the originals were put on with a punch as they are usually a bit eratic ) that I had to keep as they were quite deep, which gave a somewhat different shape from my templates, although a search round the web images did show one or two locks with similar crowns. I take it that the crown is a representation of what is known as the Imperial State Crown of George 1st made in 1714. It had more pronounced arches than later crowns, as on this lock. I realised I still need to add the broad arrow. Now I’ll get on with designing Fred’s gun engraving. I have to start work on the plans for the STEM club at school next term – the plan is for the children to build a safe and program a BBC microbit computer to control the opening of the safe, so that it can be coded. I decided that it would be good if I could make bits for them to use in building their safes (in groups of 3 children) using a 3D printer. My sons had a couple of 3D printers over the years, and make a few parts for me, but as Giles is now in Canada, and Tom doesn’t have a one, I thought it was time I joined the 21st century and got up to speed! I do have this idea that it is now possible to take multiple photos all round an object, and get them made into a 3D representation of the object, which in theory at least, you could import into a 3D printer and print in a plastic that can be used for lost wax casting, enabling you to make castings of the original parts. Along the way you could scale the model to compensate for shrinkage in the casting process – for the time being this will only exist as a dream as far as I am involved, although I’m sure lots of people are doing it. Anyway I have a 3D printer on order, and am working on the software and making the part designs. In case that doesn’t keep me busy, I’ve got a £2000 pile of the special double glazing glass sitting there waiting for me to make secondary glazing frames in oak, which is in the nice dry attic above the kitchen.

Bottom one filled in with a Sharpie to check details.
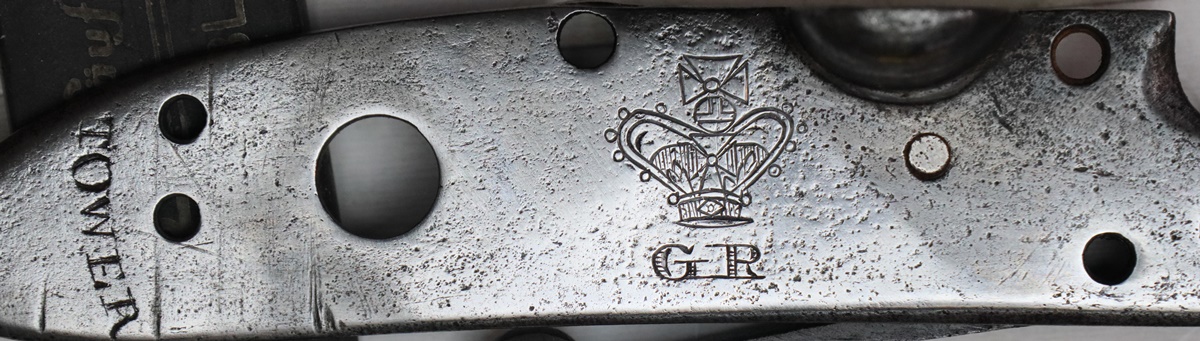
Lock engraved following the remnants of the original engraving, particularly the circles (distinct) and some other clues.
I’ve buffed over the finished engraving to remove the sharp edges – they didn’t look right.
14th March I got the night store heater wired in, and waited till the Off Peak period to test it – and discovered that instead of the 11 hour off peak tarrif we are paying for, we are only getting the standard 7 hour off peak – I guess it will be next to impossible to contact EON! Another waste of time and effort! Ayway I think the bedroom just needs a bit of topcoat painting to finish, then put in some furniture, mostly from Giles’s flat. Then a day clearing up the mess and piles of tools etc that resulted from the work, and I should be free to think about some gun stuff. Penny goes into hospital on Friday to have her other hip replaced, so some of my time will be spent being a nursemaid for a couple of weeks or so………………..
12th March I’ve been desperately trying to finish the bedroom so I can get on with a few gun related jobs,but the finishing stages always take much longer than you think. Basically I now just have some painting to finish, and the night store heater to install and connect to the off peak electricity and I had a few domestic maintenence chores to sort that took a day or so – The Aga was out because I had carelessly let us run out of oil, so I took the opportunity to clean out the burner, and couldn’t get it to relight after the oil delivery – not sure what was the problem but eventually it gave up the fight and lit. We also had a problem with the thermostat on our heatstore water cylinder – it mixes very hot water from a heat exchange coil with cold water to regulate the hot water suppl and had failed, giving only cold water or scalding water. I couldn’t get a direct replacement – on 3 months delivery – so got a near replacement that didn’t quite fit, so I had to fiddle about to get it to fit in the too small space left by the old one – quite a lot of water escaped before I finally conquered it – now OK, I hope – I always wrap the compression joints in tissue and go back later to see if the tissue is damp – doesn’t work very well on hot water pipes but OK on cold. I’m off tomorrow to do a bit more repair work on Tom’s flint wall – he has managed to take out a whole lot of dodgy wall and now has two big holes to fill. I just remembered that I’m waiting for some No 7 shot from Clay and Game – better ring on Monday and check when I will get it.
7th March Spent Sunday helping Tom repair an old flint wall – something I learnt after buying this house – I had a short structural survey which highlighted the high cost of repairs to the flint walls where the wallplate had moved outward and damaged the top foot or so of the flint facing – it actually turned out to be one of the easiest jobs on the house – replacing most of the windows with traditional oak and iron leaded windows took much longer, but at least I learnt how to make leaded windows and oak frames, although I got a local blacksmith to make the iron casements as I don’t have a forge. Anyway we filled in a large hole with lime mortar and flints – you can only build about 4 or 5 inches before the weight of the upper layers causes the whole lot to bulge out, so you have to put boards across the front as you build up. The mortar squeezes out between the flints, and anyway you have to be fairly generous to get a good bond round the edges of the patch, so when you take the boards away later it looks a horrible mess – the aim is to catch it when it is about the consistency of cheese (cheddar , not camembert) and then cut away the surplus with a fine detail trowel and when its a bit drier to brush vigorously to clean any residue off the faces of the flints and expose the coarse sand grains in the mortar. A lot of the wall had been repaired with hard cement, which is not a good idea, as when it gets too much moisture behind it, it comes off as one great big chunk and probably brings most of the wall with it – its not possible to remove it and replace it with lime mortar as the same thing would happen. Apart from that I am slowly getting nearer to finishing the bedroom – the lights and sockets are in now, so I just need to connect up the power and insulate the loft above and put another coat of wax on the floor and beam…. I really need to get it done as I am beginning to build up a queue of gun jobs – apart from the Sea Service pistol engraving, and stripping the metalwork from a pair of target pistols, I had a call from Fred in the US saying he had completed another two guns and needed them engraved – I have done a couple for him before, they are on the Blog somewhere! He gently raised the issue of the depth of my cutting – he sends his locks and furniture to a chap in the states who does pretty spectacular colour case hardening, with the emphasis on colour, and the effect of all the colour is to hide the engraving. I do know that I tend to engrave light – whether its because I’m not as strong in the wrist as a full time professional I don’t know, but I will try to see if I can go deeper……
Just waiting for the final brushing off. The sections of wall laid in horizontal courses are not traditional and use cement.
3rd February – The MOT expired on my car – all sorted now without any problems. My mechanic tells me that it is recommended that you change the tyres on a vehicle after 5 years irrespective of mileage! Mine have done 13 years and are still OK – Its a hefty price to replace them so I think they will do for another year! I got a worn lock for a sea service lock to recut the Crown, GR and etc. The lock is just soft enough to cut, I think, but whether I can cut as deep as the original I don’t know – I may have to resort to the air graver. I’ll put some photos on later when I start. The engravers who did the original locks got paid about 2p per lock – they must have banged them out in minutes! Making good progress with the bedroom – I put the first coat of wax on – I used a jar of home made wax polish to begin with and didn’t realise that it was intended for polishing guns and had linseed oil in it, which darkened the wood a bit more than I wanted – anyway I made some more polish with just beeswax and turpentine that ia a much paler finish, and managed to lighten the wrong finish a bit with white spirit. Once the first coat was on and more or less hardened I put on the skirting boards – mostly screwed on where there was something behind to screw onto, otherwise a modern building adhesive that grabs more or les instantly so no need to hold it. The elm floorboards look amazing – I didn’t realise you could still get elm – one timber merchant laughed at me when I asked if he had any – so I was really pleased to get these lovely boards – just look at the amazing grain pattern in the photo.

These Elm boards are 300mm wide – just look at the amazing figure in the grain!
28th February – Annoyingly I got a letter at the end of last week telling me that my direct debit wouldn’t take my Road Fund payment due 28th as my vehicle needed an MOT test, having expired on the 25th. Unfortunately the earliest I could get a test was next Thursday, so the car will sit in the drive til then – I just hope I don’t suddenly need something from Screwfix! Also means I can’t make a shooting session on the 3rd. Shame. Bedroom going OK – made the Oak shelves ready to finish and fit, and the skirting boards ditto. The elm floor looks beutiful in its natural pale state, so I’ve been looking to see what finish I can apply that doesn’t make it brighter and darker. Choices are varnish of one sort or another, Oil finish, Paste wax or liquid wax. I did phone a flooring shop, who said that they all gave about the same result, which looks the same as if you put water on the surface, unless you use a product with white pigment which helps retain the natural finish. I’m not too keen on that idea, so I tried a few of the products I had to hand on sanded scraps of elm floorboard. The Osma Polyx oil is definately a bit brighter and darker than commercial beeswax polish, which looks like a good finish, so I’ll go with that. I usually make up my own with grated beeswax and pure turpentine disolved in a bain marie (jar in a water bath bath) and I have a large supply of beeswax , so just need a bit more turpentine. I discovered a place on the floor where the boards creak – fortunately not where the bed will go, but the problem is that I didn’t take a photo of where the joists in that section run, and once laid there is little to tell me where I can put in screws to hold them tight – I don’t really want to perforate the floor with screwholes that miss the joists even though I am plugging the holes with elm pellets. Bit more on the sort of autobiography – its now 1/4 of the maximum size allowed for a Cambridge thesis!
27th February A bit more work to do on the bedroom! The nearer you get to finishing, the slower the jobs seem to proceed – I’d guess 2 weeks, but I bet its nearer 4! I got a call from an old client who specialises in what are called in the trade ‘ investment quality’ antique pistols. He has a pair of pistols and wants the locks and furniture removed so he can refinish the woodwork, and doesn’t trust himself with a screwdriver so asked me if I would strip the metalwork from them for him – I am always honoured to be trusted with his stuff, and it always carries a significant stress – to the extent that I have to ‘walk round’ the job for a week or two until the mood takes me and I dive in! I’ve written about techniques for removing awkward screws several times on the site, but I’m hoping that as these pistols will be in immaculate condition, there won’t be any problems – just need to have perfect turnscrews and hold the pistols firmly without marking them.
24th February – Floor is now all down and fixed! I am just in the process of cutting the skirting boards to fit – the floor boards all fit together but there are still slopes and gentle curves in the floor that need the skirting boards carefully scribed in and cut. Once I’ve cut them I’ll put them aside while I sand and seal the floor, then fit them I’m beginning to get a sense that the job might actually get finished – it will have been 5 months by the end of Feb, and there is still at least a couple of weeks of work to do – fitting the electrical fittings and putting in the loft insualtion and a bit of painting, plus all the jobs I’ve forgotten. I’m looking forward to a bit of gun work when its finished, before I embark on building all the secondary double glazing oak frames for the pile of super insulated glass that sits in the drawing room. At last we are able to contemplate starting the STEM club at the school, so Dave and I can get a plan together for after the Easter holiday – we can be a bit more focussed and technical for the next session as it will be limited to children from years 5 and 6 – 9/10/11years old (ish). Might do something like we did for the Pop Up Workshop last summer.
21st February -Having discovered that the floor board saw blade wasn’t parallel to the sides of the sole plate, so the guide and the saw blade wern’t aligned , I took it back and changed it for a cordless circular saw, which does the job properly as well as allowing me to cut slanting overlaps at the joints. I have to say it was all very easy at Screwfix even though I bought the saw in October and don’t have the receipt – I don’t even have to give my name when I go to pick things up now, and my account lists all my past purchases if I want to return anything. I’ve now sorted all the boards for the floor and by good fortune I was able to do it all with good boards, and am left with three or four boards that are a bit too ‘characterful’ to be used – not sure what I’ll do with them – maybe make a knotty door for Tom. Now I need to put down the vermiculate insulation and away we go!
20th February – I got the joists down and started to sort out the floorboards – I think I have enough if I’m careful, but the difficulty is compounded by the different widths, which means that there is a limited choice to make up each width – the boards are mostly 2.4m long and the room is 4.2m wide but the joints have to land on a joist – good brain exercise. I ran into a problem when laying the first half, in that the saw I bought which is specifically designed for cutting floorboards didn’t seem to cut neatly at right angles, so I had a bit of a job neatly butting the boards. I spent some time today trying to find out what was going wrong, thinking that it was my technique, but I discovered that the blade of the saw is not parallel to the edges of it’s base plate, so it you try to cut along a guide line it cuts a slightly diverging path – its going back to Screwfix tomorrow!
18th February – The storm came through and cut off the power at 8:30 this morning – I got out the very cheap generator I bought about 10 years ago and have never used, and it just about managed to power enough work lights in the bedroom for me to work, but it struggles with power tools – fortunately I’d prepared all the extra joists so they only needed fixing in place – a slow job as they each have to be levelled at both ends, and there is a slight bow downwards in the middle, about 15mm. At the peak wind after lunch it detached my tarpaulin roof alongside the shed and pulled off half a dozen pantiles and broke some. Anyway the power did eventually come back on at around 5:30 pm so the generator saved me loosing a day’s work.
17th February – Good day’s work on the floor considering I had to go into Cambridge for a long appointment with my friendly dentist. We’re supposed to go to a funeral in Epping in a forest tomorrow but with 70 mile an hour winds forecast to peak at the time we have to be there we are pondering…… You can see photos of the Anglian Muzzle Loaders shoot last Saturday on www.matthewnunn.co.uk under clay shoots – dozens of photos, the has put one of my Manton firing on his display panel. I look a bit wild as I forgot my shooting cap and it was windy – I haven’t faced up to visiting the barber for a while!
16th February Got the floor up in the other half of the room and vacuumed up the mess – not as much as the first half = I think this floor hasn’t been messed about with since around 1700 . The joists and floorboards are deeply embedded in the flint walls, which must have been built over the timber framed shell of the building, and there are only nail holes in the joists from these old boards – its a shame that the old boards are too bad to re-use. I found that the space between a couple of pairs of joists was filled with hop petals as an insulation, and I think because they were supposed to keep insects at bay. I’ve bagged up all the petals, along with quite a lot of dust, and will put them back before I lay the new floor. I seem to remember that when the National Trust did a restoration at Wimpole Hall they found some similar old insulation, probably chaff, and carefully seived it to remove the dust – I shall claim the dust is historically important and put it back. Building conservation is a funny business – I did an evening course run by three Local Authority conservation officers for a couple of years, so I do understand the issues! I saw advice somewhere that one should check one’s blood pressure every few years, so I got out my meter and changed the batteries. I managed to get 3 completely different readings one after the other – the first was 209/115 – almost an ambulance job, but the other readings were a bit more sensible, but still higher than I expected so I put it on one side and tried again the next day – after a few more strange readings I realised I hadn’t got it on my wrist quite properly so I think it was having to compress my tendons as well as the blood vessel – anyway now seems about what I would expect at my age – around 123/65 so I’ll probably live to finish the floor. I’m hoping it will all be finished by the end of February – I’d like to get on with something else! Bit more on the ‘sort of autobiography’ for those not totally bored by it! Claire just sent me a fantastic photo of my Manton firing – I’ll ask the photographer for permission to put it on here.
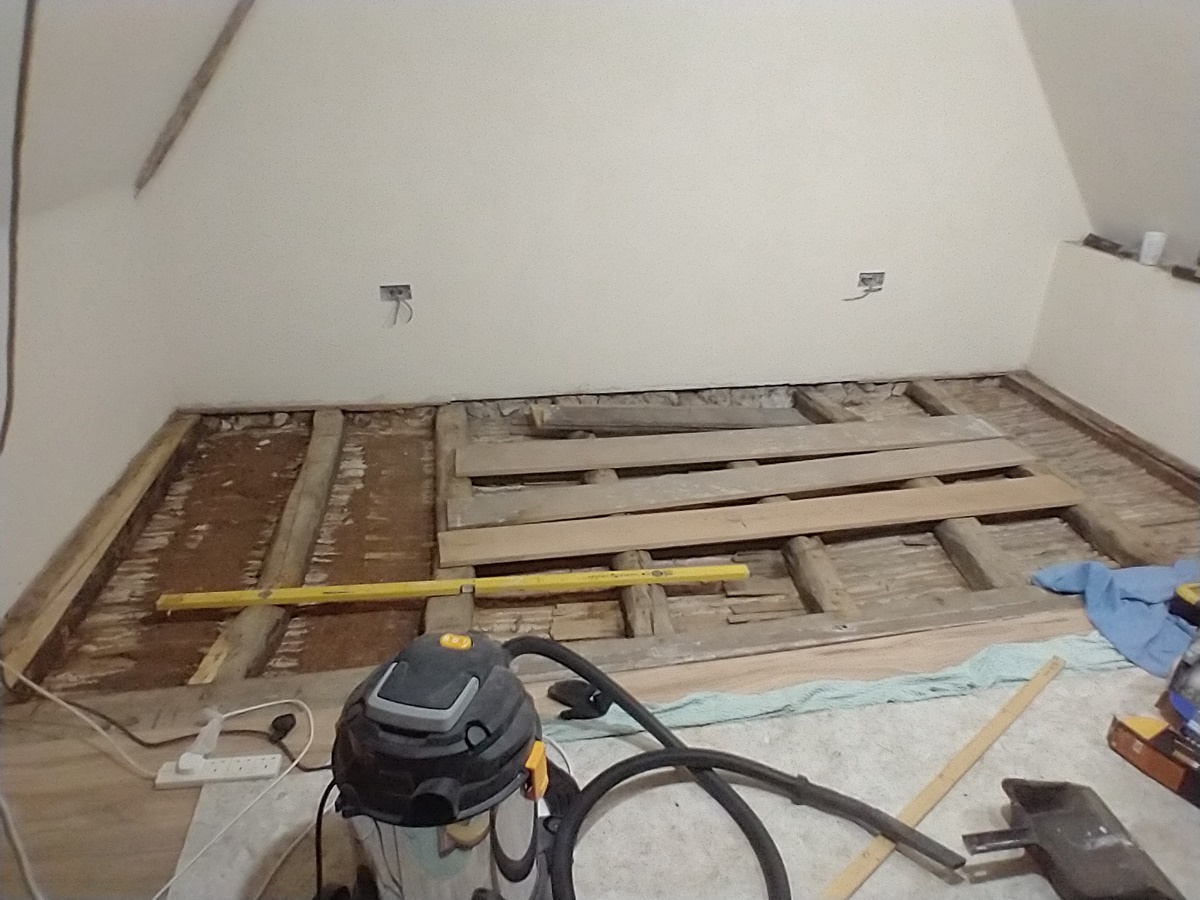 The floor does slope, but not that much! Quite bent and rough 17 century (?) joists
14th February – Happy Valentines Day ! I forgot til just now. The half of the floor I am working on is now more or less all finally down. I got a pair of very cheap (£6 each) strap clamps from Screwfix that let me pull the boards together, and I got some nifty little screws (Tongue Tite) that go in at an angle through the tongue of the T & G boards and hold the edge down and in. All very neat _ I just needed to make sure the ends of the boards mated up, and that the edges of the boards were reasonably straight – I had to plane a sliver off a couple. I’ve just got a few boards to sort and lay in the passage and then I’ll start to remove the old floor from the other half of the room.
12 th February Club shoot today – windy and cold – not an ideal day for shooting flintlock as the wind made it difficult to keep the fine priming powder in the pan – I use Swiss OB, which is horrendously expensive but you only need a small amount. I didn’t hit many clays. but I was primarily concerned with getting the gun going reliably – I was the only person shooting flint, but had the advice of Bev, who knows most of the tricks, having been shooting flint for years. Unlike percussion, which is pretty reliable given a reasonable gun, flinters can be a bit fussy as the ignition system is not ‘cast iron’. You have to get the main powder charge to come up close behind the touch hole – possibly by tapping the barrel or bumping the butt on the ground in some cases, or by putting a wad down the barrel quickly to act as a pump. Then you need to get the right amount of powder, preferably the right fine priming powder, in the right place in the pan – not covering the touch hole, with a flint approximately the right length and with a good edge for making sparks. I had a couple of misfires of the second barrel (left) after shooting at overhead clays with the first barrel that Bev suggested might be caused by left frizzen lifting slightly on recoil and allowing some powder to escape. I had been being pretty mean with the priming powder, and the problem went away when I was a bit more generous. I couldn’t decide whether I should load the barrels with the frizzens open or closed – open you can’t tell if any of the main charge has been ‘pumped through’ as it will fall away. With the frizzens close my left frizzen has a shutter with a very small hole that is designed to obstruct the touch hole, so that doesn’t show any main charge. The right frizzen has lost its little shutter, and does show a bit of powder in the pan after loading. So as you can see, that is a lot of things to go wrong! I did have one shot where the left barrel fired itself immediately the right barrel went off – I was shooting at a tricky clay I had missed several times already, but this time I hit it, although I have no idea which of the shots did the damage! I assume that the left sear doesn’t always seat in the bent – its only happened twice in 100 or so shots, and I think (maybe) that if I am conscious when I cock that side I can move the cack past the ‘drop in point’ and make sure its firmly engaged. I’ll try to do a bit more on the sort of autobiograpy post……
11th February Going to the Anglia Muzzle Loaders club shoot tomorrow – I haven’t been for quite a while so I thought I’d see how I got on with the flintlock, and avoiding Covid! I have been shooting a number of different guns lately – percussion, flint and .410 and 20 bore, all of which are quite light, particularly the old Webley bolt action single, which waves about in the breeze when trying to shoot, but the funny thing is that I get about the same success rate with all of them, so I thought I’d get out my Berretta o/u 12 bore for the afternoon and see what happened if I had a moderately heavy gun…. Will report back. I took up all the boards as in the photo to tidy up the under structure. I’ve been wondering for some time about the problems of moisture and shrinkage and warping of the boards. I reckon the floor will be impervious to vapour as the boards are tongued and grooved, so if laid directly above the ceiling the underside will stabilise at the relative humidity of the workshop, which has a brick floor directly on the earth and the upper surface will be at a lower humidity as it is well insulated and may well be heated if its in use. Recipe for the boards to curl up at the edges. So I’m putting a polythene sheet under the boards so they can stabilise at the moisture content of the room and hopefully over time will stay flat. I have just started fixing the first boards down – I’m using flooring screws that are meant to go into the tongues at an angle of 30 degrees to the horizontal and hold the boards down,, but the first boards need screwing down on the groove side. I found a 6mm plug cutter in my drill box, and so I am quite happy to put the small flooring screws in from the top and plug the holes before sanding it all down – I don’t think they will show, but I’ll try to keep them regular. The flooring screws through the tongues are suposed to be all that is necessary, but whether that works for 300 mm wide boards I don’t know.
10th February – Busy sorting the flooring. My beautiful Elm 300mm wide boards are proving quite a challenge to sort out and lay – they are all different lengths, although mostly about 8 ft , a few are somewhat longer, and a few are mixed shorter lengths. About half are pretty clear of faults, the rest vary from small knots, with a lot having voids or knots going through the boards that will need filling with epoxy resin. Some have pretty big knots and defects and I think it was a bit of a cheek including them in the order. Adding to the complication is the fact that the widths vary by more than can be accomodated in the normal gaps between boards – between 300 and 304 mm, so not only do I have to try to match lengths to minimise waste, but I’m restricted to using boards that are within about 1 to 1.5 mm in width for each span. I’ve done about 1/3rd of the floor with very little waste as I started with lots of boards to choose from. I’ve managed to avoid short lengths of waste so far by putting in trimmers between joists if I need to join boards where there isn’t a joist – I have some spare boards, but there are quite a few I’d rather not use if possible – The bit of the floor I’ve done so far is the most visible bit – the other main area will be where a large double bed goes so I can get away with less good boards there – we shall see…………………. I’m putting fibre insulation under the boards as the workshop below is not usually heated – made from recycled plastic bottles and much nicer to handle than glass or mineral wool, I’ve used up my store of it and I’m not sure if it is still available readily locally. Oh, and I got my letter from the tax man, instead of the £160 I thought I was owed, it turned out to be 60p, so for the 3 hours of doing the return its 20p per hour instead of £53 – shame.
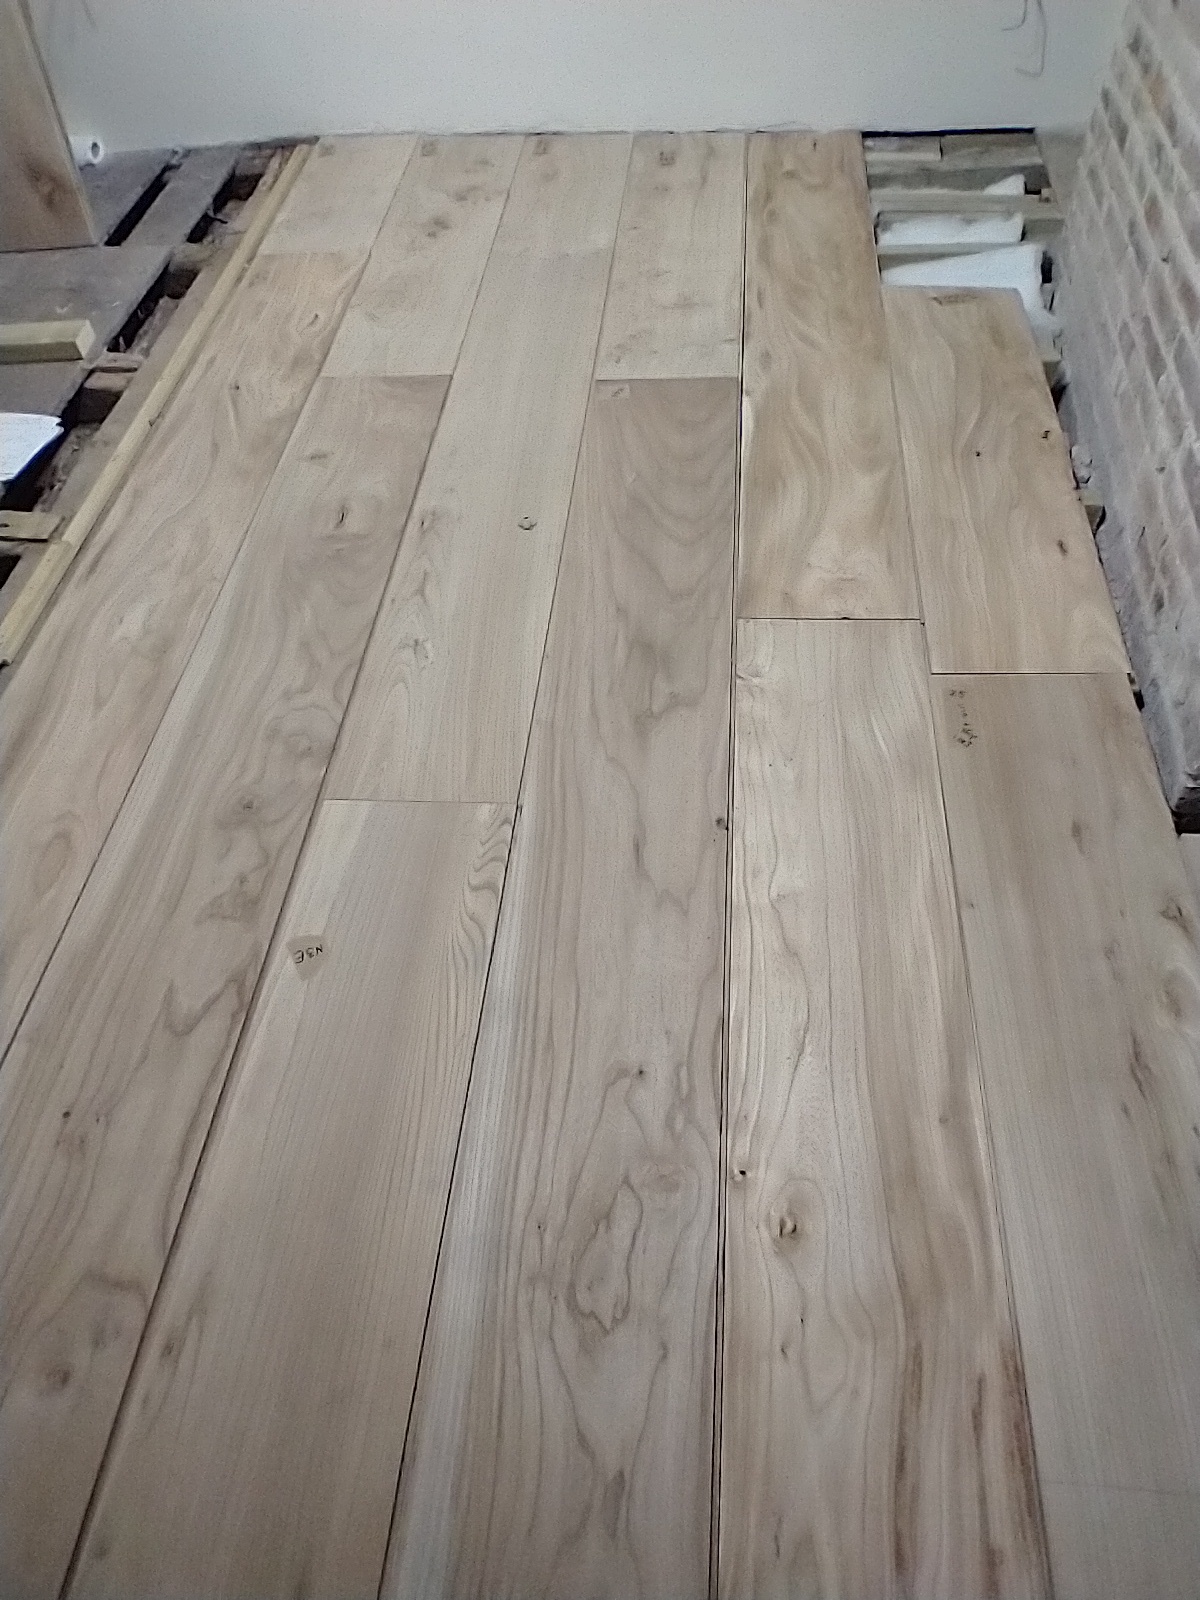
Boards cut and trial positioning – not yet tight and fixed. ( the boards on the right side are not part of the scheme)
6th February. To my brother’s funeral on Friday – it was a jolly occasion, a bit religious considering he was an atheist, but I suppose its the price to pay for being buried in a beautiful churchyard. The wake was in Rockingham Castle Walker room and half the village turned up so there must have been over a hundred in quite a small space. My patchy knowledge of statistics told me that it was very likely that at least a couple of them will have Covid, in fact quite unlikely there won’t be anyone with it there, so I stayed outside with an old friend from school who I used to build model aircraft with. Its funny, and nice, now even after more than 60 years and only a couple of contacts since, we drop into a familiar pattern of conversation immediately. He pointed out that even then I would turn whatever I was doing for myself into an opportunity to sell it to other people. I’m afraid its true! I really want to get back to doing some gun stuff – I have two barrels that are crying out for rebrowning, but luckily no client jobs outstanding as the renovation of the bedroom is taking up all my time – I took up half the old floor so I could sort out the levels for the extra joists I will have to put in to straighten it. I can’t make the floor level as that would mean raising the corner where the door is by about 10 cm (4 inches) and the door, which dates from about 1650 and so must be kept intact, is already very low, as they often were then as people were shorter. I can make sure that the falls are smooth and no bigger than necessary, which means putting in about 8 new joists alongside the old ones where I can. I got out about 40 Kg of dirt and mess from under about 10 sq m of the floor I lifted – its mostly compacted dirt and some chaff that was presumably put there for rudimentary insulation – loads of walnut shell with mouse nibblings (there are walnut trees in the garden). I found one mouse skeleton and one bat skeleton. The older bits of the floor are probably almost 300 years old, so the dirt probably is too!
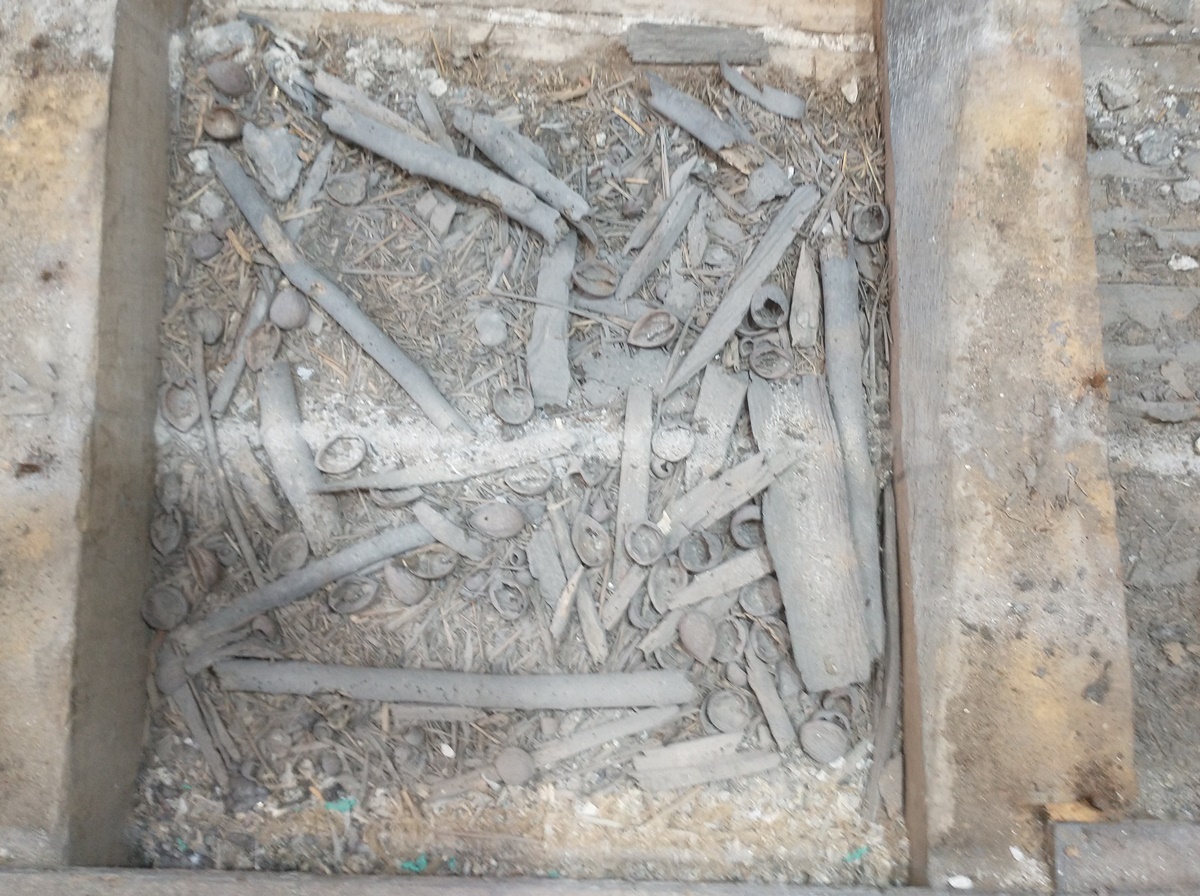 Most of the floor didn’t have this many sticks under it………….
3rd February. Yesterday I went through all the boards I had picked up and measured them and noted their quality – a number had knots and voids that will need filling with epoxy or similar and they are all slightly different lengths – mostly around 8 ft. So I have been trying to work out which bits of the floor will be the most conspicuous and which will be hidden under the bed etc. I had planned to start at the side of the room where the bed will be, but then I changed my mind and decided to start with the visible bits, so I could use the best boards there and see how I get on – I’m not sure how much I will have left – the joists are fairly widely spaced, the room is 14 ft wide, and so using the boards economically requires some thought and planning. So today I started pulling up the old floorboards at the end I want to lay the best boards. The floor is very uneven at that end – a 2 meter straight edge has a 3 cm gap in the middle- anyway under the floorboards is a mess – lots of bits of joist, and lots of dirt, and quite worrying, the ‘nibs’ that should stick up between the lathes to hold the plaster on the ceiling are not there, and not much sign they ever were ( OK where I patched it though). We have my brother’s funeral near Corby tomorrow – poor chap had Parkinsons and rapidly deteriorating health so in a way it was a relief when he died peacefully at home doing what he loved – sorting out his junk….. Anyway in his honour I decided to wash my Land Cruiser as it had been off road recently, but when out this morning I saw a hand car wash – run by Eastern Europeans as usual, and amazing – it has never has such a thorough clean, including under all the wheel arches and round the doors – £20 and it has not been so clean since it came out of the showroom where I bought it second hand about 5 years ago. I just wished that the inside had been empty so I could have had that done too. Here is a bit of what was under the bedroom floor;-
 I put in some bits when I rebuilt the chimney 20 years ago.
1 Feb – Well I did get my tax done, and it wasn’t as bad as I thought, about 3 hours. The tax man ends up owing me £160 so that works out at £53 per hour – not bad! I went to fetch my floorboards today. I’d arranged to borrow a local trailer, but when I had a look at it yesterday I got a bit worried about the state of the tyres – last time I borrowed it I ended up buying one new tyre, this time I wasn’t sure any of the 4 were road legal so rather than risk 3 points of my license for each bad tyre (thats what they dish out) I hired a massive flatbed trailer – a full 20 ft long and brand new for £70 a day – a bit steep but it would have cost £200 to get the wood delivered. So now I have a massive pile of elm boards. Laying the floor is going to be challenging as the room is 14ft wide, most of the boards are 8 ft +- 2 inches and the joists are spaced about 1m apart, so it looks as if I’m going to have to be a bit creative, and possibly splice some boards together so they butt away from a joist – quite a puzzle. On my trip to the sawmill, which was in Sotterley, a smallish place in the country not too far from Beccles, I was reminded of a peculiarity of Google Maps routing algorithm that I’d noticed before. If you ask it to find a route from A to B is will usually find a quick easy way to get on the nearest main road from A, but in the approaches to B it will start to route you down all sorts of small one way roads – on this occasion I found myself driving my trailer down miles of very narrow roads, hoping that anything that came the other way would be good at reversing ( I can reverse trailers, but hadn’t tried with the hire one). When you come to route back from B to A, it finds a nice quick way to the nearest main road, not the way you came. My solution when I think about it is to get somewhere is to route backwards then reverse it – you’ll probably know the roads around you if it does the silly small road thing so you can do your own thing until you are on the main road. I’ve named the problem ‘Google’s symetrical routing algorithm’.
30th january – I managed another day without doing my tax! sorted out a few things and got the week’s shopping in, sorted out how to fix the floorboards when I get them, and had a look at lead shot prices on the internet ( I found a source at £31.70 /Kg. – I’ll ring them tomorrow), and did a bit more of the autobiograpy post, but have now run out of excuses……………
28th January – Just a quick correction – I got the calculation about the moisture content of wood wrong yesterday – its not as bad as I thought. I got a bit mixed up with air humidity and wood moisture – normal household relative humidity in the UK is probably in the range 40 to 55% which gives an equilibrium moisture content in wood of from 8 to 10% which gives a change in across grain dimension of most timber of around 1/2 %, or 1.5 mm across my 300mm boards. I can just about live with that, but I’ll have to make sure I get it right before I butt the boards tight against each other. Looking at the old pine floor today, I realised that not only is it a patchwork of newer and older boards and short bits and repairs, but it actually alters alignment as it crosses the room by a few degrees – so somewhere I’ll have to taper a board. Oh, for me the bad news is that I have to do my tax return before the 1st of Feb, although there is supposed to be a 1 month Covid extension………
27th January Had a pleasant day’s shoot at Cambridge Gun Club today – as mentioned I took the Manton double flintlock and managed to hit quite e few clays – no worst than with anything else I shoot, which is pretty good for only the third or forth time I’ve used a flintlock. By the time I’d worked out a few of its little pecadillos with Bev and Pete’s help – both are flintlock experts – I got it going well, and it was shooting relianbly. One thing tha we realised was that using semolina instead of a wad on top of the powder missed having the piston effect of wooshing the air down the barrel and carrying the powder into the chamber behind the touch hole. There is the overshot card but maybe that isn’t as effective. As I didn’t have any wads of 14 bore with me I used a card over the semolina. How big a pproblem this is/was we were not sure – to begin with I didn’t have any problems with ignition and was using Swiss No 1 as the priming powder – later I had a few occasions where a frizzen sparked but didn’t ignite the powder in the pan, whcih we put down to the priming powder and I changed to the much finer Swiss OB. I’m always a bit unsure about these changes that one makes, because one tends to stick with them on the basis of pretty unscientific evidence and nere revisits the issues. Bev said he had a couple of near identical flintlock doubles, one of which went off quickly and the other was quite slow to fire, so he took the breechplugs out of both to see what the difference was – caution, both he and I are very cautious about taking the breechplugs out of doubles in case we separate the barrels so we use various clamping arrangements. anyway both breechblocks had a fairly deep hole down from the face of the plug that forms one pattern of patent breech, but the ‘good’ gun had a hole of about 7mm and the ‘bad’ one more like 3/16th of an inch ( that is how he told me – 3/16 is 4.7 mm ). He drilled the smaller one out to match the good gun and polished it with a Dremel and it was certainly shooting better. I could never quite work out the relation between the volume of the reduced bore in relation to the total powder charge – I think that only part of the powder goes into the hole, and some sits in what is usually a semicircular depression in the top of the plug – the original idas of the patent, I think, was to start the explosion in a small relatively enclosed space and the flash front would propogate faster that ignition through the powder.. This was certainly the principle of Nock’s patent breech which had a small trnsverse chamber behind the touch hole that communicated with the main chamber via a fairly small hole. You can tell this breech because it had s screw plug on the opposite side of the breechplug to the touch hole. Or have I got this all wrong? someone will tell me! I took my little Webley bolt action .410 (the Rat Gun) for the post lunch breech loading bit of the shoot using 2 1/2 inch cartridges firing 11 gm of shot as against 24 or 28 in the ‘big boy’s’ guns. The Webley has a very tight choke and probably covers well less than half the area that a 12 bore covers on normal cylinder bore . Judging by a shot into the bank at a ‘rabbit, about 1/2 to 2/3 of the diameter, so you need to be that much more accurate in your shooting – anyway I did quite well with it and broke a fair number of clays when I was onto a good run. Back to the bedroom tomorrow – the limewash is now done so its a major cleanup, then go and get the floorboards and juggle around with the Relative Humidity of the room and the moisture content of the wood – a 5% change in R.H. makes about a 1% change in dimension across the grain in most woods – thats about 3 mm in a 300 mm wide board – so I ought to aim to get it sorted to within a couple of degrees of the highest RH its likely to experience during the year, or the floor will warp! Probably should have specified narrower boards – oh well, too late!
26th January The 4th Jab made me feel a bit rough for a while, but I think I have recovered quicker than from the 3rd. I’m off to CGC tomorrow for a spot of clay shooting. I’m going to try my John Manton flintlock double – when Bev was over here picking up his guns he pressed me to shoot it again, so I’ll give it a try. Its a nice gun and was a bargain as it has a repair spliced into the fore-end, the only thing I don’t like is that it has ginger browning on the barrels – the real shame is that its done perfectly, so I’m reluctant to get rid of it and try for a better colour. I’ve now finished the limewashing of the bedroom walls – I ended up putting 4 coats on to get the colour solid, but its pretty quick so not a problem! I now have to get the room finally dried out so I can go and collect the elm floorboards from Sotterley next week – I think laying them is going to be quite a job as the existing floor is all over the place in terms of levels and a bit springy in places – I’ll have to do a lot of firring to level up the joists, which are bits of wood probably put there in 1750 ish and not squared very well, and a ropey in patches… are well, if I will take on these tricky jobs!
24th January Got my 4th Covid Jab tomorrow – I’ll be beginning to feel like a pincushion! Got two coats of limewash on the walls and ceiling – it is an amazing paint on lime plaster – it just becomes part of the wall and you can’t rub it off without taking the surface of the wall with it. Not sure if I’ll do one or two more coats. The lime putty and the Buff Titanium pigment came to about £25 and that would be enough to to the room (40 sq m) with 4 coats 10 times over. bit more on the Sort of Autobiography, which is getting some positive comments. I plan to do the University stuff and then my own business .
22nd January At last, the pair of pistols is finished and in a box ready to post! When Bev had a look at the trouble I was having getting colur onto the steel of the barrels in the browning he suggested that I try Logwood chips in solution. I had imagined that they might be a dye, and indeed they are used as a dye to colour fabric deep red, however then used on iron they give a chemical reaction , the Heamatoxylin in the Logwood giving a strong reaction with the iron to colour it shades of black, and leaving a light scum of black particles on the surface of the liquid. I followed recommendations I found on the web for guns and dipped the barrels in boiling Logwood solution for a couple of minutes and the steel that had refused to colour came out a light grey – a pleasing overall effect. while hot I poured clean boiling water over the barrels, and when they had cooled a bit, I rubbed beeswax over them and wiped it off again. The overall job now passes my standards, and I’m happy to return them to their owner. Having done that I went with Tom to Giles’s flat in Cambridge to clear out the last of his stuff and say goodbye to my three months of work renovating it!
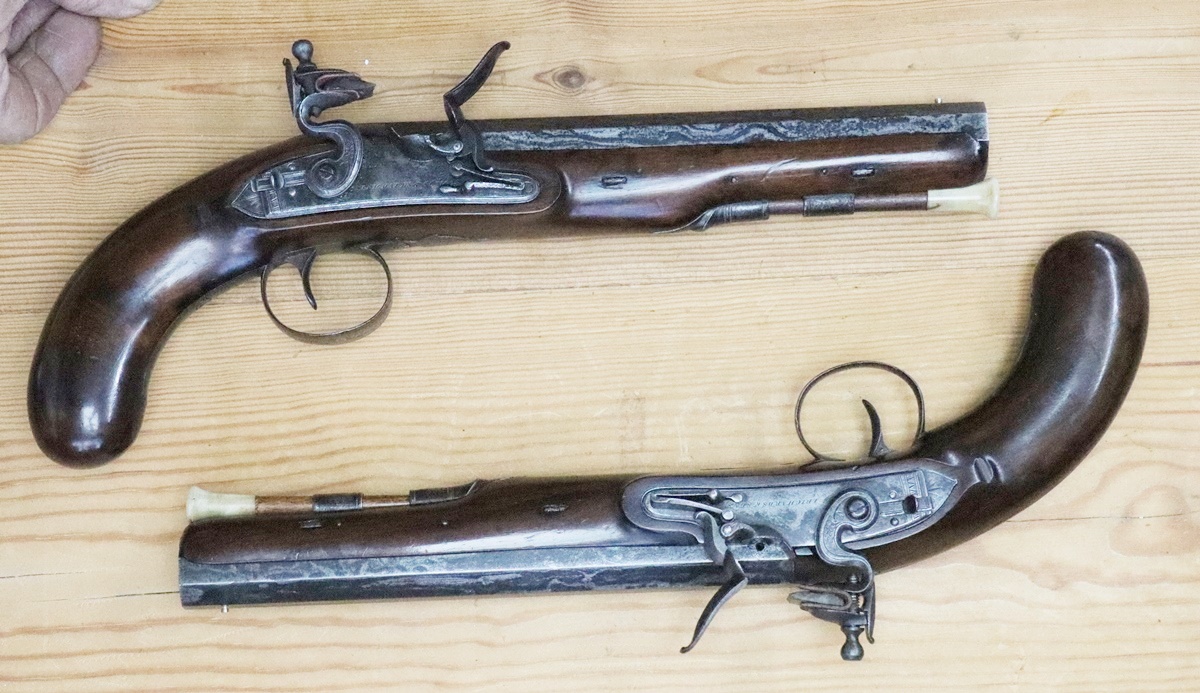
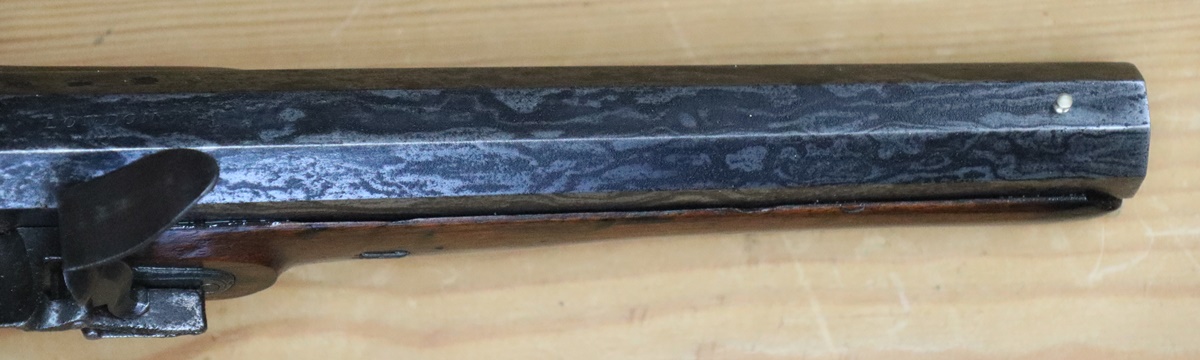
21st January – Went to see my Oncologist today – he was cheerful as usual – his Christmas skiing break in France had been great, although he had only made it across the French border about 20 minutes before they closed it to Brits. Life on the edge! A bit more on my Sort of autobiography…………. – it had 20 views yesterday! Mixed up some more limewash – I need to check the colours in daylight tomorrow.
20th January – got a coat of limewash on all the walls and ceilings. Sorting out a colour is a bit of a pain – there is too much surface area for lime white to be suitable – it would be blinding, and we didn’t want a strong colour. There is a bitof a puzzle as its an attic room, and a lot of the area is the roof slope and there isn’t a sharp boundary between the slope and the ceiling so it would be difficult to use a different colour on those surfaces. We thougth a neutral buff shade would do, and I came across ‘buff titanium’ – a different form of titanium oxide, not the stark white that one usually associates with titanium. I had a bit of acrylic buff titanium in a tube, enogh to make a few samples on white paper, which is a good way to test colours as you can dry them out quickly. I got a couple ,more tubes from the art shop – enough for the first coat, but its rather pale and needs more pigment. I found a website that sells the raw pigment as a powder, so I’ve ordered 2 Kg, which should be enough to colour the limewash a bit stronger and put on another 3 or 4 coats. It is beginning to look like a room – I am keen to get it pained as soon as possible so it can dry thoroughly before I ship in the floorboards – the limewashing will eventually put about 24 litres of water into the room over 4 coats, and that has to be taken out – my dehudifier extracts about 6 or 7 litres a day…..
19th January – Tidying up the bedroom bits that need sorting before the floor goes in – painting the woodwork etc.
18th January – I think I’v got to the end of the plastering, so I’m letting it dry out before giving it a few coats of limewash. Limewas is a beautiful, tough and very cheap paint – its basically a bit of lime putty and a lot of water, left for a day so the Calcium Hydroxide dissolves into the water, with a bit of colour added using acrylic paints dissolved in clean water and then added to the limewash. The Calcium Hysroxide only disolves to a fairly low concentration ( 1.6 gm per litre) but its enough to react with the carbon dioxide in the air to form calcium carbonate – limestone on your wall – a very tough finish and beautiful too. I am putting a bit on the autobiographical post each day – really just a series of anecdotes as Penny says.
16th January Last week’s extra job was helping Giles emigrate to Canada, at least, getting hin out of his flat, although Tom and I have to go back next weekend to clear out the last few bits. I’m still plastering – is going so-so. I’m beginning to get fed up with it to be honest, and almost at the point of wishing I’d got someone in to do it! I now just have to put a very thin coat of skim lime and chalk to level out the surfaces before limewashing it with 4 or 5 coats of homemade limewash of a sutiable muted shade of nothing. The problem I’m finding is that the setting of the plaster is very uneven – the ceiling and the tops of the walls sets up well before the walls near floor level – I’m pretty certain most of this is caused by the pattern of airflow and heat distribution in the room – I have a dehumidifier running some of the time, and occasionally a heater, but mostly I leave it to its own devices so that the lime has a chance to carbonate before it dries too much. I hppe, optimisticall, that by the end of next weekend I will have got the plastering and limewash finished……… well, one can but hope! I have been contemplating putting an account of bits of my working life etc on the site as a sort of autobiograpical post – I enjoy writing, and there might just be someone out there amongst the hundreds of thousands of people who have visited this blog who would find it a handy way of passing an idle moment. Anyone not interested could always ignore it!
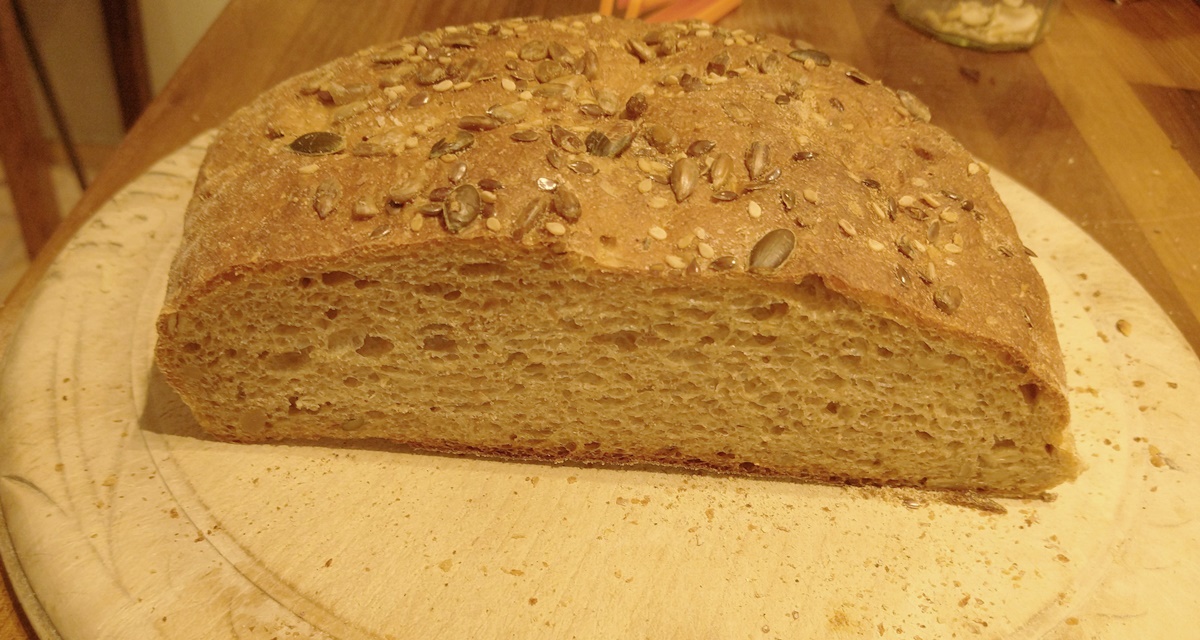 Nice open texture – I don’t always manage to get it this good!
12th January Plastering going OK, but it is difficult to find the point at which the plaster is right for the surface to be reworked. This evening’s job was to make some more bread as we have run out – I make most of it, although I’m lazy and buy the odd loaf from the surpermarket when we’re going shopping.

11th January – Plastering not going well! I mixed up the lime putty with sand and used half a bag of sand I had to hand, as well as a bag of kiln dried sand I bought – unfortunately the bag I had was one that I’d discarded when I did the kitchen because it had some large grit (2 -3mm) along with the sand – I should have put it in the skip then. Anyway it makes it almost impossible to put on a 2 mm skim coat, so I’ll have to chuck the large tub of plaster I mixed and start again using the fine sand – expletive deleted here. After yesterday’s shoot Bev accidentally left his guns in my Land Cruiser that he’d been in, so he came over today to pick them up. While he was shooting his double flinter on the shoot, it split at the wrist on the recoil, pinching a bit of his hand in the crack. The crack goes pretty well all through the wrist and as he uses quite meaty charges it won’t be adequate just to glue it. We had a good look at the problem – my solution would be to strip the stock of the trigger guard and probably the false breech as well, and mill a deep slot into the recess where the tang of the trigger guard fits, and make a block of wood that is about 1/4 mm narrower than the slot and comes to the right level for the tang to go back onto. This can then be glued in with epoxy, the clearance allowing a glue line – necessary with epoxy. The trigger guard is fixed with a screw into wood and then unwinds from a threaded hole in the trigger plate at the front of the trigger guard – if necessry I would drill out the screw – the new screw will go into the new block, so no need to plug the hole. I’d be pretty picky about the wood I put in the slot so that the grain didn’t follow the split – I might even use good quality ply. Thinking about holding it all together while the epoxy sets, I thought the ideal thing would be to bind it all with self amalgamating /self vulcanising tape – its a fantastically useful stuff – rubbery, will stretch to 5 times its length and then slowly shrinks somewhat, and the layers bond together into a solid mass, still rubbery and retaing a lot of tension – one of those magic things like electrolytic derusting! On another gun issue I was showing him the pistol barrels and lamented that they hadn’t really taken – he thought they were great, and the client would be delighted! So maybe I need to look at them in a different way………………………………….
10th January – Game shoot today – actually only 25 minutes away on very slippery roads! I wasn’t on form, and was mostly out of the action, so that left most of the birds for those who were! Anyway it was good to be out in the countryside and it wasn’t so cold and there was no wind, so all in all an enjoyable day. I can now do another experiment in gun cleaning…… Back to plastering tomorrow – Tom and Giles came round yesterday for tea and I sneakily got them to take the bags of unused NHL plaster down and bring up the very heavy tubs of lime putty plaster – a tub holds 25 Kg of the lime putty, but when mixed with 2 parts sand ready to go on the walls the tub holds more, even when only half full. Giles flys to Canada on Friday, so Thursday is reserved for shifting the last things in his flat, which means I only have 3 days work this week. I am trying to get the wet jobs done as soon as possible so I can get the elm for the floor into the room and laid. It is supplied planed to 22 mm thick but needs sanding – at the moment I’m not sure whether to sand it before its laid, or after, or some of both – I guess it will be clear when I see it! the existing floor is very uneven – probably the variation in height is about 3 or 4 inches overall, and includes quite a slope. Should be fun to lay……
9th January – I thought I’d tackle a couple of outstanding jobs today – fixing up wires and pruning the vine that yielded a splendid crop of grapes this year, and finding out why there were a couple of damp spots on the sloping ceiling of one of the bedrooms came from – turned out to be a valley that was lead dressed in about 1994 – very well done judging by the superb lead welding – turned out that a slate had slid down the roof and made a very small crack/cut, or at least that is where I think the leak was. I contemplated doing a lead weld myself – I’ve done them in the past but I not an expert and its a difficult job. In the end I cleaned it all up and used Fix-all. I had a real gun surprise – as I mentioned earlier, when I finish shooting on Thursday I spray WD 40 down the barrel and planned to clean it next day – well I forgot , and didn’t remember until late yesterday when I was just going to bed, so I gave it another shot of WD 40 and left it. I finally got round to cleaning it this evening – boiling water, a few drops of washing up liquid and a scour with a bronze brush, rinse with boiling water and remove nipple, then a few drops of 303 cleaner (emulsifying oil) and pump vigorously with polyester wadding round a jag. Leave to dry for a few minutes then one run through with a folded kitchen tissue on a jag to remove water, then a new tissue with WD 40 – repeat a few times….. Only this time the tissues came out almost completely clean, whereas they are usually dark grey/black for as long as I keep replacing them. Final wipe through with gun oil. Not sure why it was so clean, but a lot more dirt came out with the wadding clean water than usual – I will certainly repeat the experiment ( delay of 72 hours and 2 sprays of WD 40) – a completely surprise result – I don’t think I’ve had such a clean barrel since I cleaned a newly honed barrel!
7th January 2022 – now finished the second coat plaster and mixed up some lime putty plaster to start the final coat – I’ll wait til Tuesday to start that, and hope that my sponged finish is rough enough for the plaster to adhere. I had a very pleasant clay shoot at CGC yesterday – it was pretty cold, but actually I kept quite warm, except my right hand – putting caps on is a challenge in cold weather. I did have my Zippo hand warmer in my pocket, but there isn’t much opportunity to hold it, I had one of the disposable warmers on one shoot – it was actually a foot warmer with a self adhesive pad for sticking in your shoe, but I found it ideal to stick round the wrist of my gun so I was holding it most of the time. The disposable ones seem to chuck out more heat than the Zippos or the charcoal ones and last at least as long – it always amazes me that they can work just by rusting a few grams of iron powder, but it makes you realise why its a good idea to keep guns oiled! I’d been vaguely lamenting that I had no more game shoots this year, but was rung up last night and offered a muzzle loading shoot on Monday as someone had dropped out – its pretty much my favourite shoot and only about 40 minutes away. I had run out of semolina yesterday, so had to use cous cous – which seemed to work just fine, so I’ll have to add semolina to tomorrows shopping list. Several of my fellow shooters seem to have adopted the habit of putting WD 40 liberally in the barrels of their guns (out of the stocks) after use, and leaving them overnight before the usual boiling water wash in the morning. I’ve been doing this for some time (and not just for lazyness) and it does make them quite noticably easier to clean. I was looking at the visitor statistics for this blog – most visitors are from the US, next is UK then Europe, with lots from China and Russia – not sure what they make of it, or if its all attempted hijacks! I had an email from a work colleague from about 50 years ago who had come across this website and managed to associate it with me – goodness knows how as he isn’t an antique gun person.
3rd January – Back to plastering all day – the NHL plaster drives me mad, but I’m learning to get the better of it, although the floor is knee deep in blobs of plaster! I am using my 1 meter long springy edge (plastering spatula) to level the plaster, and then after a decent interval of 4 to 6 hours going over it vigorously with a sponge float to get rid of any lines etc. Seems to work. I will go over it all with some decent lime putty plaster as a finisheng coat. I was reminded that this web site was originally started to post breadmaking information, hence the un-gunlike name. It had a brief period as a roof restoration story, and then became a gun blog. I still make almost all the bread as we prefer it to anything ou can buy in the supermarkets, and we don’t have access to a decent baker, Cambridge and it’s several French bakers being too far and too much parking trouble. I was reminded yesterday of my early days of experimenting when I made a couple of loaves – Giles is emigrating this month and gave us his Kenwood Chef – its a lot better at least in theory, than mine, which was a very cheap version from TKMAX many years ago and has suffered many indignities, including falling off the table while mixing dough and continuing to mix while lying on its side on the floor – several times. Its now tied on! Anyway Giles’s has a posh stainless steel bowl, ours has a cheap plastic one – but when I tried the stainless one it wouldn’t mix dough at my preferred consistency – the dough just spread itself round the outside of the bowl and left a void in the middle in which the blade rotated and I had to intervene several times. Its all down to the brushed stainless surface which the dough stickes to – its more difficult to clean too – you leave the plastic one and the bits of dough fall off when they dry, not so the metal one. When made the bread didn’t rise quite as it should – its interesting because it shows how many variables there are in the process….. As a boring scientist I’m always interested in how domestic appliences etc earn their keep – if the breadmaker cost £100 and I use it twice a week for ten years, that still adds about 10p to the cost of a loaf. When we first had the above ground swimming pool I used to note the cost per swim – its now about £2 per person per swim. Makes you think….. End of Christmas holidays tomorrow, although mine ended a couple of days ago – lets hope for a better 2022……………….
2nd January 2022 Well, I made it into 2022 in one piece! Given the ever circling Covid and it’s attempt in March 2020 to do for me, that has to be good. My best wishes for 2022 to all the followers of this blog, and my particular thanks to the kind and thoughtful people who email me from around the world when I don’t post for a while to see if I’m OK. I started on the second coat plastering yesterday – I got the plaster recommended by the supplier of the wood fibre boards, but I think its not really the right stuff for the job – I think it is meant for external render. I always use lime plaster as its an old house, and in the past I have always made my plaster using lime putty, sand and chalk, but this time I’m using the recommended bagged lime plaster which is based on Naturally Hydraulic Lime (NHL) which sets by forming silicates as well as combining with carbon dioxide, whereas the lime putty doesn’t form silicates and sets much more slowly. Anyway the plaster I have for the second coat ( and enough for a final coat) is a real pain to use! Lime putty plaster is ‘fat’ and workable and spreads easily as its somewhat thixotropic – this stuff is horribly sticky, even when quite soft and begins to stiffen up almost immediately you have mixed it – not at all pleasant to work with, and not really possible to ‘bring it back ‘ to rework the surface when its beginning to harden up – horrid stuff, but I have another 8 bags, so I will probably use it for the second coat and try to level out all the surfaces, then switch to ‘real’ lime putty. I put the single barreled gun together – its quite a nice single percussion – I had made a lock for it and engraved my name on the lock and barrel and re-browned the barrel, but the rib came off so I had to resolder it and then re-brown it – I just hope that the relevant authorities can see that its actually made from antique parts and is thus an antique! I dug out the Westley Richards double percussion that I used to shoot when I was a teenager going out in the evening to shoot pidgeons to feed the ferrets. ( turns out Pete, one of the Anglia Muzzle Loaders used to shoot the same wood when he lived at Fingringhoe!). I used it again for a year or so when I started shooting with the Anglian Muzzle loaders but gave up on it as it would bung up and misfire from the 30th shot on any session – clean it thoroughly and it was fine for another 30 shots . Anyway it looks a bit sad as the barrel is a bit rusted and stained although the bore is good and there is plenty of metal, so I think I’ll have a go at re-browning it – I’m keen to find something that actually browns ‘properly’ rather than these pistol barrels which are still resisting colouring on the steel after 10 brownings, I might also investigate why it misfired, although I am always reluctant to remove the breech blocks from doubles as its easy to put a force on them that separates the barrels – and that leads to a major, beastly job.
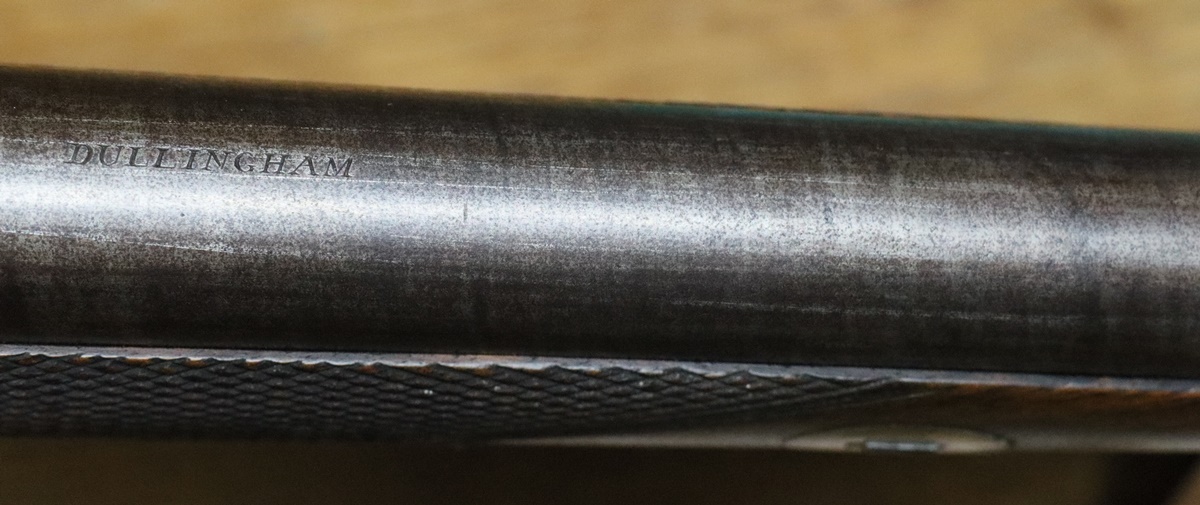 The barrel of the single has a mild but acceptable browning.
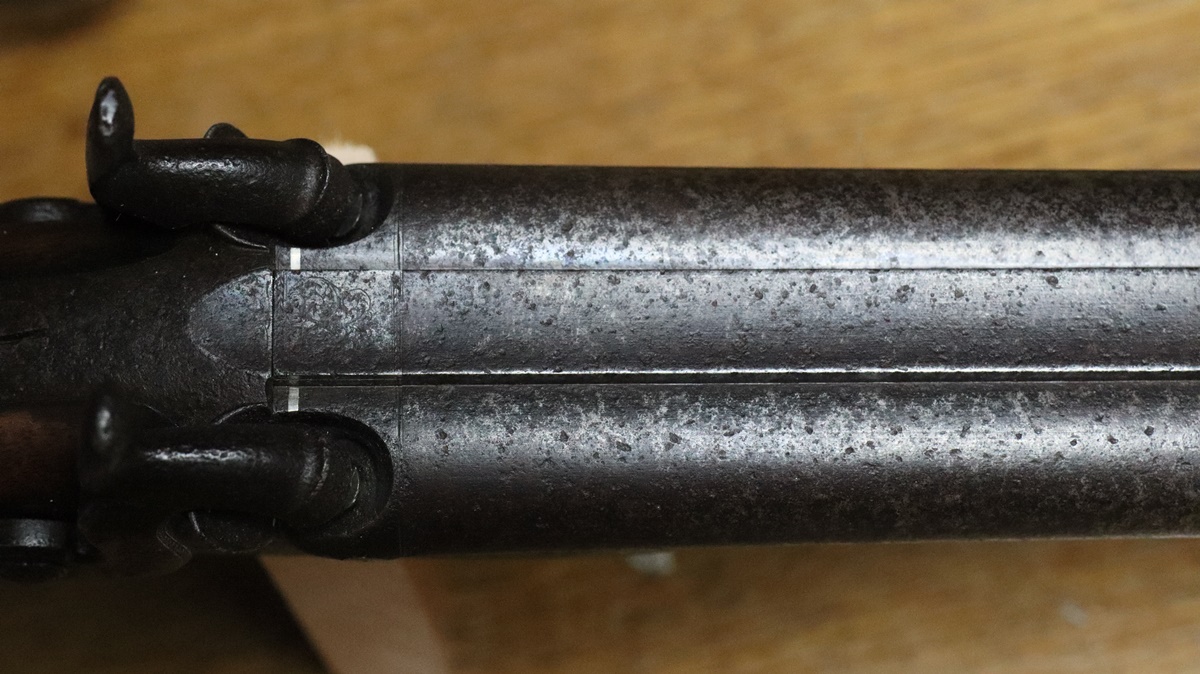 My old Westley Richards percussion – I’m hoping the barrels will clean up a bit without taking off too much metal
I think it looks worse that it is – we shall see!
31st December – Its late, New Year soon! I didn’t start the plastering today, just sorted a few tools and got the lads to carry 10 bags of plaster upstairs. I’m still browning the pistol barrels, but maybe they will shortly come good. I resoldered the rib on a single percussion some time ago and got fed up trying to brown it, so after about a dozen brownings without much colour I propped it up in the workshop and left it (probably for 3 months). I thought It looked pretty rusty, so I thought I’d better at least clean off the rust and oil it or it would just clutter up the workshop and mean that gun was useless. I wire brushed it fairly vigorously and it didn’t look too bad – I heated it up on the AGA and poured boiling water over it several times and rubbed it over with a block of beeswax while still hot (my favourite finish) and I have to say it looks quite a decent lightish brown, but certainly within the range of decent shades and with a strong twist figure. Now Ive got to find the breechblock! Happy New Year in 2 minutes………….
30th December – The percussion lock is now done. I realised that I couldn’t re harden the tumbler without disturbing the silver soldered extension, but when I heated it up to I probably didn’t take the bits round the bents up to a high enough temperature to anneal them – anyway it works just fine! I coloured up the cock a little – I tried to get the area round the square red hot and dumped it in water, but it didn’t harden much. As I mentioned its a late percussion gun ?1850 ish? so the mainspring is more like that of a modern sidelock – the early springs often? usually? had a short top arm compared to the acting arm but later on they got more nearly equal lengths. I had always wondered about the elegant taper of mainsprings, and I read somewhere that the test of a good spring was that when amost fully closed you could just run a 10 thou feeler gauge all the way along the gap between the blades. The spring in this gun is extremely strong and when the lock is on full cock the blades of the spring are almost closed. I am a bit concerned that the spring is so strong that it will strain my cock-tumbler square! I’m tempted to anneal it and close it up a bit as there is no need for such a strong spring, although I suppose it might take the odd millisecond off the firing delay. I’m trying to steel myself for a return to plastering – I was going to buy a new, £60, replacement for my old plastering trowel which was bowed, but I had a look at the new one in Screwfix and decided that they were meant to be like that, so saved that expense! I do have a nice new finishing trowel that is flat, so that will suffice for the final stages. I’m still trying to brown the barrels of the two pistols and its still not happening – the soft iron is getting well rusted and dark, but the steel is acting like stainless steel and doesn’t take any colour to speak of. I’m half a dozen rustings into the third attempt, lets hope……………….. I have never seen this problem before! Well, actually see tomorrows entry- I did despair of the single barrel.
Little blob of grease from the cock screw spoils the picture!
 As was – I’d already changed the nipple for one of my titanium ones
29th December – 2022 is approaching rapidly! I tried to drill out the bits in the cock thread, but the thread extractor metal was harder then the rest even after annealing, so the drill just started to wander, so that was a fail. I Araldited the tumbler in a bit of faced off bar located by the bearing on the back and cut off the square and faced the 3mm stub and put a 4mm end mill into it for about 3.5mm and turned up a short piece of bar to fit to replace the square and silver soldered it in place, then filed a square on it. Its interesting that there was a de-facto standard amonst percussion gunmakers that defined the alignment of the square on the tumbler shaft so that cocks are often interchangeable. I tried to use this standard orientaion and filed up the cock to match – As with many gunmakers I didn’t get a perfect square, but I did get a reasonable fit in the correct orientation – I used one of my unused castings for the cock as the original was pretty horrible. All that remains to do now is to reharden the tumbler and colour up the cock – not sure that it needs hardening – and make the No 4 UNF cock screw. I had a bit of a problem with my lathe today – a few times recently it hasn’t powered up when I’ve switched the mains on, and I’ve had to feel round the back in the wiring box and reset the circuit breaker (switching off at the mains first!) This time it was dead whatever I did to the circuit breaker. It’s a big lathe and weighs over half a ton and the wiring box is at the back and there is only about 4 inches clearance to the wall. I cursed, and went and got my testmeter and a crowbar – but when I came back it was on so did the job. Went out later and same thing, came back an hour later and it was on. I suspect the main circuit breaker may be faulty as the work light isn’t on and that doesn’t have any of the trips and interlocks in its circuit……Have to dig out the crcuit diagram if I can find it….. Something else to sort out. I ought to get back to plastering tomorrow – I need to go to Screwfix to pick up a new plastering trowel as my old one is bowed – thats £50! I forgot when I was having my rant about the building inspectorate failings to include Grenfell.
The 2 punch marks are interesting – possibly to shift the stopping point of the tumbler?

just hope the brazed joint is strong enough over such a small area…..
I used the one on the left to replace the central one.
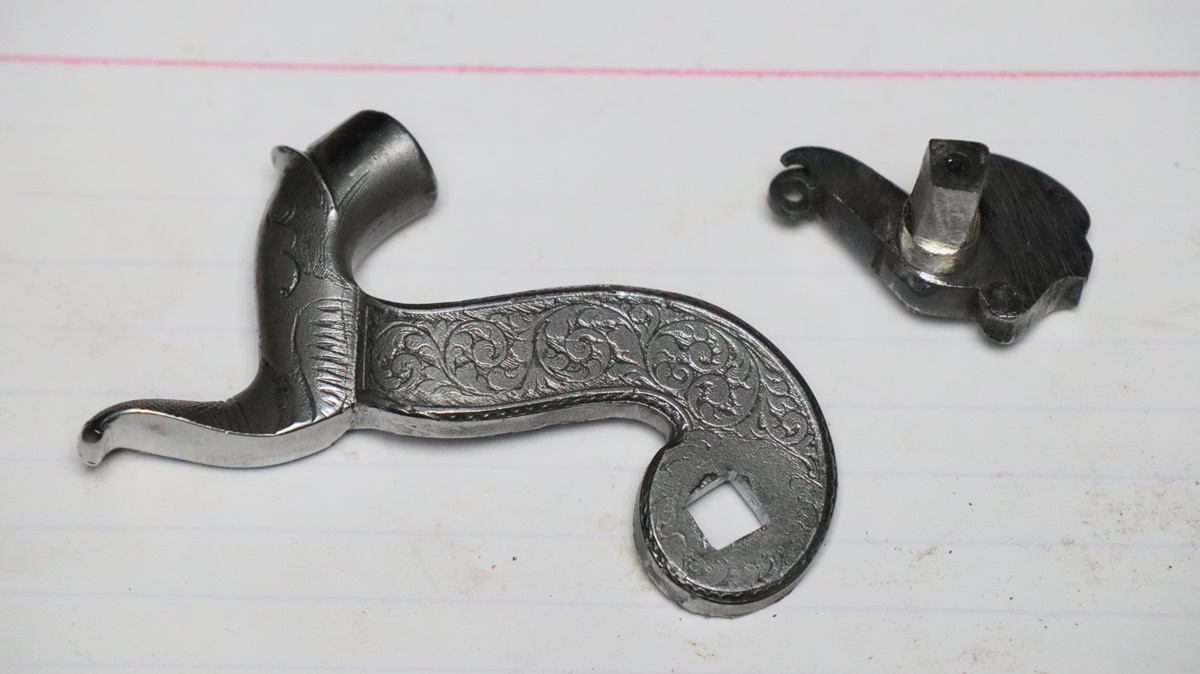
Getting on for a day’s work…….
28th December While waiting for the third try at browning the pistol barrels (!) I got out the slip that was waiting in the office and had a look at the next job which I had more or less forgotten about… Its a percussion single – not particularly special, Birmingham and late. The cock screw had sheared off, and the owner had resourcefully acquired a screw extractor to try to remove it. As anyone who has tried that with an old gun will tell you (with hindsight!), that is a recipe for disaster because the extractor, in doing its job expands the stuck piece of thread, which of course means that its stuck even more firmly – the harder you try the harder it is locked in place until, as in this case, the screw extractor also shears off – and that is likely to be even harder metal than the original screw. Usually with a flintlock or older percussion I would araldite the tumbler to a bar in the lathe and turn off the whole square and drill out the tumbler and silver solder in a new axle and put a new square on the end and tap a new hole – takes a while but is straightforward although it does mean annealing and re-hardening the tumbler. However, with this late gun the tumbler has a link to the mainspring (no link on older guns), and the link folds into a slot in the arm on the tumbler, and the slot actually crosses into the tumbler axis so if I made a new axle I’d have to cut a slot through it, and I am not confident my miller will be accurate enough to cut a 1/16 inch slot. So that solution is not easy, although I could file the slot before fixing the axle in the tumbler. That leaves softening the tumbler and trying to drill out the broken extractor and bit of screw, and hoping there is enough metal left to tap a thread without weakening the square – maybe I’ll try that and if it doesn’t work I’ll try the new axle. The cock (hammer) is a bit of a mess, probably a bad a casting, and has had multiple attempts at tightening it on the square. I can either fit another cock – I do have 2 suitable castings – or drop a milling cutter through the cock and silver solder in a disk and remake the square to fit the tumbler…. I will have to get back to plastering soon, but I might just sneak another day tomorrow – I did manage to do some work on the loft hatch today so at least some work was done…… Oh and I did a little tinkering on the pistol wood repair and it looks even better.
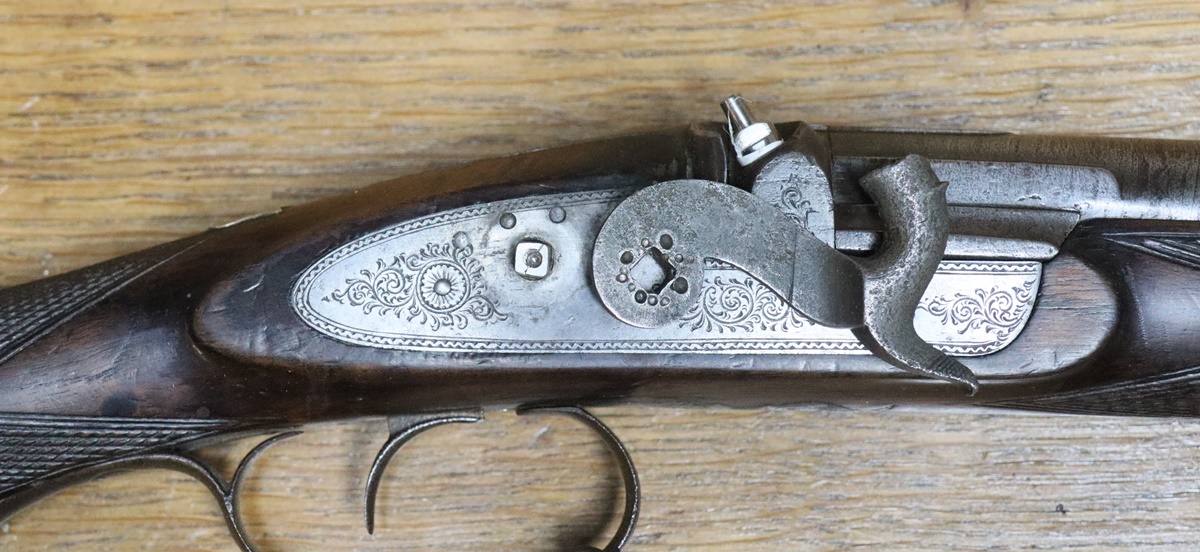
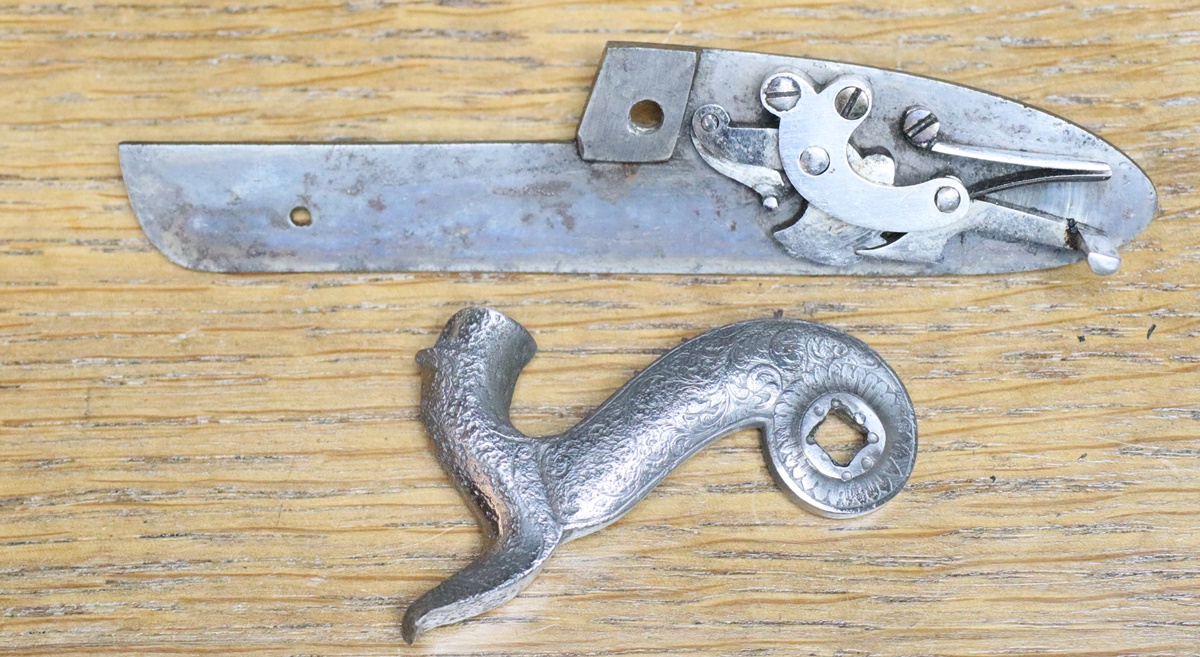 The hammer looks as if its got some terrible skin disease on its nose
27th December More work on the pistol stock. I had to cut back quite a chunk to get to good wood – some of the black stained (rust) wood was very weak – anyway I glued in a chunk of walnut with isocyanate – its quick and makes a thin glue line and doesn’t need clamping, just a quick squirt of activator. I have now cut it back to match the curves and coloured it up – unfortunately there is still some stained wood around that it would not have been sensible to cut out, so I had to stain the patch black to match. Then a couple of coats of thin shellac and a rub down with 2500 paper and its looking good – I gave the wood a quick polish with my favourite wax polish – its actually a hard mould release wax polish that gives a good finish and doesn’t clog things too much. I listened to a program on house ventilation this morning that set me thinking – modern building regs call for 0.4 air changes per hour – if you put 10 people in a 30 cu meter room in about an hour with that low level of ventilation they will be be breathing 5% of other people’s breath even if the air mixes perfectly – ideal for transmitting Omicron! My old house probably runs at more than 5 air changes per hour – if I hold up a sheet of newspaper in a doorway it isn’t vertical. Much healthier . So once again building regs have got it wrong – in the 1940’s it was cement as strong as brick, so cracks propogate through walls, in the 1970 is was all reinforced concrete now rusting and spalling off. Now we are burying tons of carbon intensive concrete in massive foundations – a friend got permission for a 3m x 3m extension to his small Victorian cottage – the building inspector insisted on 2m deep foundations, then looked at them and said they needed to go to 3m deep – right up against the cottage with its ?600mm deep foundations! How stupid can you get – my friend is now waiting for cracks to appear in the cottage while the extension sits rock solid!
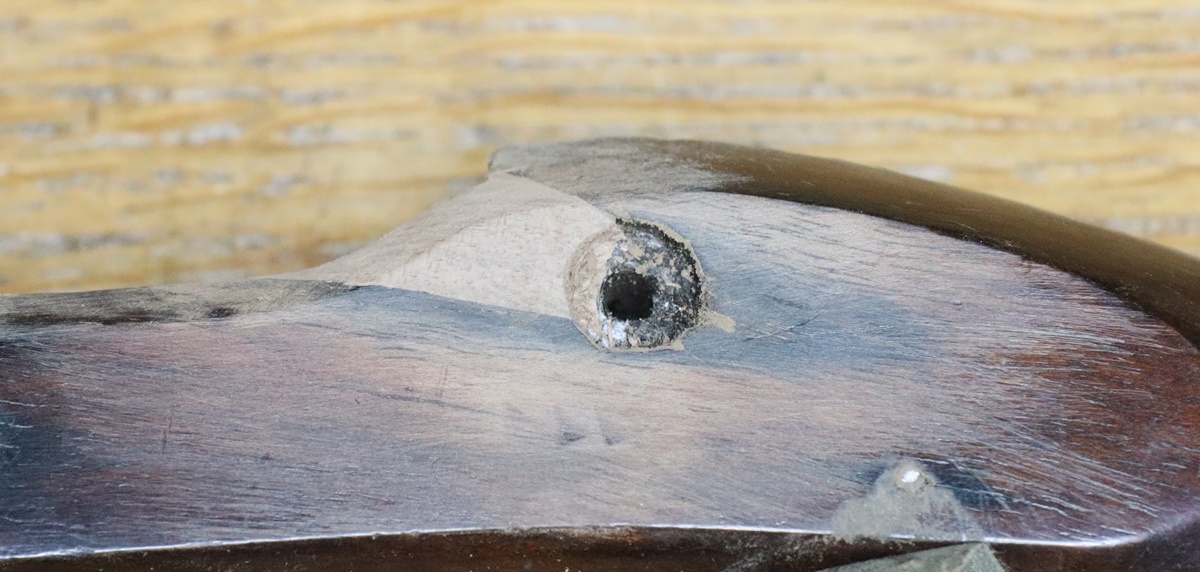
I think this pistol must have been lying on a damp surface for years judging by the stains.
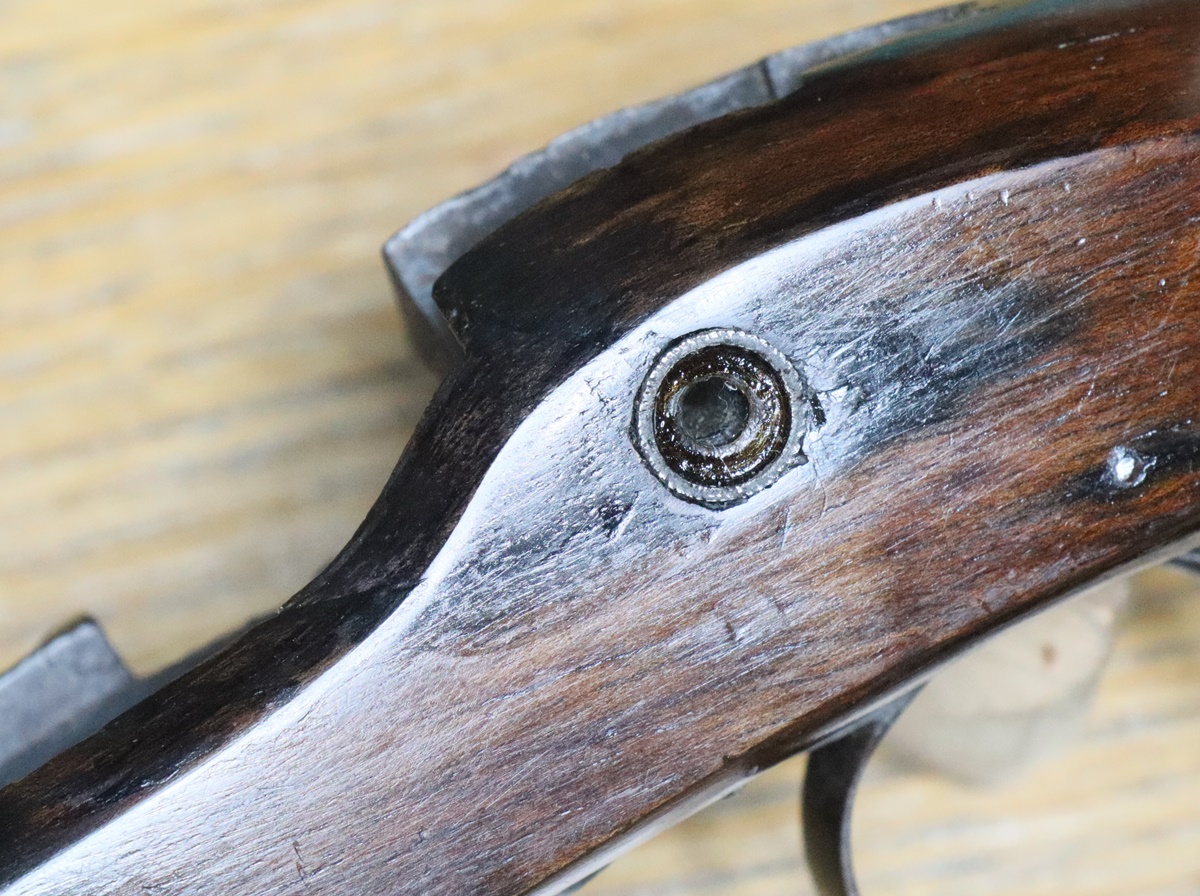 Final clean up and polish still to do.
26th December My holiday from plastering continues, so I got a bit more gun stuff done today (about time too, I hear you say!). I hardened the spring I modified yesterday with the propane torch and polished it and found a nice spot on the less hot plate of the AGA where the temperature was about 310 C, so I put the spring down there and covered it with a pad of fibreglass insulation (the sort used in roofs) and left it for 15 minutes. When I got it out it was a nice blue colour indicative of about the required temperature for tempering springs – 305 to 310 C according to my book. I had been quite careful to open the spring to the same extent as the extant spring on the other pistol while it was soft, and was extremely careful to ‘work the spring in’ to let any stress in the metal redistribute itself before fully compressing it. I even kept it fairly warm to make sure it didn’t fracture – it works, thank goodness, so that is one more job out of the way. The photo shows the new spring in place and a modern sidelock spring very similar to the one I modified to make it – the critical detail is the distance of the peg on the side of the upper leaf from the ‘elbow’ of the spring, the rest can be sorted in the cutting, bending and welding – the top leg needs a fairly high tab built up on it, or the elbow hangs down below the edge of the lock and the top arm touches the barrel. The stock of one of the pistols has a crack running forward from the rear side nail cup and looks a bit of a mess – its a very common place for pistols to crack – they tend to crack from the side nail hole right through the stock, often on both sides. First thing is to investigate the obvious crack – I do this under the microscope as its easier to see what the materials are, picking the crack out with a modelling knife to get to some wood. In this case I found I was digging in black filler/glue ( not wax as it didn’t melt). Now there is no point in trying to put a repair on top of an old repair, so its a matter of digging away till you get to some solid wood, in this case taking out quite a lot of the filler. you then need to finish the gap with straight sides, preferably tapering so you can get a good fit. I think I’m now almost back to wood, so tomorrow I’ll shape a matching piece of walnut with the right grain and glue it in place. It is always better to make sure you cut back to a sound foundation – trying to keep repairs as small as possible often doesn’t quite look right if there is still some damage on either side.
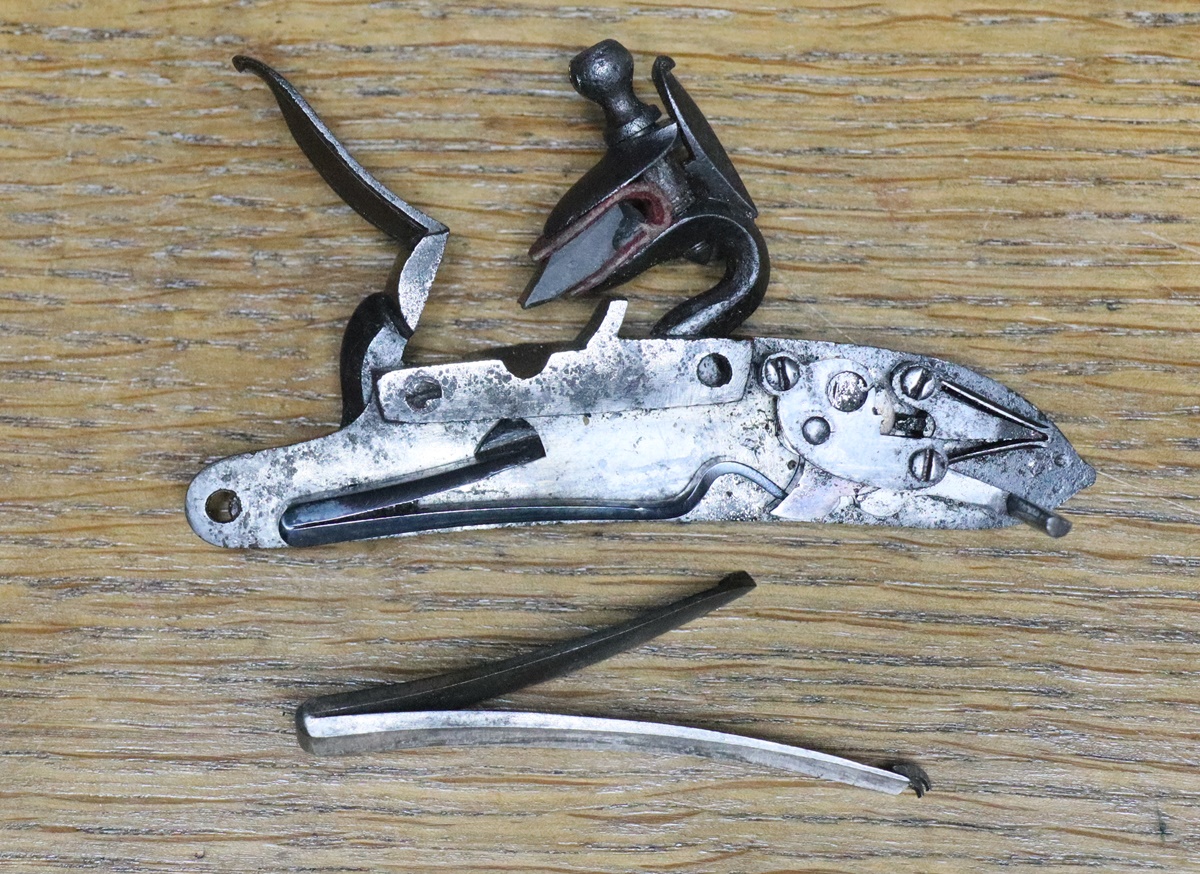
New spring and modern sidelock or late percussion spring very similar to the one modified for the new spring.
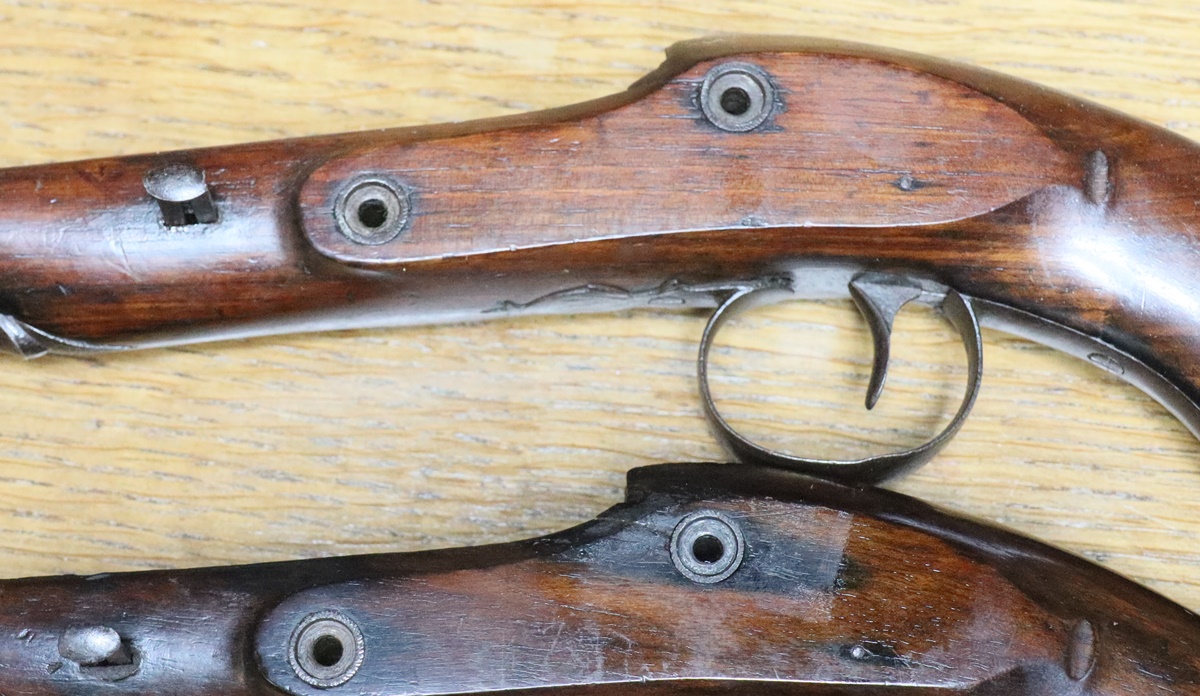
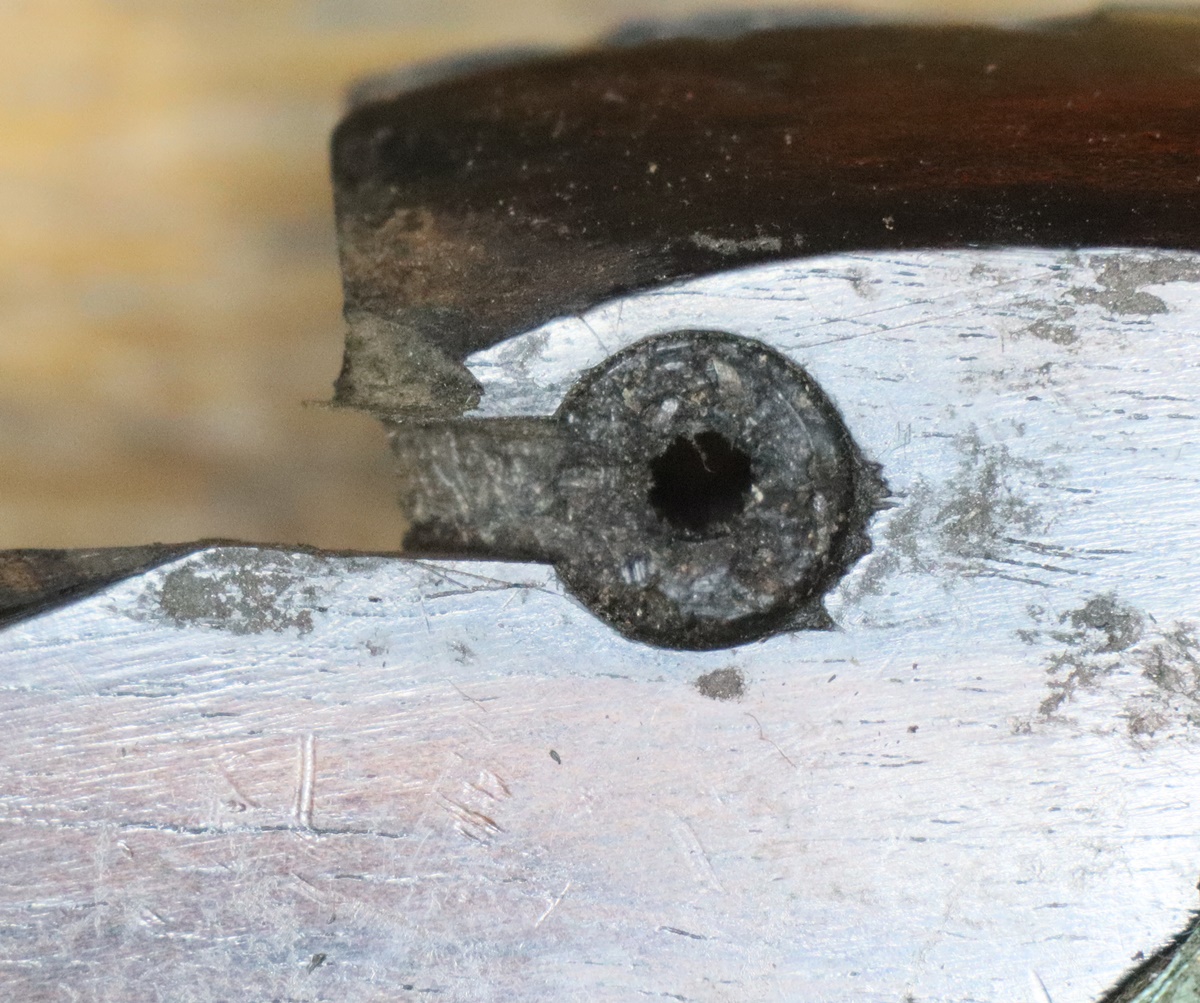 Still a bit more at the top to come off as there is still some damage to be cut out and the gap needs to be tapered for a good fit.
25th December – I can’t believe how long it is since I last posted – I’m sorry, but I guess a lot of my regular readers will have got fed up and deserted – don’t blame them! My excuse is that I’ve been desperately working on the house restoration, trying to get to the point of finishing the ‘wet trades’ i.e. plastering before Christmas. I wasn’t sure if I could do the plastering myself, or if I’d need to get a professional in to do it. Well, I did just manage to finish the first coats on everything and so get the bulk of the drying out of the way – I’m quite slow, which is OK with lime plaster as it doesn’t ‘go off’ like gypsom plaster, so it took me around 5 days to do the 50 sq meters of the walls and ceiling, which were mostly wood fibre board (in place of the original laths) and some cork insulation. It all required a base coat, then pressing in a fibreglass mesh to stabilise it, then going over with another thin coat to hide the mesh. One job I didn’t enjoy was pressing 3 meter lengths of mesh into the wet plaster on the ceiling – until you have got most of it stuck it doesn’t stay up, and once its stuck you can’t move it around to align it, and then it all falls down and you are left standing there draped in mesh partly covered in plaster – not fun. It went reasonably well and is flat enough for the top coat, although I found that my big posh finishing trowel had got slightly banana shaped somehow so it won’t do for the top coats – fortunately I bought another one earlier. I hadn’t realised that there was what I call ‘tool porn’ in the plastering trade, where manufacturers try to make functional tools look sexy and posh as well as functioning well, I also notice that the cool tool colours are now black and yellow- copied from DeWalt tools. My excuse for not posting is that at my age 7 or 8 hours work, including plastering leaves one completely zonked out ( is that still a word – we used it when I was a child) so I miss my usual active late night slot. Today being Christmas I have a bit more energy – we had a small family Christmas party, but as some of us are vulnerable, including me, we decided to have it outside round the fire pit with hand food, like we did last year – it actually worked pretty well and no-one died of hypothermia, or at least not before they left. On the gun front I haven’t done much although I will do some over the next few days while I rest from plastering. I had a clay shoot with a few friends a CGC a coupleof weeks ago and shot the best I have done for years, if not ever – I wonder if having shot very little for the last two years has got rid of some bad habits I had! The cheering thing was that I shot well with my percussion Nock single ( the only muzzle loader that I shoot nowadays), but also with a 20 bore hammer gun, I am getting back to the broken spring job, having made one new spring and then broken it, I’ve found another spring that could be modified, and bent, filed and welded it to fit – I now have to harden and temper it and hope that it will not break – I will be very gently and will probably end up with a spring that is on the weak side, but better than another broken one. I still haven’t managed to get a decent brown on the pistol barrels – I got rather deperessed by my previous attempts, but am steeling myself for attempt no 3. I also realised there is another job in a gun slip in the office that a friend left to be sorted out – I can’t even remember the exact details, although I think I wanted to find another percussion cock for it, and was going over to see Dick before this latest Covid thing happened – his wife has type 1 diabetes so is vulnerable, and he is on immunosuppressive drugs and so is very vulnerable, so that won’t happen for at least a few months. I wish the vaccine refusenics realised the stress they cause, including to the hospital staff I know who have to pick up the pieces of their obstinacy! Lets all get jabbed and boosted and re boosted and take care so we can get back to something resembling a normal life again. The drug companies are doing a great job designing new treatments as well as vaccines so I hope the days are approaching when Covid can be treated the same way as seasonal flu – I got an email form the NHS a couple of days ago saying I would get one of the new monoclonal antibody drugs if I got Covid so I’m on their radar which is good news….. Take care, and I hope you have a good 2022.
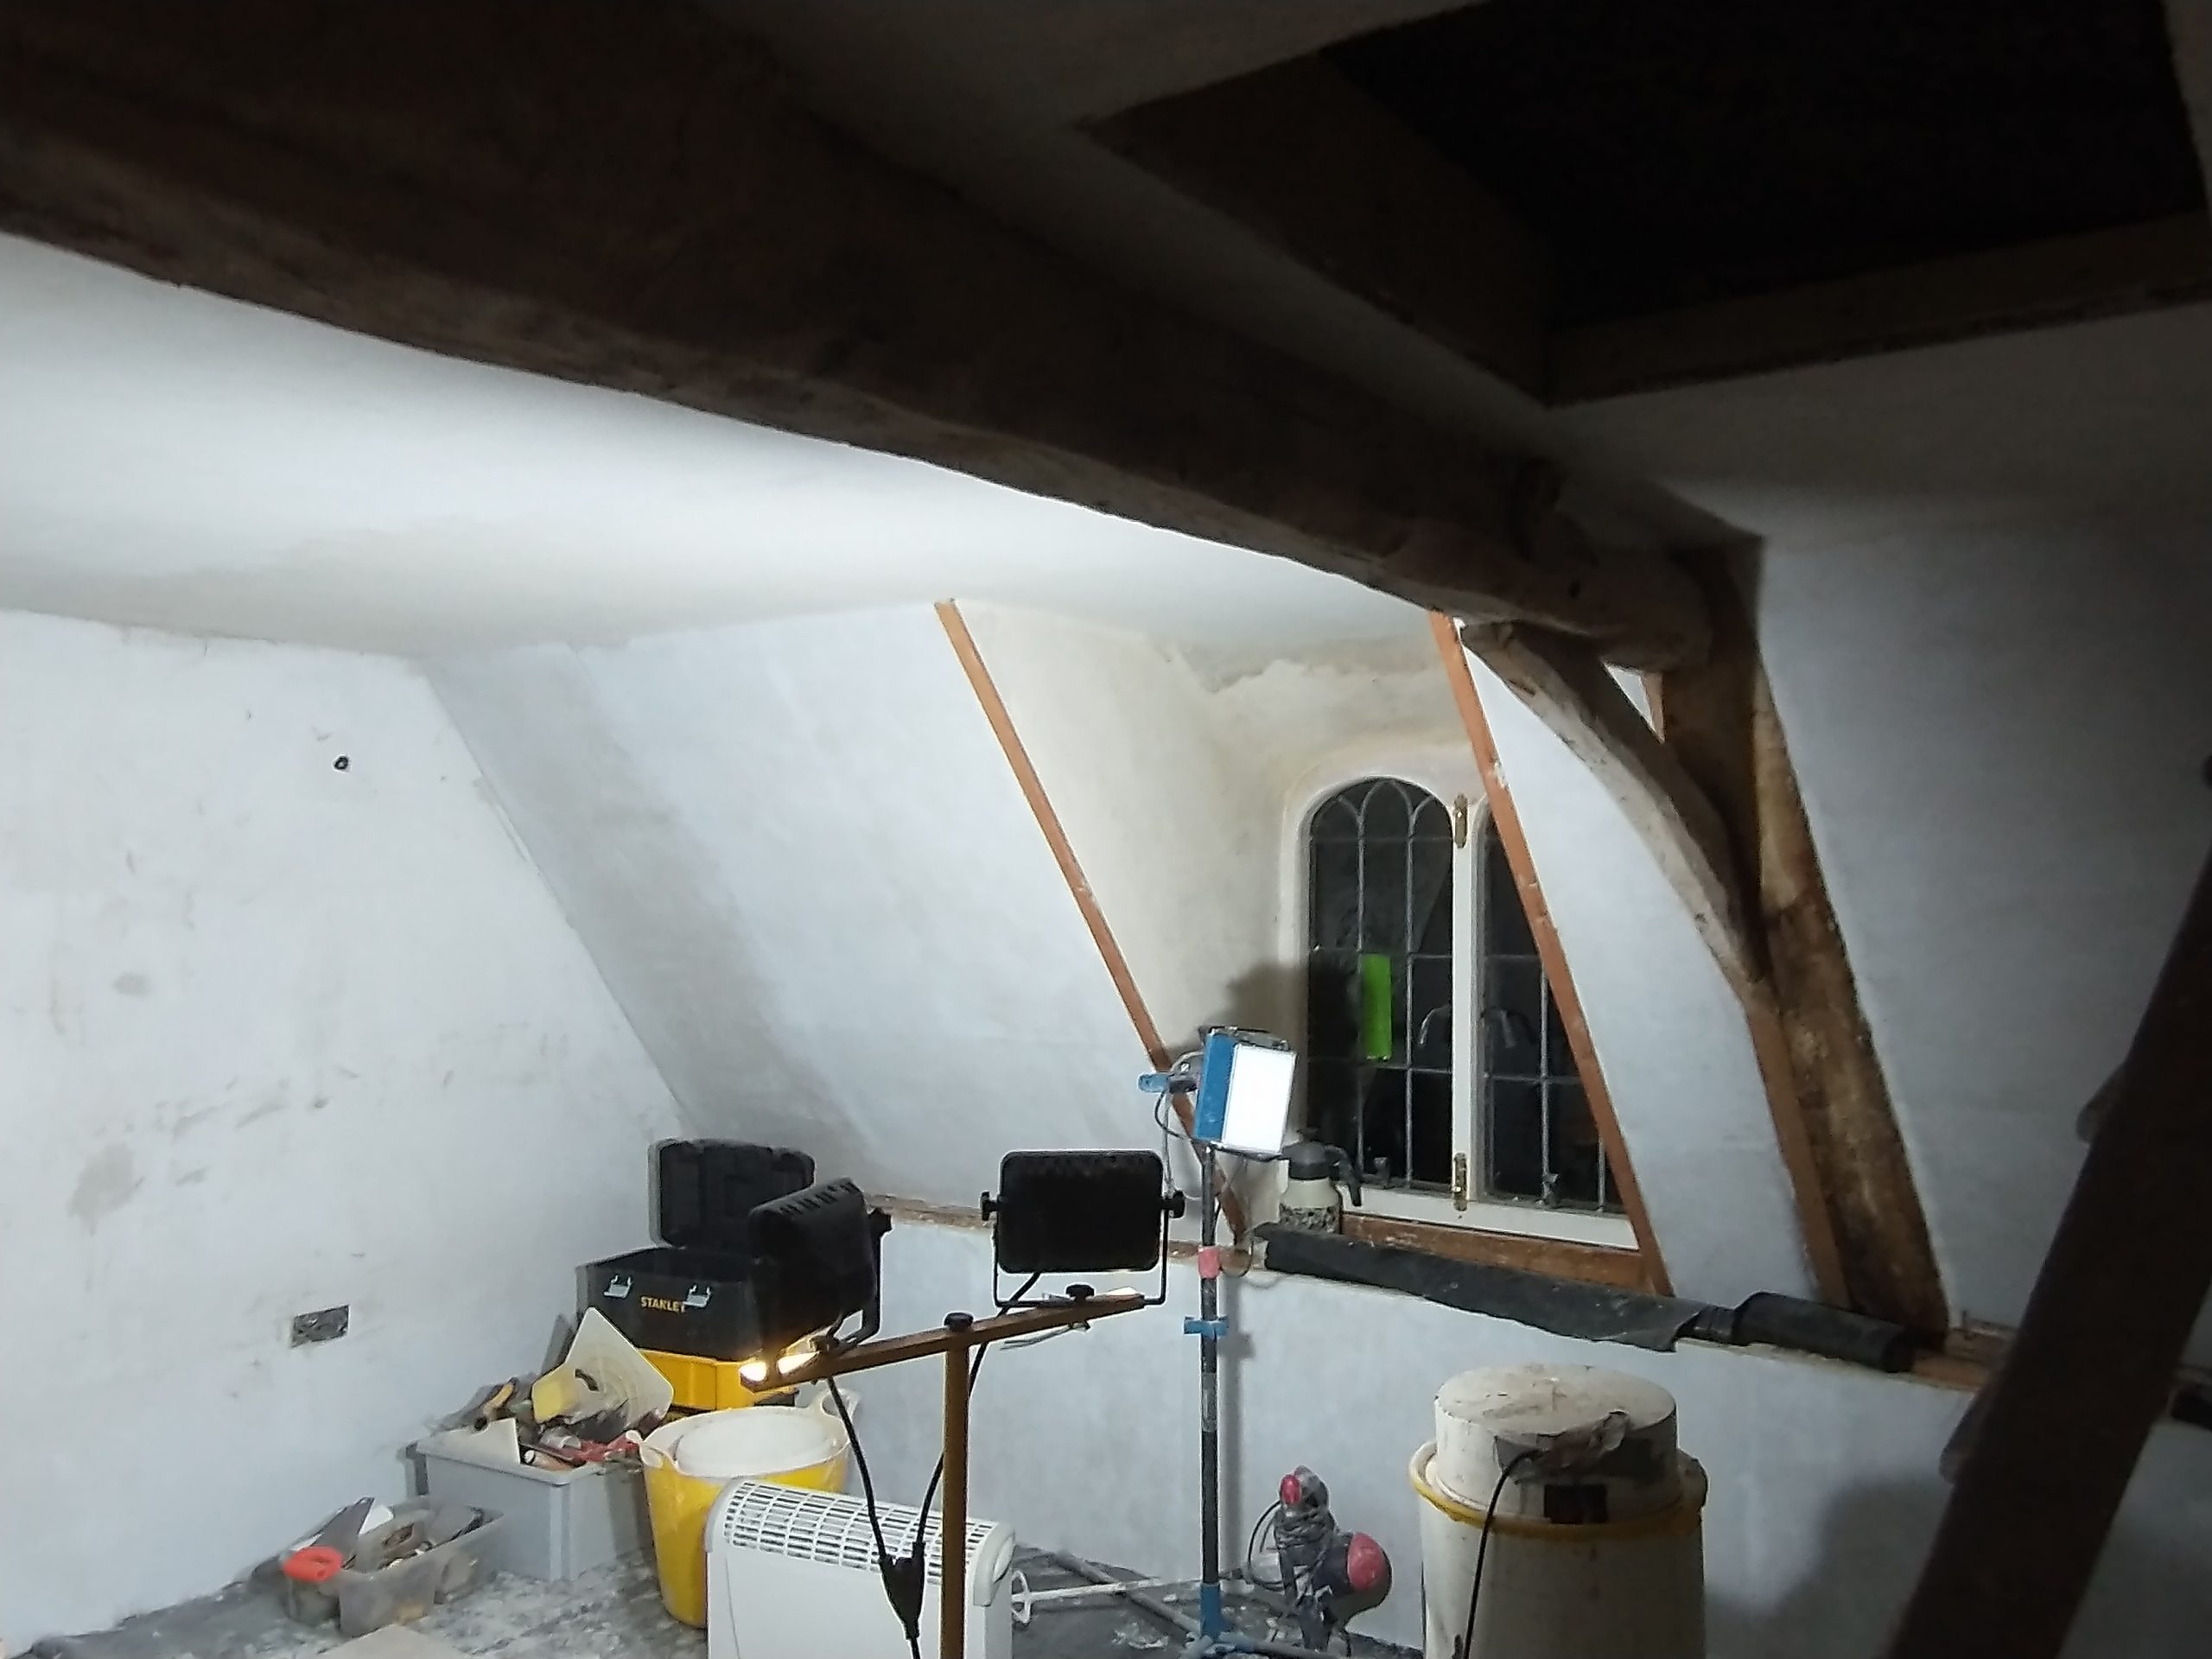
11 November – Really good muzzle loading shoot yesterday! Weather very cloudy and occasional Scotch mist – enough to twart one of the flintlockers for one drive – and not a breath of wind to deflect the birds. The bag was fairly small – 67, but the birds were flying well and the drives were good and even, so everyone had a most enjoyable time – proving that numbers are not everything. I had mostly pegs on the outskirts and wasn’t in line for any big flushes, and I decided that I prefer it that way, especially as I shoot my single barreled percussion gun, so ‘left and rights’ are not possible. I seem to be the only person to shoot a single – someone asked my why I used it – the answer is I shoot better with it than any other gun I have, it is light to carry about all day (5 1/4 lbs), and it saves the dilemma of whether to reload after shooting one barrel or wait til you have shot both. I was surprised in discussion to learn that other experienced shooters had inadvertently reloaded with a cap still on the live barrel! I did make a small plastic ‘top hat’ that fits over the nipple and is locked in place by the cock, but I haven’t used it. All in all a very good day, enhanced by the fact that it was only 25 minutes drive from home. I seem to have got my left eye under control – I have a vintage pair of big gold round frame glasses of the type the NHS used to issue that have a W bridge instead of nose pads – so they fit closer to my face than normal specs and thus offer better protection from bits of cap. I put a bit of sellotape over the top quarter of the left lens which is just enough to stop my left eye dominating when my head is down on the stock – I don’t notice it when looking normally. I’m carrying on the browning of the pistol barrels – I think we are getting somewhere this time – I’m about 6 or 7 rustings in, so hopefully we will be nearly there. Work on the bedroom continues – still not much visible reconstruction yet, but lots of fiddly framing started, and I’m now putting in conduits to pull the electrics through later. I need to use conduits as the house seems to have had a severe mouse problem at some time – much to my surprise they seem to be happy burrowing and making nests in the fibreglass insulation – which makes it pretty disgusting – I’m replacing it with wood fibre (Seico Flex 036) and I’ll try to compartmentalise it to keep rodents out. I did come across one power wire that had the insulation nibbled off – jut not enough to electrocute the perpetrator! In my last house when I lifted a floorboard there was a 2 meter length of flat cable with all the copper exposed like a railway track! That was the advantage of the old TRS rubber covered cable – nothing ate it, although it did get brittle.
7th November – I’m sorry for the missed blogs – I got a nasty infection that made me feel rather useless – and it took a while to sort out – I even stopped working on the bedroom restoration and sat on the sofa most of the day. I did try and do a bit of gun work, but that turned out to be a disaster! My browning of the pistol barrels got no-where – goodness knows why. I never managed to touch some of the steel layers – almost as if it was stainless steel, and the rest didn’t get any colour to speak of – a complete mystery – I ran it to about 14 browning and then gave up and decided to start again when I felt a bit more dynamic! I hardened and tempered the pistol spring, but wasn’t really ‘with it’ and it ended up a bit too open and the ‘hook’ end snapped when I tried to put it in the pistol – I will have to tackle that shortly! I am now more or less back on track and working on the bedroom again, which is just as well as there is a load of work to do – as I pointed out before, I do tend to get more ruthless as I begin to be able to see the job in hand – so I did a bit more demolition and removed an old built-in cupboard that was built of completely woodwormed uprights. I now have a larger room to finish. I have taken it all back to the rafters I put in in 2002, and will put in lots of insulation before putting on Savolit wood fibre board – its a substitute for lathes and can be diretly plastered over. There 1s a lot of plastering to do – 40 or so sq meters at three coats, I’m not very quick at plastereing so I might ‘cheat’ and get a professional in to do it if I can find someone who is good with lime plaster. We had Giles’s flat plastered by a pro – a joy to watch and perfectly smooth, but he left one room to his mate, and that was no better than I could have done (but quicker).
25th October The browning of the two barrels looks a bit more promising – I may have found a clue – I suspect that if you put on the browning too generously it actually takes off the existing oxide layer? sounds improbably I know, but I’m now wiping on a very little browning solution. I spent the afternoon scrubbing distemper off the gable end wall (horrid job) so I could dub it out flat ready for attaching the cork. I rang the floor board chap this morning to confirm their bank details as my bank doesn’t like me using bank details that come from emails – there are loads of scams called BECS going the rounds, where somehow a scammer intercepts genuine emails from a business and sends an email perporting to come from that business but with the scammer’s own bank details. It is usually directed at big business and has raked in hundreds of millions of pounds for the scammers. Penny got scammed out of £500 pounds when having carpets fitted in the cottage in Cornwall, so I take it seriously……. Anyway the floor board chap (Ben at Sutton Timber if you need floorboards!) pointed out that I’d better get all the ‘wet trades’ finished before fitting the floor or the boards would curl up ( actually curl down is more likely!) so I must push ahead with the plastering, but a lot to do first – like putting in the conduits for the power and lights, and sticking the wood fibre boards up so I have something to plaster onto!
24th October – Well, a bit of a gap again – sorry! I had a skip delivered so have been trying to fill it to justify 6 cu yds! Work on the bedroom has been progressing – I have been debating what to do about the floor – its a mix of old and not so old pine boards with lots of patches and gaps – I was going to board it with OSB and have it carpeted but Giles pursuaded me that that wasn’t in keeping with all the other fearures of the room – I did think of getting a few old pine boards and lifting the floor and relaying it, but figured that that would be quite difficult as the nails will surely tear the wood if they are lifted. Anyway after a discussion and a search on the internet I have opted for new Elm floorboards (I didn’t know you could still get Elm in England!) 300 mm wide – we have other rooms with old Elm floorboards, so its a reasonable choice. One really surprising thing came to light when I lifted a section of floorboard – the space between the joists was filled with tan coloured loose material that looked like perfect insulation – at first I thought it was coarse sawdust, but careful examination showed it was plant material that I identified as the petals of hops – I got some hops from the garden, and apart from the colour (garden ones are paler) they were identical. Goodness knows how many hops would be needed to fill around 10 sq meters of floor to a depth of about 7 cm (3 ins) – I wondered if they were a byproduct of brewing or something. Anyway they are clean and a good insulator (the room underneath was the dairy) and will stay, possibly supplemented with some vermiculite if there are empty joists. I’ve never heard of hop petals being used as insulation in old buildings – must make some enquiries…. Things happened on the gun front, but slowly – I did about 8 rustings of the two pistol barrels but they haven’t started to brown yet – in despair I rang Dick to see if he would like to have a go, but he said it usually takes him 10 to 12 rustings and I should be a bit more patient! I have adjusted my technique, being careful to apply browning with an almost dry sponge, and using medium steel wool…. we shall see………. The pistol’s owner sent me the stocks to make sure things fit and work – I was having problems with the heel of the spring coming below the lock edge, so I welded a longer stud on the top arm that locates on the bolster, that kicked the heel up, but the tumbler end of the spring then got a bit low and was too short – straightening out the bent bit a little fixed the length, and bending it down cured the problem of the low spring – now I just have to reharden it. Now I just have a little bit of woodwork to do on one stock and finish the browning, then I have another gun to sort out and another client is threatening to visit wih more work….. And I think I have another pistol to do that I’d forgotten about! And the frames to make for the secondary double glazing…… Plus I have to plan and buy stuff for the STEM club that starts after half term next week………….. Maybe I should retire for the third or fourth time, but I don’t seem very good at it!
17th October – I got one gun job out of the way this morning – a repaired spur and ‘mouth’ on a percussion cock to engrave – difficult as its all on a steep curve, so I resorted to the GRS – the welds are not altogether even textured so it was not straightforward, but the overall effect is OK. I coloured it down with my gas-oxy torch, and then made its mate the same – I think it looks good, but I don’t have the gun to check the overall effect. I photographed the cocks together after I’d engraved the top and the photo showed that the repaired cock had much less engraving on the high part of the body – its a thing I’ve noticed before – you think a job is done and you photograph it, and pack it up to go, then later you look at the photo and see a problem. Anyway I got the cock out again and recut that bit of engraving – the two cocks are subtely different in engraving and surface texture but now look a bit more of a pair. I’ve done two brownings of the pistol barrels – they are beginning to show figure, but there is still a fair amount of metal the browning won’t bite on. I’ve been taking photos after each browning, but they don’t show up as much as in actuality – I must see if I can find a photo trick to show the actual effect. You can distinctly see that the barrel is made of strands of different iron/steel rather than a homogenous material, but as its a pistol barrel the composite bar wasn’t wound round a mandrell in a spiral as it would be in the case of a long gun, but was made into a strip and wrapped round the mandrell and hammer welded into a tube in a series of grooves in an anvil with a lap joint so broadly the pattern runs along the barrel. I believe most pistols were made this way, as were all (?) military muskets and rifles. Some fancy pistols did have wound barrels and elaborate patterning, but most didn’t.
 After second rusting – there is pattern, but faint, and a lot of untouched metal!
 the cock on the left has lost its engraving on the high part

Recut – original engraving not identical on the two cocks…… (& different lighting)
 Here is the bedroom I’m working on – the visible vapour membrane is directly inside the slates. –
there is 140 mm of wood fibre insulation to go in and 60 mm of cork on the gable end wall.
 This beam is probably at least 250 years old – it has a curved brace at the left end that I’m repairing as its half rotten.
A similar brace at the right end is missing and will be re-instated when I can find a curved bit of wood.
16th October -More work on the bedroom yesterday – got me thinking about the 7 deadly sins of old house restoration and what would be the 7 deadly sins of old gun restoration. My 7 for old buildings are :- 1) Cement, 2) UPVC in any shape or form, 3) MDF board, 4) Plasterboard, 5) Vapour barriers, 6 Struck pointing of brickwork, 7) Float glass. Not sure I can get to 7 for guns ;- 1) Sandblasting (yes, it has been done!), 2) Brazing of broken parts, 3) Use of woodfiller, 4) Polyurethane or similar varnish, 5) stainless steel, 6) Slotted head woodscrews, 7) Almost all sanding of existing wookwork. This weekend is devoted to getting some gun jobs done – I’ve prepped the barrels and cleaned them with water and washing up liquid to get rid of any oil, then given them a wash over with chalk and water mixed like thin cream. When this was allowed to dry you can see some figure showing through as faint rust marks – the beginnings of browning – its now having its first proper browning. I decided to make a completely new top jaw screw and cut the thread on the lathe since it is set up for a suitable thread pitch – 28 tpi. I heated up the top of the screw and dipped it in colour case hardening compound not to full read heat – anyway that dulled it down a bit. I then reverse electrolytically derusted it ( i.e. rusted it rapidly) – in order to slightly dull the surface. Its actually put some natural looking blobs of the surface too. Its not a bad match for the original, I’m satisfied. There is one niggling job that I need to attend to;- the new mainspring I made/converted is very close to the edge of the lock, and probably won’t fit within the lock pocket of the completed pistol (which I don’t have) = There are 2 options, either move the hole in the lockplate that houses the peg on the top leg of the spring, or reshape or remake the spring. Either way its a great bore and will take a while – the lock plate is hardened so I’d have to anneal it, which won’t improve it, so I’ll proably work on the spring! I got an email from school a couple of days ago asking if I’d organise/run a project for 2 classes to build their Nativity display models for the local church – I’ll be delighted to do it, I’ve already bought a couple of strings of LED christmas lights to illuminate Bethlehem! Bit ironic for an atheist to be doing the church display but hey ho, thats life……
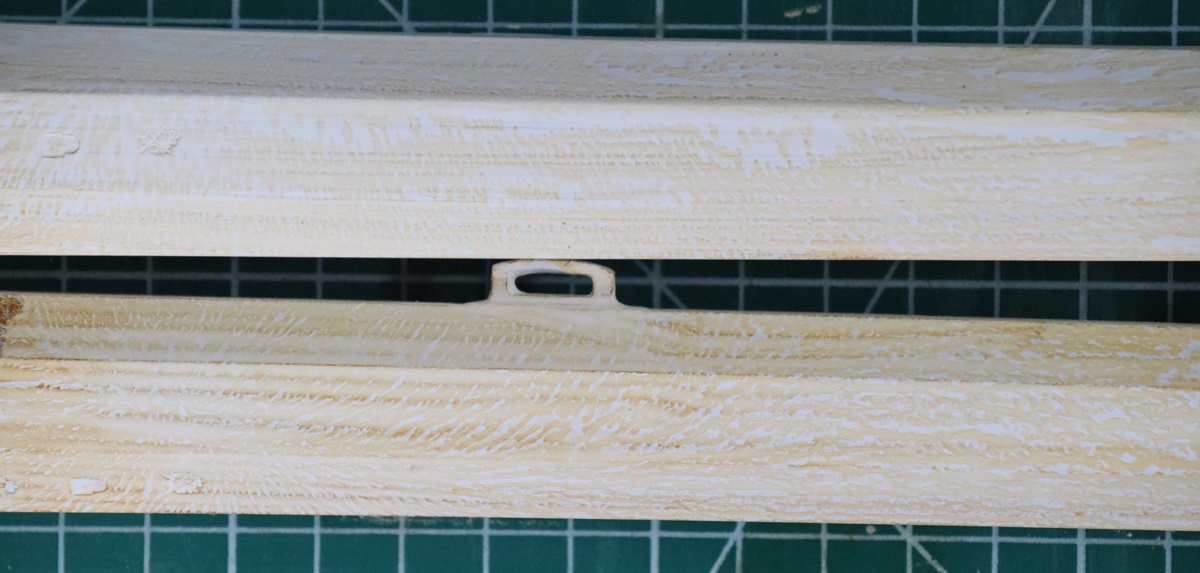
I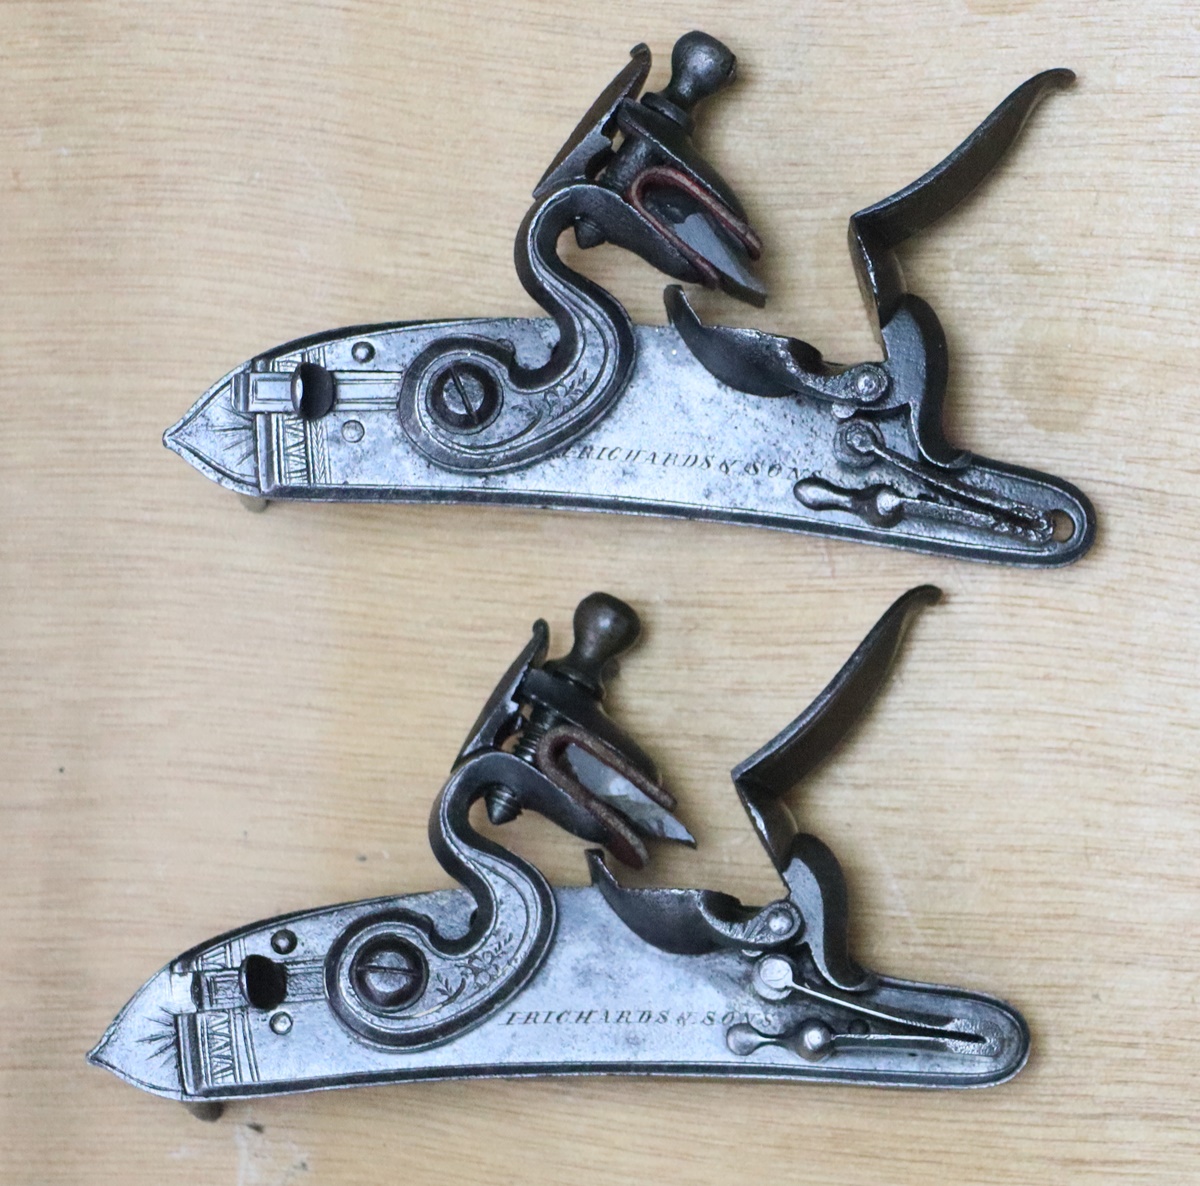 I can tell them apart ‘in the flesh’ but don’t know which is which from the photo, so must be OK!
14th October – Destruction more or less complete – just waiting to get the last 20 bags of rubble and muck down to the ground using my ‘crane’ – actually just a pulley stuck out on an arm from the window. It needs two people, one up one down, to operate so I have to wait for Giles to come over tomorrow. I was just about to finish in time for my 4 p.m. transfer to gun jobs when the materials for rebuilding were delivered on a couple of pallets and dumped outside – that took most of my afternoon gun time to sort out, anyway nearly ready to go, some framing up to do and it will be ready to stick on the sheets of wood fibreboard (Savilit) that will be the base for plastering with lime plaster. So I had better go and get a few minutes work on outstanding gun jobs. I’ve got a percussion cock that has been welded to re-engrave – its all curved surfaces which are very difficult to do hand encraving as you can only keep a constant depth of cut by EXACTLY following the curved surfaces, otherwise you almost invariably slip and make horrid cuts. My solution for this is to use the pneumatic graver (GRS) that operates with almost no push and so doesn’t tend to slip. I’ll go and start now………
13th October – Still destroying! Quite mild here – how long will it last? We have a massive crop of green tomatoes in need of another week’s sun – can’t face that much chutney! We planted a grape vine about 5 years ago and have never had more than a handful of unripe grapes, but this year it made it from its trelis to the south facing wall of the house and went mad – we must have had enough grapes for a Chateau Cablesfarm vintage – bottles running to two or three figures ( that’s roman numerals). It won’t happen, as the potential winemaker ate them all at about a bunch a day for the last month. I’m still experimenting with striking up the pistol barrels. One of the problems with using a file is that occasionally a speck of metal gets embedded in the file and creates a deeper scratch. I tend to file wet as this helps avoid the problem – some people use chalk for the same purpose, not sure which is best. I got good results from using a small fine diamond sharpener stuck to a plastic handle (EZE-LAP) until the white spirit I was using disolved the adhesive holding the diamond onto the plastic. My current best guess at a good technique is filing down to No 4, then use a fine slip, then 400 grit and finally 1000 grit. Looking under my x25 microscope there is still plenty for the browning to get a bite on. I’ve recut the engraving on the barrels a couple of times as I’ve filed so that they still look crisp. The microscope x25 does reveal that the surface still has multiple small pits, but I think when browned they will not show (they don’t really show to the naked eye) so I think I’m now ready to go! I have had to divide my day up to get both the bedroom and the guns done – I reckon 6 hours of labouring is enough at my age, so at 4 p.m. I retire to the gun workshop for a bit of filing etc. ( after a cup of tea of course) until 6, then maybe back again after dinner for an hour or two if I feel energetic, then attend to the blog if I have anything to say!
of blog from Jan 2021 to June 2022, but maybe they will reappear!
Sorry, the comment form is closed at this time.