I thought it was time to pull together the bits and pieces that are in various posts into a coherent story! This post is intended as an introduction to the other posts on barrel re-engraving of specific guns and pistols.
Before we get into the details, it would be a good idea to discuss the rights and wrongs of recutting engraving! I have no problem with recutting on guns that have almost unreadable engraving and are not unusual or of high value – if something is rare and particularly if its old – say before 1770, then I would think very carefully about the need and justification for recutting – in fact I’d almost certainly not do it. You will sometimes see guns in (proper) auctions that mention that the engraving has been ‘refreshed’ – that’s obviously not to make the gun sound MORE attractive, so it must be intended as a warning – in other words some collectors would avoid it – so be warned! I have recut engraving on barrels of good guns where it is worn much more than the rest of the engraving, but it requires great care to avoid it looking like faking. Mostly I recut things that are being built as ‘bitzers’ to shoot, or not very special guns that have almost illegible engraving, where recutting definitely enhances the gun.
Just to get you in the mood, here is an example of very bad recutting, or possibly just faking on a barrel that doesn’t belong to the gun – with engraving this bad on a Purdey who knows what happened? It’s difficult to see how this lettering could be put on top of ‘proper’ Purdey lettering, so I’m puzzled – barrel lettering is usually fairly widely spaced so that minor variations in spacing don’t show and it looks more even because the letters aren’t so visually close to each other and period Purdey lettering usually has extremely fine serifs. ( Update – I have since seen several Purdey guns with similar engraving, and come to the conclusion that in fact its just surprisingly rubbish Purdey engraving!)
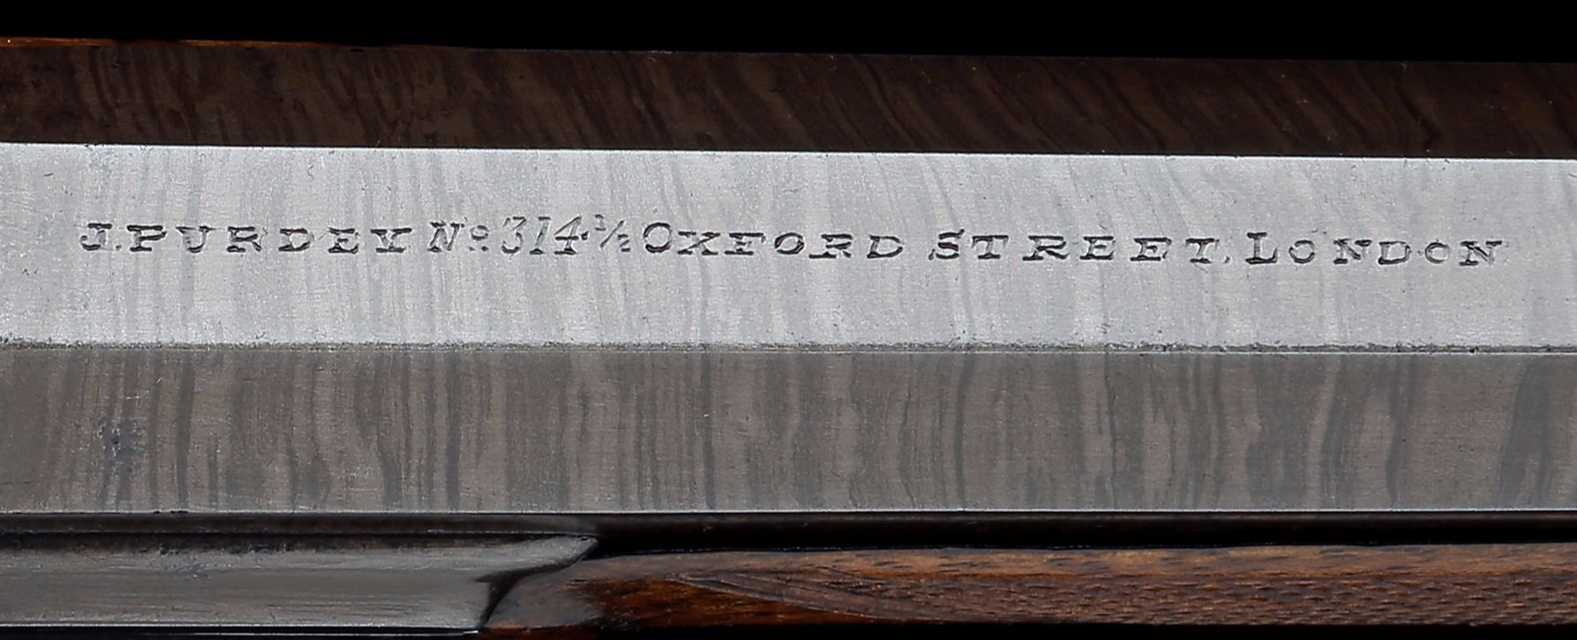
Faults include ;- uneven vertical stroke angles, very poor spacing, ‘O’s too small and, stylistically, serifs not Purdey style, spacing too close, letters poorly formed, curved cuts not deep enough or ‘fingernail shaped’ – a complete dog’s breakfast of a job – glad I didn’t do it!
One of the most common jobs I’m asked to do is re-cut the names on barrels of percussion pistols and guns. There is a reason for this – barrels were and still are relatively soft compared to the rest of steel or iron making up the gun – in fact they were very soft. The lock plate and false breech are usually case hardened and show relatively slight wear, while the trigger guard and trigger guard finial are usually intermediate in hardness, although the finial gets less wear than the trigger guard – I do occasionally get asked to re-cut guards and finials but as they are less conspicuous and don’t carry the maker’s name they get less attention. The barrel engraving almost always seems to be less clear than one would expect!
As well as being soft, barrels seem to be more prone to rusting and pitting than other parts of the gun, and guns and pistols that have very crisp engraving on locks and even trigger guards may have signs of having had the barrels ‘struck’ and re-browned in their lifetime. Even barrels that are on fine quality guns may have been re-finished and show signs of minor rust that hasn’t been fully struck off under the new browning. I often see barrels that have been struck off and then finished with fine abrasive paper that has flexed as it passes over the surface of the engraved letters and has slightly rounded off the sharp edges of the engraving which slightly blurs the appearance.
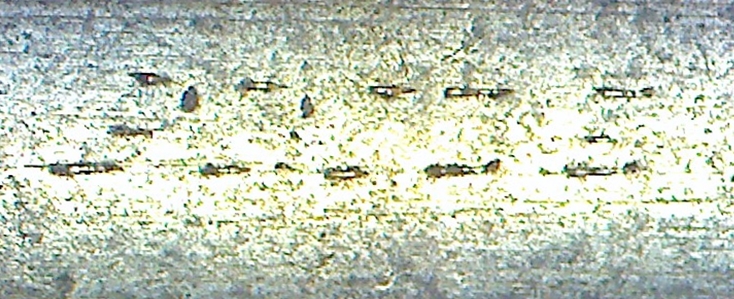
Another phenomena that is slightly puzzling is the hard skin that forms over active rust in the recesses of the letters. As this skin matches the browning perfectly it effectively hides the lettering and makes it look a lot less deep and conspicuous than it would otherwise be – you can see pictures of this in the Westley Richards re-engraving post.
Why would anyone re-cut the barrel engraving? The main reason is that the name on the barrel is difficult to read and looks worse than the condition of the rest of the gun would lead one to expect – the barrel name and address are very conspicuous and if not clearly readable detract from the overall appearance.
Why might I not want to re-cut the barrel lettering? If not done very conservatively and with very careful attention to the style and workmanship of the original it will stand out as having been re-cut and may detract from the genuine appearance of the gun. Any suspicion that the engraving on the barrel is not close in appearance to the original engraving style or is too new or deep will raise the suspicion that the barrel has been replaced with one that wasn’t original to the pistol or gun, and therefore the suspicion that it is a ‘bitser’ – i.e. made up of bits of several guns!
What does the engraver need to do to preserve the feel of the gun, whilst making the name more visible?
- Ideally the re-engraving will be done in conjunction with a complete refinishing of the barrel, in which case I would lightly recut once before striking up teh barrel to make sure that the lettering stayed visible, and then do the main recutting when the barrel is ready for browning. After recutting it will need any burrs thrown up very lightly removed, and I might or might not run the barrel under a very fine wire brush to very slightly round the corners of the letters to bring it down to a more appropriate state. It is possible to recut barrel lettering on a browned barrel but you have to be doubly careful not to make even slight marks on the surface, and avoid anything that might wear the surface of the browning which can be quite fragile. Of course if the barrel is already browned you can’t burnish out slips!
- Identify the quality and date of the gun – this will give you important clues as to the care with which it was engraved – a lot of old engraving was done very quickly with great economy of strokes – each line was cut once, except wide strokes that were cut with two or three strokes – usually verticals were cut upwards and not overcut in reverse – its difficult for a modern engraver to cut corners like that, but it was the style! The curves on ‘O’s and ‘D’s and ‘P’s and’R’s etc were single cuts upwards for a right handed engraver except for ‘O’ which was cut up on the right and down on the left – theses cuts were surprisingly deep and are the last part of lettering to wear away. Serifs were cut from one direction only.
- Good quality and later guns generally showed more variation in cut width than lower quality ones – very high quality late guns had very fine serifs (the lines at the tops and bottoms of main strokes). I think the reason that thin serifs are a feature of class guns is because they are cut with an ongulet or knife graver (a very fine one) which are fragile and need to be sharpened frequently to keep cutting fine lines – which is enormously expensive in sharpening and tool changing time, even if you have an appretntice standing at your elbow to keep sharpening you tools. Most of the rest of the lettering is cut with ‘square’ graver, but note that a square graver will gradually wear away its point so that the lines it cuts will gradually get wider, and it will fairly quickly loose the ability to cut fine lines.
- Check carefully to see if the original engraving was cut with flat gravers or round gravers. or the more usual ‘square’ gravers (square means using a point of a square graver to cut) or even an ongulet. You may need to put this off until you start to cut.
- Engraving gun barrels is tricky, depending on your engraving style – engraving under a microscope as I do, long guns are a pain, and I don’t have a lot of room round my bench so its a problem – you are restricted in that you can’t cut from some directions, which can be very frustrating when re-cutting script lettering on long guns. Pistols are of course easier, although it pays to plan out the work and go through the whole job doing strokes of one direction at a time – remember to watch out for the lines getting wider as the tool wears.
- Follow the cuts of the original engraver and make sure you are re-cutting exactly in that style – to do this you need to look carefully at what is in front of you, and at the rest of the engraving on the gun and preferably find a gun or pictures with the same name etc on its barrel.
- Go over the lettering stroke by stroke to clear out any rust in the letters – try not to cut much new metal at this stage, but preserve the outlines – if its very worn just lightly clear the bits you can positively identify.
- The most difficult part is deciding how deeply you are going to recut – that is a judgement that can only be made with the job in front of you, but remember that if you cut too lightly you can always have another iteration – if you overdo it it will look as if teh gun has been messed with and there is nothing you can do about it!
- Having finally recut the lettering you will ideally need to remove the very slight burrs thrown up at the edges of the lettering, although sometimes you can control the last cuts to avoid them – passing the barrel very lightly under the fine wire brush can work, but test it on a hidden area of teh barrel first! Of course if the barrel is being refinished then there is no problem, see 1 above.
- Having got your engraving sorted you are left with bright letters that look all wrong! I use a very very dilute instant blacking with the finest artists paintbrush you can buy to paint the blacking into the cut letters under the microscope – don’t get it onto the browning as it will stain it
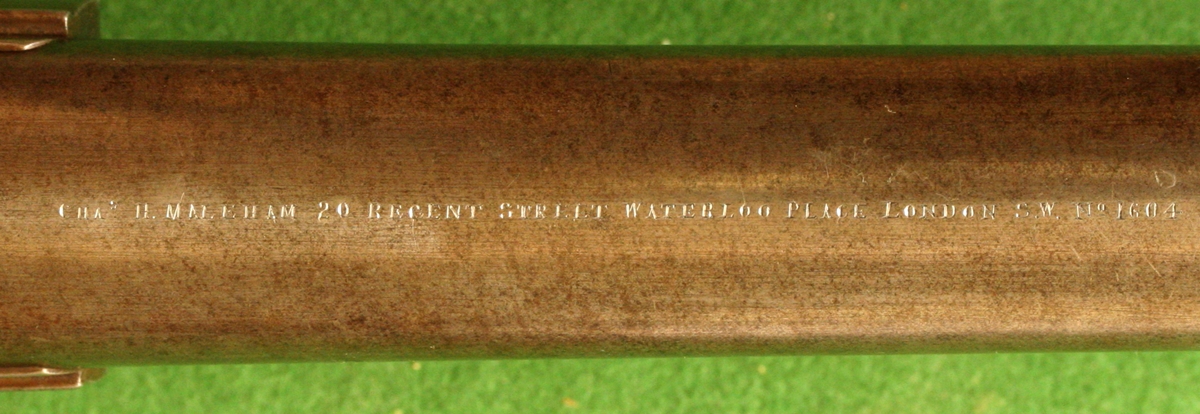
Here is an account from the diary of recutting a client’s 8 bore single barreled black powder breech loading double gun by Maleham of London
The inscription reads;
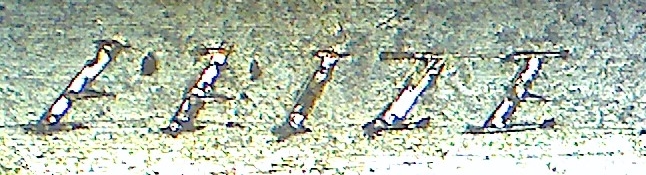
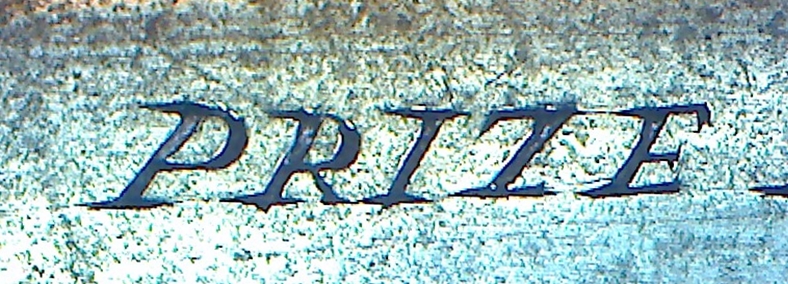
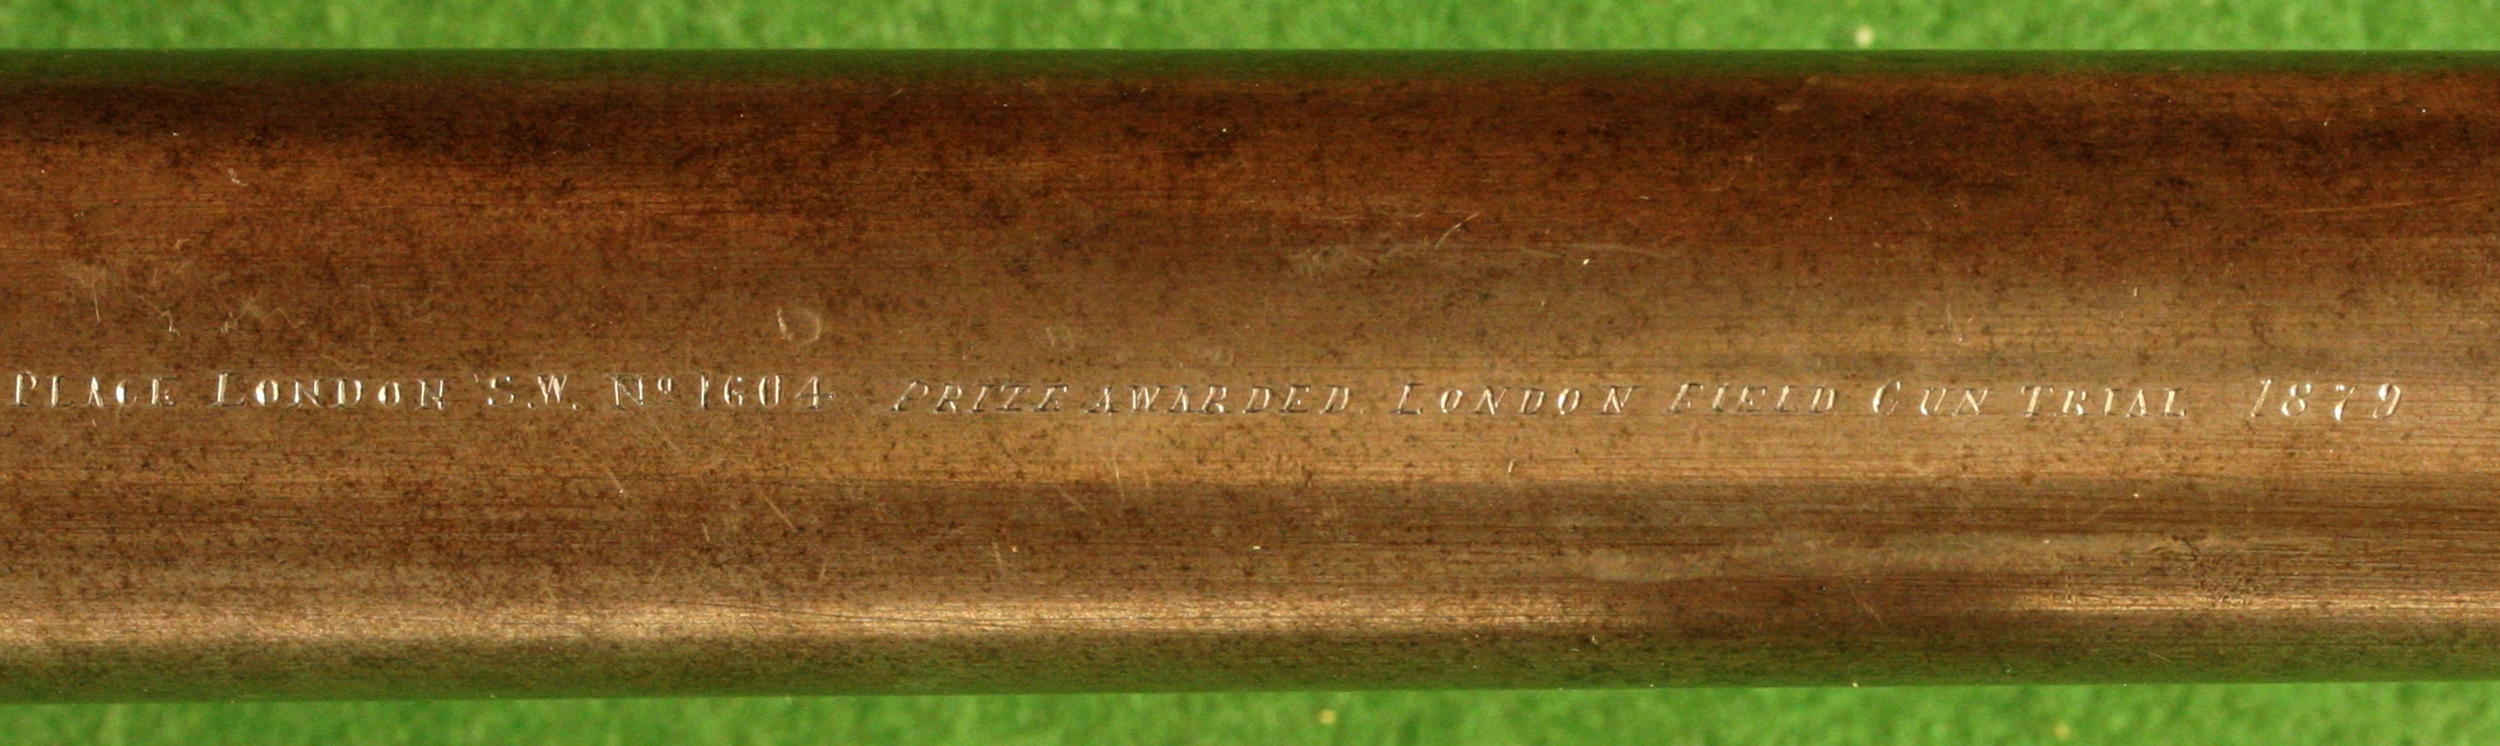
CHAS H MALEHAM 20 REGENT ST LONDON S.W NO 1604 PRIZE AWARDED LONDON FIELD GUN TRIAL 1879
I have started on the Maleham barrel to recut – its actually 8 bore – and spent a couple of hours doing an initial recutting of the second bit of the engraving, which is actually in italics ( I’ve changed the quote below to show this) . Its best not to start recutting at the beginning because that is the bit everyone looks carefully at, by half way through they stop looking so critically – so you can get your eye in where it is less exposed! Anyway I got about 18 letters recut in around 3 hours, including fiddling around with the microscope camera to take pictures – say 10 letters per hour when I’m going well. It took a while because I have to clear off all of the things around my bench so that I can swing the 39 inch barrel to different angles to accommodate different directions of cut – I used about half a dozen different positions – I need to cut the slant ‘verticals’ and the serifs in both directions and then do the curved letters O, P, R etc and the bits at the ends of the ‘E’ s. It’s slow work – I believe Geoff Moore charges £5 per letter, but he is much quicker than I am! Here are some pictures of the stages of the work;-

This was a fairly good , readable word (LONDON) – some were worse including PRIZE below – the O’s and D’s etc are always clear.
It’s a little tricky to see what gravers were used for what cuts, but I try to use what was used before if I can work it out – in this case I think the heavy uprights were cut with a flat graver, not with several cuts with a square as they often were, and I think the serifs were cut with an ongulette , although I think the ends of the uprights were picked out with a square to start with. I am cutting the heavy uprights with two cuts with a square before finishing with the flat as that way I am less likely to slip.
I start by cutting (partial) serifs & horizontals with a No 4 Ongulet – these letters are 1.2 mm high !
Then put in the uprights, first with a square and then the heavy ones with a No 2 flat – I’ve rubbed over the letters with my finger so they have picked up a bit of dirt! As it happens all the verticals in ‘PRIZE’ are written as downstrokes and therefore heavy.
Finished for the first iteration, I’ll go back over it when I have done all the lettering once – the serifs are cut with the Ongulete and the letters are filled with a marker pen so I can see the shape better. You can see slight burrs thrown up in places. These pictures were taken with a microscope camera put in place of an eyepiece – when seen with the naked eye they will look fine – they always look a bit irregular when viewed at high magnification – depending on your screen size you are probably looking at them at between x10 and x20 magnification ! You probably need to be 20 to 30 feet ( 7 to 10 m ) from the screen to get a better idea of what they look like on the gun.
Maleham barrel recutting – quite a marathon – at least 10 hours work in total. I did the last half properly – i.e. going through it doing all the cuts from one direction then changing the orientation of the barrel and doing the next cuts on all the letters etc – saved quite a lot of time and probably gets a more uniform result but its easier to forget what you are supposed to be cutting and make a mistake, although I only made one small one and I’m not going to tell you what it is! Here is a picture;-
Click on the pics to enlarge, then use the browser ‘back’ button to return to the blog. They look MUCH better that way!
Examples of recutting can be seen in the barrel re-engraving posts on specific guns – the Westley Richards, The Bales of Ipswich and the Chas Moore.