Dragoons were essentially cavalry of medium or heavy weight, as distinct from light cavalry. The army had both Dragoon and Cavalry regiments in the 18/19th centuries.
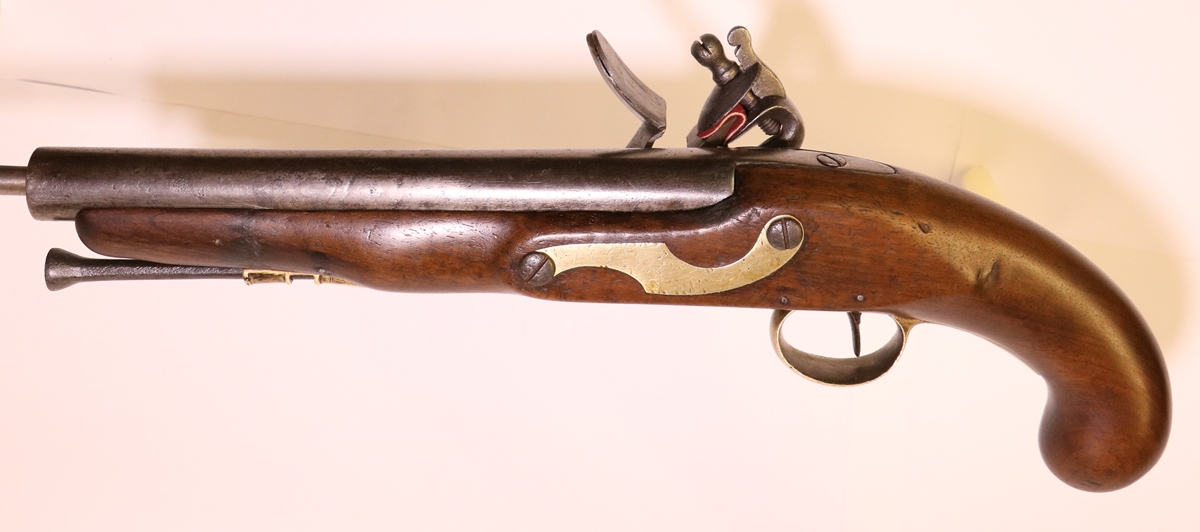
This is a pretty standard Heavy Dragoon pistol of 1795 pattern with rounded lock and iron ramrod. All parts are original – all the ironwork bits are marked with the assembly mark X\III – even the screws. Proof marks are missing from the barrel, although there is a ghost mark in teh right place. The marks that would have been impressed on the wood are missing, although there are pits where they might have been.
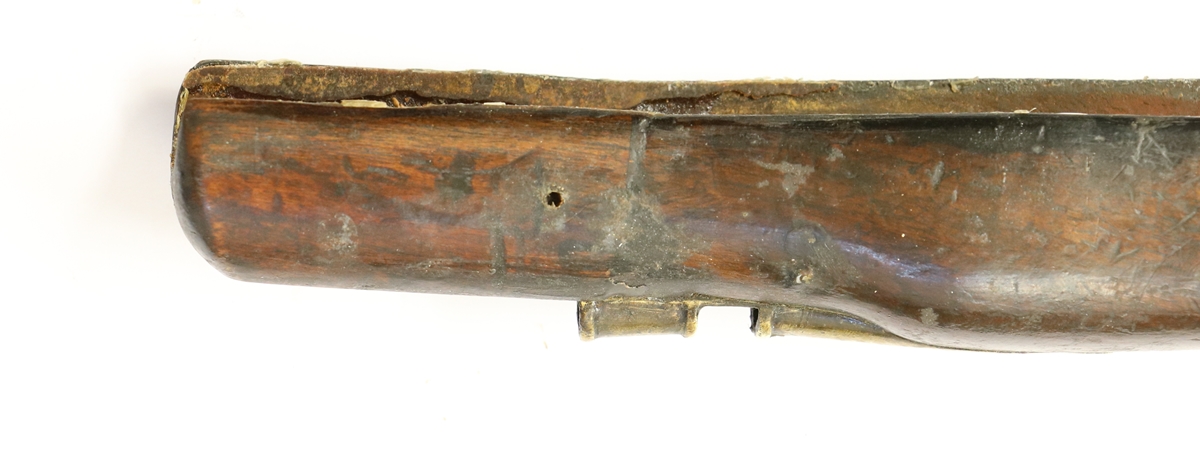
This is a pretty straight pistol, all original with a poorly repaired muzzle end to the stock, and the bents on the tumbler and the end of the sear all worn so that it can be fired on half cock but won’t hold on full cock. There are numerous small dents in the woodwork from a hard life, and the frizzen has been refaced, also suggesting a hard life. The barrel has been struck off at some point and lost all but a trace of its marks, but isn’t rusted on the outside and will clean up perfectly. Here are a couple of views before starting work;-


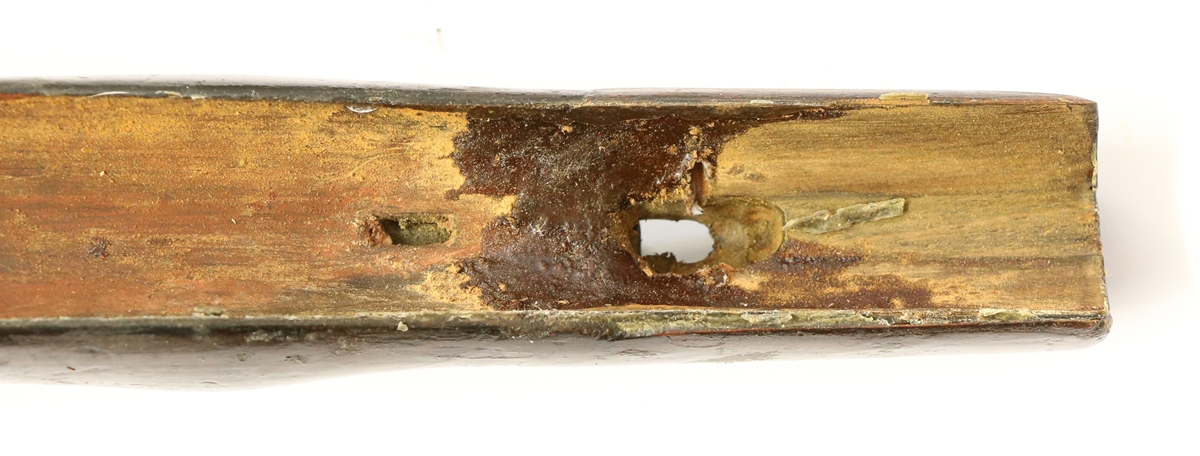
- The woodwork is in need of a little attention, the repair is a bit of a dog’s breakfast…….
First job is to run all the metal through the de-rusting electrolysis, followed by the very fine wire brush
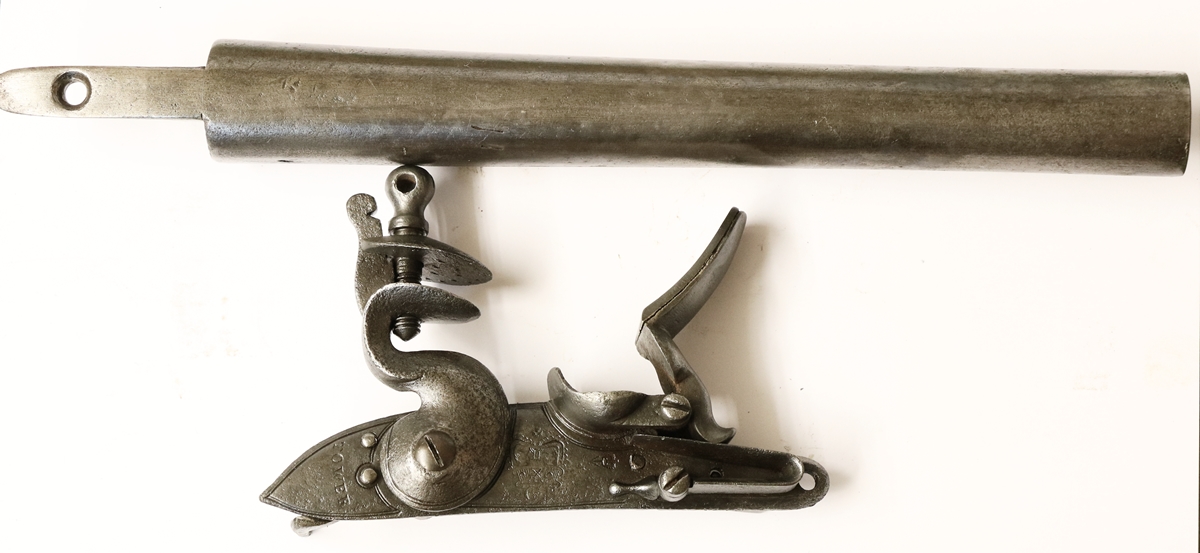
That all looks good, no need for any more work on those bits!
And so to the serious business of restoration……
I started by rasping and filing the chunk of wood to the correct profile and in doing so managed to find out how much of it was filler and how much wood – it turned out to be good enough to leave in place, it would have been tedious to put on a new piece as the ramrod pipes had been glued in and it would have needed a fair bit of destruction to free them. The rest of the woodwork was coated in a thick dark varnish and had a lot of dents, so I used paint stripper to get back to the bare wood, and then oxalic acid to get rid of dark stains and slightly lighten the wood, after which I steamed it all to reduce the dents, and very lightly sanded it ( so as not to round off anything) with 400 grit and medium steel wool. Having got a reasonable finish I played around with various spirit based stains to get an even colour, then a light coat of ‘shellac varnish, brushed on and wiped off, followed by 0000 grade steel wool and wax polish, with local touching in of stains and a marker pen to deal with the joins etc. I use a very hard release wax plus brown and black hard wax to finish the wood and blend in faults. The finish looks a lot better now! Interspersed with the woodwork I stripped the lock and welded additions to the sear and tumbler and filed them up – I have a bit more to do on that tomorrow, and I’ll need to harden them too.

There is a small corner of old filler above the front pipe – it will be pretty unobtrusive in that position so it will stay!
The old glue joints are not as fine as I would like, but they will suffice.

You need to be careful at this stage NOT to sand everything into a rounded shape – keep things as distinct as possible!
I need to sort out the white balance on the camera!
I decided it wasn’t necessary to take out the trigger or guard – leaving them in helps preserve the fit, protects the edges and also retains some of the worn look.
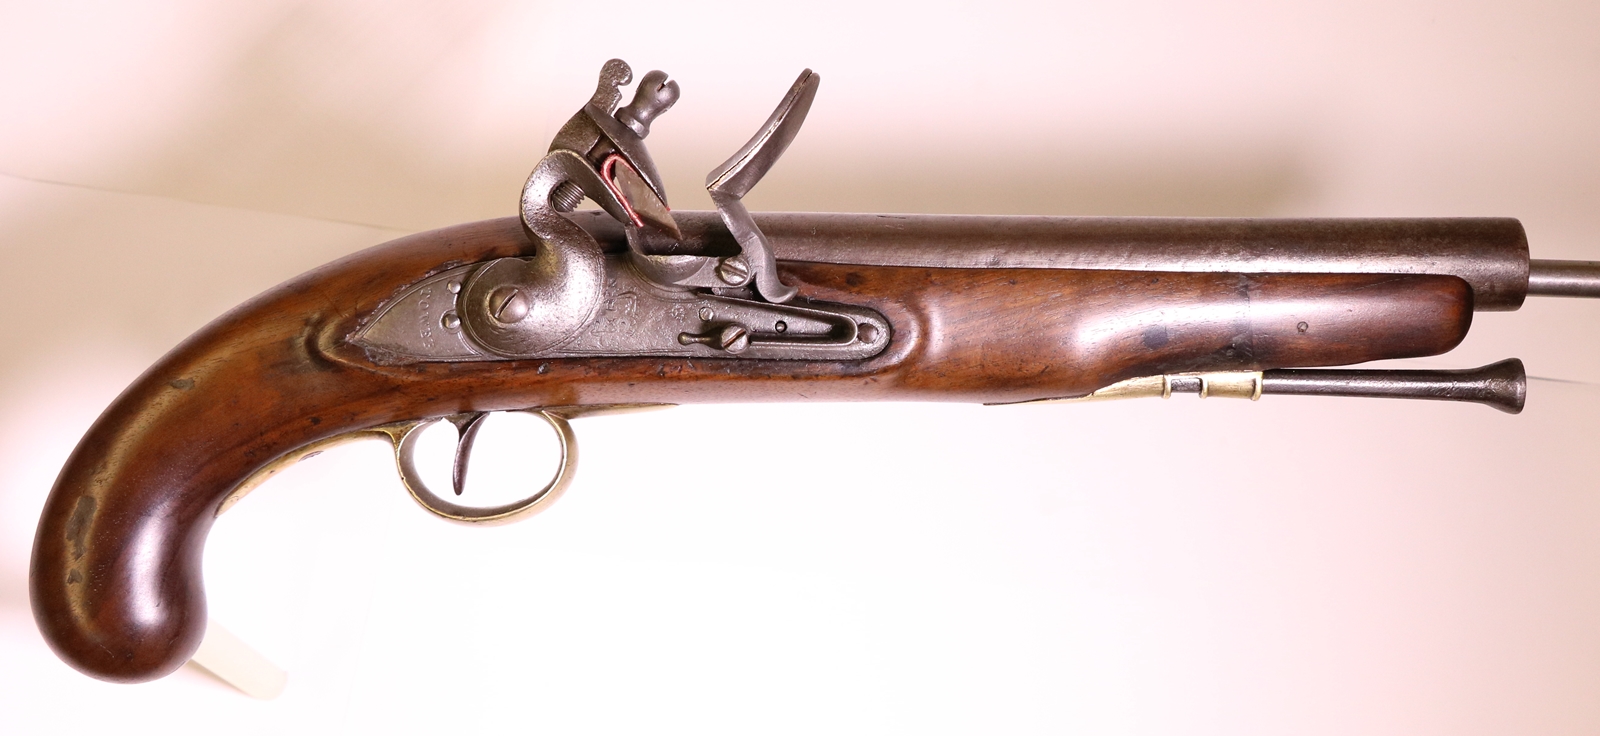
Here is the externally finished Heavy Dragoon…….
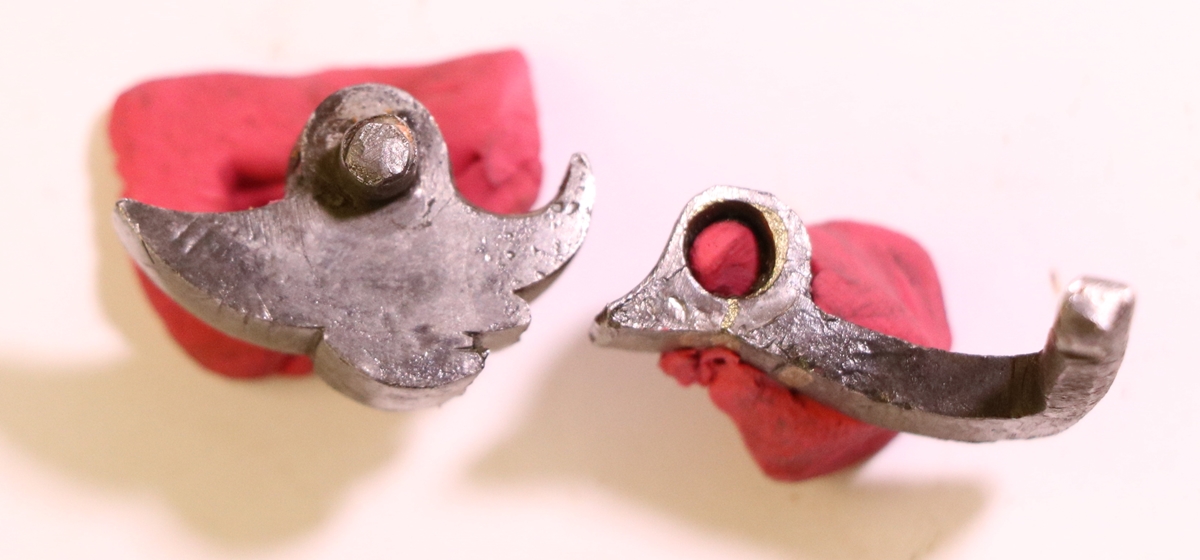
The tumbler and sear were badly worn and needed welding – half cock didn’t hold against the trigger and the full cock didn’t hold at all! So a bit of TIG welding with piano wire built up the surfaces a bit. Of course the reshaping changed the geometry, and as so often happens the sear caught in the half cock notch when fired, so there is a bit of fiddling to do before the parts can be re-hardened before final assembly…….
As the sear cooled quickly after welding it was dead hard and had to be annealed before shaping.
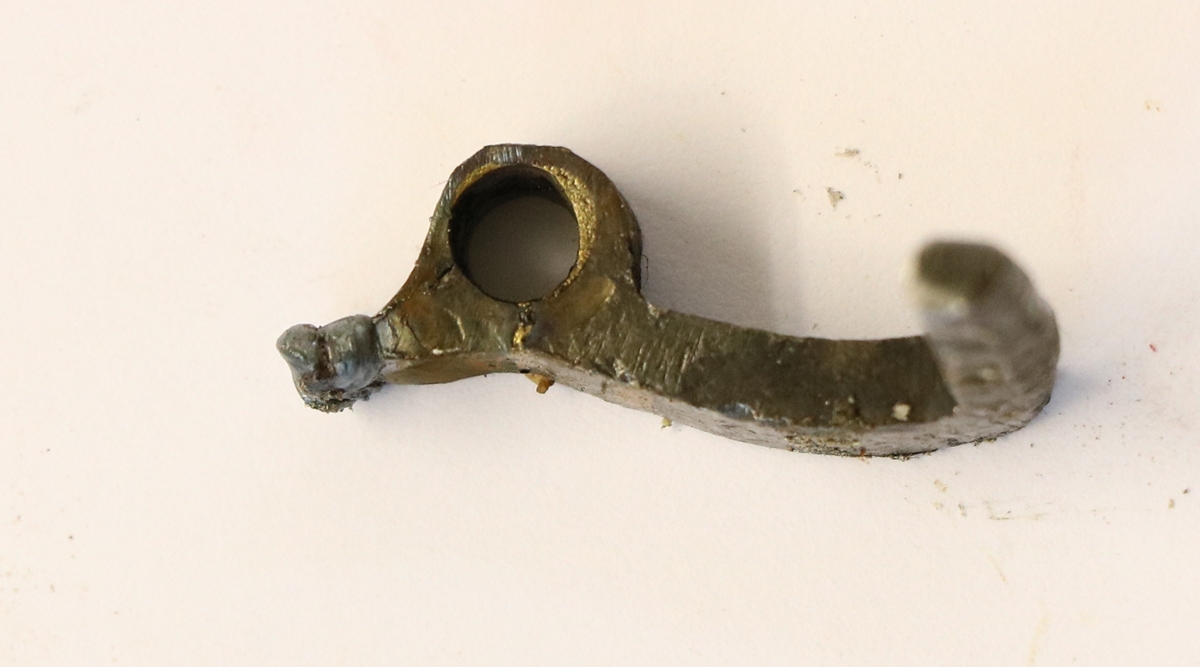
Filed, tested, filed… , hardened, and tempered in the top oven of the AGA – very safe half cock bent…
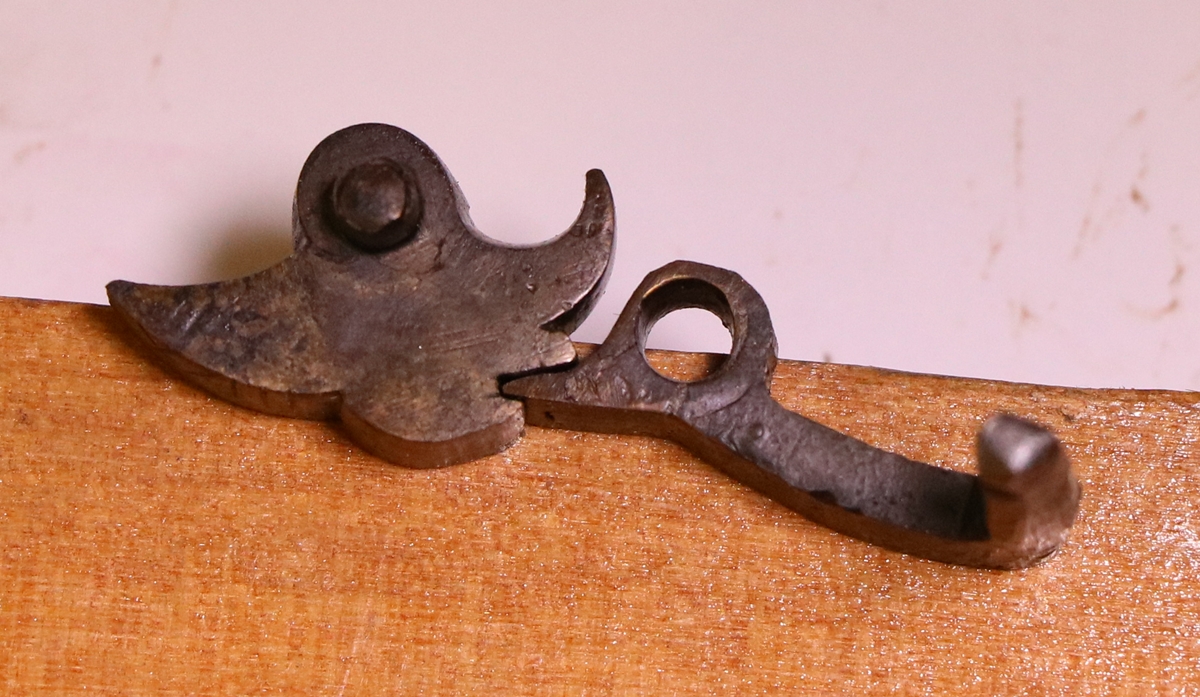
Finished the Heavy Dragoon (which I mistakenly called Cavalry, although I’m not sure of the difference) this morning – I was happy with the action after a bit of gentle filing so I hardened and tempered the tumbler and sear – a file would hardly touch them – so that is back together. I decided the cock screw was wrong so I checked the thread -the old screw was about UNF 6 ( 40 t.P.i ) but the thread in the tumbler was more like 28 t.p.i. – since I didn’t have a 3.5 mm x 28 t.p.i die (excuse the usual mix on units!) I settled for 6 UNC (32 t.p.i.) as being the nearest I had, and it seems to hold at least as well as the one in there before, which was clearly not original. I dulled down the colour with heat and Blackley’s case hardening compound and did a bit of reverse electrolysis to dull the surface – it looks reasonable and is a much better shape. A bit of peening on the back of the cock to tighten it up, and its all ready to go – it sparks quite well, although if I were going to fight a war with it, I’d probably fit a stronger mainspring…… I’ll leave it, as snapping it off (only with a flint and the pan closed, please) is less violent that way.

New cock screw – slightly the wrong thread but it holds (like the previous one only the right shape) !