I made a small furnace for heat treating steel, although it should also be hot enough to cast aluminium and brass. The basic design is from a YouTube video by a schoolboy, and is the neatest small design I have seen on the web, although the basic principle could easily be modified to give different configurations – in particular it would be easy to make a front access furnace, or one that would take a longer part using the more of same bricks and elements etc. with a different configuration and a modified steel cage round it. Having used the furnaces a few times I think I skimped by only having half thickness bricks on the base as it gets pretty hot underneath – although as its standing on legs above a piece of stone it doesn’t really matter. The basic parts of the furnaces were sourced from Ebay and I spent around £80 or 90 making it, but I did have quite a bit of old junk lying about that got incorporated, including the metal for making the framework, the wiring bits for the circuit and the old plastic box and aluminium panels.
click here to continue reading this post
Look at the YouTube video – there are two at –
Essential bits you need are:
10 insulated furnace bricks – come in boxes of 5 at about £26 a box.
Electrical heating element – various sizes available, around £5 from China – takes a while to get so get two while you are about it!
(The elements are connected using bits of threaded rod BUT the elements I got were all wound the wrong way for a normal screw, so I turned the thread off the end of the threaded rod and forced them in. – Not elegant but it has worked so far, and the elements are about the cheapest bit of the system so its no great hardship to replace them – I put everything together in a reversible way so I can take the furnace to pieces in a few minutes.)
PID controller – from Ebay, get a 1000 degree C one from INKBIRD – mine is model ITC-100VH with a 40 Amp Solid State Relay (SST-40 DA) and a K type thermocouple. It should come with a K type 1000 degree one but mine came with a 400 degree sensor. A 25 Amp SSR would be fine.
Heat resistant wire ( Glass insulation necessary) wires from an old cooker are ideal!
Double pole 20 Amp mains switch and mounting box.
Electrical connecting strip – >10 amp (aka. Chocolate Block)
Angle strip and bolts for framework – ideally you should have access to a welder – if not I’d consider using more bricks and making a rectangular shaped furnace so that you can bolt the framework together out of Dexion or Handy Angle or similar.
The videos tell you exactly how to make it, so I wont repeat it here – I wired mine up a little differently because I incorporated a temperature controller from an old cooker that I can switch into the output to allow me to put a bit of heat into the furnace as it starts to cool. I will also include a switch to disconnect the output of the SSR so that the PID controller can continue to show the temperature while its not heating – you can do this by turning down the temperature on the controller, but that is a slow process – there is probably also a way to turn its output off , but its a bit fiddly to set so I prefer a simple switch!
Here are some pictures;
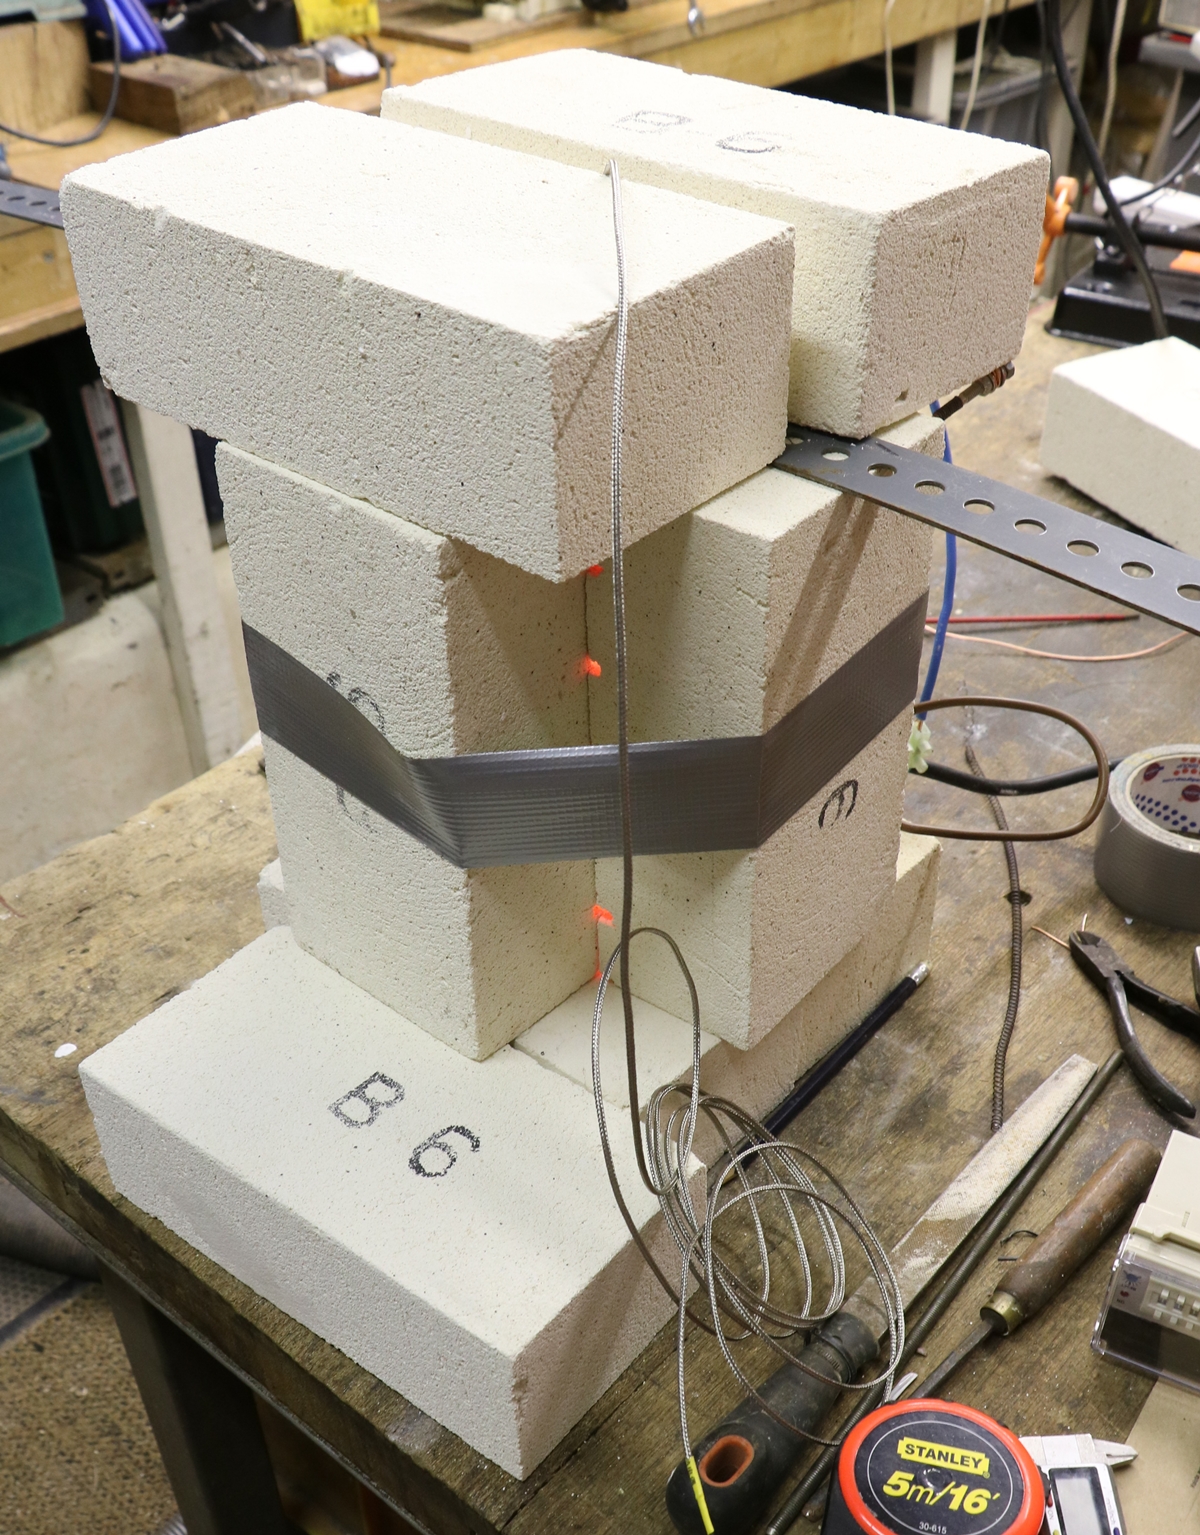
Lash up to test element etc
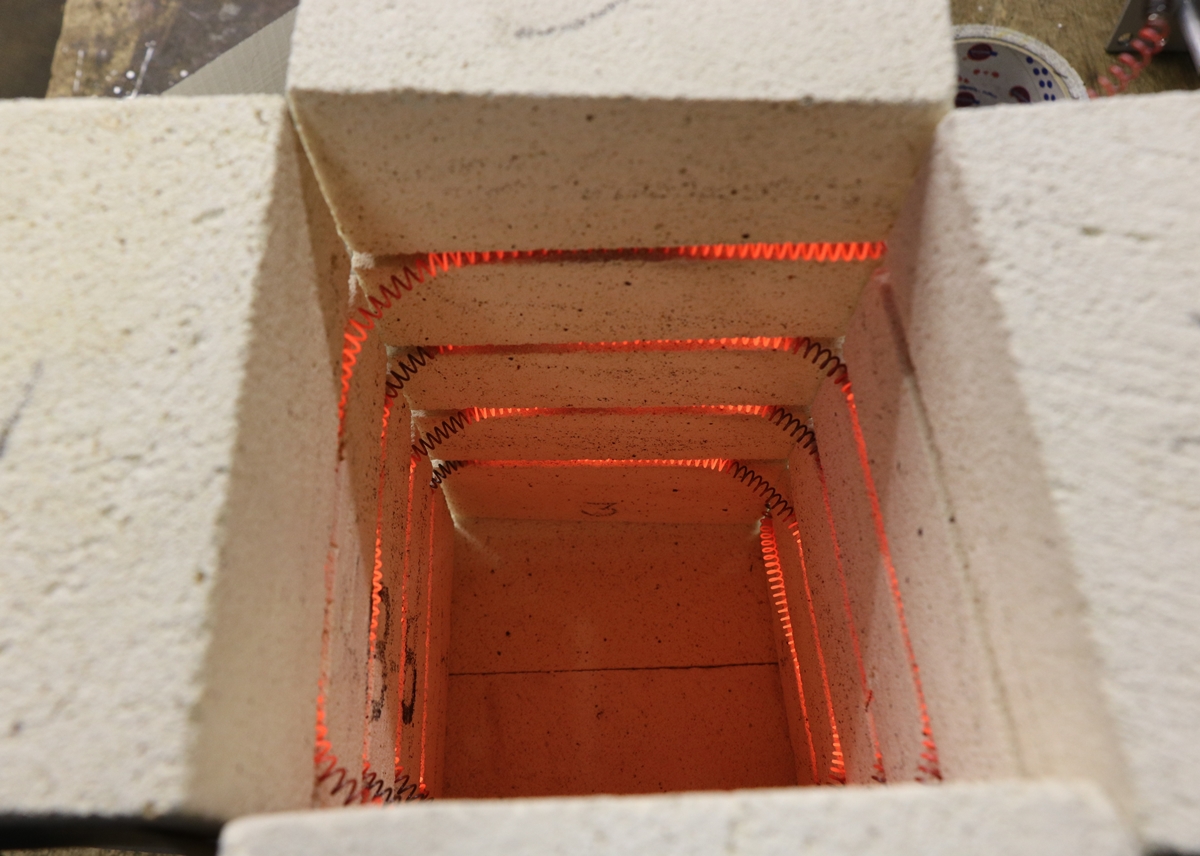
It’s a bit of a fiddle getting the element in place – it does sometimes pop out – make sure any metalwork you put inside the furnace is earthed, including the sheath of the thermocouple!
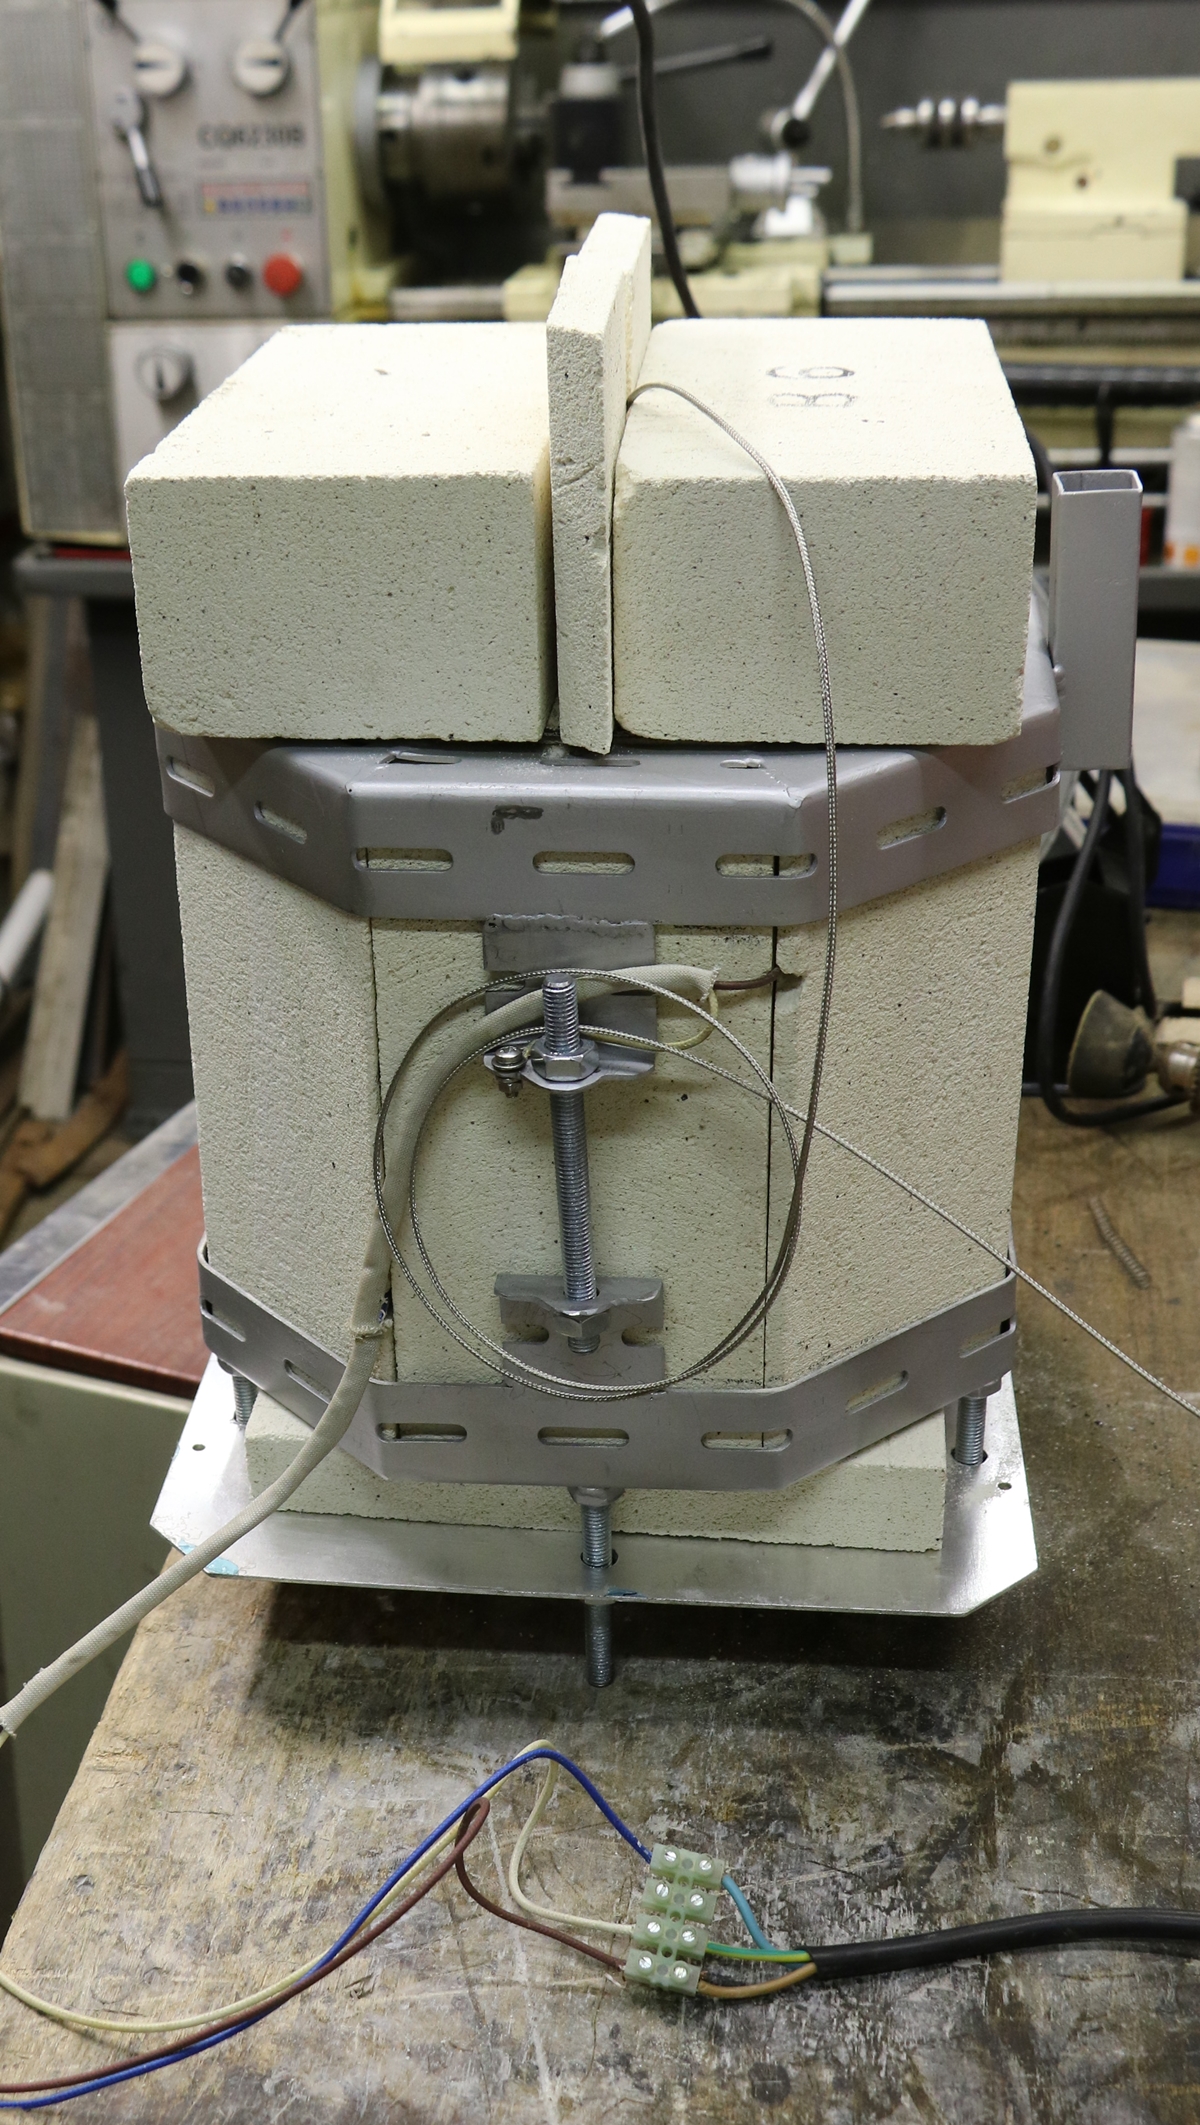
Frame fixed and wired for an uncontrolled test using a millivolt testmeter and a table of K type thermocouple output voltages to measure the temperature – it got up to almost 1100 degrees C in around 60 minutes before I switched it off.

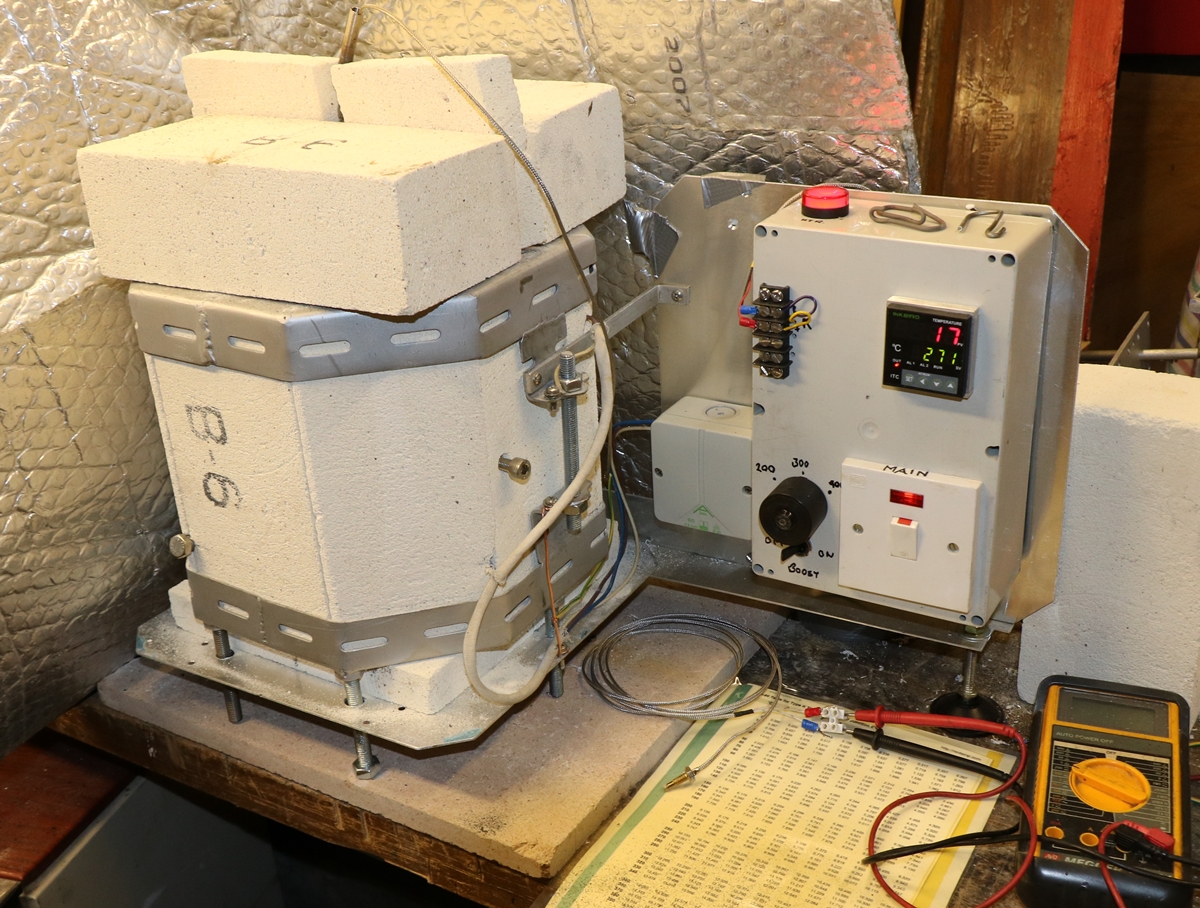
Mains switch, cooker control, PID controller and thermocouple terminals ( so I can check the voltage/temperature) mounted on a old plastic box on an aluminium panel – It is IMPERATIVE that everything is very firmly bonded to earth, including each bit of the frame, the aluminium back plate and floor plate, the thermocouple sheath and any metal in the furnace, and that the unit runs off a socket protected with a RCD ( residual Current Device) either in the socket or on the consumer unit. (mine comes via 2 RCDs – it has been tripped a couple of times when the element has come adrift while heating and touched a metal pot hanging in the furnace – the RCD saves the element as well as the operator!) Stick rigidly to the rule that you unplug the mains BEFORE touching the unit and if you are not confident about wiring get someone who is to cast an eye over it. ‘The control panel’ is all insulated so you can operate the switches and PID while it is plugged in, and also read the thermocouple voltage – as long as its sheath is firmly earthed!
One problem with heating iron & steel up above about 6-700 C is the scale that forms on the surface – it is difficult to remove, it is likely to spoil the finish and it changes the dimensions. There are two products that will sort this problem – stainless steel & titanium foil to wrap the part and crimp the edges to seal – some people recommend putting a small piece of some burnable material inside the package to burn up and consume any oxygen left inside – when I tried it I wrapped the part in a bit of brown paper and it worked fine. The other product is an anti oxidation paint called ATP 641 anti scale paint – both of these are available from Brownells – I’ve tried both, the paint is difficult to remove if you use it for annealing as it doesn’t come off very easily – I think it might be better for hardening, but I need to try sometime. Anyway I was pleased with the foil.
Here is the K type calibration table;-