The UK definition and legal requirements for a gun or pistol to be classed as INERT and thus exempt for requiring a firearms licence are contained in the Home Office document ; Guidance_on_Firearms_Licensing_Law_April_2016_v20
Basically you can make a reproduction of a gun or pistol and make it INERT and exempt provided that;-
1) it is based on a design that predates 1870 – so in practice nothing breech loading .
2) Is unable to be fired in any way.
3) Cannot be modified to fire with the skills and tools that a normal person may have for the construction and repair of his/her house – i.e with basic DIY skills and tools.
If you build a pistol or gun, that doesn’t meet all of these 3 requirements you will, if caught with it in the UK, face a long MANDATORY prison sentence – there is no effective defence and the police are really hot on this.
In building this pistol I inserted and welded a length of 1/2 hardened steel rod into the breechblock that would prevent the chamber from being loaded, and would be too difficult to drill out with normal DIY tools. To be on the safe side, I welded the breech plug into the barrel so it can’t be unscrewed.
Note – although I’ve referred to this pistol as an inert pistol, it is, technically still an antique as its based on an original barrel and still has the original proof marks on the underside, and indeed some of the furniture is also original, so its stricly a restoration and reconstruction project, but I nevertheless made sure it complies with the requirements for being legally INERT …….
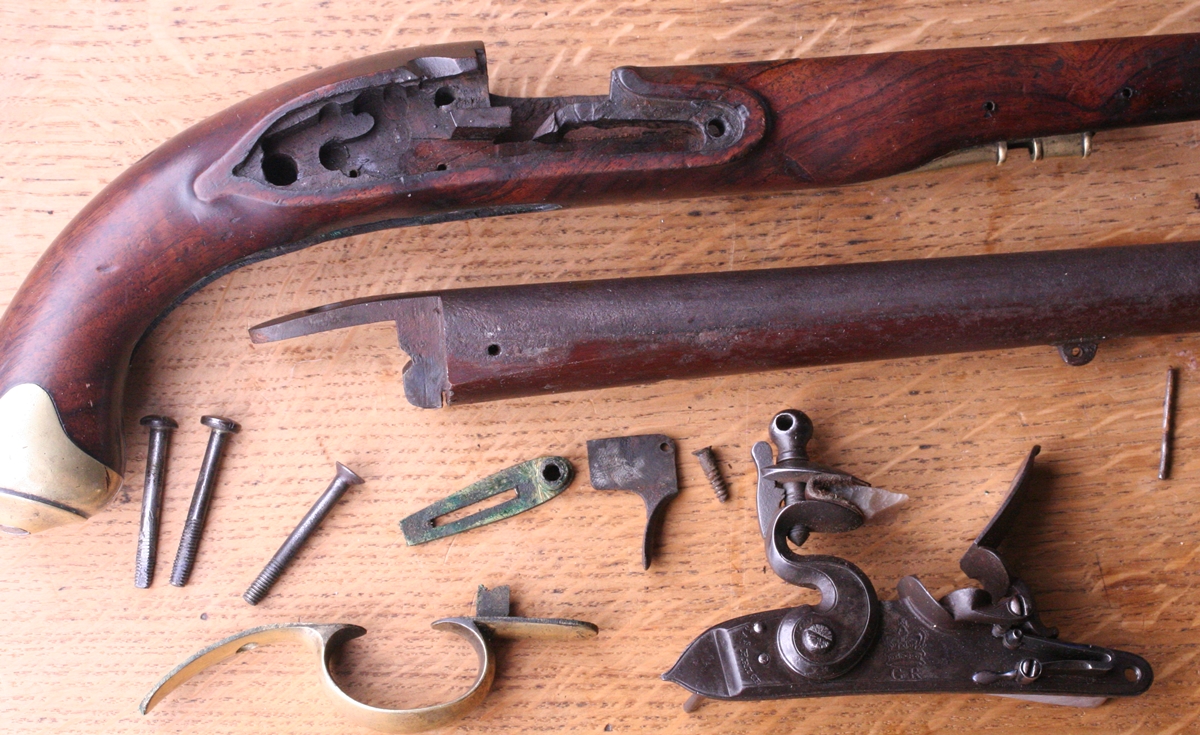
I need a decent looking (antique) flintlock that isn’t shootable – i.e. it has to be without a touchhole and not easily convertible to fire – to take into schools as a demonstration for historical topics. As long as it can’t be fired I would feel OK flashing off a pinch of powder as a demonstration, but while I’m happy to take an antique into a class and let the kids handle it, I draw the line at flashing one off. I nearly bought an Inert pistol from Kranks but then realised I had just made a lock – the Dolep lock ( see post) – that I didn’t intend to use seriously, and had a roughly shaped pistol stock blank that wasn’t quite right for a decent repro. So I have gathered up a few parts to see what I can do. I found a single old and very rusty twist barrel from a double percussion gun and removed the breech plug (called the ‘hut’). I have always been astonished that however old and rusty a gun is, once the initial joint of the hut in the barrel is broken, the thread will turn out to be in excellent shape………
This one was no exception – first check with a probe that the barrel is unloaded, then lightly clamp the barrel in a big vice and heat the bottom two inches near the hut until it will just about scorch a matchstick on contact. Take the barrel out of the vice and dip just the base of the hut in cold water for a second or two to set up a thermal gradient across the joint, then lock the barrel firmly in the vice and apply a jerking turn to a long hut spanner ( a bar of 2 x 1/4 mild steel 24 inches long with the appropriate sized slot cut in it) – it should come undone, if not heat and repeat until it does – if you don’t intend to refinish the barrel take care not to heat too much, and be very careful how you clamp the barrel in the jaws of the vice or you will mark the barrel. If its a double gun take extra care, and think whether you actually need the huts out as you may split the barrels apart and its a beastly job resoldering them!.. So I need to reshape the hut like on old style breech plug with integral tang welded on using an angle grinder and a 1 m.m. cutting disk. I’ve cut off a suitable length of barrel, and I’ll give it the electrolytic derust treatment to see how much I need to do the get a presentable finish.
Making a pistol or gun replica needs to follow a strict sequence, particularly if you don’t have a scale plan or exact master to work to;-
1 cut the stock blank well oversize to your desired shape and make sure that the top, bottom and side surfaces are flat and at right angles, and mark the barrel centre line – cut about 3 mm above this line and make sure this surface is flat and true.
2, Inset the barrel and false breech so that the centre of the barrel is at your marked line.
3 You can now fix the position of the lock, either from the nipple for a percussion, or the touchole or its notional position for a flintlock, and inlet the lock. At this point you may want to trim slim off any surplus wood from the profile to get depth of the stock in the lock area correct, but keep the two sides intact and parallel.
4 Having got the barrel and lock in their correct positions, you can now position the trigger blade to contact the sear, and make a slot for it deep enough to allow it to operate the sear. You can then inlet the trigger plate.
5 With the trigger plate recess cut, the hole for the ‘nail’ that holds the breech tang to the trigger plate needs to be carefully positioned so that the head of the ‘nail’ is in a sensible position on the tang – mine is about half way along. Normally the nail will go in so the head lies on the curved surface of the tang, so may go at a slight angle through the stock, but in any event it needs to emerge at the bottom just ahead of the trigger slot. The boss for the tang nail can then be made and silver soldered onto the trigger plate at more or less the correct angle and then drilled for tapping while in place to get the correct angle. It will help if the tapping drill has been used to make the initial tang nail hole. Again if you have all surfaces well squared it will be easier to drill the nail hole in the right orientation.
6 Once that is done, the trigger can have its pivot pin installed (assuming its like mine with the trigger hung on a pin directly in t he wood) Ensure that trigger contacts the sear and has sufficient movement before deciding on the pivot position. Drill right through the stock – at this point you really do depend on having the two sides of the stock parallel and true!
7 Once the trigger is installed you can then inlet the trigger guard – don’t drill the hole for the pin holding it in at this stage.
8 Next step is to mill the external groove for the ramrod, using an 8 mm ball end cutter, keeping the cut parallel to the barrel midline. Using the resulting groove as a guide, a 7 mm home made ‘D’ drill was used to extend the ramrod hole into the stock as far as is necessary to accommodate a ramrod.
9 The ramrod pipes can now be inlet into the underside of the stock to line up with the groove and the hole. Slots need to be cut right through between the barrel groove and the ramrod groove to accommodate the tabs on the pipes, and a slot cut for the barrel loop that holds the muzzle end of the barrel. Drill holes in the stock for these pins, but do not drill the barrel tab or the tabs on the pipes or on the trigger guard for the pins until the gun is almost finished.
10 The lock nails take their position from the lock, so mark and drill them from inside the lock pocket. It is quite common to find that a shallow groove needs to be filed in the underside of the barrel to accommodate the front nail. You may find, as I did that the rear lock pin goes through the lump on the back of the breech block.
11 Once you have the two lock nail holes drilled you can make the sideplate and inlet it – you may need to inlet it slightly below the surface of the stock so that you can sand of any dirty or marked wood.
more to come….
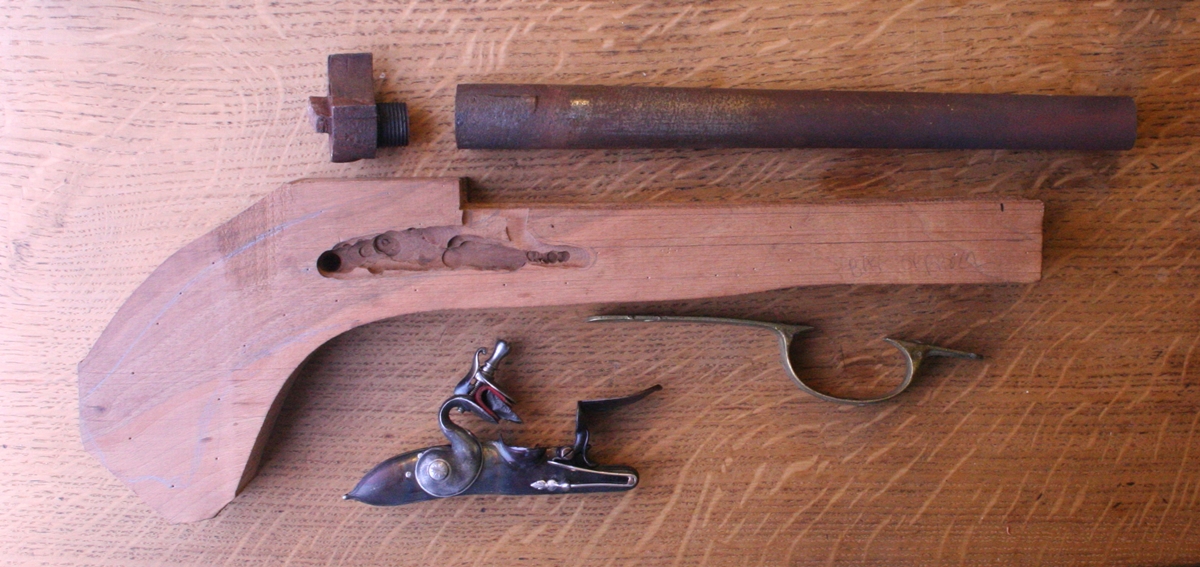
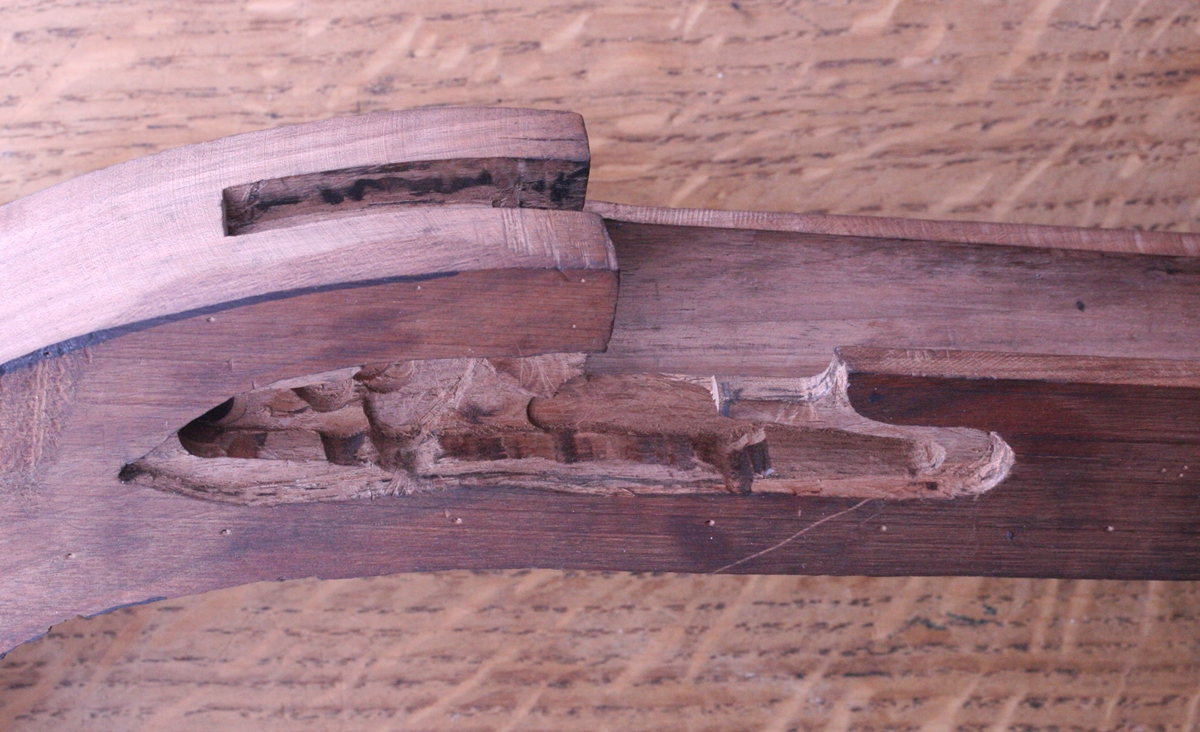
The lock pocket was roughed out for another lock, and the trigger guard is from a long gun – I got a brass butt cap and a ramrod pipe from Dick after the photo was taken, so I think I have the parts I need – I can make a trigger plate, and I can probably find or make a trigger. So a new project is born…….
The old barrel was the left hand barrel of a double percussion 12 bore, so the breech plug wasn’t directly usable. Since this is a quick project I opted for a plug breech with the tang being part of the breech plug, and attacked the old breechplug with an angle grinder and a 1 m.m. cutting disk. The breech plug was fairly hard, so the job took a couple of disks, but with a bit of filing it looks OK – I have to admit that in the heat of the moment it’s all done by eye but I hope it won’t spoil the result. My derusting revealed that it is a twist barrel, so the finished pistol is going to be a strange mixture of periods!
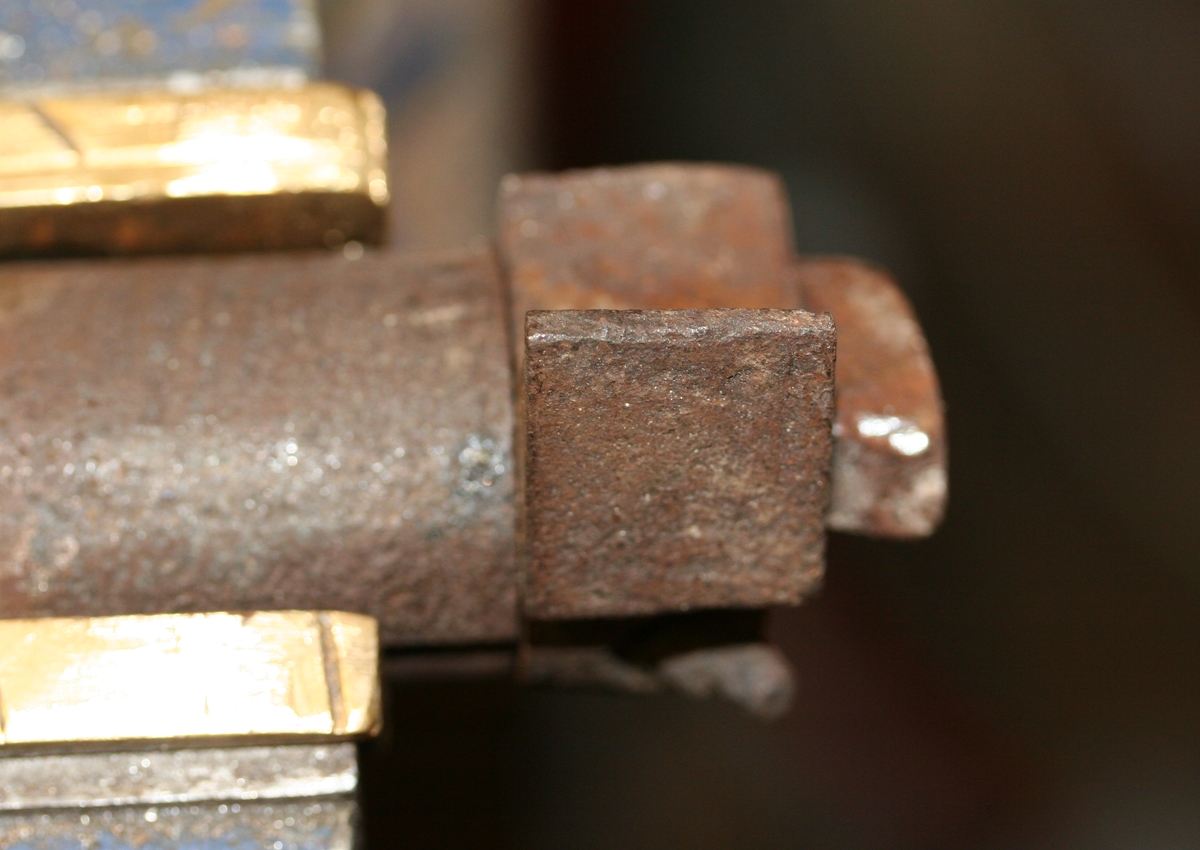
The original left hand breech plug
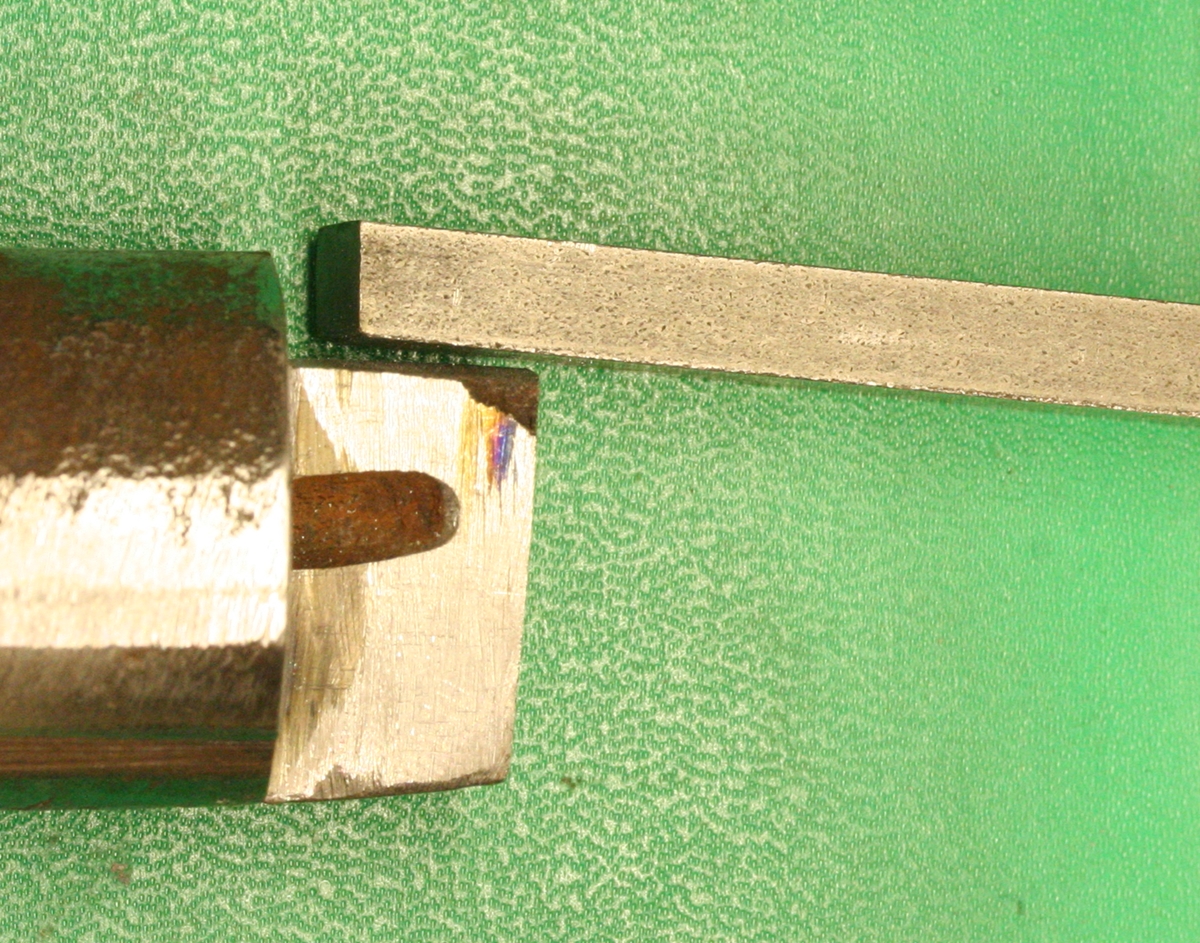
Breech plug cut down ready to weld on a piece of 12 x 6 m.m. bar for the tang – I need to check the angle here…. The powder channel from the nipple to the chamber is exposed – I’ll put a bit of rod in the hole and weld it up carefully . I can’t decide whether to remove the breech plug to weld the tang, or whether just to do it in situ as it is……. probably in-situ as it will be easier to get the alignment right – in fact I’ll go and do it now!
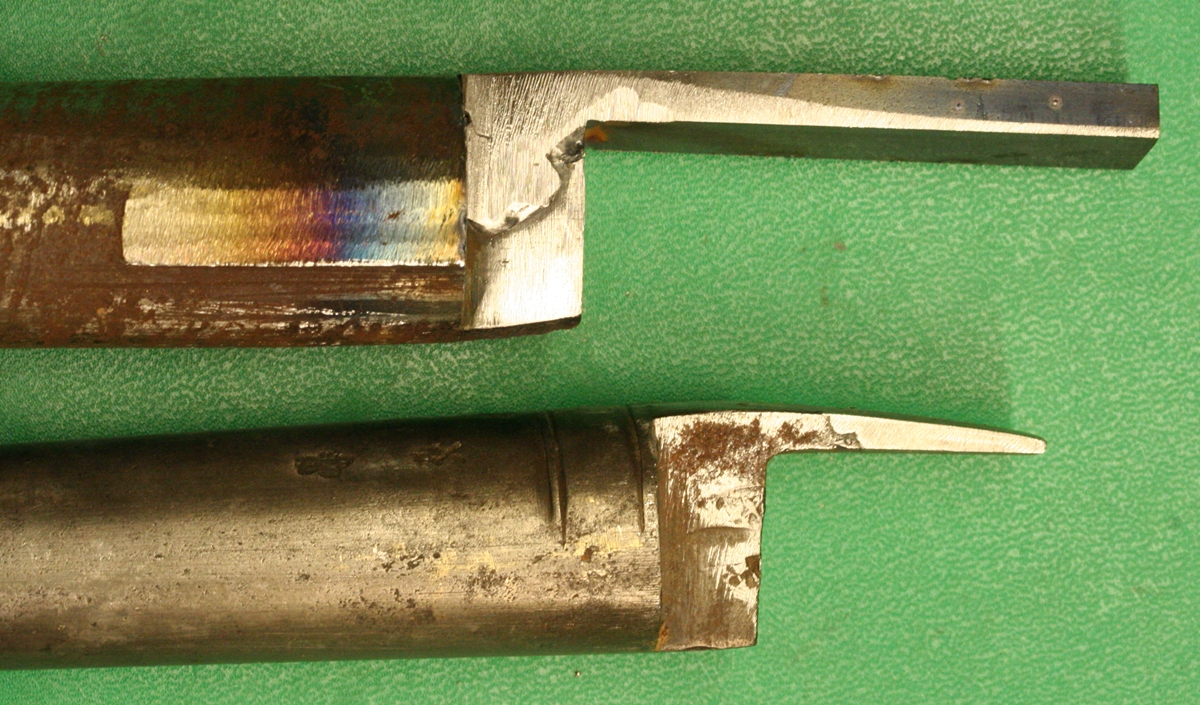
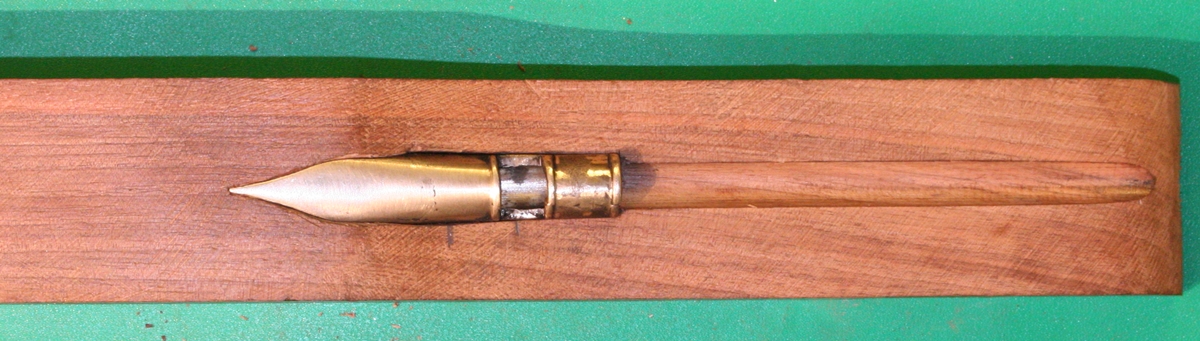
Rough welded tang alongside an original military barrel I’m using as a model. I’ll clean it up when I’m ready to inlet it and know the curvature required to fit the stock….
The lock isn’t in quite the right place, but the barrel needs to go down at least 3 mm to get the middle of the barrel just about 1 to 1.5 mm above the top of the pan.

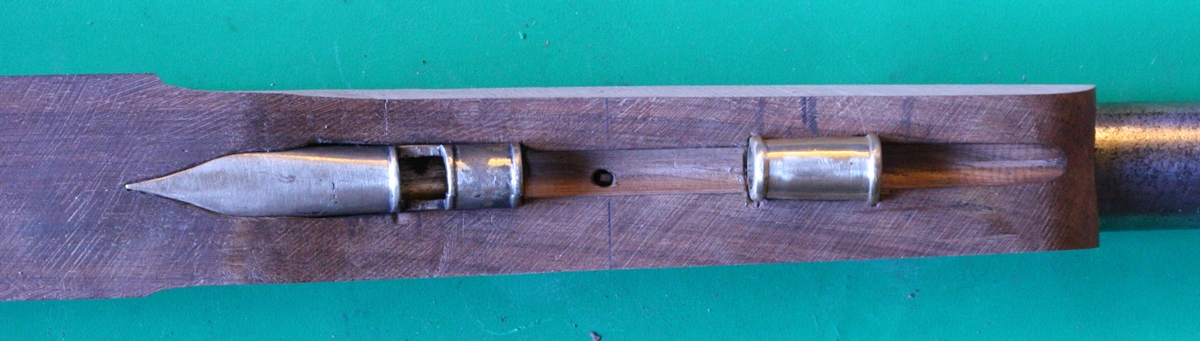
The grooves were initially routed square, but have been shaped with the only large gouge I’ve got, plus a lot of sanding with a bit of 80 grit wrapped round a section of old barrel , using the taper of the barrel to ensure that the sanding has the right curvature.
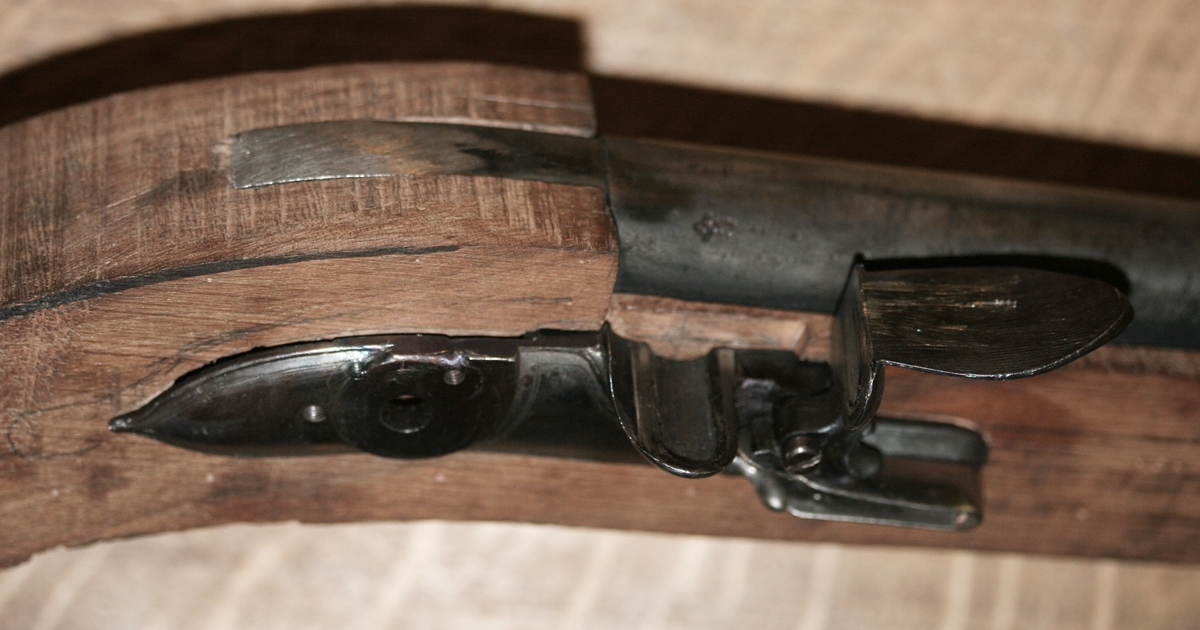
The lock is in the correct position as defined by my earlier attempts at cutting a pocket for a now forgotten lock. The barrel is getting there, maybe a millimeter or so more inletting – the horizontal pencil line above the pan marks the level of the touchhole, which needs to be at the midpoint of the barrel depth. (except that as an inert gun, there will be no real touchhole, just a mark…) The tang is shaped and trimmed – when I’ve got the stock a bit further on I’ll pit a couple of lines across the end of the tang…
Inlet for barrel and lock more or less complete.
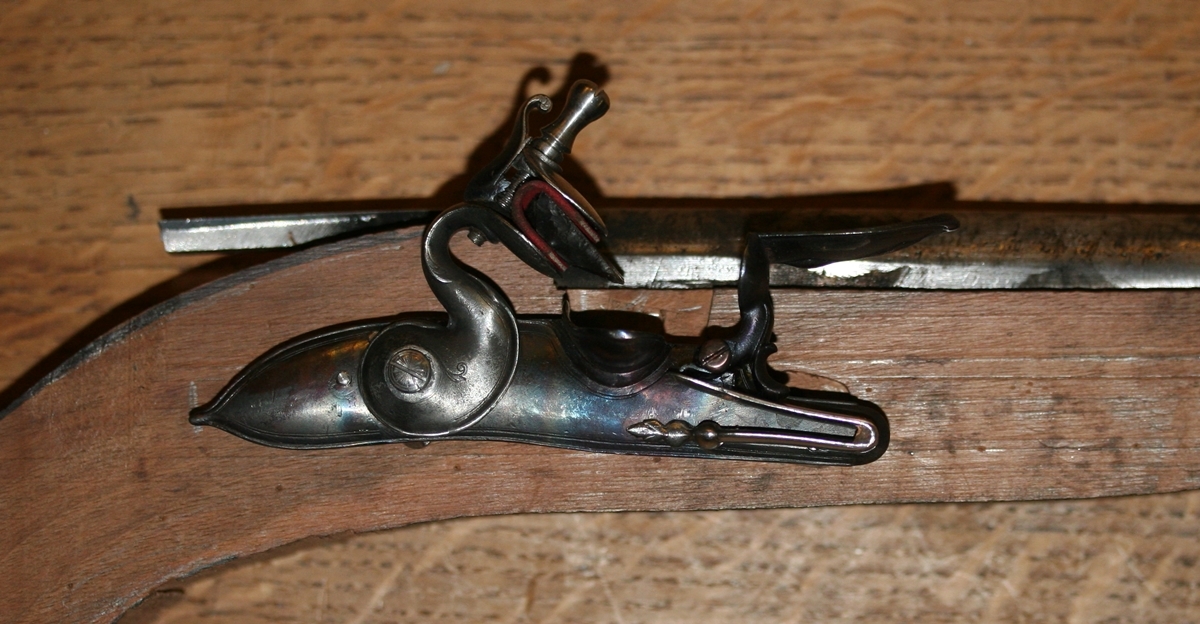
This is the original service flintlock by Jas. Price that is the nearest I’ve got to the gun I’m attempting to build, so I’ve stripped it down to get a pattern for the trigger plate and trigger etc. It uncovere a few repairs needed – the loop holding the pin for fixing the trigger guard is missing – cracked off, and there is some broken wood near the muzzle and a small crack by the lock. Another restoration job – probably rebrown the barrel too as the underside of it looks very good!
On the Inert pistol, I spent some time making a trigger out of 2 mm sheet mild steel, cutting a profile and a 6 mm wide strip for the face and welding it all together. I also started the trigger plate from brass sheet. Dick suggested a good way of reshaping the trigger guard I have, and silver soldering it in an inconspicuous way, so I’ll have a go at that. I need to sort out the positions of the trigger, trigger pin, trigger plate, tang screw and trigger guard. The trigger guard will also need a tab silver soldered on at the front to pin it to the stock.
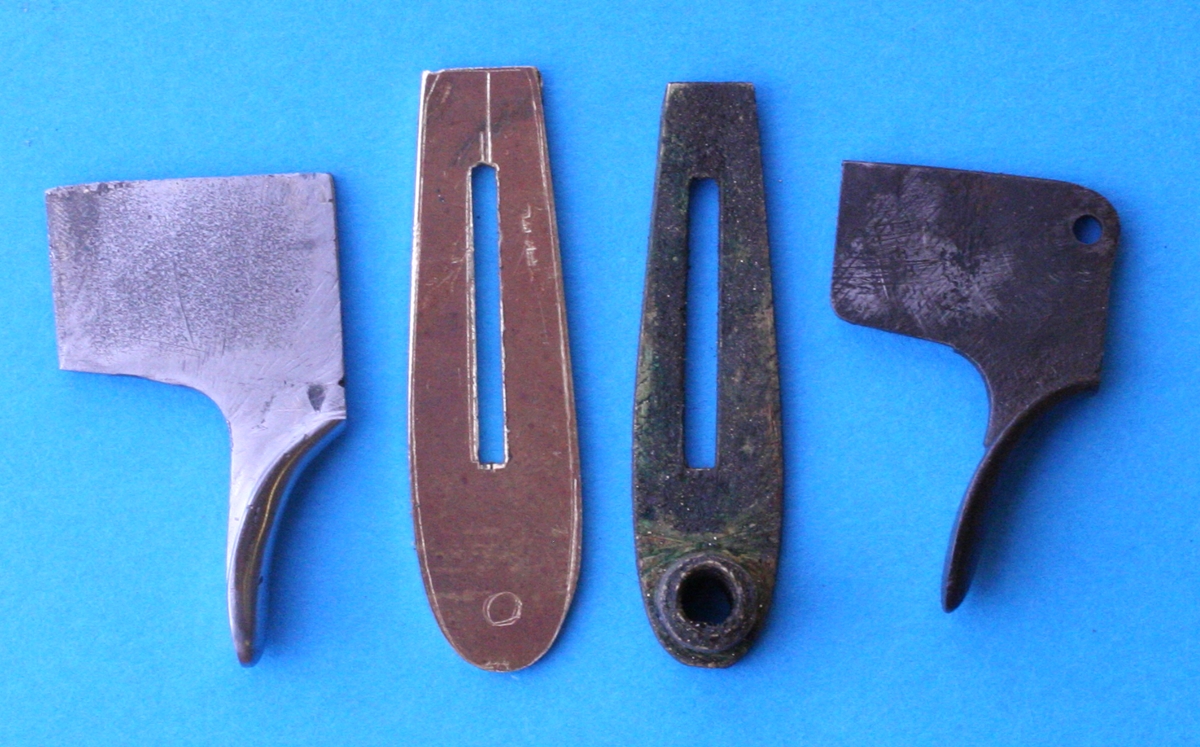
Welded & filed trigger & oversize plate with the patterns – a bit more work needed!
The inert pistol got some attention this evening – I put the hole for the breech tang in the tang and through the stock, made a the ‘nail’ – 10 x 24 UNC seemed about right – and made and silver soldered the tapped lug for it on the trigger plate and milled a 10mm hole for the lug – it all fits together. I did some refining of the shape of the stock and butt – at the moment I’m keeping it all square so I’m just copying the profile and not rounding anything. I’ve started to inlet the trigger guard, and have now silver soldered the tag to pin it into the stock. When that is done, I’ll inlet the pipe for the ramrod and start to fit the butt cap, although of course that will mean that I have to start rounding everything and it will begin to look like a pistol… photos in the morning sometime – first I have to go off to get a new steering column for my Land Cruiser which has been out of action for the last month….
29th June – Busy with my school science club most of the day, but I did cut the slot for the trigger and inlet the trigger plate ( without the lug for the tang nail yet), and this evening I managed to modify the musket trigger guard to match my pattern pistol one. See the Inert Pistol post for pictures

(the trigger plate and nail shown are from the Jas Price pistol)
I now have to position the tang ‘nail’ and inlet my trigger plate before silver soldering the boss onto the trigger plate at the right angle. I’ll start by milling a slot for the trigger in the stock, then drill and countersink the tang. All the milling and drilling must be exactly vertical – I use my little Seig X2 mill, which is ideal for small jobs in wood although it struggles in steel.
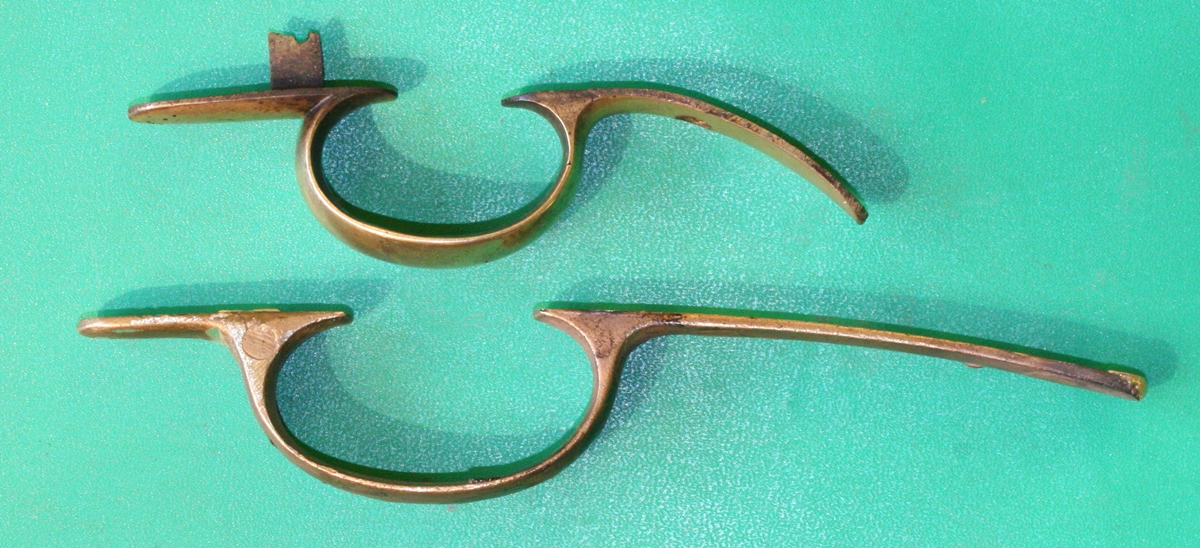
The pattern trigger guard and, below, the casting to be modified. It needs the bow shortened by cutting out a bit and silver soldering it back up.
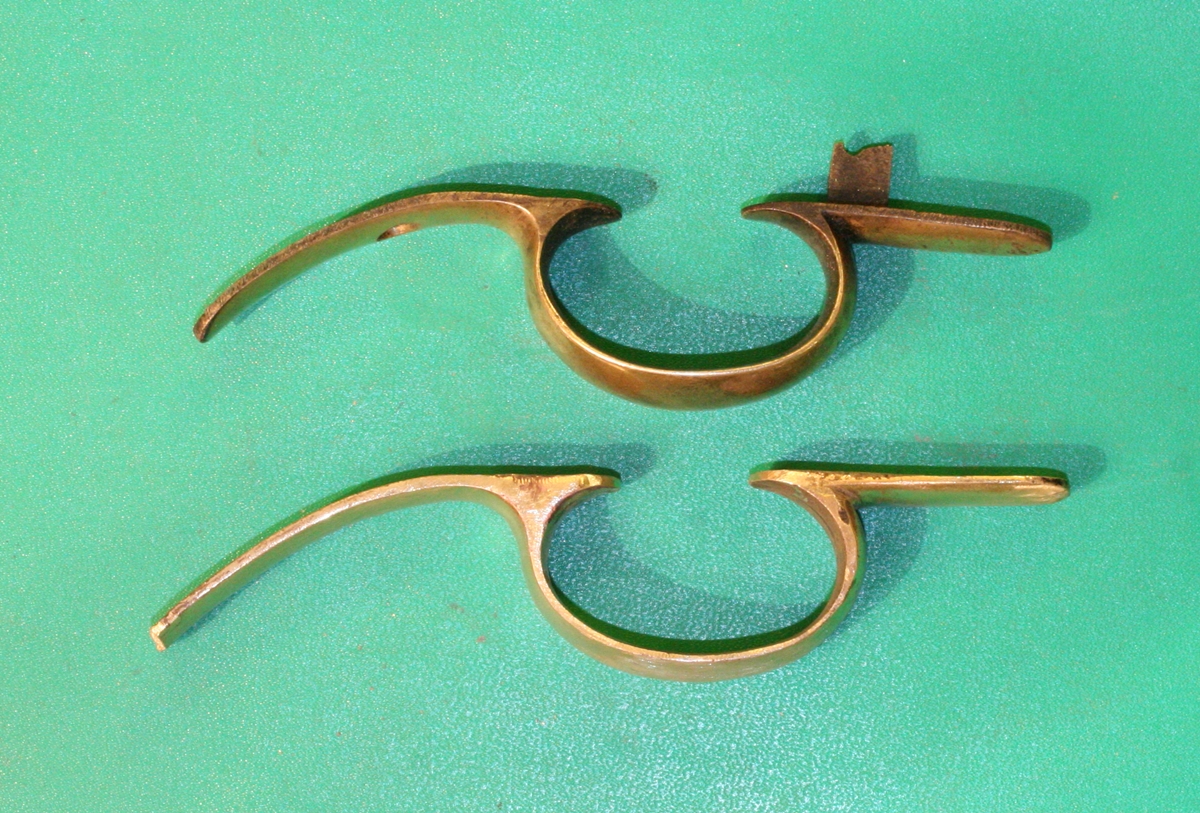
Needs a little slimming down as its a bit heavier than the original – also needs the tag fitted for pinning it into the stock- but I am pleased – its better than I expected and the silver solder joint is almost invisible at the back of the bow.
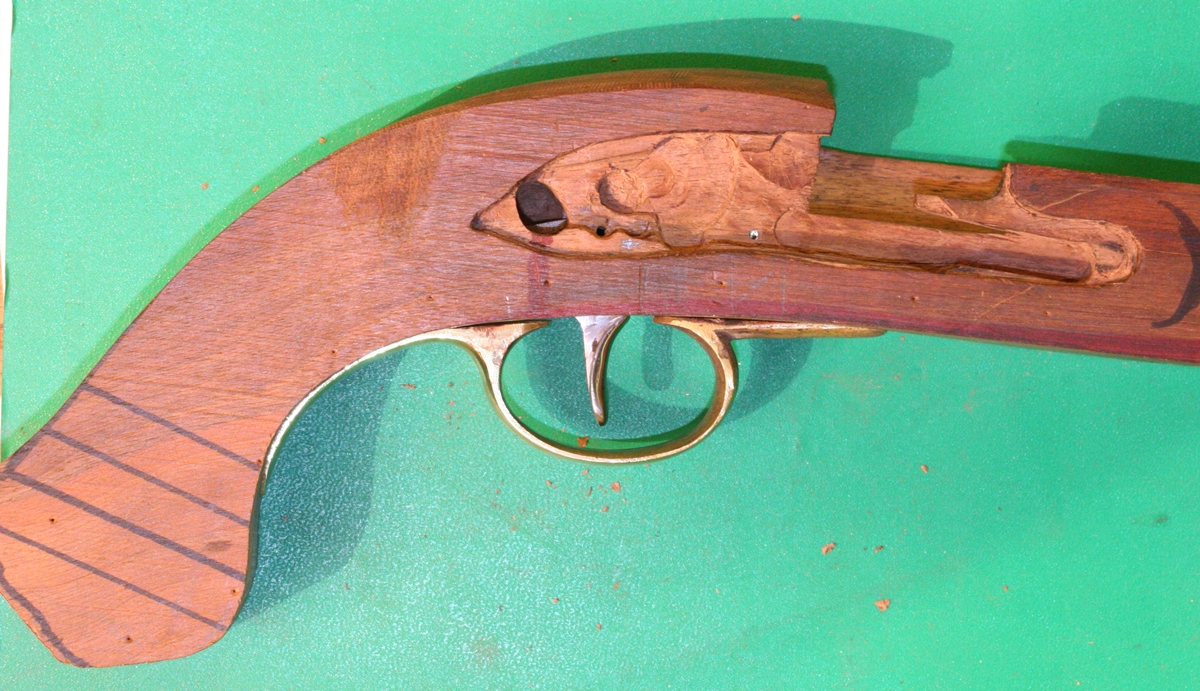
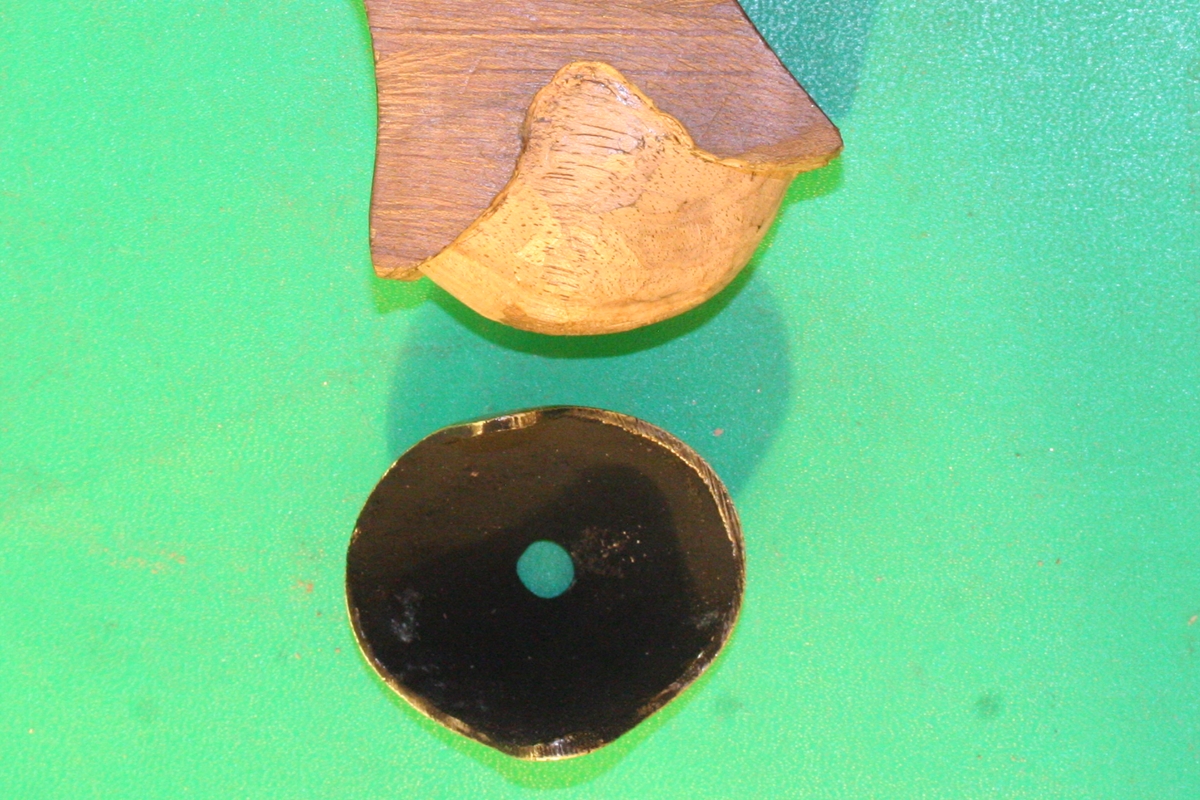
More work on the inert pistol – I had to add a bit to the tag on the trigger guard as it wasn’t long enough to let me put the pin holding it in its correct location inside the lock opening. I tidied up the inletting of the trigger guard etc. and drilled holes for the in to act as a pivot for the trigger and drilled the trigger pivot hole ( miraculously in the right place!) . I routed a groove for the ramrod with an 8 mm ball end cutter, and drilled the ramrod hole with a length of 7 mm steel shaft from an old printer that I’d ground into a very simple ‘D’ cutter – I’d been lazy and only ground about 15 mm of flat on it so I had to keep taking the drill out to empty the dust – still it did drill a straight and clean hole. Then I inletted the pipe where the hole emerges from the stock – I accidentally mashed a bit of the edge, so I may need to stick a bit of wood on th build it up. That leaves one more pipe to make and inlet, and I still have to make the side plate from brass sheet – quite a lot of work with the fretsaw – and drill the lock for the two side nails – I’ll need to get the hole spacing right on the sideplate. Then there is the butt cap……….
I get a bit confused by the oblique grain – things that I know are straight just look slightly angled!
I’ve now made the extra ramrod pipe and put a loop on the barrel so that I can drill for the pins through the stock while it is still square – here are the parts I’ve made….
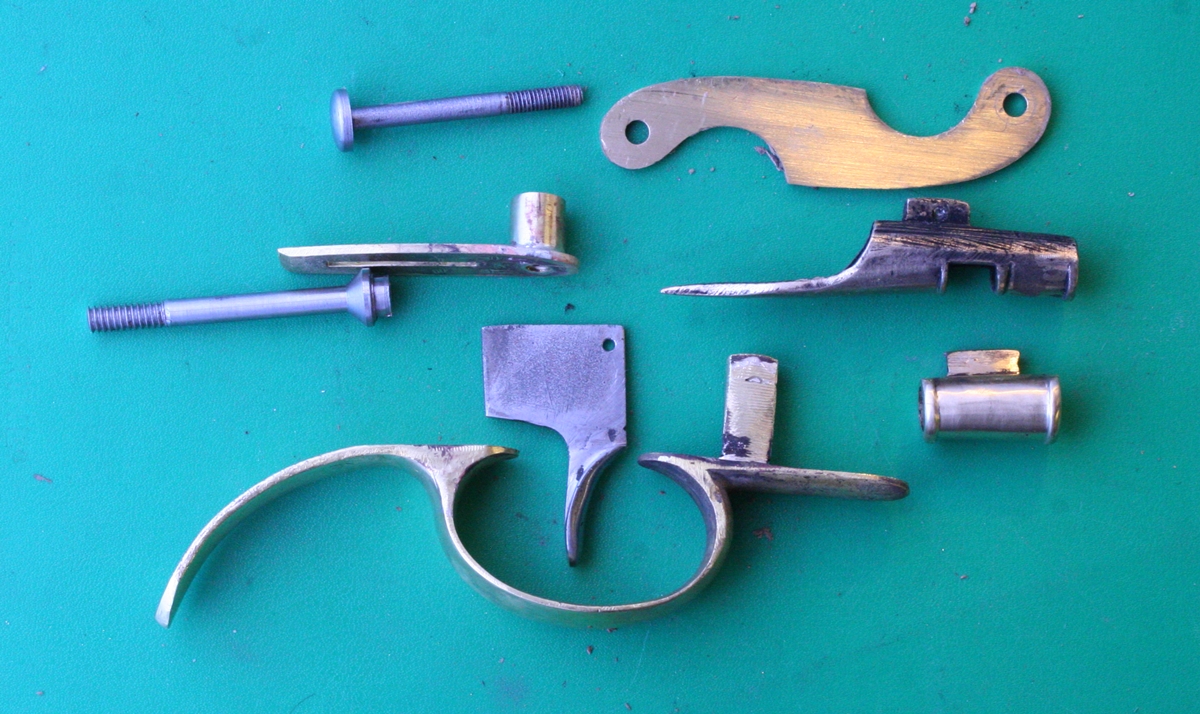
I sanded the sides off on the disk sander – you can see I will have to be careful to even up the angles when I finish it!
The parts won’t be drilled for the pins that hold them until I’ve more or less finished shaping the stock – to make sure that it all fits perfectly.

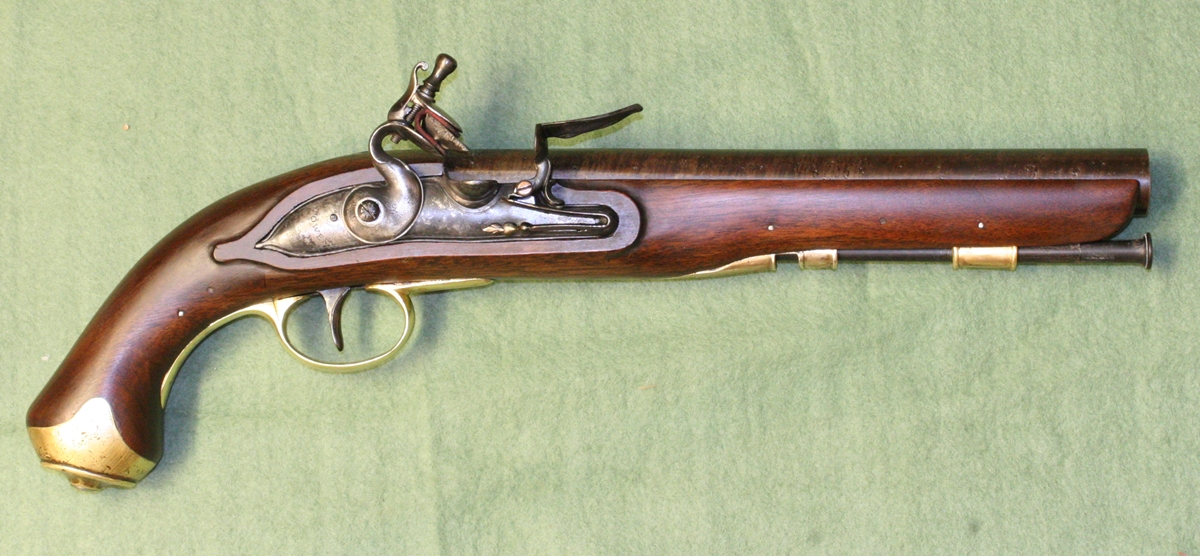
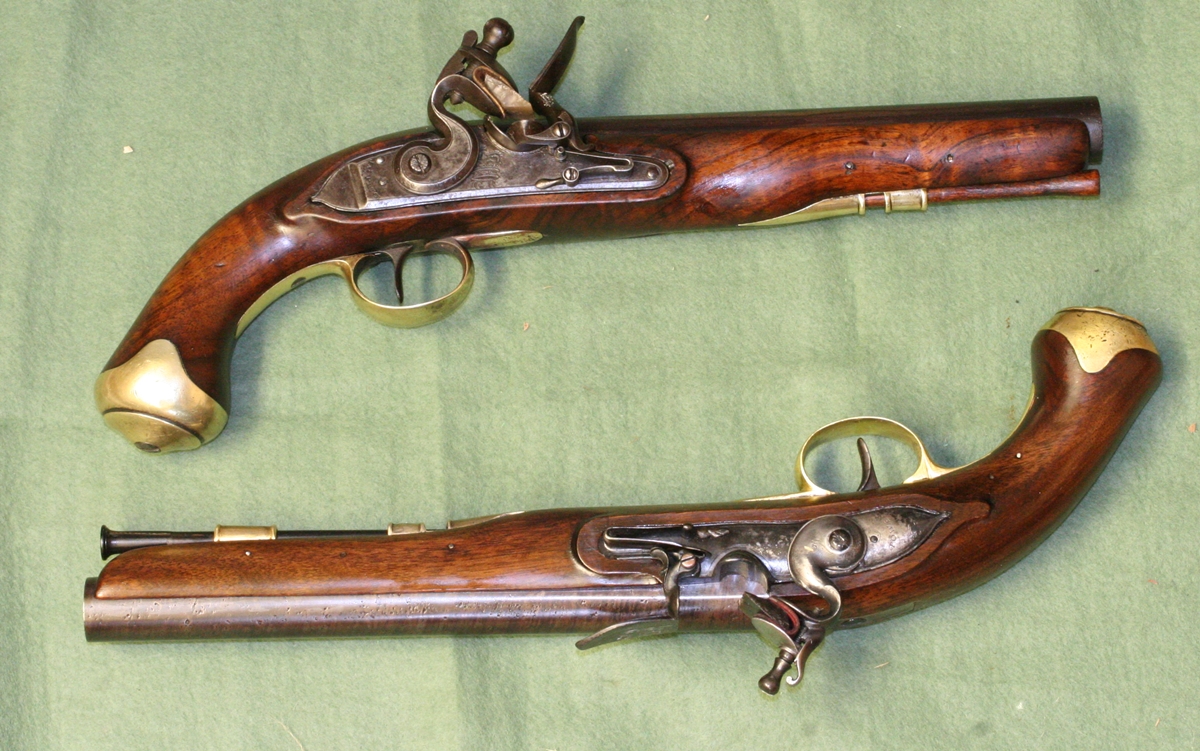
Jas. Price Officer’s pistol at top, Inert pistol finished below