Here is a new project;- I need a very low profile engraving vice for my portable kit, and it would probably make life more comfortable in the workshop – the height of my engraver’s block/ball, plus the working distance of the microscope plus the height from objective to eyepiece is uncomfortably close to the distance between my lap and my eye when sitting. So I have a project to build a thin vice using only 8mm x 50 mm bright steel bar, an angle grinder, a pedestal drill and some M6 screws and an M6 tap plus an M10 tap and an old M10 bolt for the fundamentals, plus a very small amount of TIG welding on the jaws (could be screwed). I have cheated in that I put the half finished vice platform in the lathe to get it shaped – cosmetic only – I could have done it with the angle grinder given more time and patience than I had – plus I ran out of cutting disks for the grinder!
To read more click here……
I welded three bars together to make the base but of course it distorted so I had to skim it – it would have been much better & quicker to put the bars across the base and screw the whole thing together using 6 screws each side through everything! When I’ve got the jaws sorted I’ll cast part of a ball in resin or urethane so that I can get some tilt – it won’t be as much as a ‘proper’ engraver’s ball, but I seldom use the full range. I don’t use much in the way of fancy jaws as I try to fix parts onto blocks of wood if I can find holes for screws, or use jeweller’s setting wax for small parts – Araldite works too – a bit of heat gets rid of it, I’m told putting it in the freezer is just as effective – that sounds a warning bell to me…. For holding regular shaped metal I just put a fairly heavyweight lead sheet on the jaws.
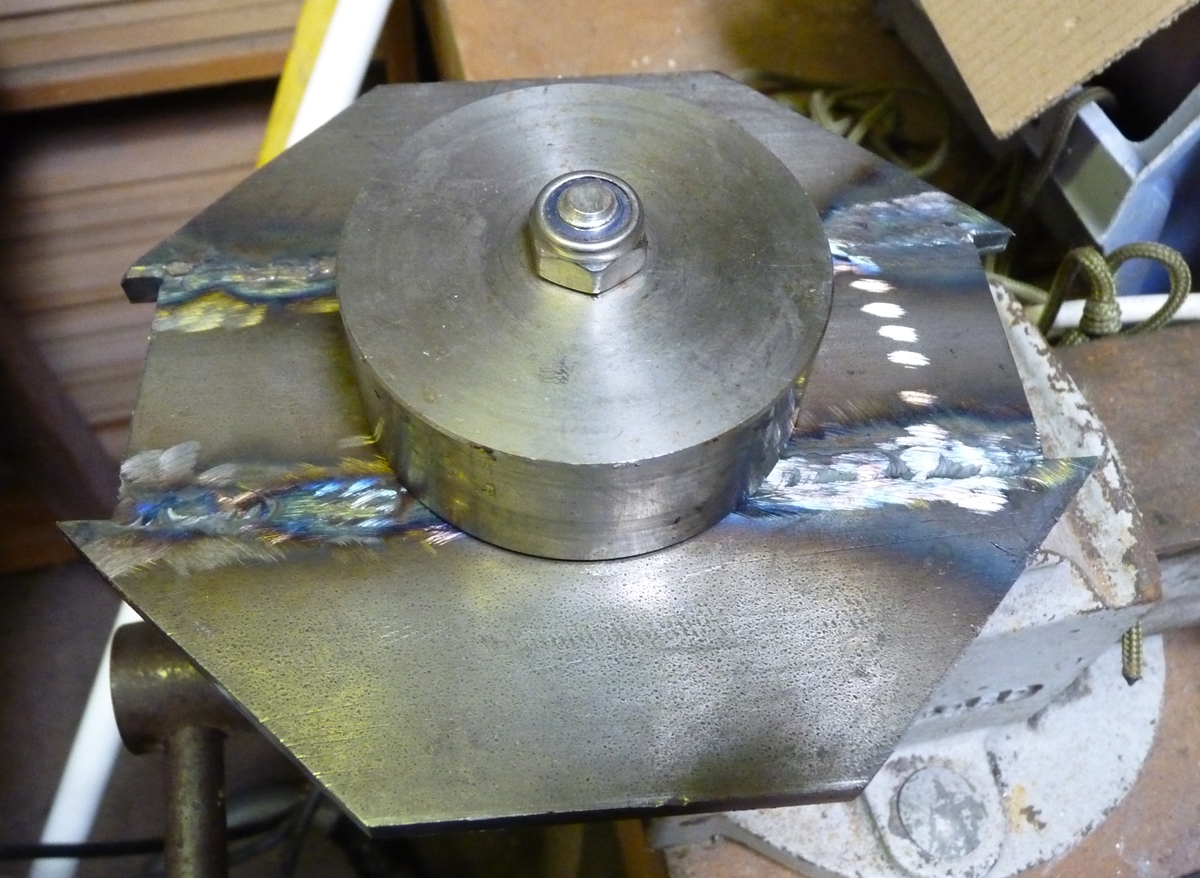
Three strips welded ( a mistake) bolted to a hub for turning.
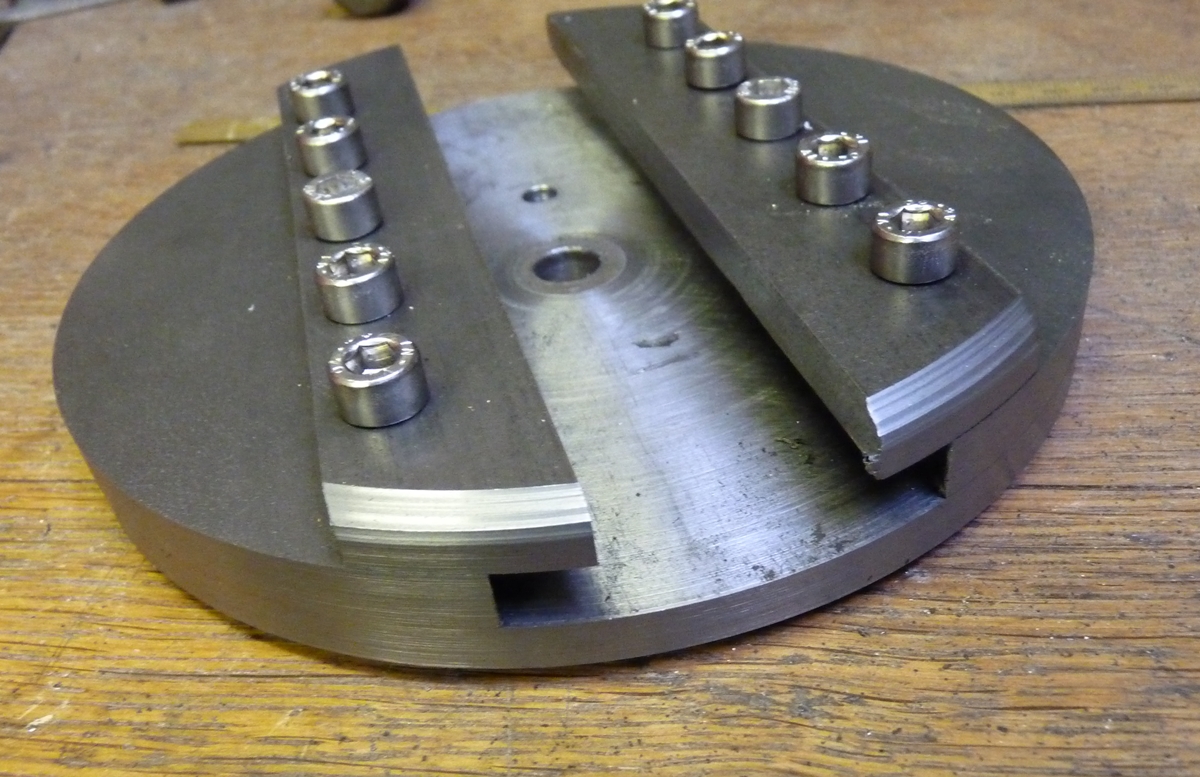
The base of the vice – the M 6 cap screws have been replaced with countersunk screws. When its finished it will have to have some sort of shroud to I can hold it comfortably in my left hand while engraving. The base is about 150mm diameter.

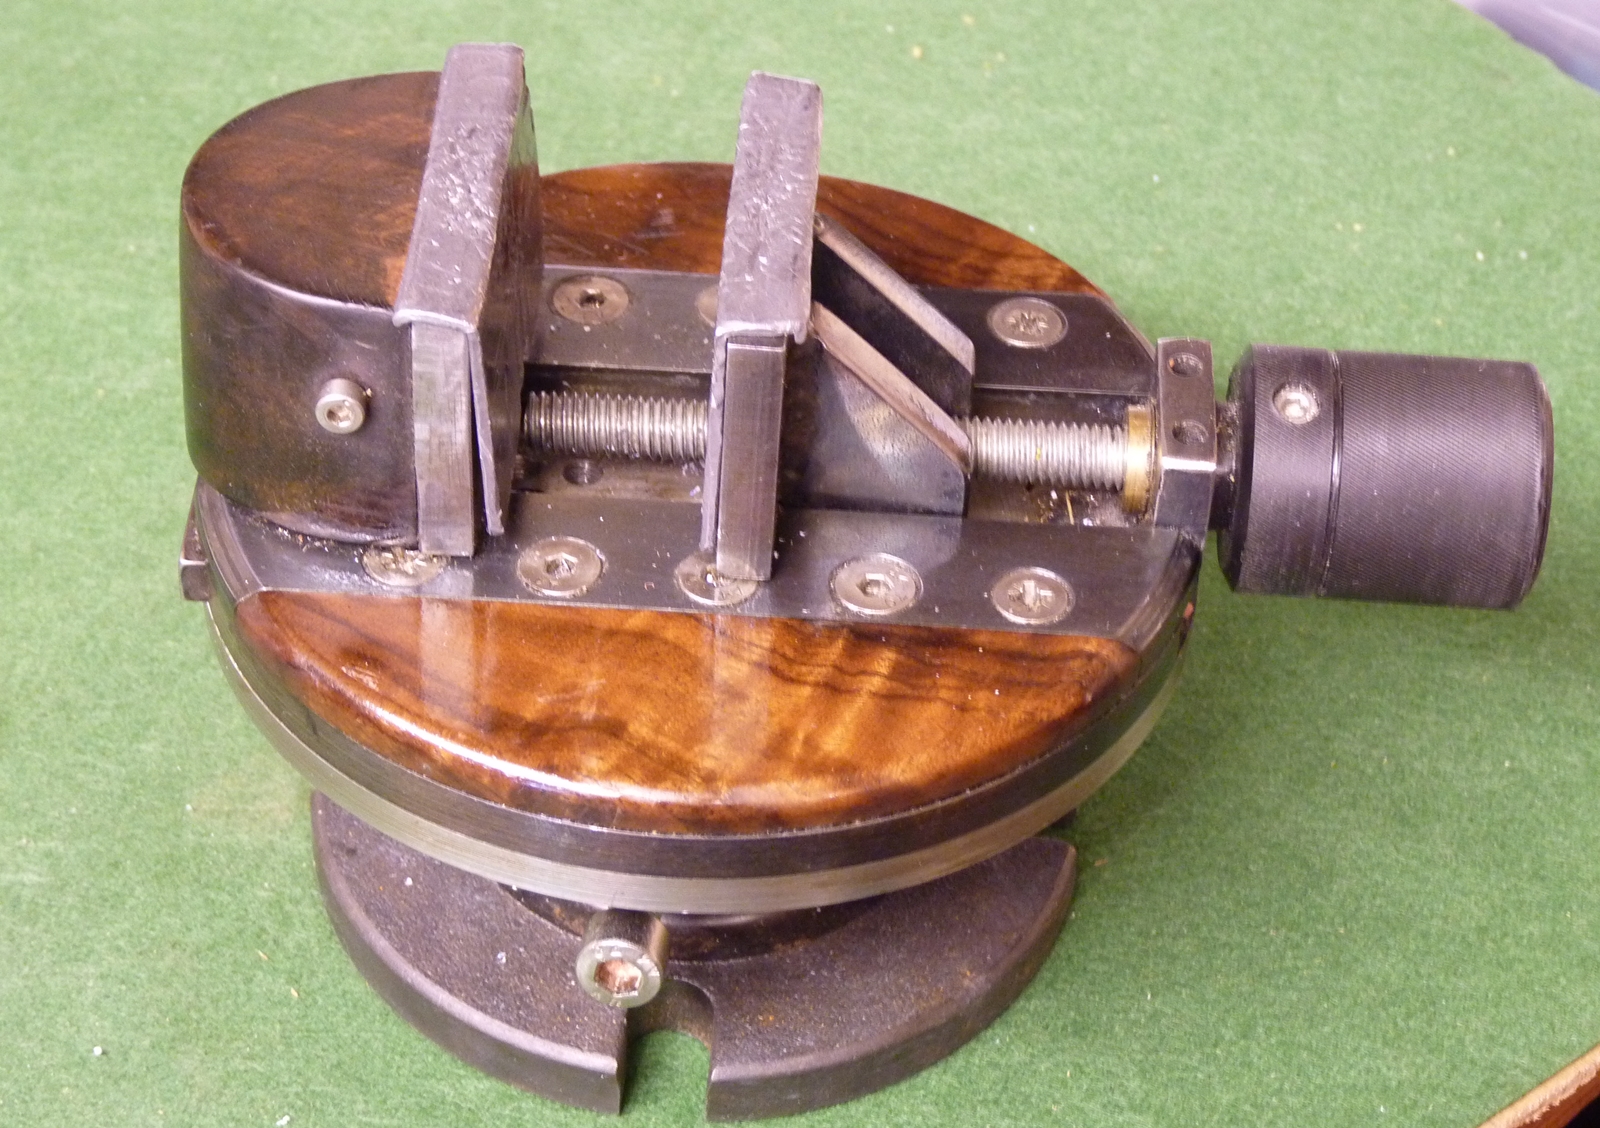
The back jaw is fixed by 2 M5 screws to suit the opening required – it has about 30 mm of movement in about 5 mm increments – the main jaw has about 30mm of movement by the screw thread ( the screw works ‘backwards’ !) I welded the jaws with a slight angle so they finished leaning slightly inward to counteract the movement in the slide etc – they now seem to be parallel in the vertical plane when tight which is as it should be – there is a little movement in the horizontal plane to take up minor irregularities.
Since the jaw slides are the same thickness as the sides of the track I put a thin layer of paper under the top strip to give a little clearance – you can see it in the holes that don’t have screws yet – I could have filed the jaw slides but this way I can adjust it.
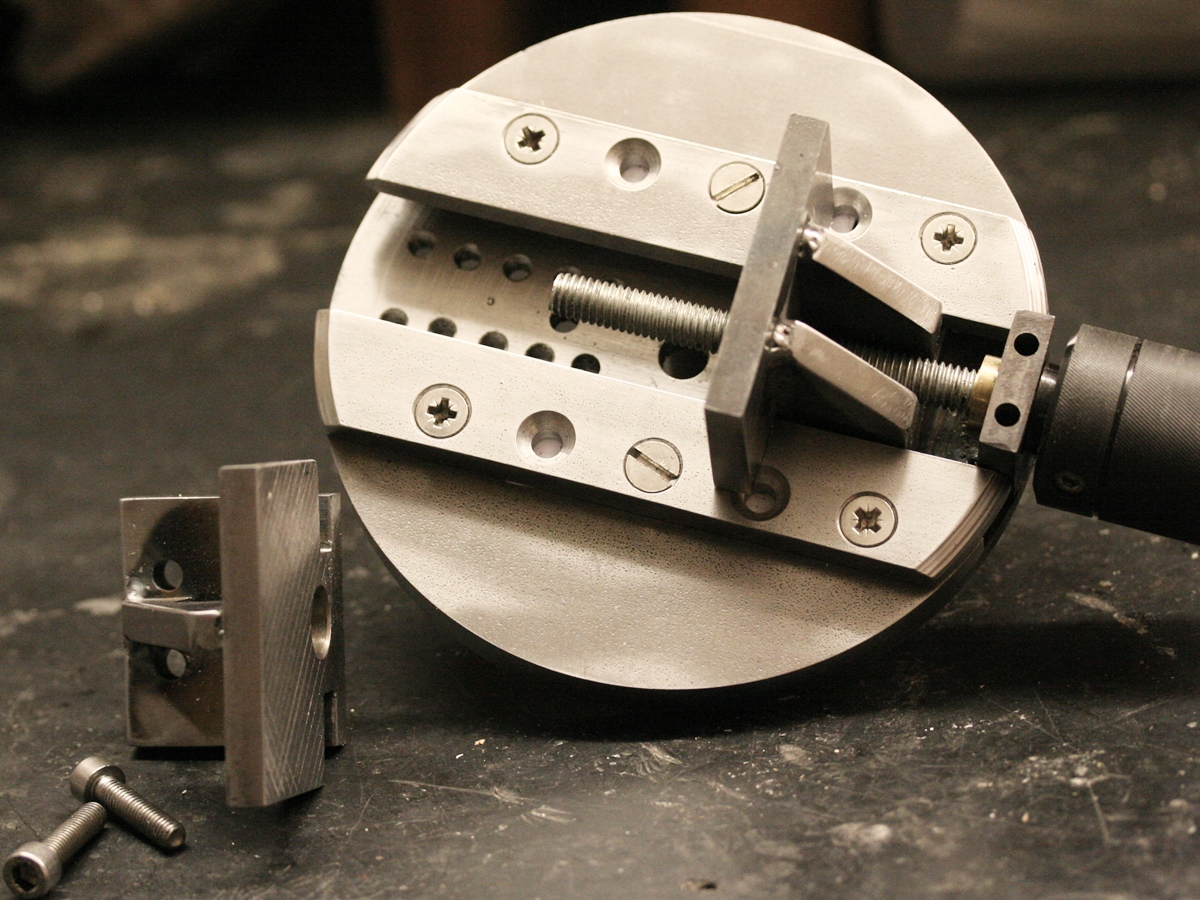
I welded the bracket for the brass screw bearing to the base because the holes I drilled were slightly misaligned – hence the empty holes! The jaws are (badly) TIG welded although it would have been as good to fix them with M4 screws but quite a lot of work and too much opportunity for getting holes slightly wrong! The M 10 screw is a very poor thread from a coach bolt – I’ll replace it with a better thread some time. I still need to sort out the countersunk screws – my screws box has a large collection of stainless screws left over from jobs, but mostly there are only 2 or 3 of the ones you want and dozens of the ones you don’t!
The vice is about 150 mm in diameter and this part is about 75 mm high – when I put a partial ball on the bottom with a stand it will probably add about 35 mm, finishing at 110 mm high compared to 140mm for my existing ball vice – saving 30 mm doesn’t sound much, but I struggled for every millimeter saved when trying to get my new microscope set up. I will do some experiments to see how much angular variation I need, and see if I can get away with less height in the ball. Some angular adjustment is necessary for engraving on curved surfaces – engraving ‘downhill’ is tricky, especially with a microscope as you loose angular information.
Dick came up with a ball jointed base with a fancy differential thread lock – I’ll try it and then compare with the ball.
I does seem to me that this is quite a simple and compact design of vice – when I have time I’ll make a set of drawings and put them on here. In the meantime, if you want more information please contact me via the comment box.
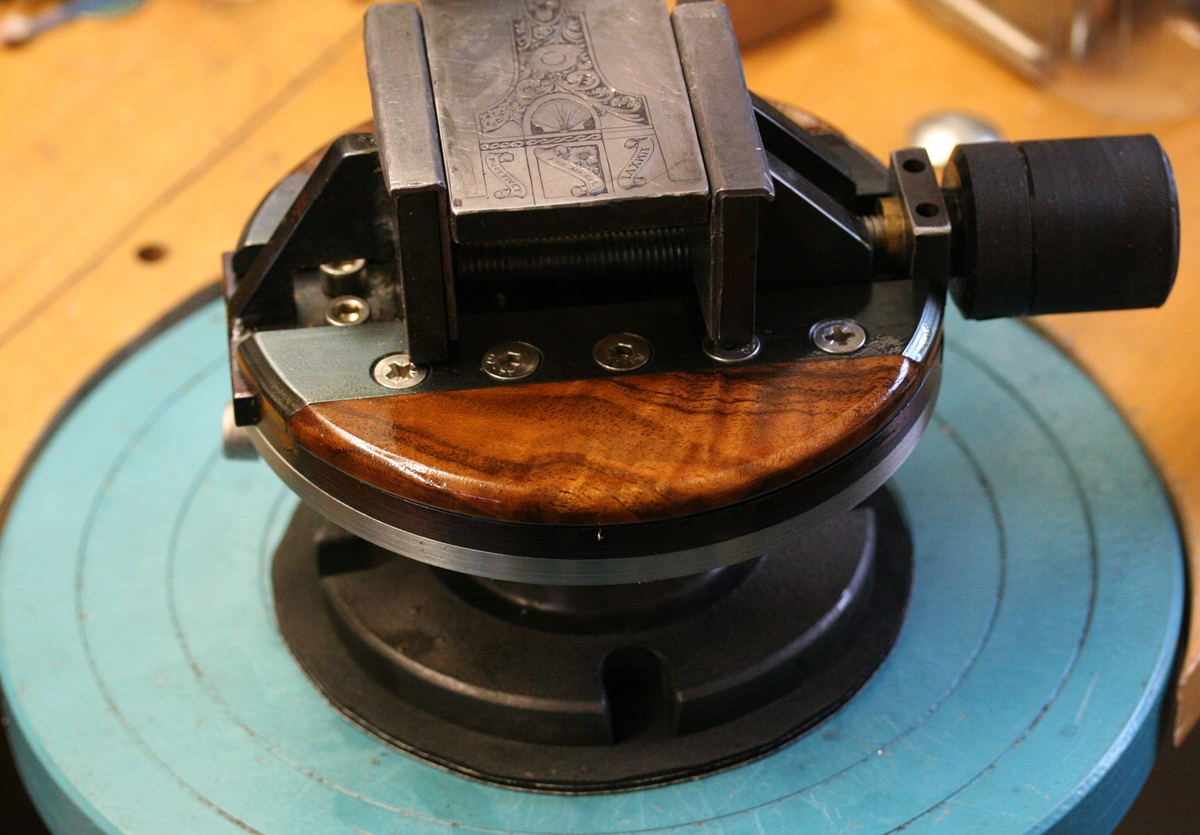
Now working – a couple of gunstock offcuts of walnut to make good handrests while holding the vice with the left hand.
Casting a mould for an alternative ball base using my old engraver’s block – this one didn’t work.
Eventually I realised that bubbles rise and the mould had to be made with the ball at the bottom!
The lead weights and the metal sleeve will be part of the sphere segment

mould ready to pour – unfortunately the vent on the right doesn’t communicate with the cavity!
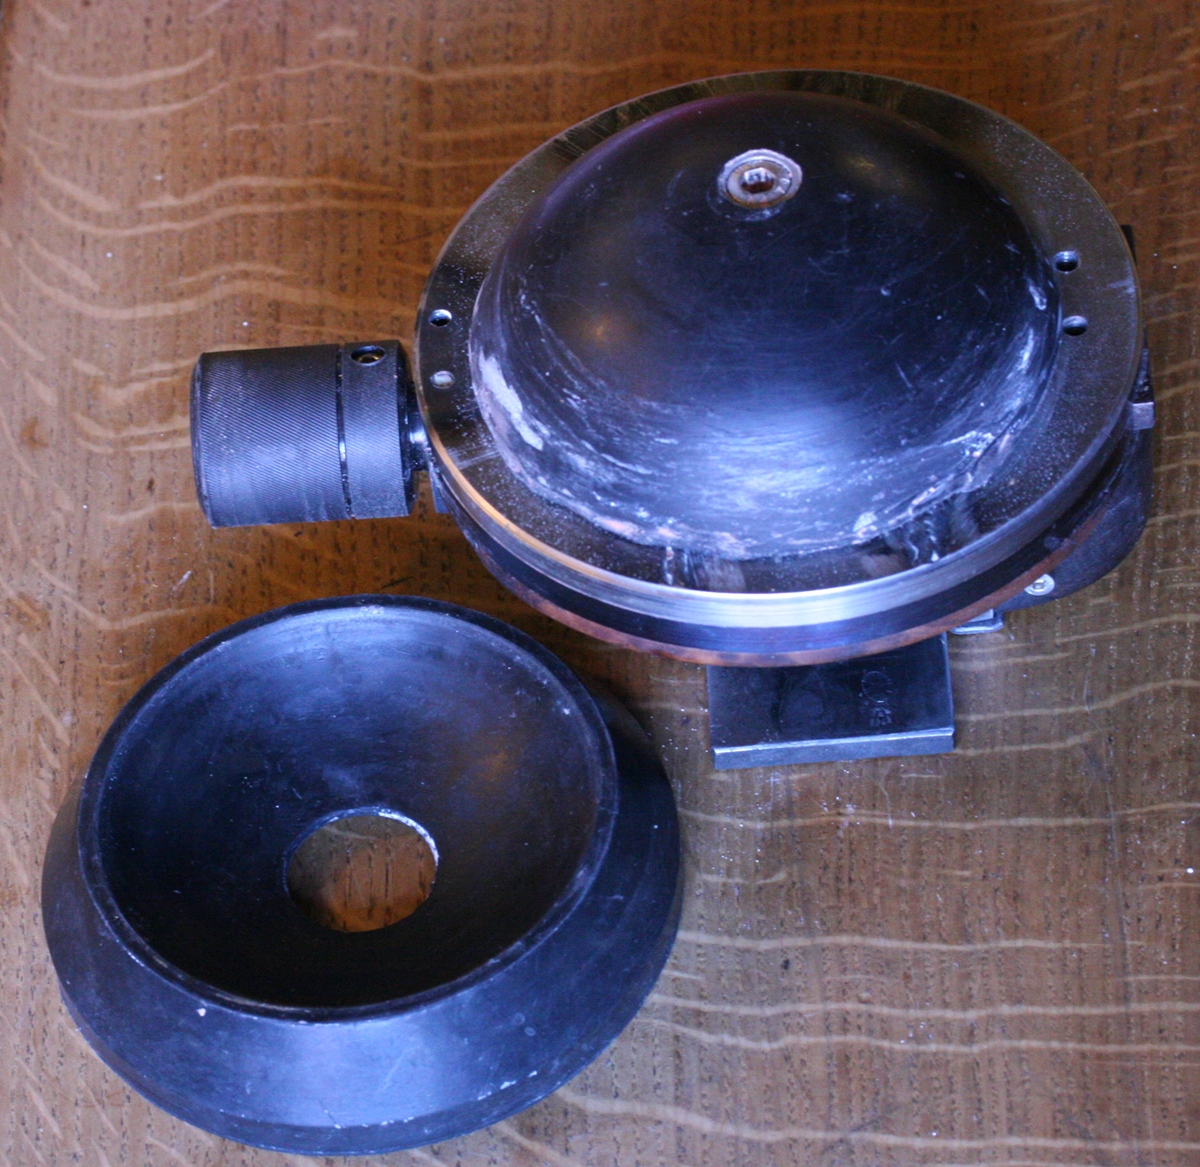
Moulded part sphere, with cup from original engraver’s block.
Both the ball joint and the moulded shape work fine, but the moulded shape has a bit less friction than ideal so I changed back to the ball joint – they are interchangable so I’ll try and find a way of getting more grip in the ball. The vice itself is good – I won’t go back to using my proprietary Indian engraver’s block as the lower height makes working more comfortable under the microscope.
Its been in use for six months and its perfect for my work – the locking base could lock a bit more firmly, but I really need to replace the socket head screw you can see with a longer arm as a lever.(now done). One day I’ll get round to fitting a block of wood ( offcuts of gun stock walnut, no less!) over the back of the other jaw! I’ve never moved the back jaw from its outboard position as the whole vice sits on a turntable and I just move the vice to put the required bit under the objective lens. The vice will accommodate 2 inch wide strip ( just)