My equipment and examples of engraving are pretty well covered on the posts on ‘my setup’, ‘graver sharpening’ and ‘engraving-technical’ and are an essential background, but I thougth it was all a bit intimidating and implied that you needed to spend a lot of money before you could do anything, so I have set out here to offer a minimalist approach!
There are several essentials to deal with before you can begin begin, seeing, holding, and sharpening, plus you need something to engrave and an idea of what you want to put on it! All take a bit of thinking about, so here is my a starting point ;- engraving screw heads:-

more follows…..
- Seeing – you can’t engrave gun stuff with the naked eye, or at least I can’t. The cheapest way is to use a x 3.5 loupe held in the eye socket and put your head near the work – Geoff Moore, a professional engraver I know does it that way and always has, but I can’t get on with it. The next cheapest way is to use a ‘head magnifier’ ( that’s a magnifier that fits on your head, not one that magnifies it -there are enough big headed people around) – you can buy a number of versions of these but the one I use is has to binocular magnifications of x1.5 and x3 and an additional lens on one eye to give a x8 magnification. You can wear your spectacles under it and if you buy ‘off the shelf’ 3.5 diaopter glasses it will give you a bit more magnification. (You can buy optical aids from ‘the Loupe Store’ -see LINKS mine is £26.50 part 2191162 or buy it elsewhere – I haven’t tried others, some are very expensive but I’m not sure are much better – its a matter of what suits you and if you buy a cheap one and it doesn’t do the job you haven’t lost so much! – update- I tried a x4 Optivisor (around £30 to 50) which was very good, and a x10 which only worked for my right eye – the magnification is probably too much for a head magnifier anyway…
- Holding – If you start with screwheads or bits of mild steel you can get away with fixing them to blocks of wood – you’ll be working on more or less flat surfaces so don’t need angular adjustment, and there are lots of ways to hold bits of metal onto chunks of wood – ‘setting wax’ from H S Walsh (see links)works with a hot air gun, or Epoxy glue – it can be got rid of by putting in the freezer and then breaking it (or so I’m told)…..
- Sharpening – this is the bugbear, and where you really have to bite the bullet and get something that approximates to the right kit or you will never make any progress – you’ll need a fine diamond ‘stone of at least 100 x 50mm and an Arkansas stone of similar size, plus a jig to get the angles rights and a school protractor to check angles – see the ‘Graver Sharpening’ post for more details.
- Something to engrave – Screw heads are a good start as they are the most common job and are pretty easy because the lines are short and the visual impact is good even if the engraving is a bit rough! In addition you can do a number of variations that don’t involve stopping a cut while in the metal, which is where beginners have difficulty because its so easy to break the point off. There are a number of standard designs but even good antiques often had rather scrappy screw heads! Check ebay for ‘Traditional Screws’ and you’ll find lots for sale in smallish quantities – you need N0 8,10 or 12 and preferably about 1 inch long. Don’t use modern woodscrews as they are too hard or tough to engrave. Prepare your screws by putting them in an electric drill and polishing the heads on 240 and 600 grit. Screw them well into a block of wood so they are firm, and don’t stick out more than 10 mm (3/8 in)so you can rest your hands on the wood while you work.
- An idea of what to engrave! – fortunately there are a few common designs of antique screwheads that are easy to do – see other posts.
- Additional items shown include a desk light of some sort, a scriber for marking and a black felt pen for filling cuts to help see what you have done, and some 240, 600 and 2000 grade wet and dry paper to prepare metal.
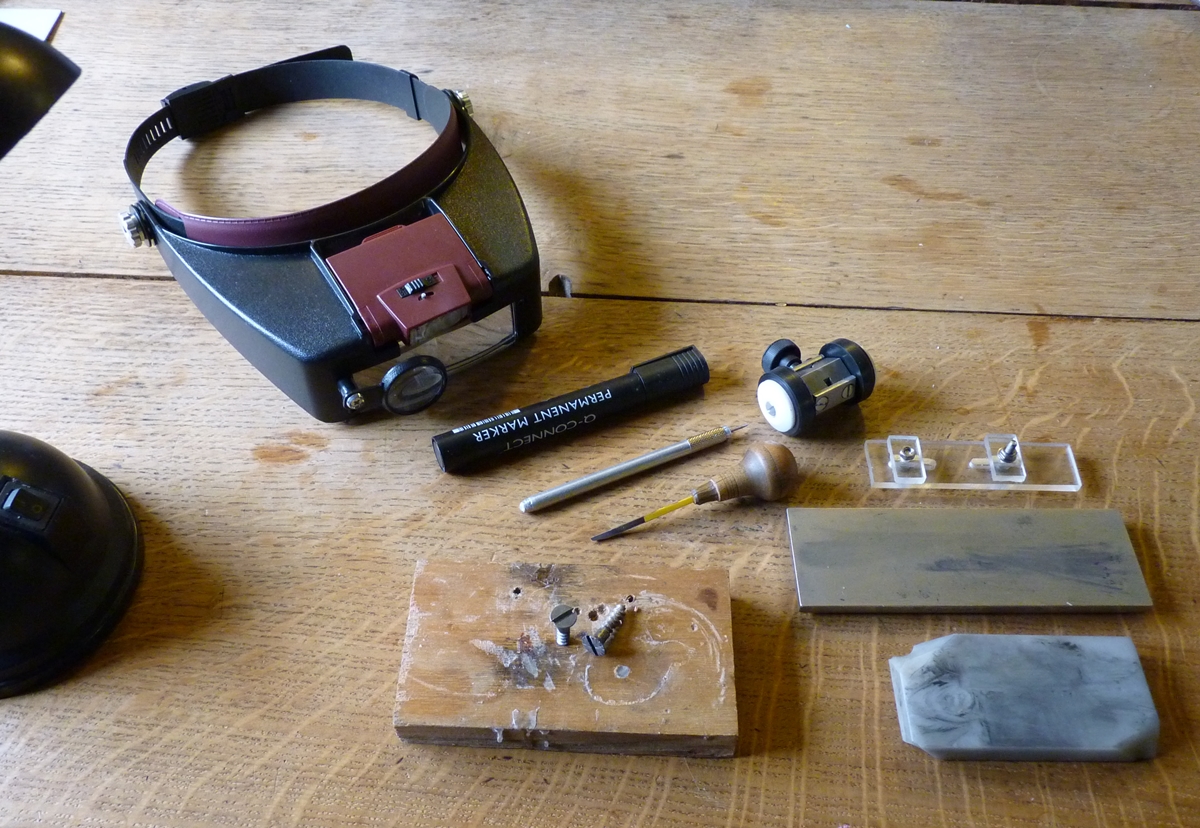
The minimum collection of more or less essential equipment
The easiest designs to do on screwheads are ones that only have radial lines that end at the edges of the screw – I guess that’s why they are the most common design too! There are a large number of variations of the basic idea based on simple radial lines in minor geometric patterns and various daisy like designs, and as your skills improve you can elaborate the designs, putting in centres to ‘daisies’ . Most can be cut freehand with minimal marking out, possibly just a few main lines to divide the space up evenly.
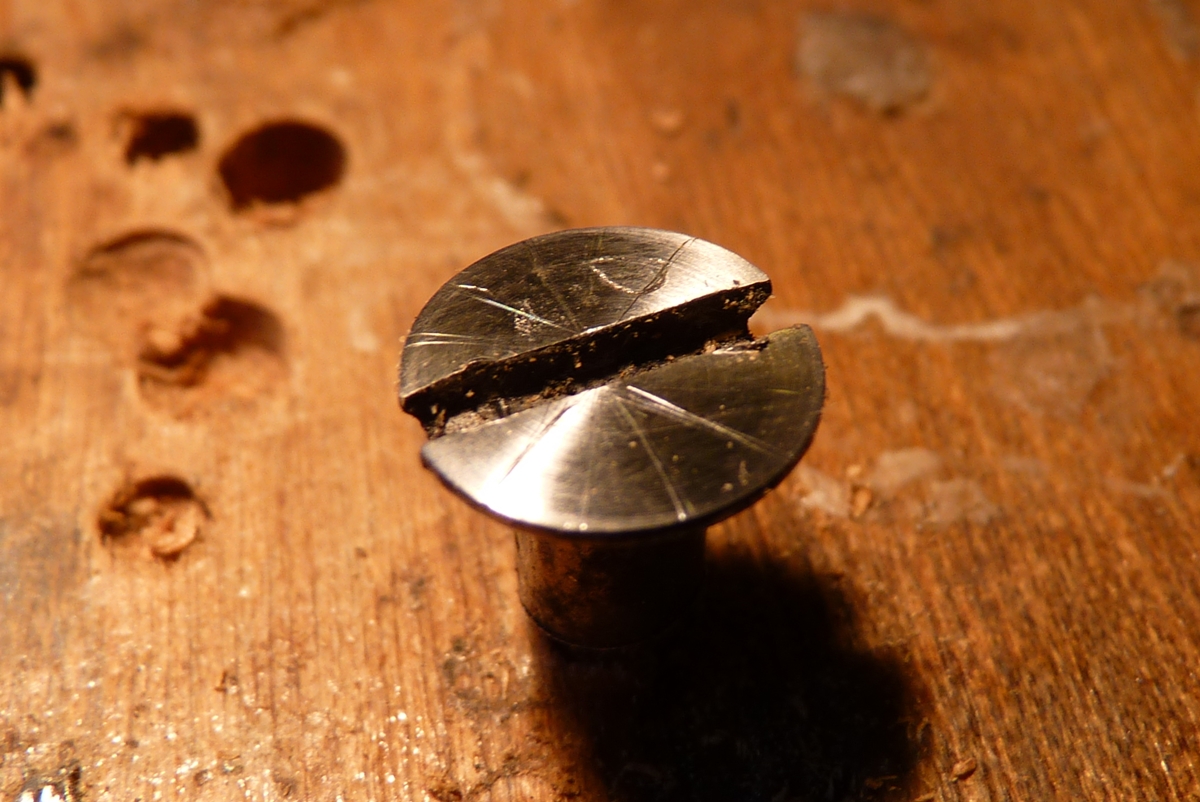
Screw with minimal marking out….
You are now ready to begin;-
The graver is held in your dominant hand with the ball in the palm like this;-

The graver I’m holding has worn down and is now a bit short – time to retire it or weld a bit on the top.
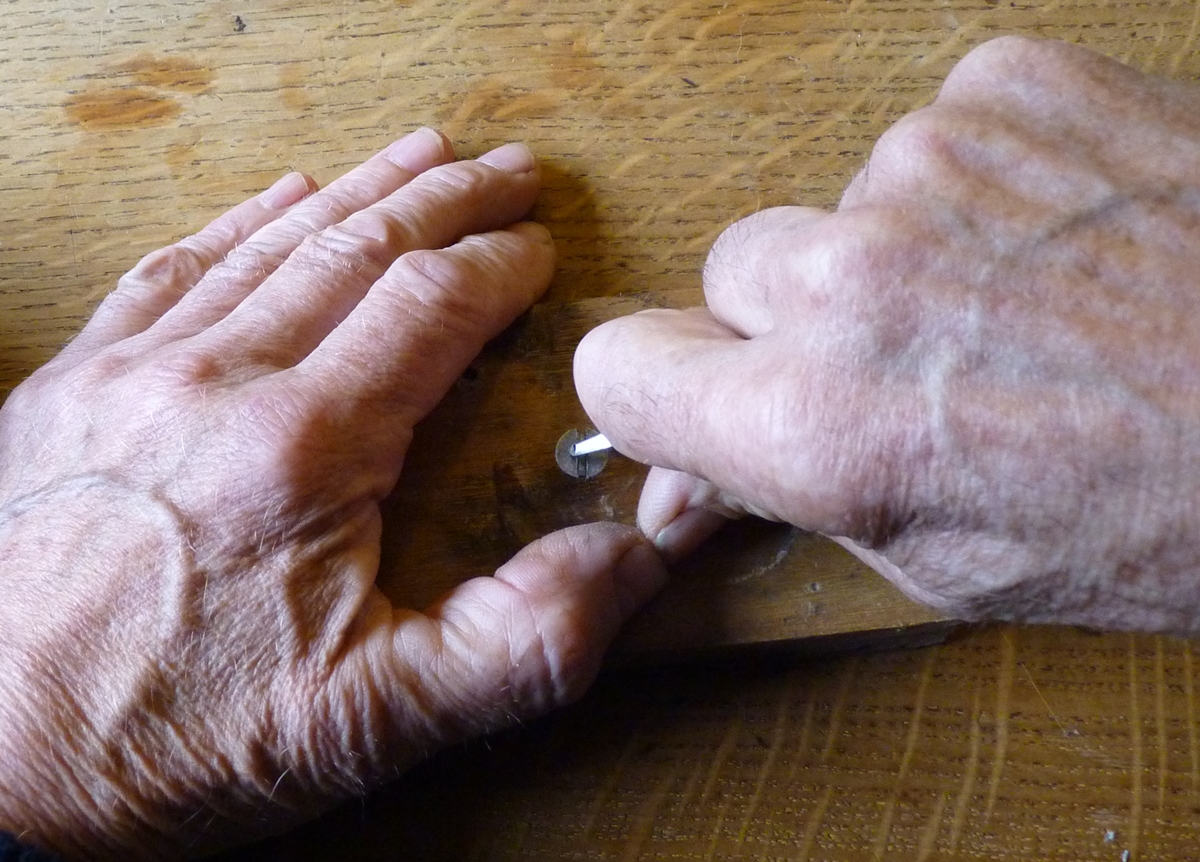 You need to exert quite a lot of force on the tool to cut, but don’t want it shooting off into next week when you come off the edge of the screw, so you need to brace it against your other thumb or the screw, and keep you left hand out of the way of the overshoot or you’ll stab yourself! You can see that the graver is short, another centimeter or so would be ideal!
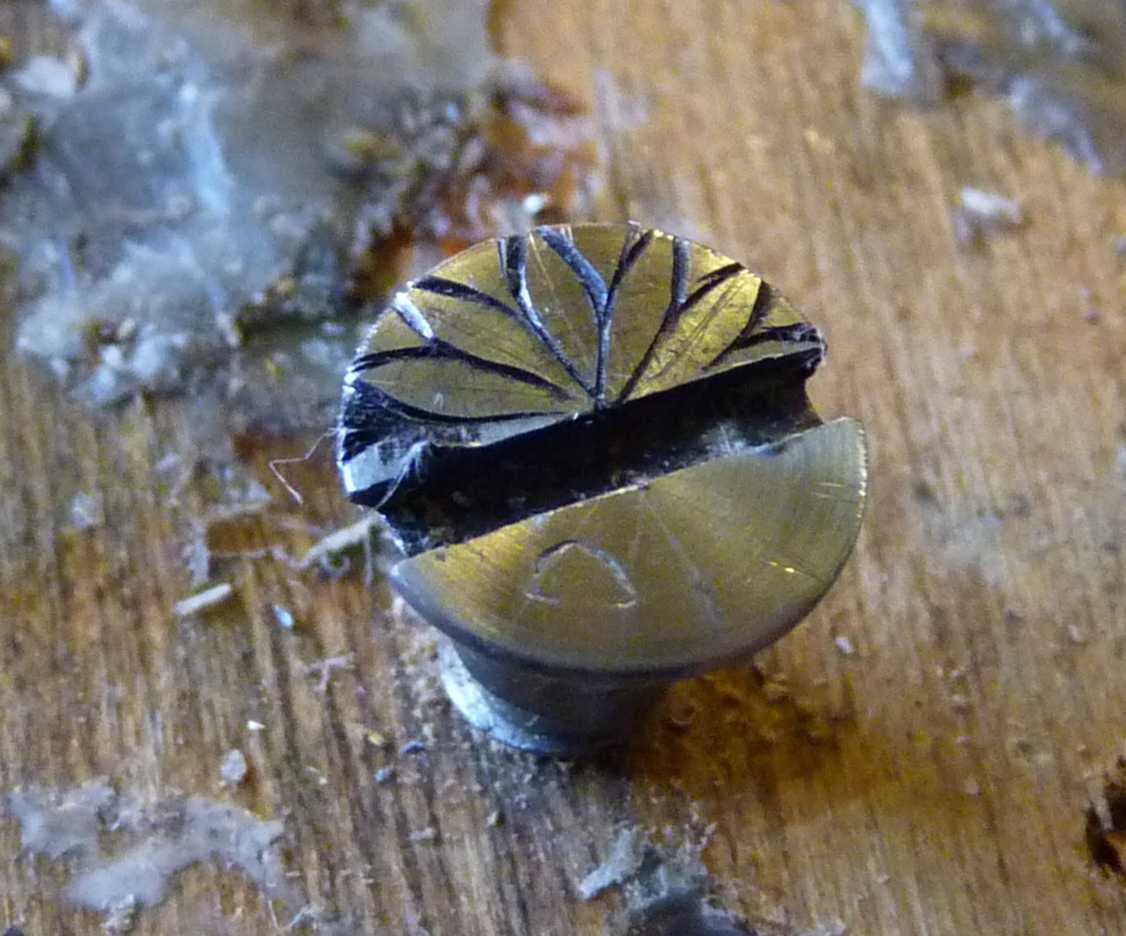
You can see I have made the main cuts for the petals – the cuts go from the centre to the edge – some don’t manage to follow the curve as it curves in to the tip, but that doesn’t matter because all the material in the wedge is going to be cut out in a series of cuts, as on the left of the picture… It looks a bit uneven, but so do a lot of the originals! They were probably done in a couple of minutes per screwhead! the head has been wiped over with the black marker pen and then wiped with a bit of tissue to show the cuts better.
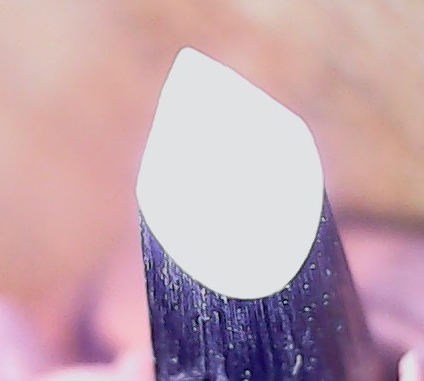
By the time I’d cut all the main lines on one half of the head the graver was quite badly worn! See how rounded the tip is!
Time to sharpen it ….
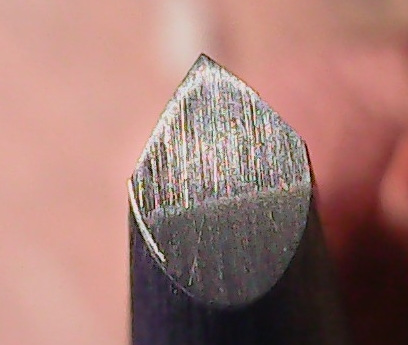
I started off with the wrong jig and cut the back of the face, so had to adjust. The slight rounding of the main face at the point is from deburring it on a sheet of 2000 grit paper – I should have used an old, oily sheet….. But the tip is very sharp and it will cut just fine…….
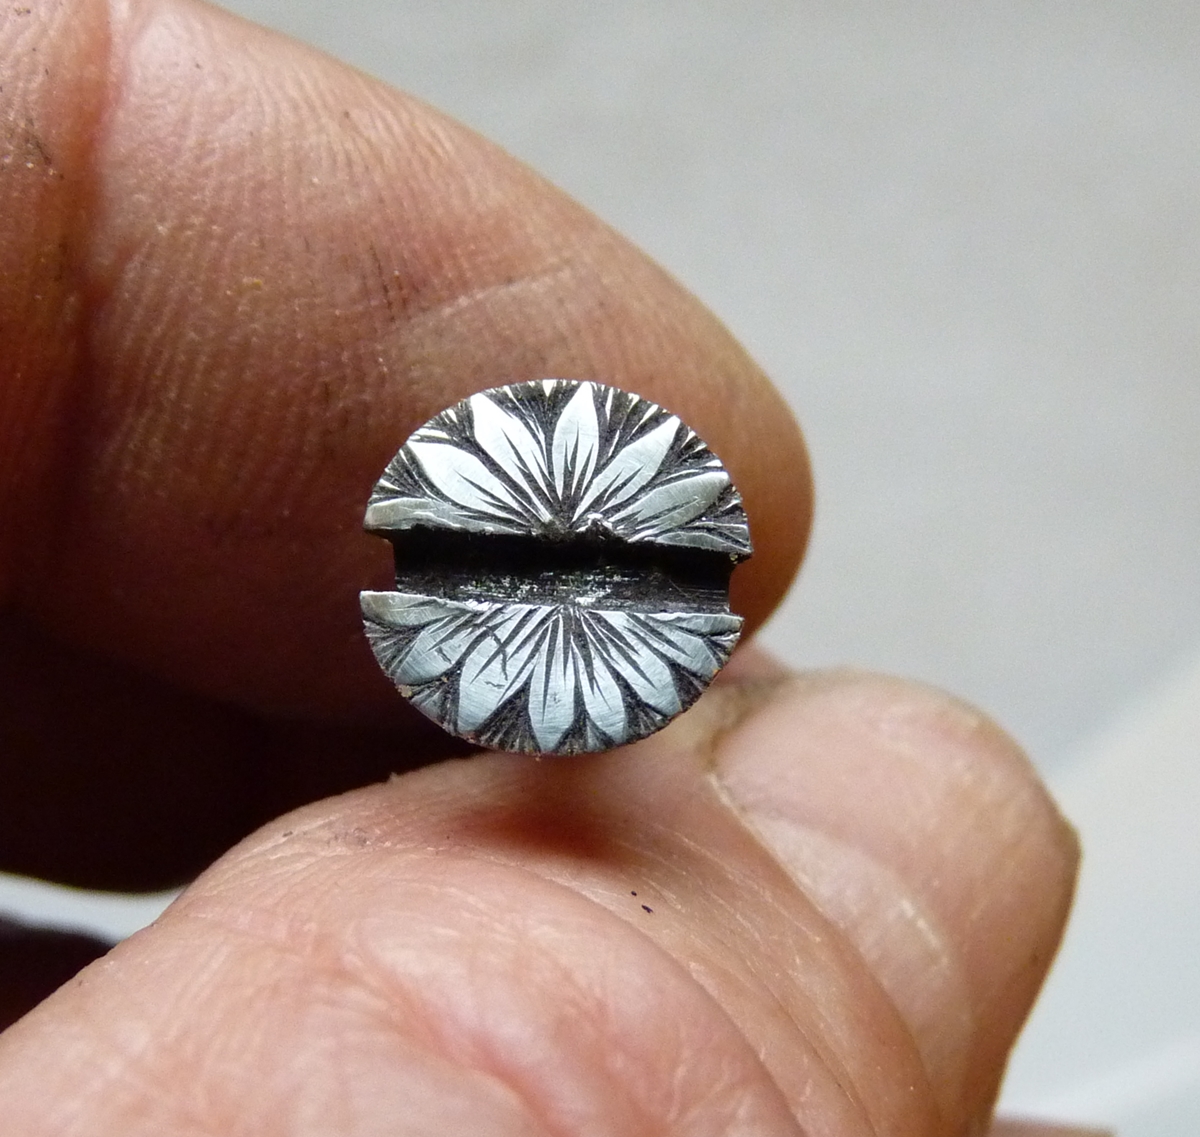
When the petals are outlined and the bits between them are cut back, the radial lines on each petal are cut towards the centre, getting deeper as they go – this is best with a fairly sharp graver as the lines start fine and get deeper and wider……
You will need to get used to the effect of scale and visual context on the appearance of your engraving – on my computer the photo above is about 4 or 5 times real size, seen below it is about 1:1 on a desktop and the uneven petals and spurious marks that were in the screw before I stated don’t really show;-