Since putting this up originally I’ve changed my microscope – the Wild I now use is described, but I also more recently bought a Chinese AMSCOPE zoom trinocular microscope because I wanted to have a digital video camera that showed my work while it was in progress for demonstrations – unfortunately the cheap trinocular microscopes you can buy all seem to work by switching out one eye in order to use the camera, so you cant work normally and show it to a screen at the same time, so it didn’t do what I wanted it for. It is, however, a perfectly good microscope, and I’ve fitted a pillar for a headrest in place of the digital camera mount. Mine came with a very good stand with a sliding arm and quite a long reach, and it has the slight advantage over the Wild that the eyepieces have a longer ‘eye relief’ so your eyes can be further from the eyepiece lense and its easier to keep your glasses on. The zoom isn’t much of an advantage compared to the 3 stage click magnification of the Wild as its easier to get the scale of things if its one of 3 magnifications. All in all it is a perfectly acceptable microscope and for our purposes there is not much to choose between it and the Wild which probably originally cost 10 times as much, and even second hand cost 50% more. ( I paid £600 for the Wild with case and stand and light, the Amscope was £422 with stand).
as of Oct 2018 I mostly use the Wild microscope in my workshop and the Amscope for demonstrating as it saves disturbing the Wild.
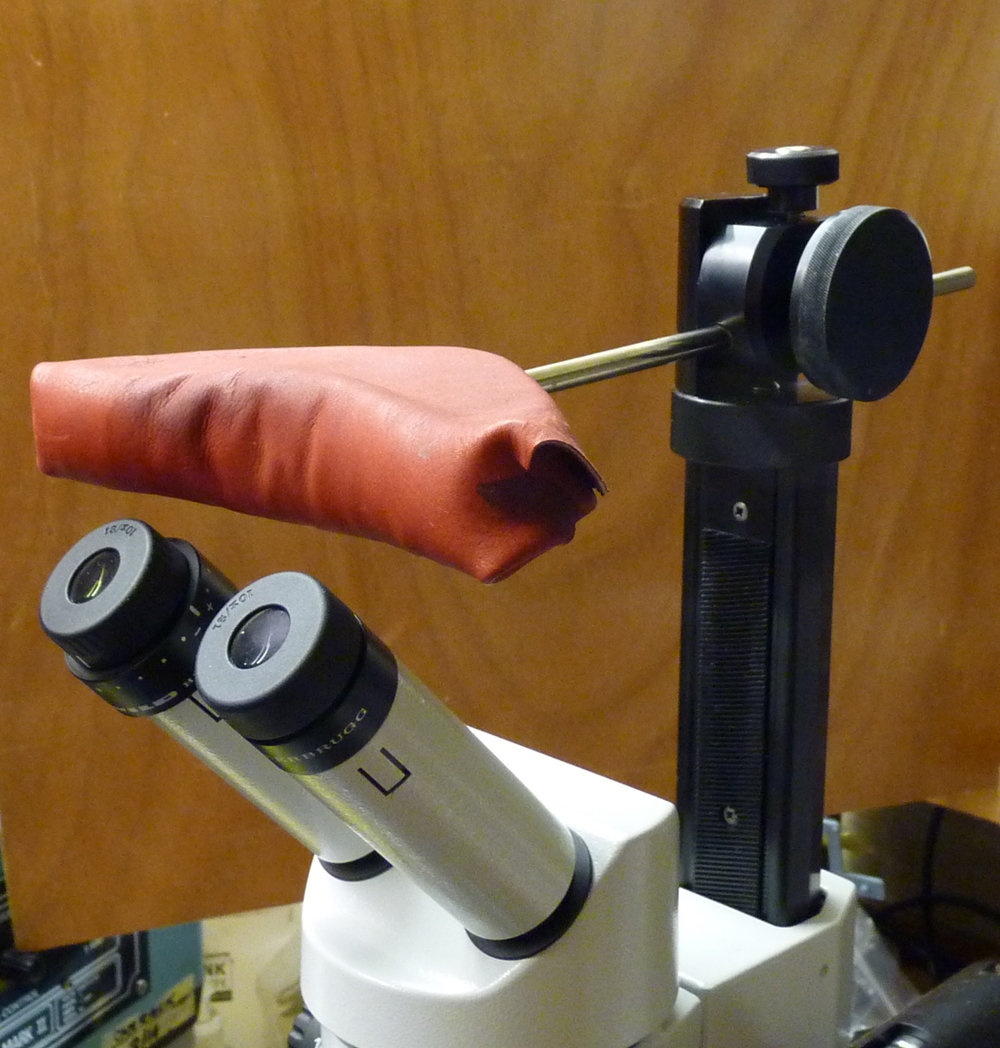
The starting point for engraving is the tools, for me that’s mostly push gravers, and mostly square gravers. Since engraving steel wears the tools very quickly, and the biggest cause of slips and errors is blunt tools or broken tips, you won’t get anywhere until you have got the equipment and skill to sharpen your gravers – there is no short cut to this. Experienced engravers can (mostly) sharpen their tools by hand without jigs or guides but for ordinary mortals it is not possible. Disbelieve me at your peril!
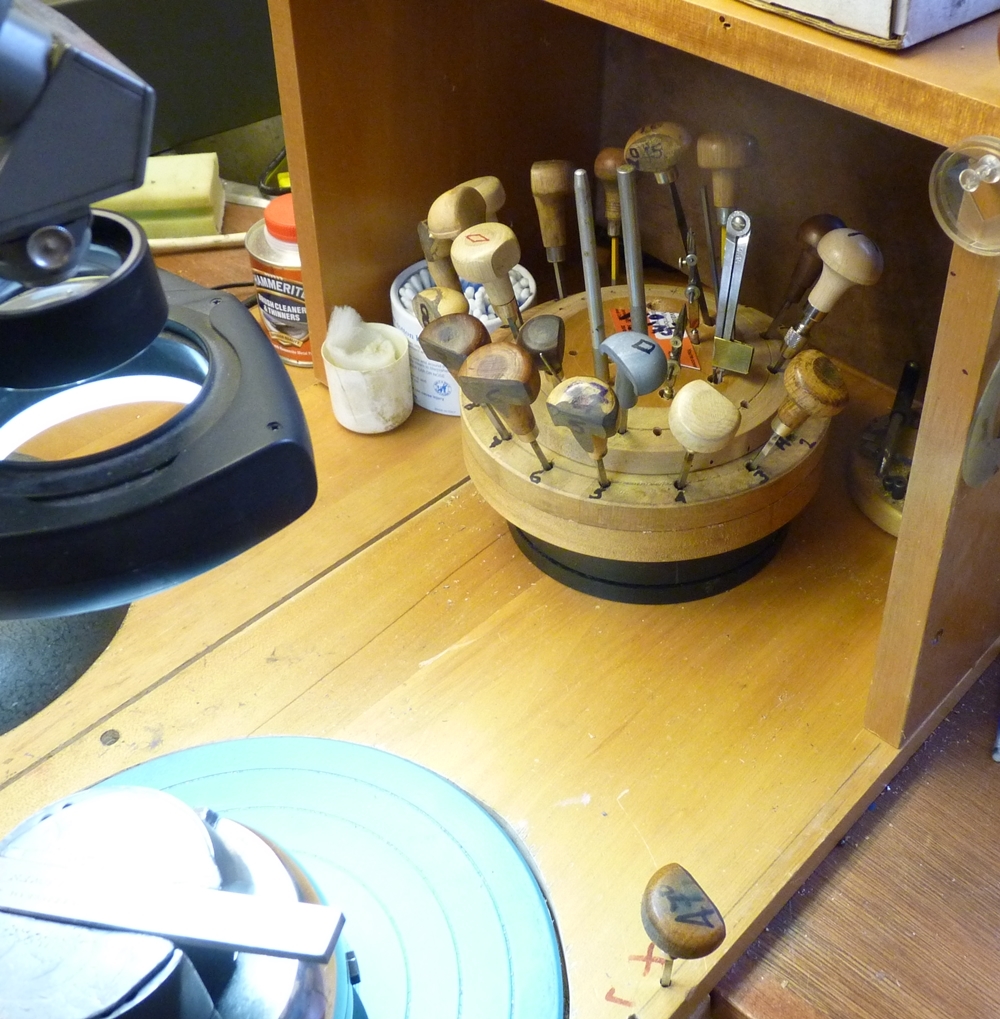
Part of my setup – the tools are mostly squares sharpened the same way so I only have to stop and sharpen tools when I have blunted a number. There are a few other tools – knife and ongulet and some lozenge.
There is more here……………………………..
Sharpening;
The normal graver to start is a square graver, and it has 3 sharpened faces, the main face cut on the diagonal at about 45 degrees, and two heels at a nominal 15 degrees on the back of the point, so the point has 3 sides converging. The main face is fairly large as it cuts the whole tool, but the heels have to be kept fairly small so that when you cut round a curve they don’t drag up the side of the curve. Typically the heel might be 1/4 or 1/2 mm long, so it doesn’t require the removal of much metal, whereas the main face is much larger and needs the removal of much more metal to maintain the shape. For this reason I use a 1200 grit diamond for the main face and an Arkansas stone for the heels. I used to use a couple of jigs to hold the tool while I ran the jig back and forth on the stone, but now I sharpen the main face on a GRS 1200 diamond hone on an old lapping machine I got when it was thrown out by a mineralogical lab. The traditional way to tell if you have got the tool sharp is to slide it gently at the appropriate angle up your left hand thumnail – if it ‘bites’ under its own weight its sharp. I use my microscope as a chipped tip can also pass the thumbnail test! There is quite a lot about graver sharpening on the web.
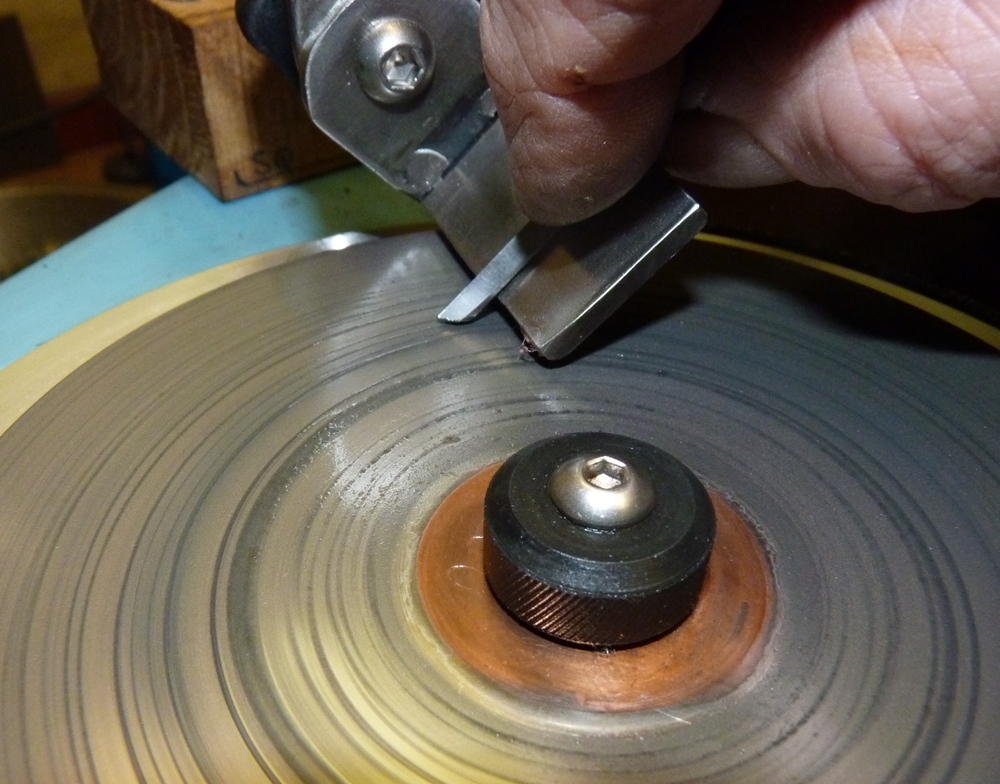
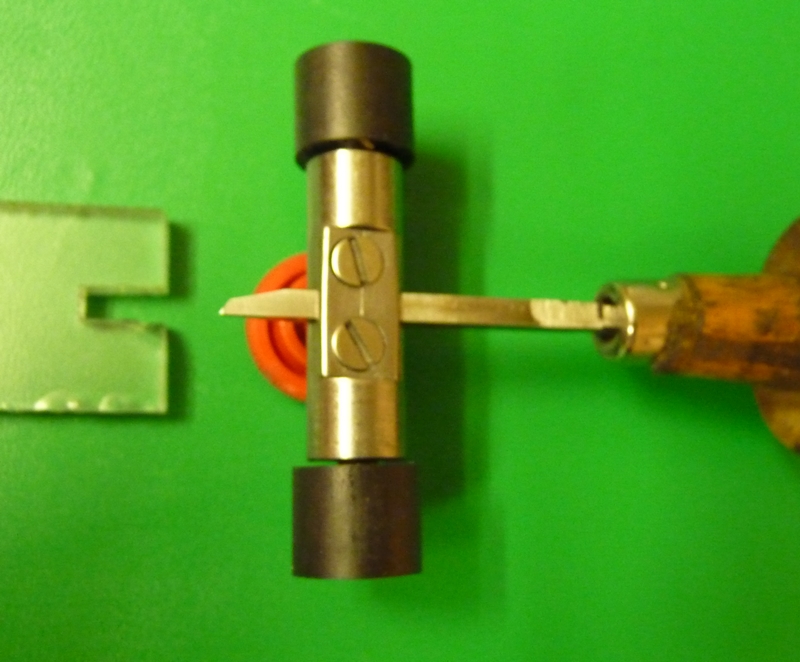
Diamond hone with simple holder with a 45deg angle and an accurately cut groove to locate the tool, which is held by a finger for speed of use. The holder is free to swing across the hone on an arm swiveling on a vertical bearing.
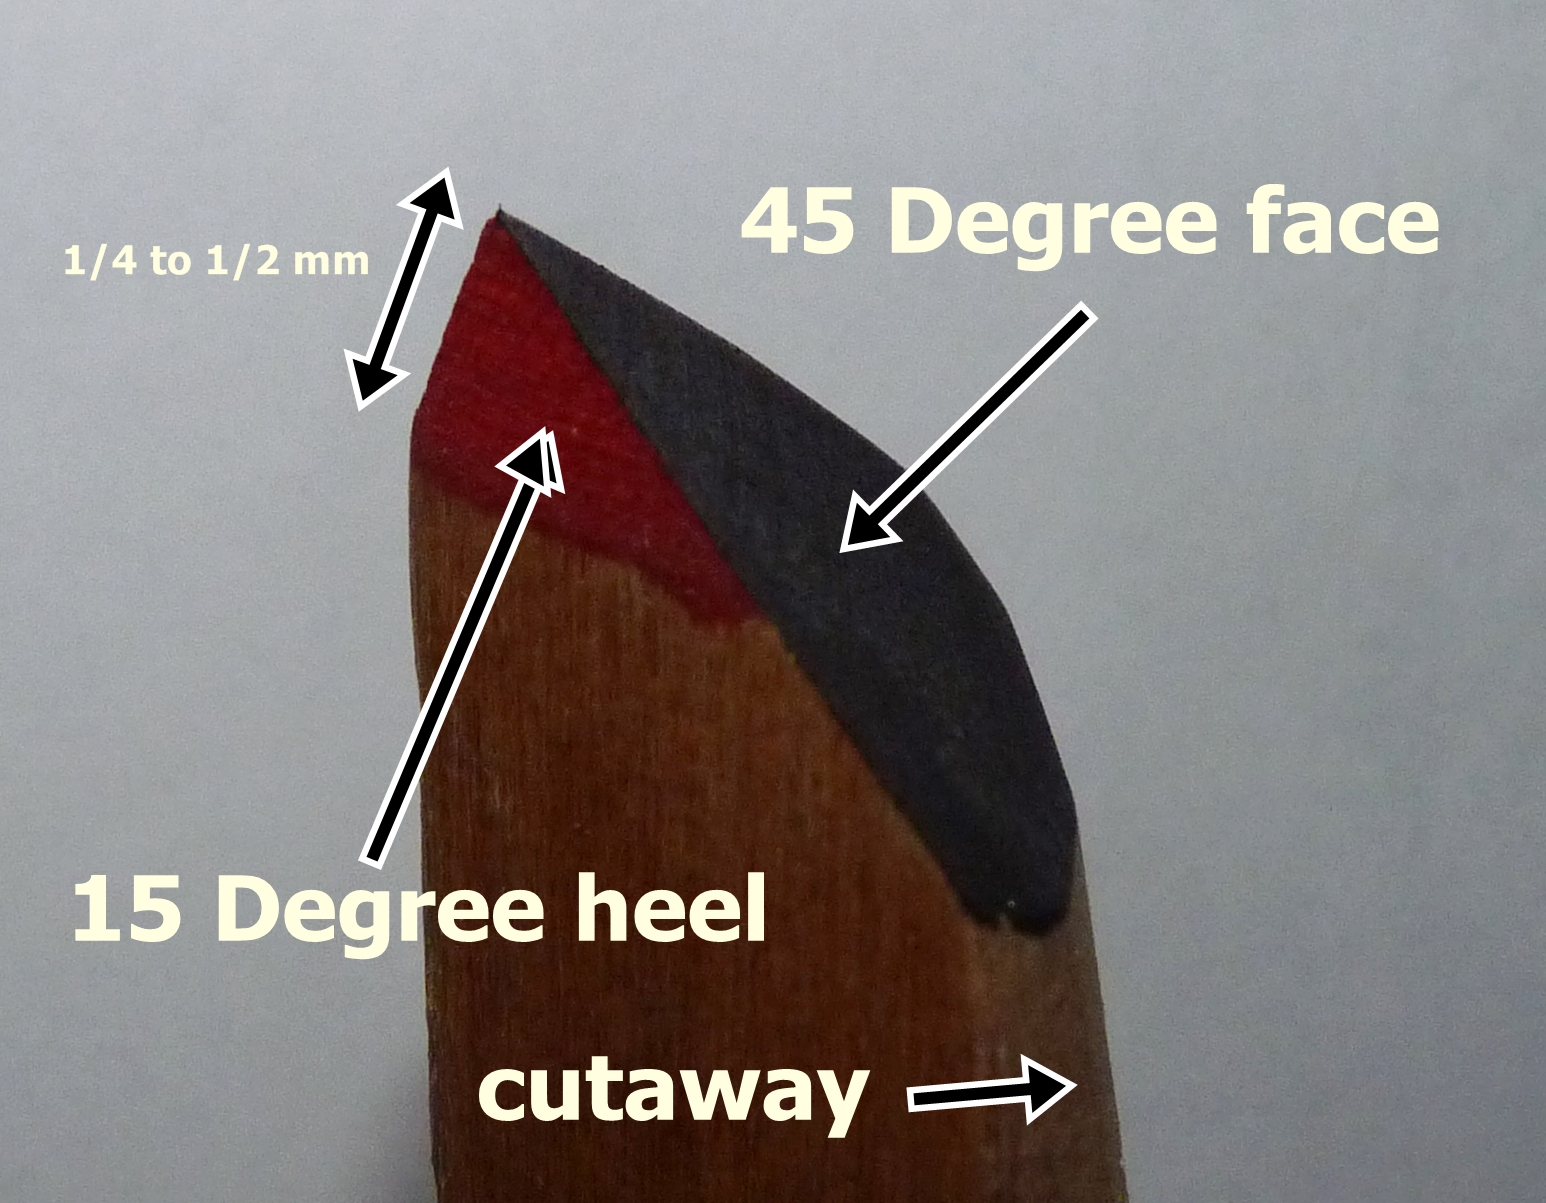
Shape of normal square graver
You’ll see that the top of the end of the tool is ground off to get rid of unused metal that would otherwise have to be removed each time it is sharpened following a chipped tip – its also easier to see what you are doing when you use these chunky tools made from 1/8 inch square tool bits. Be very careful not to heat the tool any hotter than you can bear to touch when you grind the excess off or you will likely ruin the temper and wreck the tool.
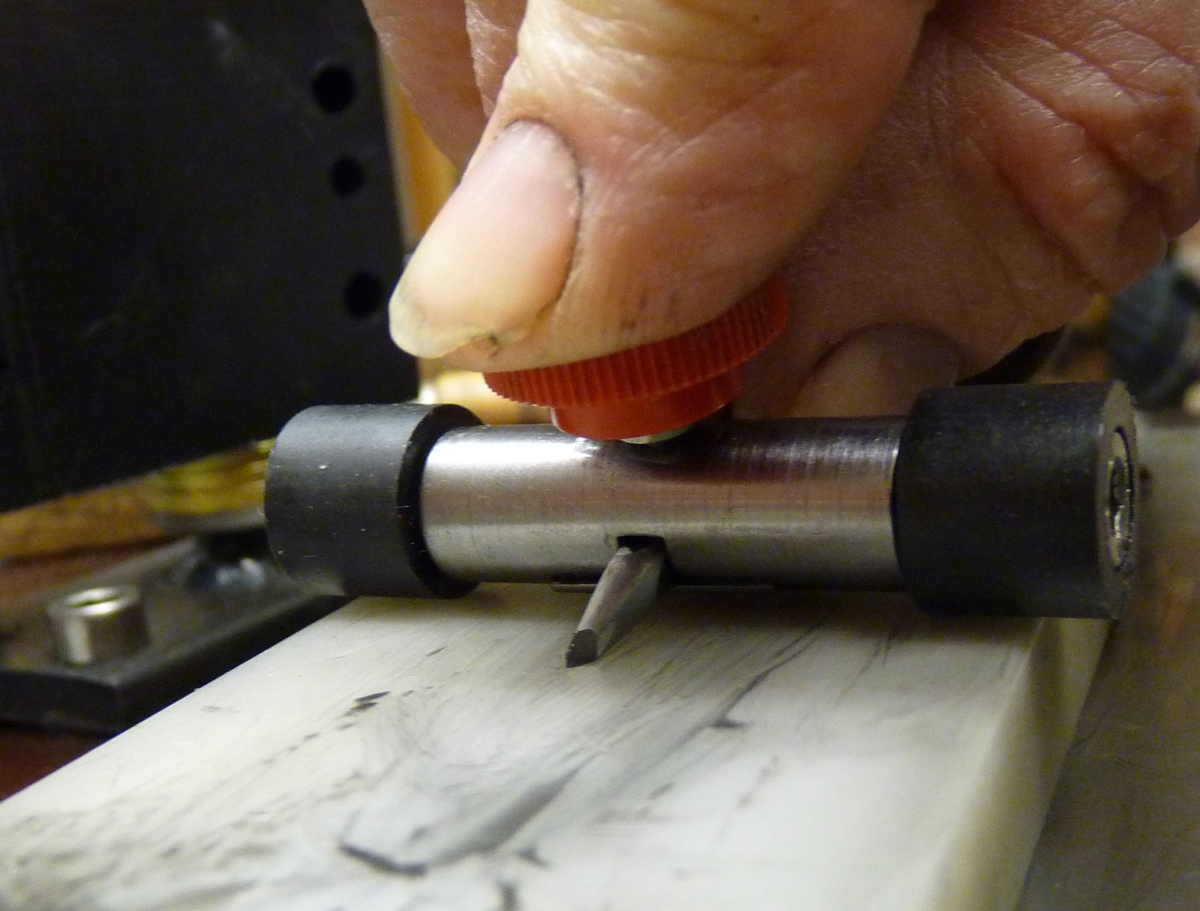
Here is a new jig I made for sharpening the 15 degree heels on square gravers – the perspex piece is a jig for setting the length of the graver protruding from the jig to achieve the correct angle; The tool can be made very accurately and is easy to use – maybe I should go into production…..
Seeing;
Sept 2018 – I decided to get a trinocular microscope so that I could get a proper video as I worked, both for a you tube video and for live demonstrations. I bought a Chinese trinocular Amscope with roughly the same magnification and working distance as my Swiss Wild on a good long stand. Unfortunately I discovered that in order to use a camera that can be attached vertically to the microscope you need to switch the optical path that goes to the left eyepiece, so you no longer have a binocular microscope! Which really nullifies the whole point of buying it. In itself it is pretty much comparable to the Wild – I wouldn’t complain if I had to use it instead, but I do slightly prefer the Wild – I think the optics are marginally better, as indeed they should be given the new price of the Wild. The only advantage of the Amscope from my point of view is that they have a much longer eye relief, which means you hold your eye further away from the eyepieces which means you can engrave while wearing glasses – but that’s not enough to make me use it in preference to my Wild. One snag with the Amscope is that the clamp that locks the rotation of the stand arm about a vertical axix is not sufficiently strong so you can easily knock the microscope off its proper position over the centre of the turntable. If you are looking for a microscope and can’t find a good Wild or Leica or other good make, or are not sure if the optics have been knocked about, the Anscope is in my view an adequate substitute.
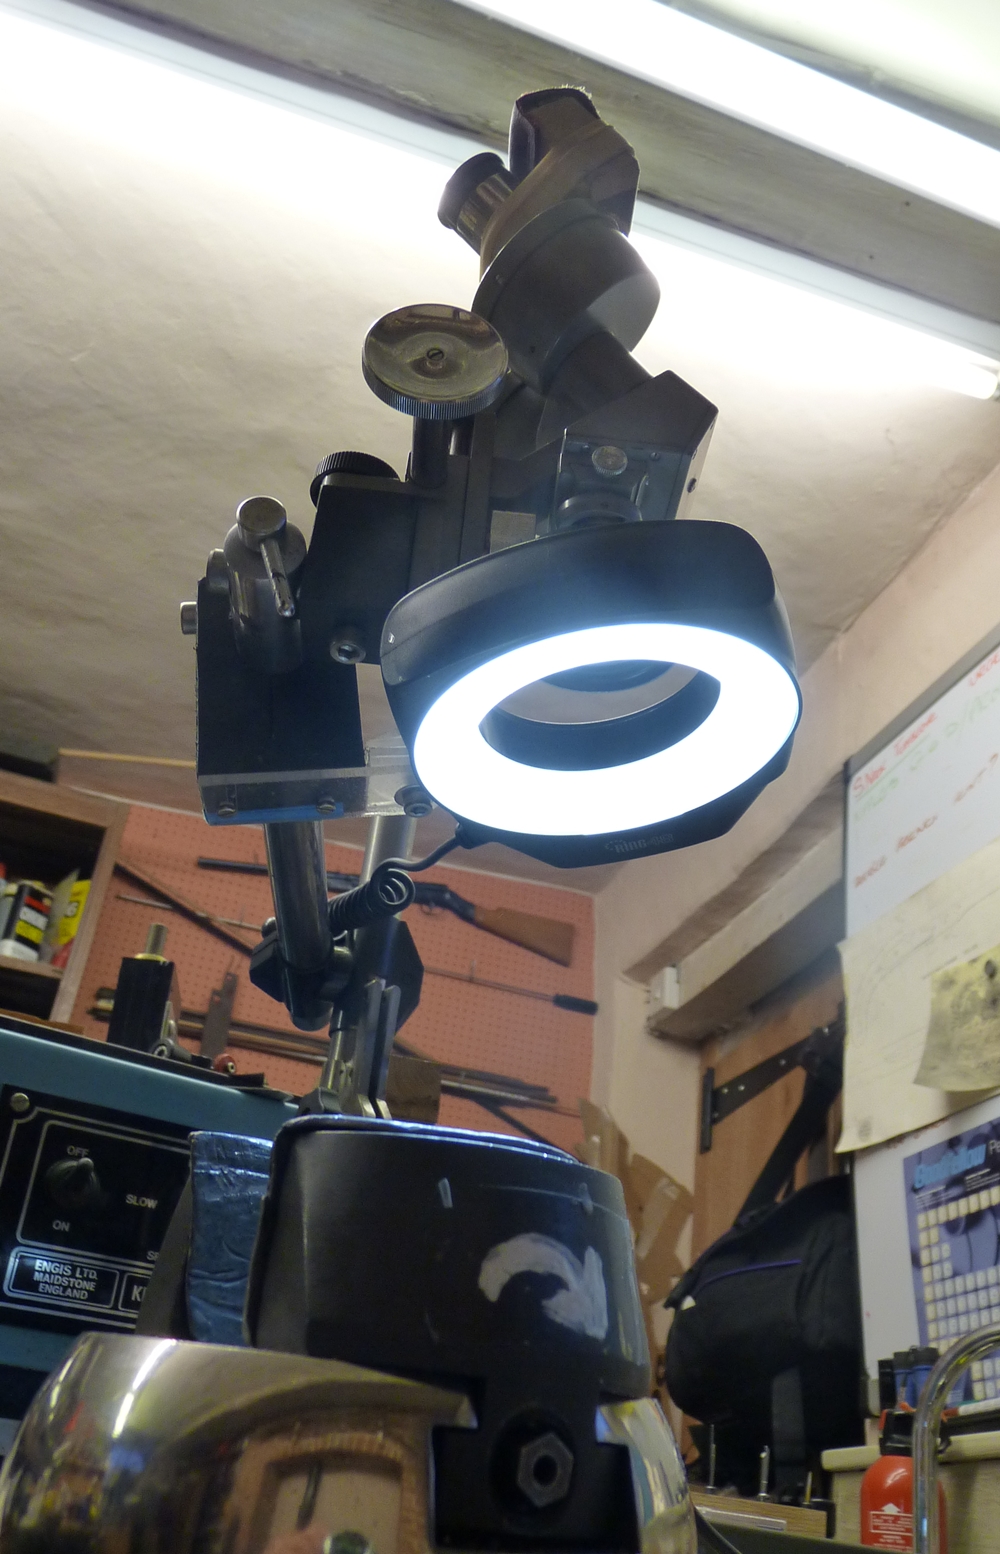
8th Jan 2016 – I have now got several engraving jobs lined up ( see below ) and I started to think about my microscope, which was a very old and primitive Beck. Looking at the specs of more modern stereo microscopes I realised that the field of view of mine was tiny, which makes it difficult to follow curves and get an overall sense of the flow of the design, so I looked on the Web to see what was on offer and what was recommended – there is a lot of helpful information available, and I concluded that I needed a fairly modern design of stereo zoom microscope. The choice is a second-hand high quality Swiss or German or UK microscope or a Chinese copy of one – the prices are broadly similar. Taking advice from the web I opted for the former, & found a WILD M3B (Swiss made around 1990) with a very substantial long armed stand and a light, with a x0.5 objective and x10 eyepieces and x6.4, x16 and x 40 preset zooms (they are multiplied by the objective magnfication and assume x10 eyepieces, so I have x3.2, x8 and x20 working magnification at the click of a knob and a constant 180 mm working distance with a very useful field of view of 64, 25 and 20 mm diameter respectively. It is an optical revelation & everything is so beautifully made! I can see what I’m doing at last, and its useful at all magnifications at different stages of the engraving. The only problem is that it is taller than my old one, and has a longer working distance so the eyepieces end up about 3 – 4 inches higher than those of the Beck, so I really need to grow a neck like a giraffe. (or get an adjustable stool). I was lucky to find a microscope with a x0.5 objective as it doubles the working distance compared to a x1 objective and halves the magnification, and the lower magnifications are an advantage for engraving- and it had a directly usable stand and light – I think its better than a ring light, although I have now put the ring light on as well – I’ll need it for country fair displays as we don’t normally have any mains power – the ring light is LED, but still eats AA cells although in the workshop it runs on teh mains.
12th Jan – Had a bit of luck with the scavenging! I found a good quality camera close up lens that is the same diameter as the Wild objective & it slightly decreases the magnification and reduces the working distance and doesn’t appear to spoil the optics – I got Giles to print a ring and 3 clips on his 3D printer to hold it so I now have about x4, x10 and x 25 and a handly 155mm working distance instead of 182 so not such a giraffe posture. I also found a pair of perfectly serviceable adjustable swivelling draughtmans’ stools being thrown out, so after drying a month’s rain out of the foam they are now in use.
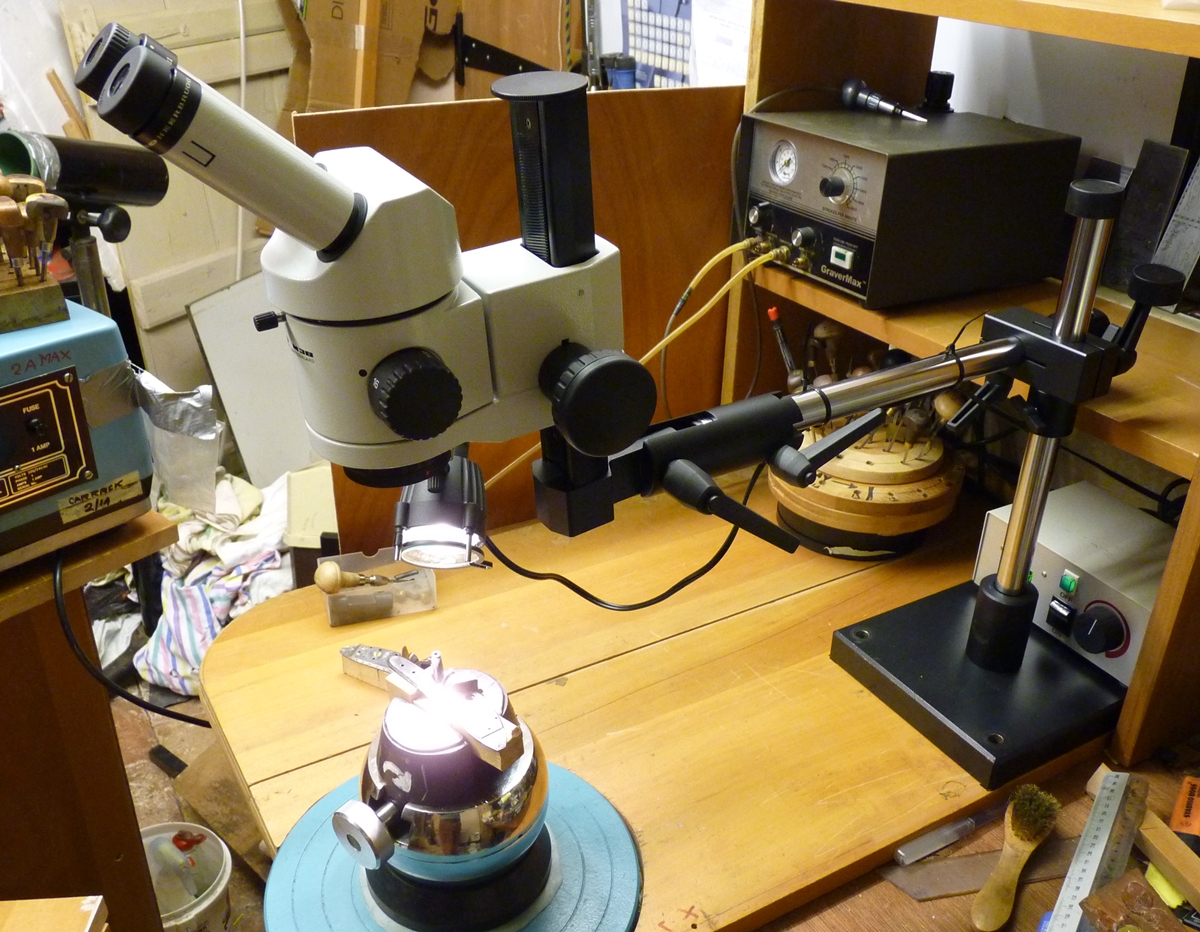
Here is the Wild microscope with the added Konica close up lens – the lens is optically slightly convex and distinctly dished – for minimum distortion it needs to be mounted dished upwards so that the two angled beams are as nearly normal to the lens surface as possible – it seems to work pretty well…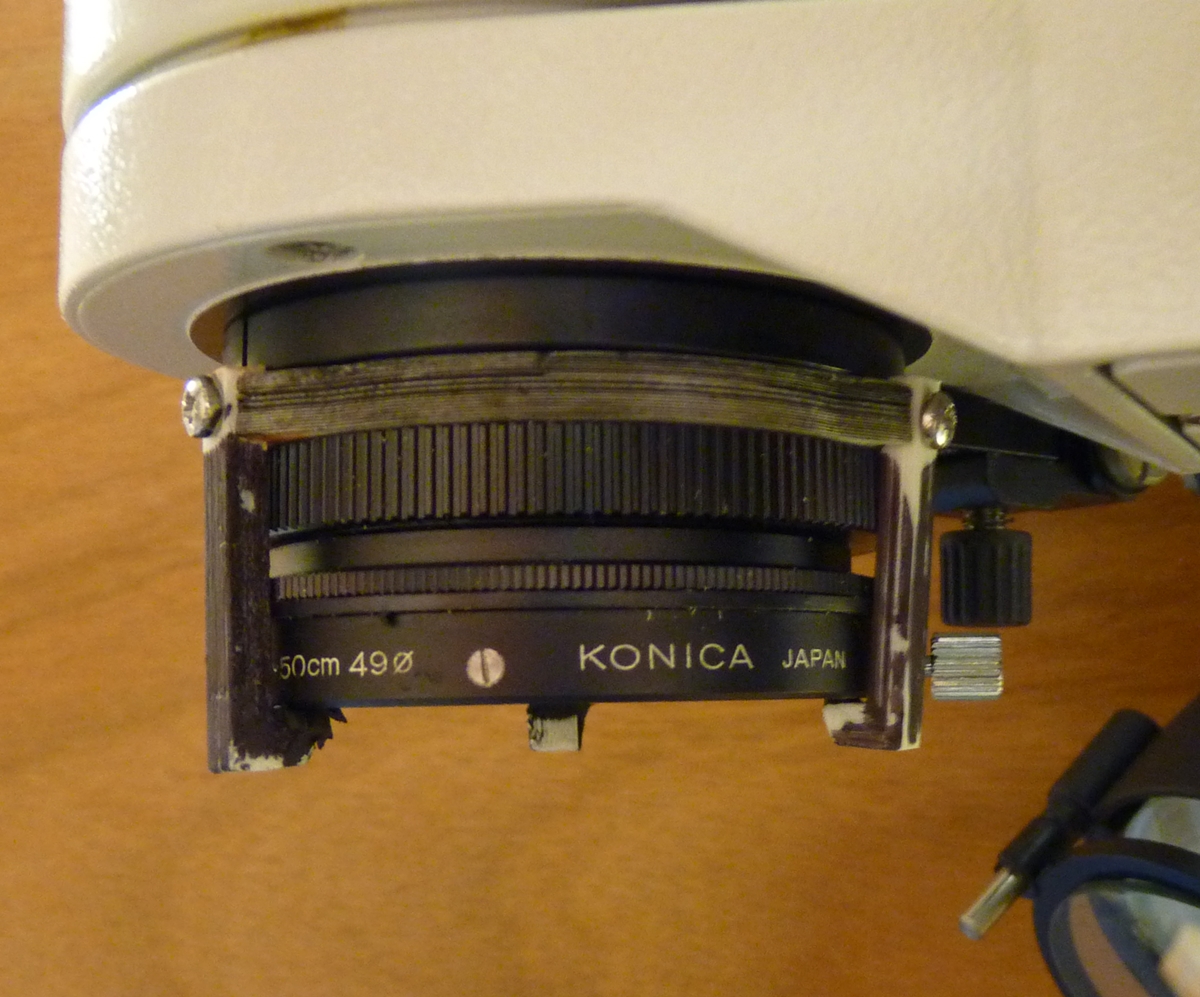
There is a convenient space for two rings above the knurled ring on the objective – the top ring is for the light mount and I’ve put the lens clip below it – it can all be removed without leaving a trace.
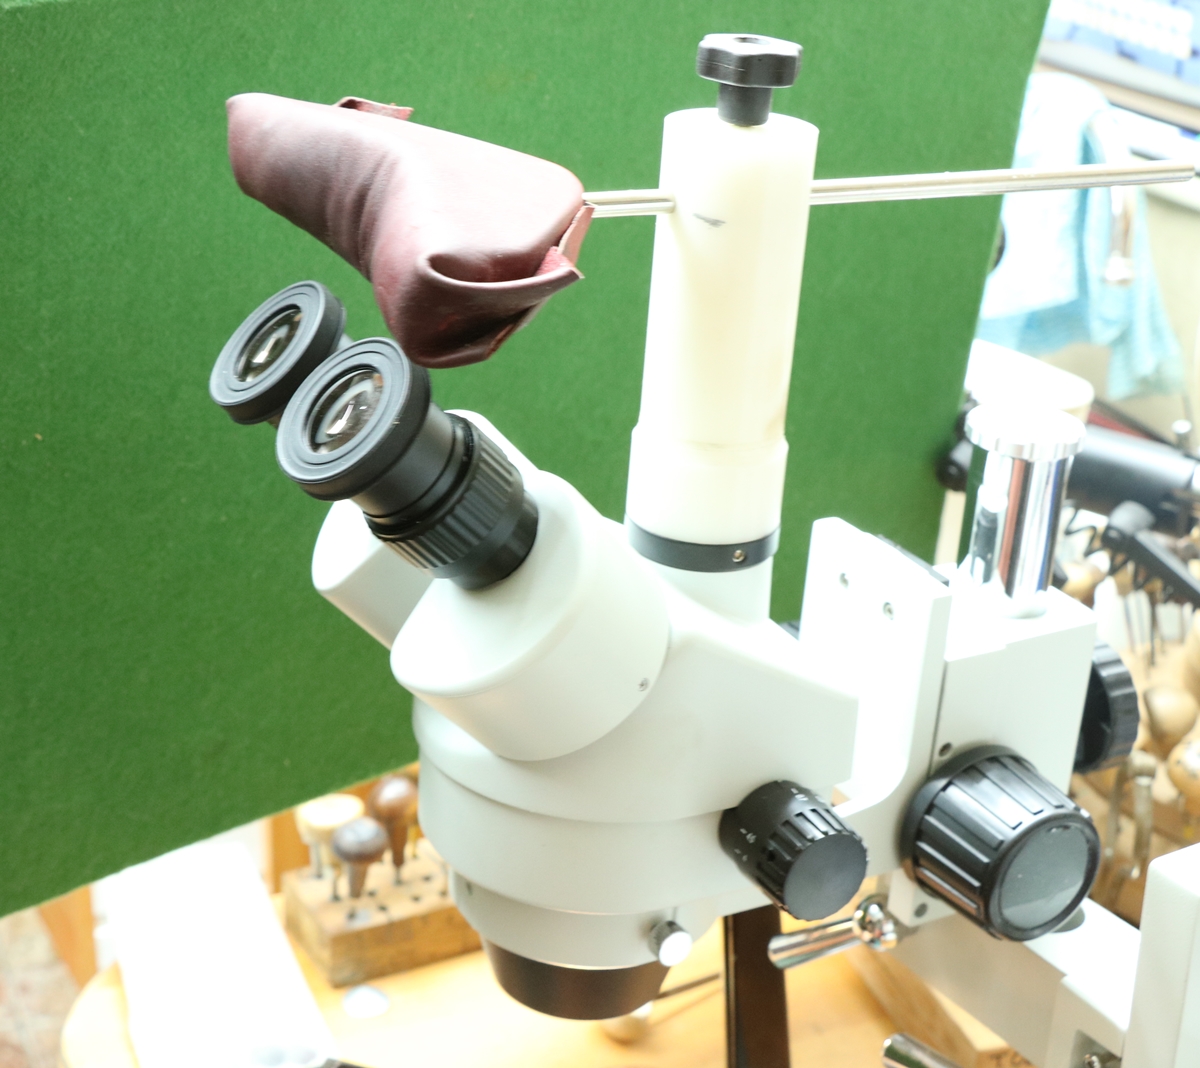
I’m now in the process of adding a headrest on the vertical rack – here are the parts before anodising (anodizing) ;-

I went a bit mad with the knurling tool! All will become clear when its finished.
The D.I.Y. black anodising matches that on the microscope rack perfectly!
I made up a rotating mount for the stand of the microscope so that I could put the microscope at any angle relative to the stand – this will let me use it for displays where I want the stand to one side to leave a view of the work;-
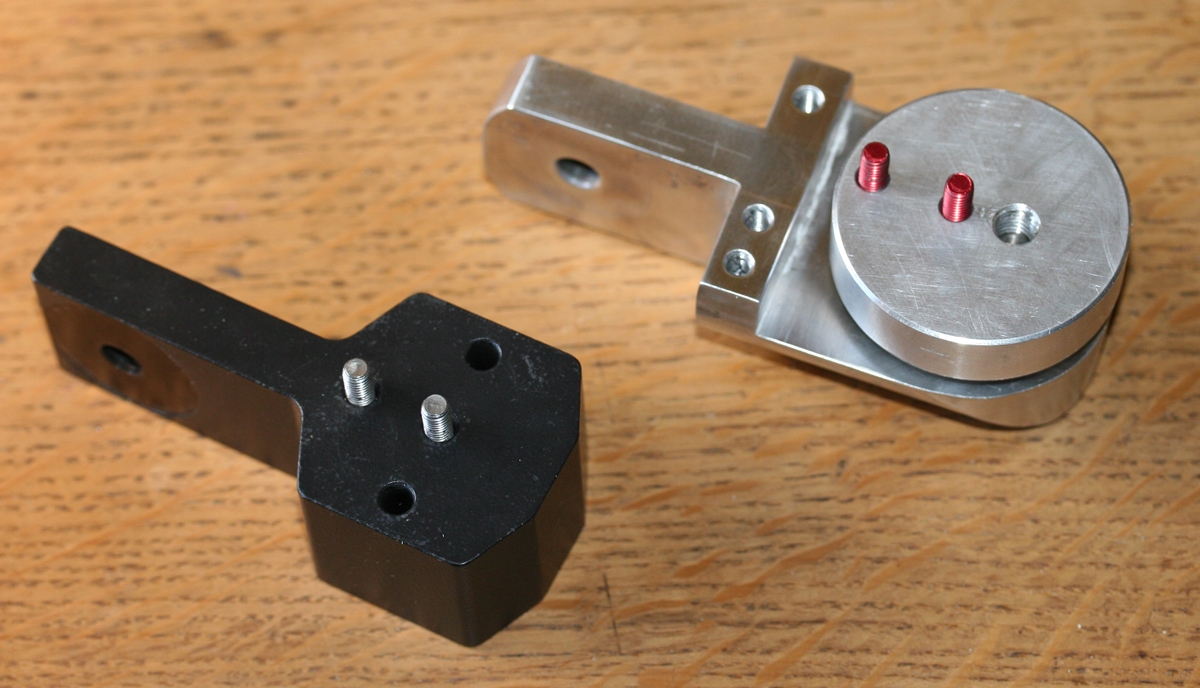
The old fixed head on the left and the new head, as yet unanodised, on the right
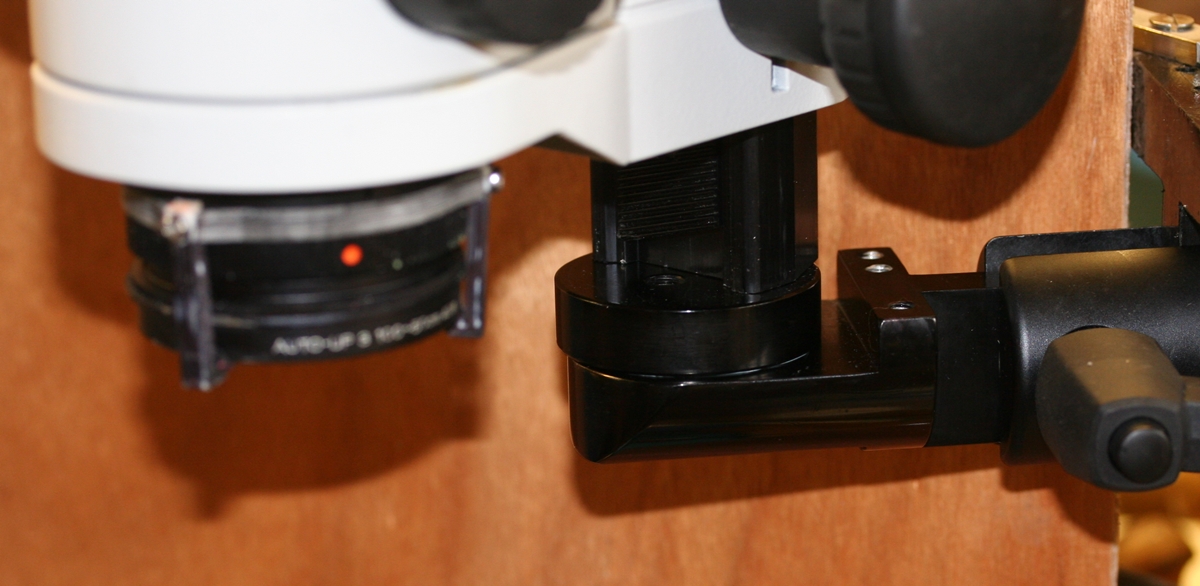
The new head in place underneath the vertical focus rack – the tapped holes are for light and digital microscope fittings.
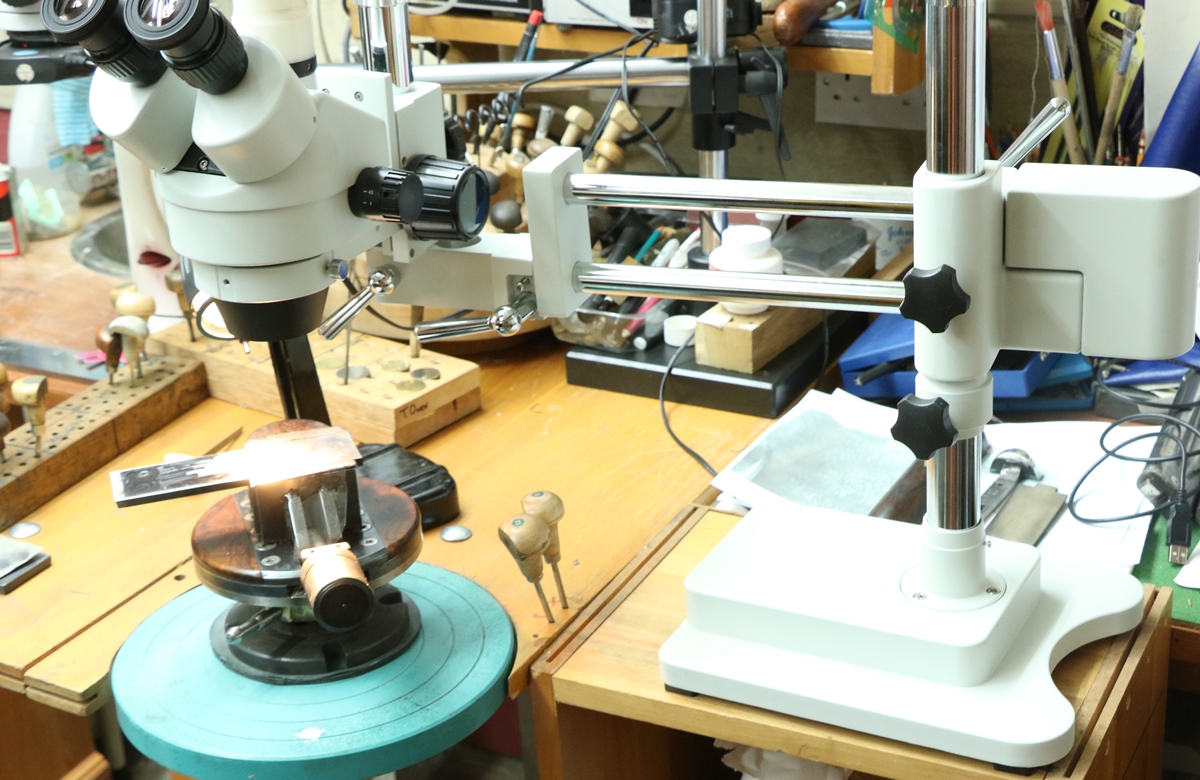
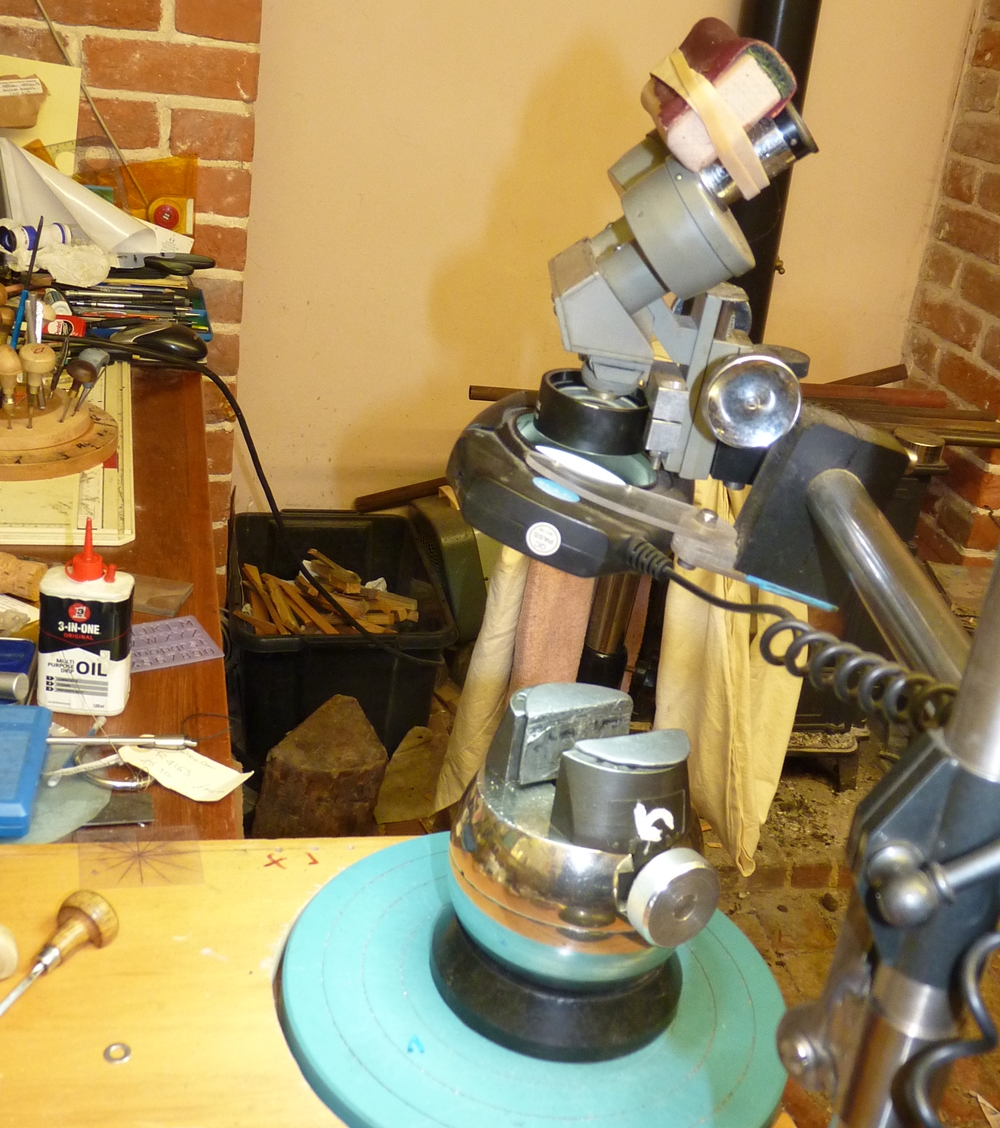
This is the Amscope and Stand;-
This is the old system…
You need some optical aid to be able to engrave guns! Traditionally engravers used an eyeglass, called a loupe, in one eye. Since it was a single lens the working distance is linked to the magnification, so that a x3 loupe has a working distance of about 4 inches (100mm), and a x7 loupe a working distance of about 1 3/4 inches (45mm). Since you need some room under the lens to work without engraving your nose, a x5 magnification is about the limit for simple lenses. Two lenses can be combined with a headband to make it easier by using both eyes, but x3 is about the reasonable limit. If you go to optics with more than one lens in the optical path ( like a telescope – 2 lenses invert the image, 3 put it back to the right way up) you can break the link between magnification and working distance to some extent, but at a cost in complexity, length and cost. Dentists headsets use complex optics to give high magnification while working on teeth without putting their heads in your mouth ( at least mine doesn’t!) but are extremely expensive and microscopes achieve the same goal but without the ability to move around. Ideally you need a binocular microscope with a very low magnification by microscope standards – say x 5 or x 10 and a reasonably wide field of view if you go that route. Special engravers’ or inspection microscopes are available with zoom and magnifications between x 5 and x 20 which have working distances in excess of 4 inches (100mm) , making them useful for engraving. My rescued scientific microscope had a fixed magnification but I put a concave lens (called a Bartow lens) below the lenses that doubles the working distance to about 5 inches and halves the magnification to about x 5, swinging the lens out of the way removes the effect, so you can look at tools and details in your hand without altering the focus of the microscope, which is still ready to work when the lens is swung back. It is awkward to use a straight microscope, much more comfortable to use one with angled eyepieces as most have. You also need good lighting, preferably with the ability to alter the direction of light to control reflections and highlight cuts. A ring light on a microscope is a standard approach – my cheap LED camera light has 2 sections that can be switched separately.
A binocular microscope with angled eyepieces and a rest for the forehead makes for comfortable working.
Work holding;
The vice shown here has now been replaced by one I made that takes up less vertical height – its not as easily tilted but its adequate – see post on ‘Making an Engraver’s Vice’. I haven’t used the ball vice since I made the other.
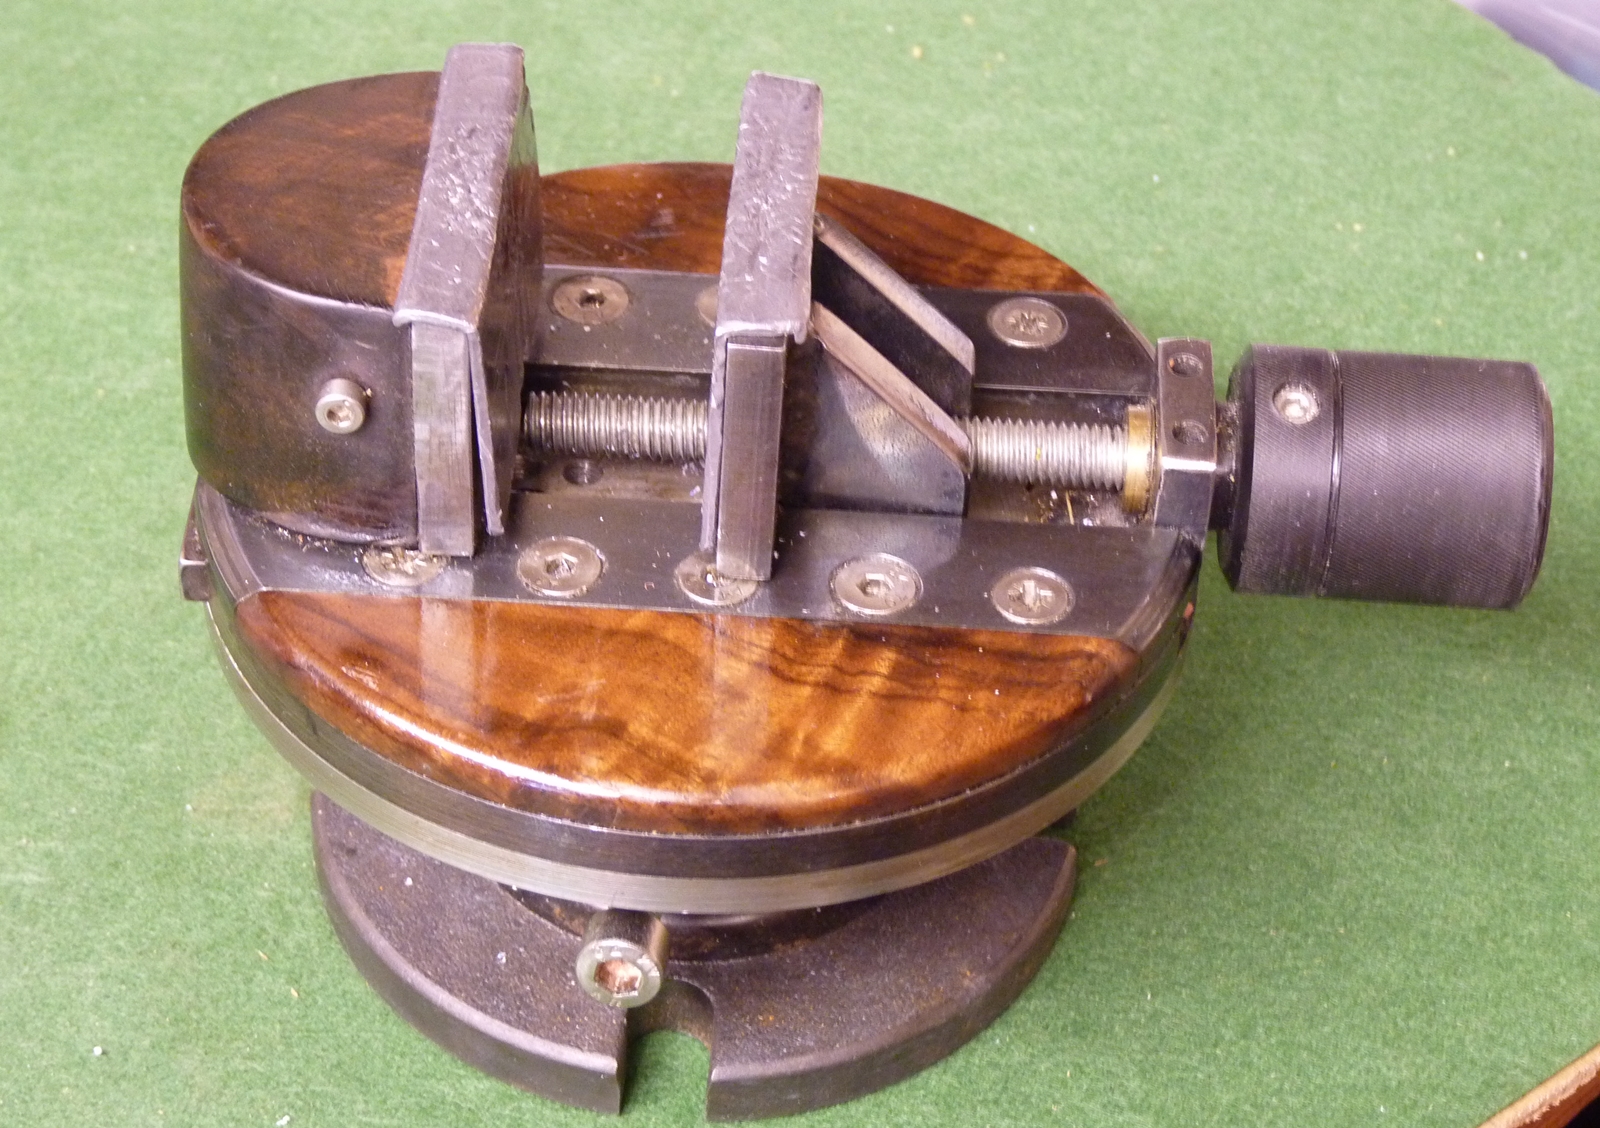
New home made vice on a ball joint – its the only one I use. I often screw bits to be engraved onto blocks of wood to make holding easier.
The curved wooden cover on the back of the jaw makes it comfortable to hold with the left hand.
Traditionally engravers using a loupe would stand to work so they could move round the workpiece to get favourable positions for each direction of cut – since in any one position you can only cut safely and accurately over a relatively limited range of angles – say about 30 degrees for a beginner. Alternatively you sit and have a vice that can swivel and tilt ( an engravers block). If you use a microscope, it seems to be easier to learn to engrave, because you will have a steady view at good magnification with good lighting and can place each cut more accurately, and the better vision means you can make your cuts more deliberately. The problem with using a microscope is that you are held in a fixed position with a very limited field of view – maybe about 3/4 inch (20mm) across, ( much bigger with a decent microscope!) and as you move the work around you have to keep the bit you are working on within that circle. That problem is eased by fixing a freely rotating turntable under you microscope and moving the engravers block about on it. That way you can position the microscope so that its field of view is centered over the centre of the turntable, and anything that you bring into view will stay there when you rotate the turntable. It works well – I have a cheap Indian engravers block from Cousins, and a cheap 10 inch (200mm) turntable made for sculptors that has been let into the bench. If you get it all set right you can make long curved cuts almost without moving the graver, just by rotating the turntable. If I want to lock the turntable I can put a wedge in the edge. I got rid of the T bar that tightened the vice and made a knurled knob as it stays in place better and you can tighten the vice without looking at it.
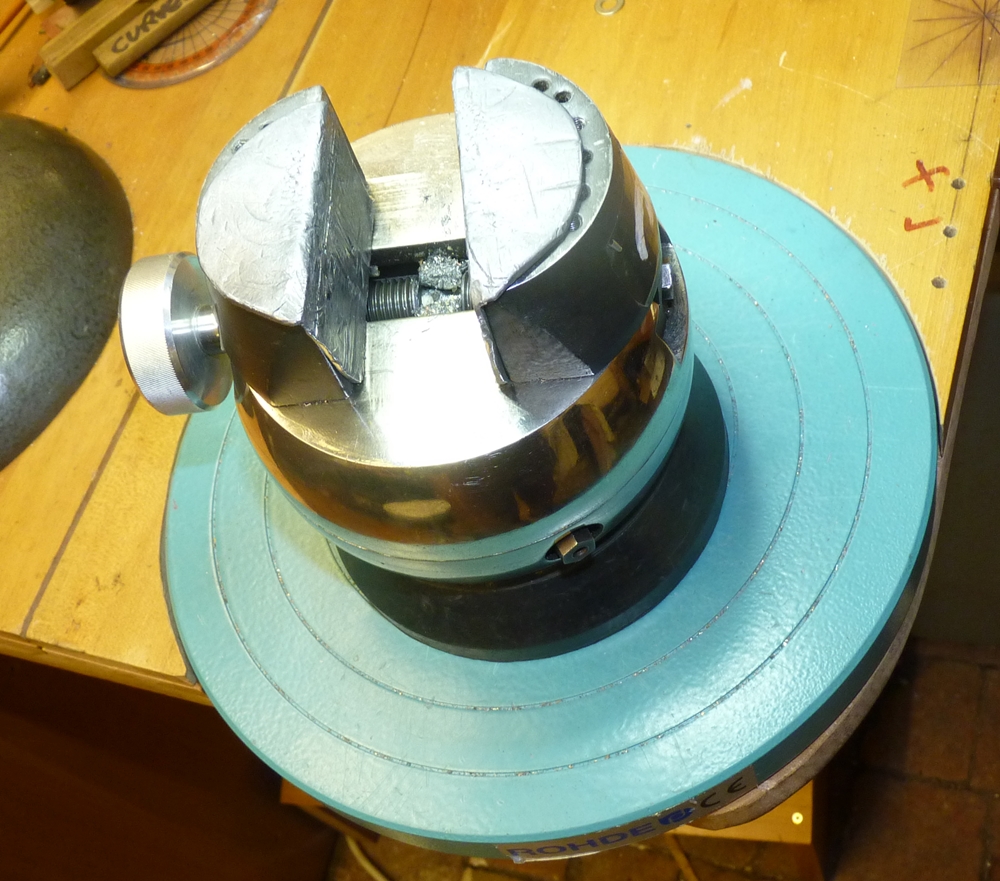
Engravers block on cheap turntable let into the bench – I tend to use sheet lead on the jaws to hold work.
This vice has now been replaced by my own make vice – see separate post – I use that all the time now as its more comfortable and works just as well.
GRS Gravemaster
I bought a GRS Gravemaster machine from Geoff Moore as he didn’t use it much – I have used it a bit, and for some things its very good – for instance engraving scales on the cock of percussion hammers which is beastly to do by hand on account of the metal and the geometry, but I’m sceptical about using it for ‘normal’ engraving as I think it changes the look subtly, and I’m keen to keep my engraving authentic.
I found another use for the Gravemaster a few days ago; because the graver cuts more or less on its own with virtually no pressure from your hand, you can get away without fixing the part you are engraving – at least not as well as you would have had to do with hand engraving. I did a few necessary cuts on a frizzen held on the vice with my left hand without difficulty.
I recently went to see Katia Filipovic (http://www.gunengraving.co.uk/) in Stamford, and had a very useful afternoon comparing notes. I was flattered that she thought my push engraving just needed practice, rather than lessons, but I am going to get her to give me lessons in inlay and chasing some time later in the year. Have a look on her website – she does some really nice engraving on guns and also watches and other things. Apparently the stainless and titanium watch cases have the hardest metal to engrave, and I got some useful tips as to what tools last longest – I now need to do a bit of shopping for GRS carbide and Glen Steel tools from Suttons – much more expensive than the 1/8 inch square HSS and Cobalt steel I usually buy for less than £4 for a 2 1/2 inch length but hopefully also longer lived. ( I have now ordered some tools by phone – its worth noting that if you are just ordering things that will fit in a small package you avoid the high delivery charge that is added to online orders – my phone order saved about £5, it can work with other online outlets too). I have tried carbide tools before but they do tend to be more brittle, and if I’m going through one of the phases when I seem to be breaking the points off gravers at every turn, carbide is very annoying because it takes much longer to get back to a good point! – interesting to see if these tools do last longer.
I had an interesting experiment with the Gravemaster – it came with 2 springs that looked about the same wire thickness but one was longer that the other – with the longer one in the tool the cutting won’t start till the amplitude is high and the cut starts very agressively, whereas the shorter spring is much more progressive. I’m still playing around with the settings of air pressure and pulse frequency that have to be tuned to the resonance of the spring and weight in the tool – when its set up properly it cuts very easily and can be manipulated quite precisely, but I haven’t really managed to get as much control as I have with push engraving. I had a bit of trouble with the Bambi compressor that wouldn’t stop running and eventually cut out from overheating as its only rated for intermittent use – I found that the pressure regulator on the compressor seems to have a punctured diaphram and leaks badly when it gets up to the set pressure so the compressor wasn’t shutting off. I did a fudge by turning the pressure valve up as much as possible and turning the electrical cut off pressure switch down so that the compressor shuts off before it gets up to the set pressure of the valve – must get a new pressure regulator valve some time. With hindsight I am sure the Bambi was fitted with a pressure relief valve not a damaged pressure regulator – I don’t know if it always had been, or if Geoff had changed it at some point – With the new pressure valve it works fine, although the 901 handpiece and foot pedal are quite thirsty.
A year on from the blog above, I use the Gravemaster very occasionally for specific things – a visitor to this blog asked me about it – this was my reply
The Gravermax doesn’t get a lot of use for a number of reasons –
1) – as I don’t use it very often I am not really tuned in to it.
2) – the style of most 19th century engraving rather depends on the limitations of hand engraving – take those away and you don’t have 19th century engraving, as all the Americans who try to imitate old English engraving with a Lindsay should realise but don’t!
3) – My belief is that for very fine work you are relying on the resistance of the tool in the metal to give you precision you can’t get freehand – I’m not shaky, but the trickiest part of engraving lettering 1/3 mm high is the initial placement of the tool on the metal! Once cutting I’m essentially controlling force not position. With either air system you eliminate most if not all of the resistance. One (main) element of control is lost!
4) – Having said that, I use the Gravermax in some particular situations – on hard brass where slip is entirely unpredictable so eliminating force is useful, and on convex surfaces where it is often difficult to judge the curvature and if you don’t get it right you slip. The same is true in long straight cuts where the angle of your hand changes – 19th century engravers cut them in shortish sections anyway. In those and a few other situations its an advantage to eliminate most of the resistance.
I haven’t used a Lindsay or a palm controlled Gravermax – mine has a pedal control. I don’t know any professional gun engravers in the UK with either, although I don’t actually know what equipment they do have – mine was owned by one, Geoff Moore, who only used it for stippling and even then got fed up with it and sold it to me! I think if I did deep relief work it would probably be worth persevering with it – they shift metal fast, sometimes too fast.
I think one possible advantage of the Lindsay is that it doesn’t need tuning, whereas the Gravermax system sits just one side of resonance and is pulled into resonance to cut – mine is quite critical to tune up, although it doesn’t get out of tune very often.