I was surprised at how easy it was to get perfect results on some aluminium parts for my microscope headrest that I wanted to match the rest of my WILD microscope. There are lots of videos and info on the web, but I have put down the essentials so that I know where to look when I come to do it next time!
Click to see more…….
WARNING – Nitric and Sulphuric acid are hazardous liquids – they attack skin & eyes etc and must be handled with care – wear latex gloves and eye protection and old clothes – splashes of sulphuric acid will rot your clothes and they will fall apart about 24 hours later! Do not dispose of down drains without neutralising carefully with bicarbonate of soda (add very slowly).
PRECAUTIONS – the process gives off fumes – do it in a shed with lots of ventilation or out of doors. Keep a bucket of strong bicarbonate of soda solution handy in case you get acid on your skin or to neutralise acid spills etc. Keep away from children and pets.
HINTS & TIPS – Lots about anodising on the web suggests it is difficult and people do have a problem getting consistent results – that has not been my experience! My method is reliable – I’m sure you can fiddle around with the times, currents etc and you have an infinity of possibilities – stick to this set if you want results, observe the suggested temperatures for the anodising bath and dye, and keep the current density and time about right. It is possible to do it with batteries etc, but you will have no real control of the process, and you’ll be lucky to get consistently good results………
You need:
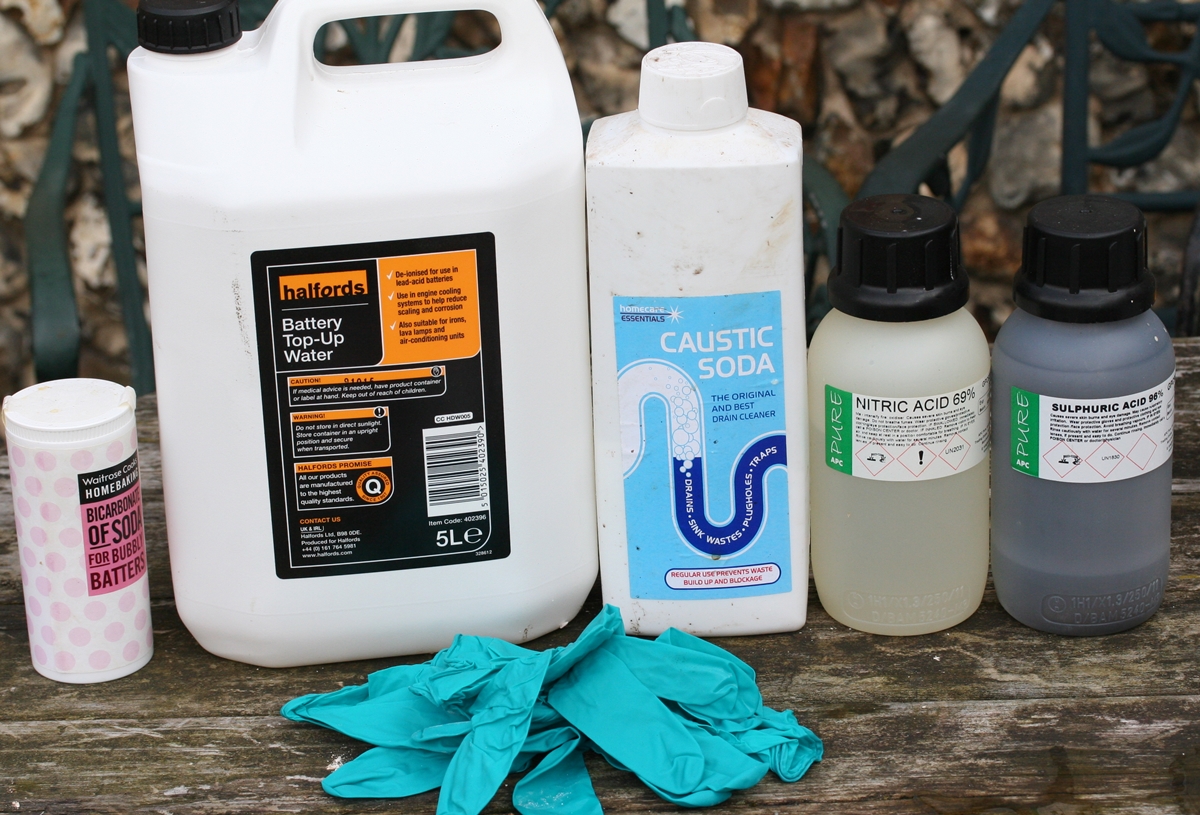
Chemicals needed – the Nitric acid is rarely needed
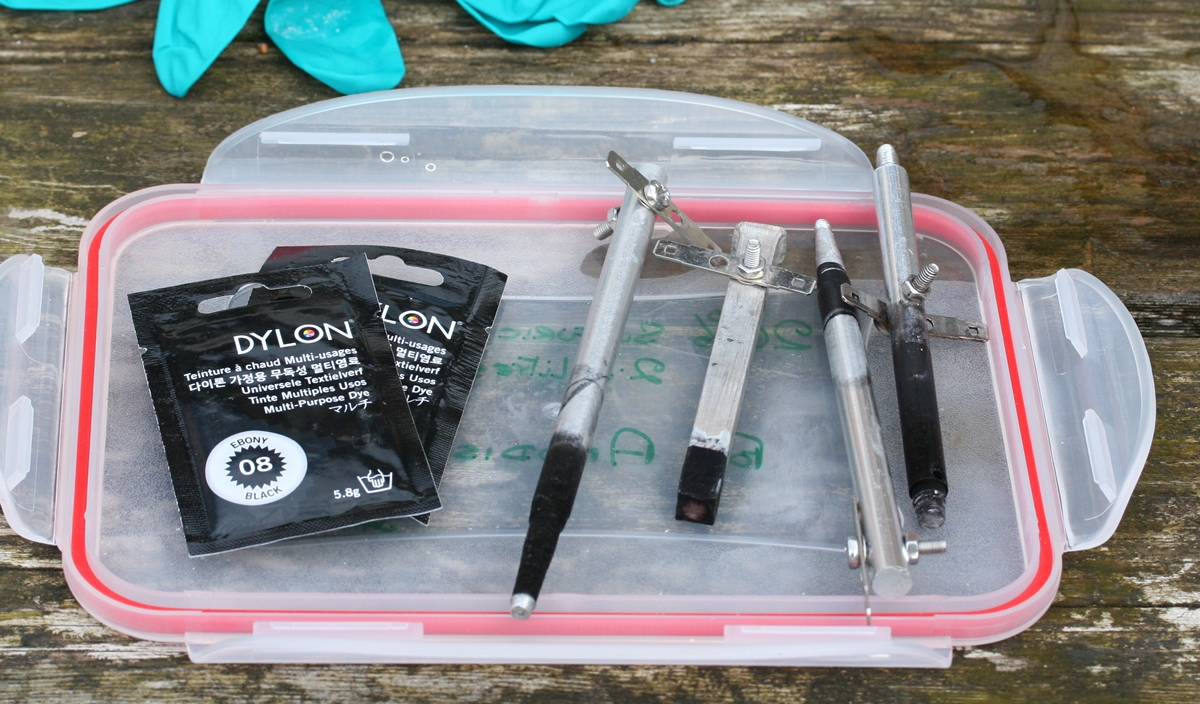
Good parts holders are well worth making!
Metal Finish – needs to be perfect, any blemishes will show up more when anodised.
Fixing – parts to anodise need to be held securely on ALUMINIUM or Titanium fixtures for electrical and mechanical connection – no other metals may be used as part of the anode system in contact with the acid – I used old rods from a wind chime and tapped threads on the end to give rigid handles for anything with tapped holes – it makes handling parts much easier all through all the processes (when sending trade parts for professional anodising I always put a tapped hole in an inconspicuous place for fixing)
Cleaning – scrub several times with washing up liquid and hot water, then do it again! Wear Latex gloves so you don’t put finger prints on the clean metal – you’ll need them for the rest of the process anyway.
Etching – mix up a solution of Caustic Soda (NaOH) in distilled water – about 30 – 50 gm per litre of DE-IONISED water, add soda to full volume of water and stir with a plastic rod or spoon. Leave parts in solution to fizz for 2 to 4 minutes only – this will clean, remove existing oxide and slightly etch the surface – omit this stage if you want a highly polished finish but you will have to clean perfectly instead. Etching eats away the metal so it may affect the fit of precision parts – don’t etch for longer than necessary for the finish you want- longer equals more matt surface..
Rinse.
Post etch – a quick dip in a 50:50 mixture of 70% Nitric acid and distilled water will get rid of any metals other then aluminium that have been exposed in the etch – usually OK to omit this stage unless there are ‘smuts’ on the etched aluminium. Nitric acid is nasty stuff so don’t use unless you need to.
Rinse in distilled water.
Anodise – You need a plastic container at least 2 times bigger than the parts all round – I use a plastic box about 6″ x 9″ by 4 1/2″ 150 x 225 x 110 mm) deep that holds 2.5 litres for my parts ( 2 litres of distilled water to which 500ml of acid was added slowly while stirring – it gets quite warm..

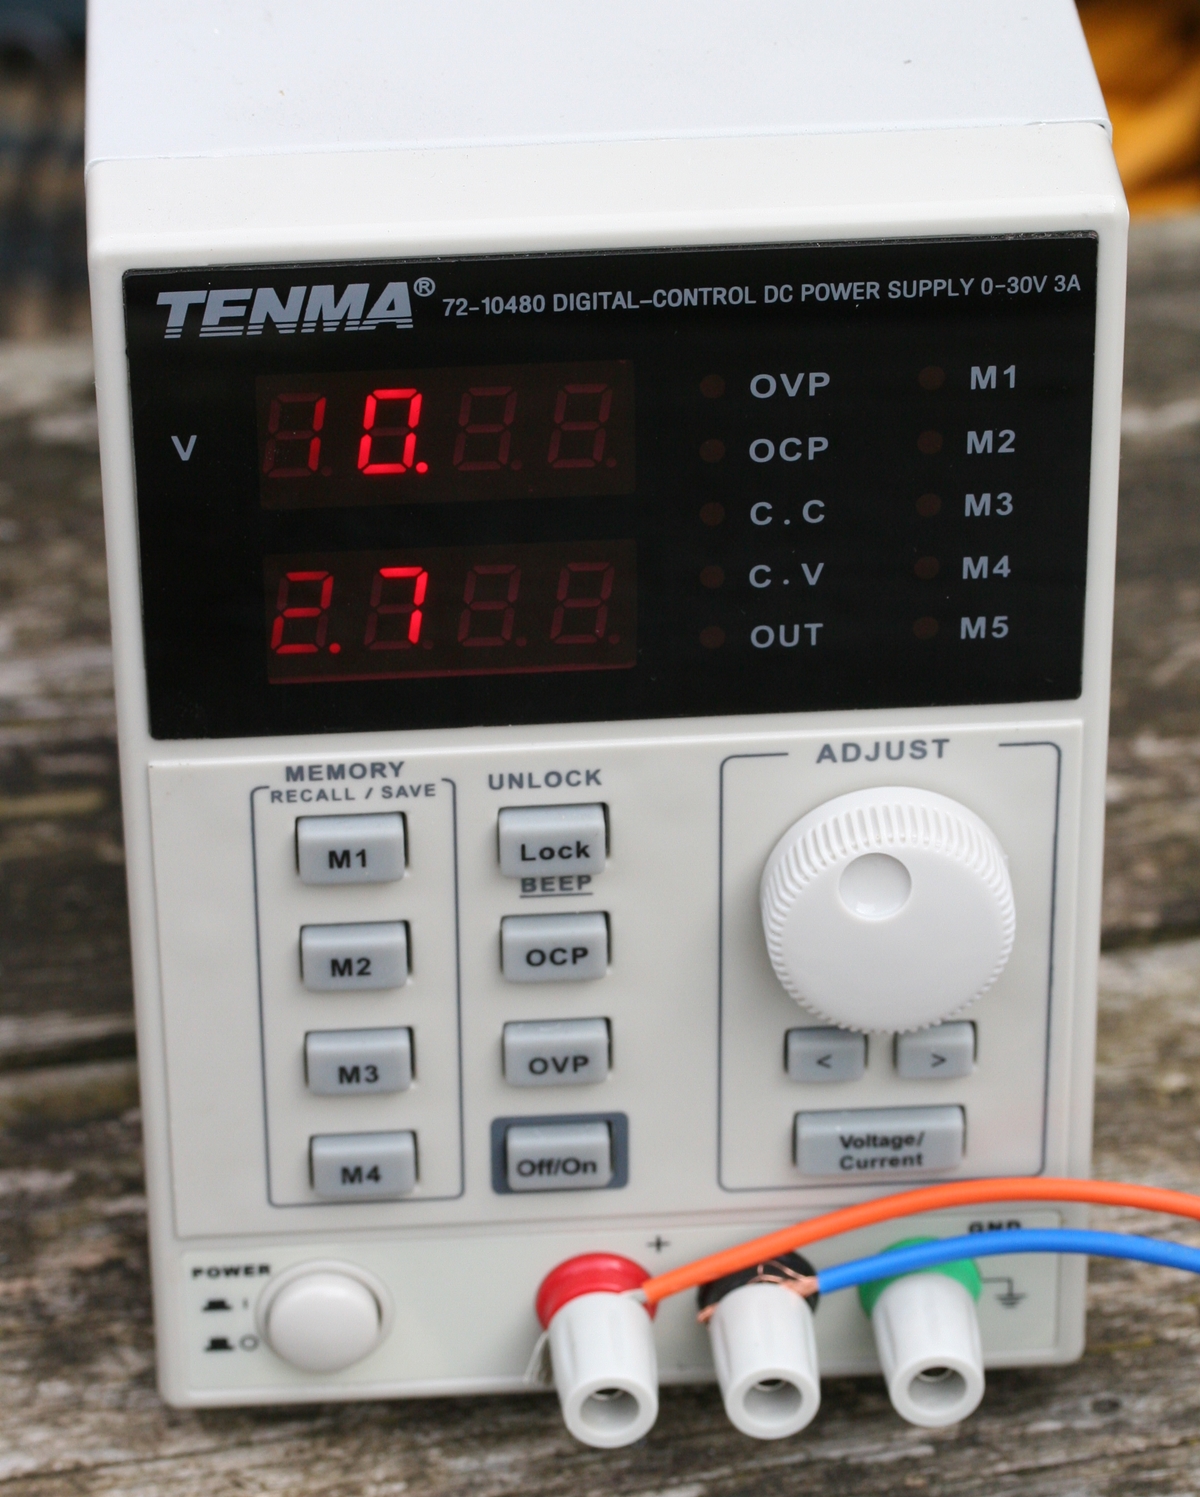
I use a constant current supply – these parts need about 2.7 Amps and the voltage can get up to about 12 Volts.
Cathodes – the cathodes are made of lead and need to be at least twice the surface area of the parts – if the lead is against the side of the box it doesn’t count for area. Connect it/them to the negative terminal of the supply but again no other metal except lead is to be used in the liquid – join the wire on out of the bath. Clean the lead before putting it in the acid.
Anodes – the parts are the Anodes and are connected to the positive terminal of the supply – only aluminium allowed here in the solution. They should have a fairly clear ‘view’ all round to the cathodes. A beam across the top of the box can be used to suspend the parts.
Anodising Electrolyte – Sulphuric ( Sulfuric) acid solution made with 20% concentrated (98%) acid and 80% distilled or de-ionised water ( battery top-up water) – always add acids to the full volume of water as they heat up. If you can’t get conc. sulphuric then use battery top up acid diluted 2 parts acid to 1 part water. You can keep the electrolyte for future use as it isn’t exhausted by use.
You need a power supply that gives D.C. of up to 12 Volts with a current appropriate to the surface area to be anodised, at the rate of 160 milliamps ( 0.16 amps) per square inch of total surface area. Some people use a simple 12 Volt supply and hope for the best – I use a cheap 30V 3 Amp supply from ebay that can be set to give a constant current at the required rate and adjusts its output voltage accordingly. I found my parts were roughly 18 square inches ( you can trace the outlines onto squared paper and measure that way) so a current of 2.9 amps was OK – just within the capability of my supply. At that current an anodising time of 1 hour is recommended. Adjust the time if you have to use a different current per square inch.
Aim to keep the temperature around cool room temperature – the solution will heat up when you mix in the acid so you may need to stand it in a basin of cold water to cool it to 20 to 25 Centigrade. The electrolytic current will heat the solution so you may need to keep an eye on the temperature – maybe adding ice to the water in the basin. The quality of the anodising suffers if the electrolyte gets too hot, and it will not take the dye well.
Dyeing -After the appropriate time remove the parts and rinse in deionised water and place in your choice of dye solution. For Black, blue or green DYLON cloth dye is very good ( I used Ebony Black and it does what it says on the packet!) – some recommend Quink inks for reds. DYLON should be diluted into about 500ml (a pintish) of hot water and allowed to cool to 30 to 40 centigrade ( ) before use. Put the parts into the dye solution for 20 minutes, keeping the solution warm but NOT above about 40C. You can buy proper anodising dyes on the web – they are better if the anodised part is to be exposed to sunlight.

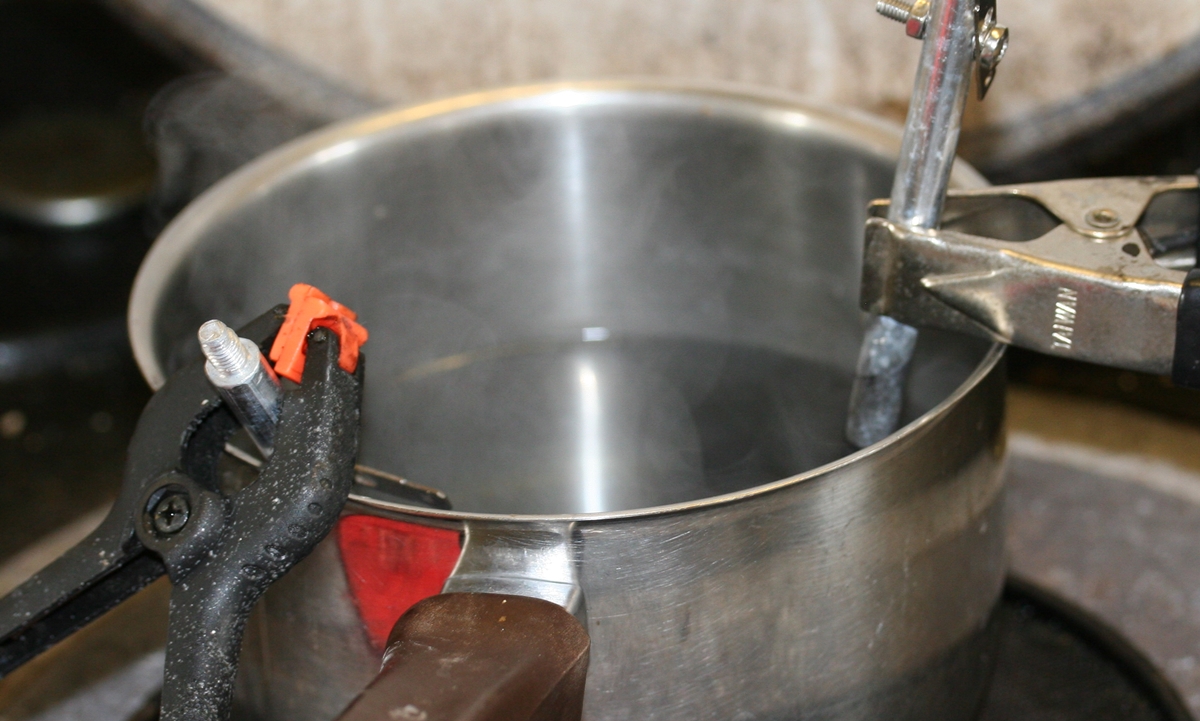
Sealing- After anodising the pores of the aluminium oxide coating are open and it will take up the dye and hold it within its pore structure. The pores close up over a period of days, but this can be accelerated by putting the part in near boiling water for 20 minutes – this locks in the dye. To ensure an even dye colour it is best to steam the part before putting it in near boiling water and then putting the water to simmer very quietly. Rapid boiling initially may displace some dye.
Polishing – Once out of the sealing stage let the part cool and polish with a soft cloth. I rub the part with a little beeswax while it is still hot and then polish it off to give a pleasant finish – I’m not sure it is necessary or beneficial, but I like the smell!
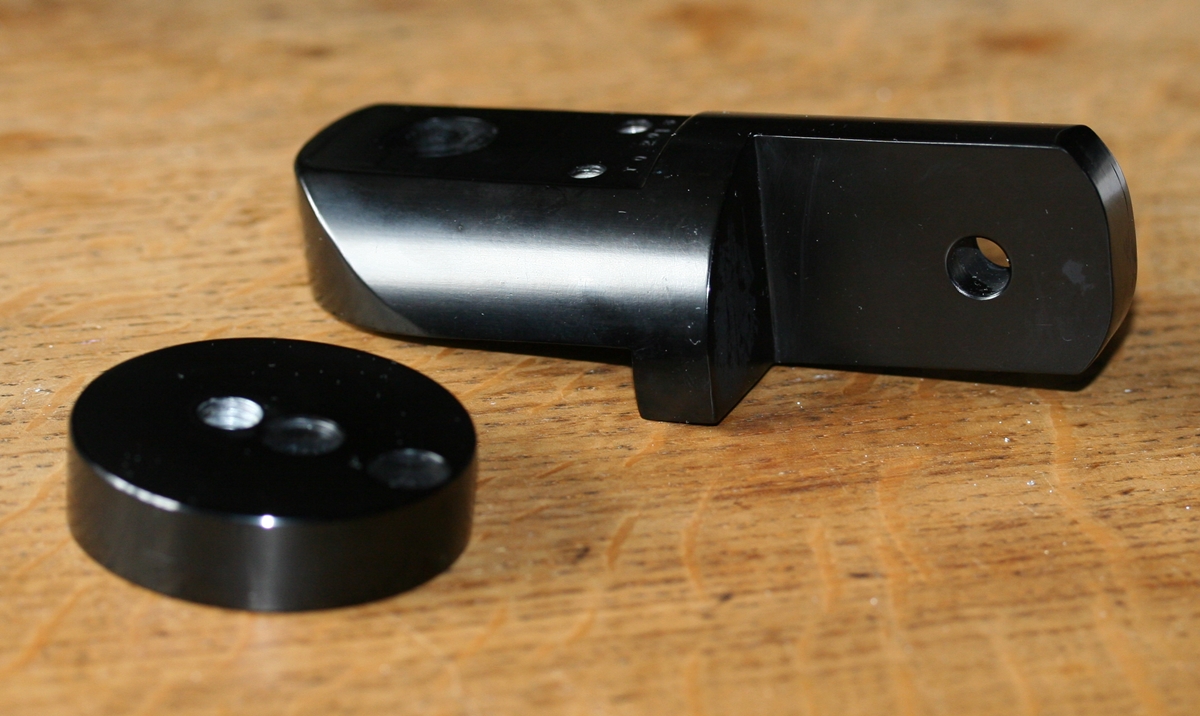
As you can see, they come out a very solid black – did have one small fault – probably due to a bit of contamination lurking in a screwhole;-
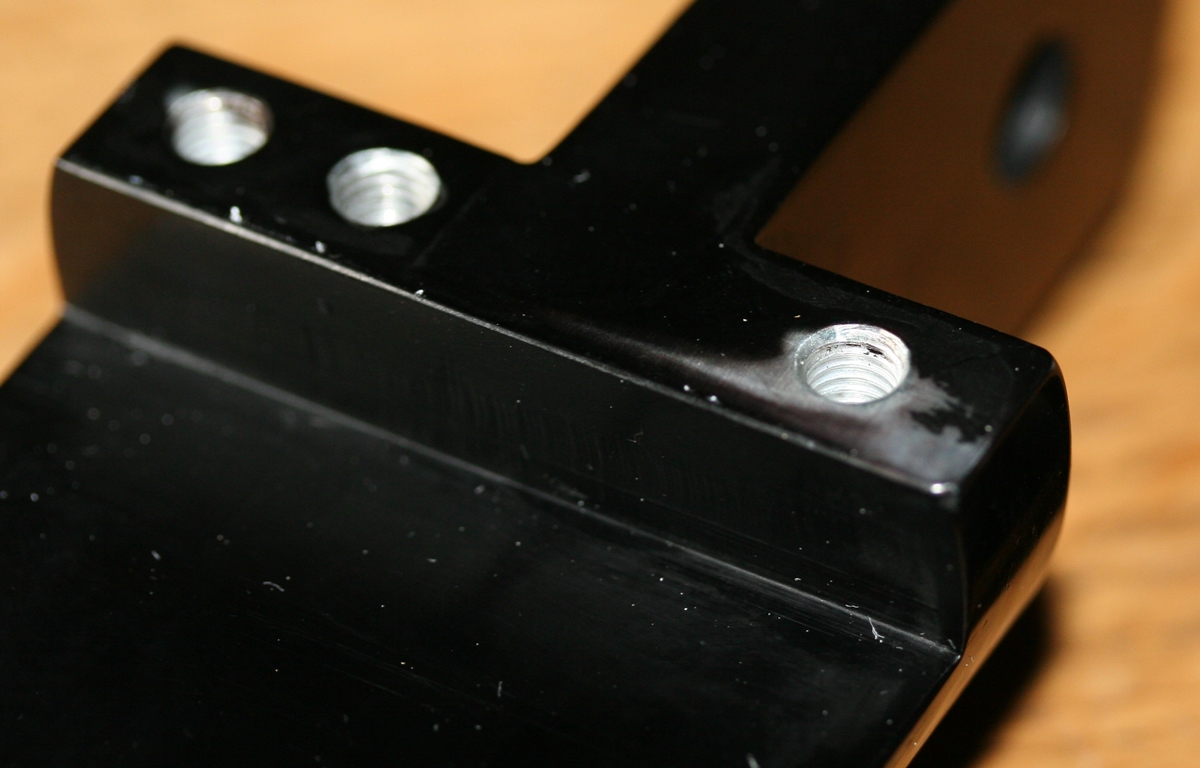
– unfortunately in one of the few places that will be visible!
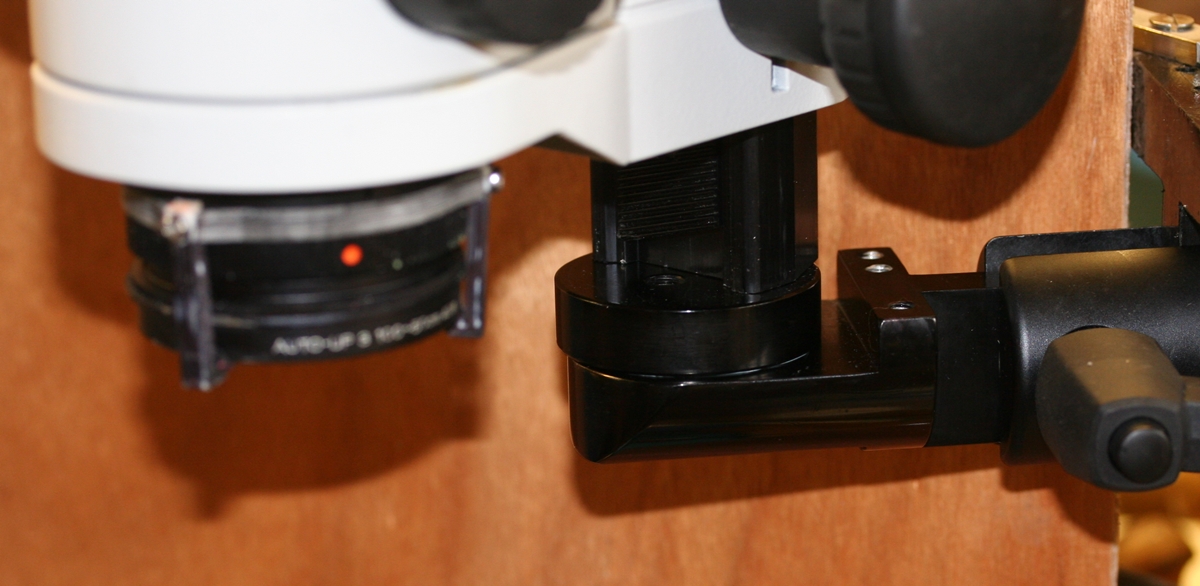
Here is the finished rotating head for – my microscope – it allows the stand to be at an angle.

These were the first parts I anodised for a forehead rest for engraving.