The lock lock I’m making up here is a from a set of castings from Jim Kibler in the US, I think he charged $125 for the kit which has all the cast parts but no screws – good value for a nice kit. I built up the lock without any particular destination in mind, but later I made a pistol in the style of a sea service pistol and fitted the lock to that – see INERT PISTOL post .
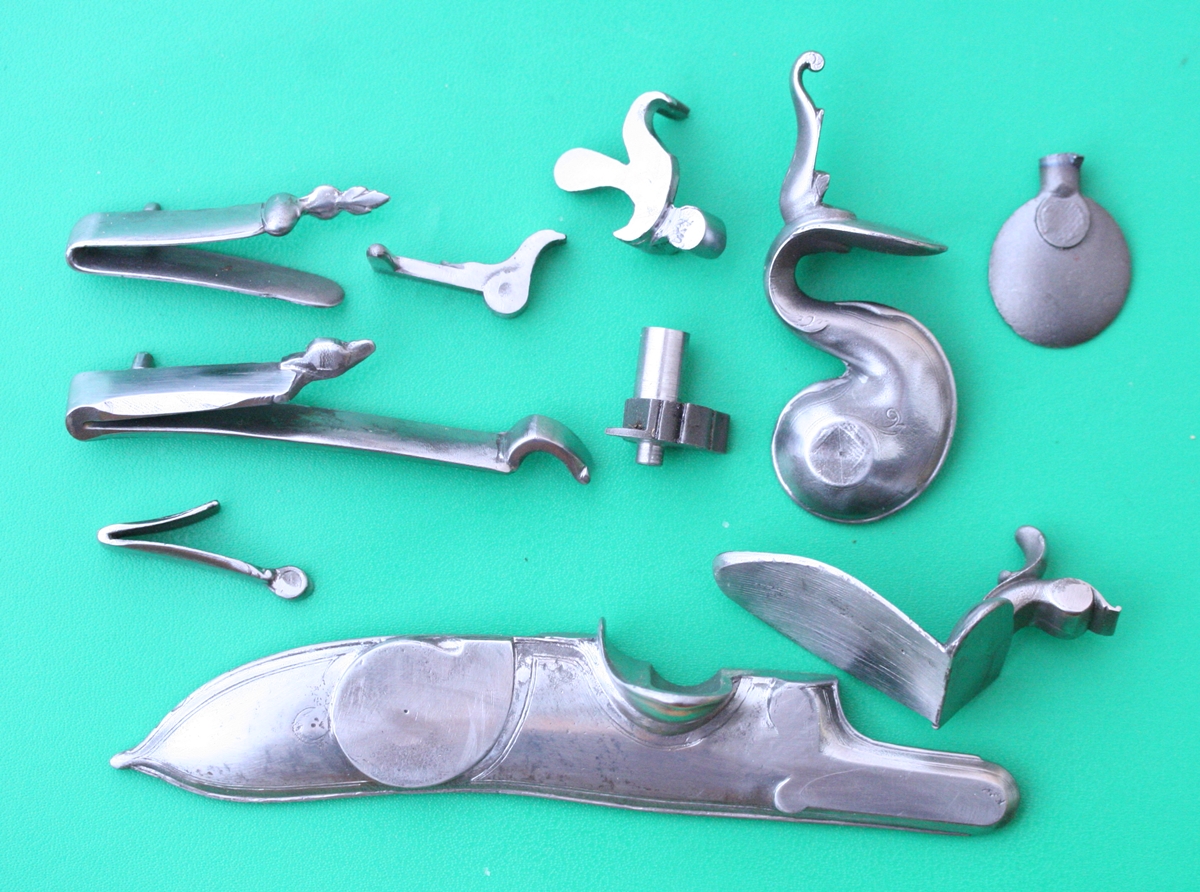
Here is the kit – I have cleaned up most parts and turned the tumbler down – only the top jaw is untouched.
I made a mistake in the order in which I did things – but in any event its a circular operation if you have no measurements or example to go by and don’t have a lot of experience. You need to mount the bridle and then drill the holes for the tumbler through the lock and bridle in one go so you know you have perfect alignment. because I wasn’t sure of the position of the bridle ( I had already had one go at mounting the bridle and had to weld up the holes and start again!) I drilled the tumbler hole in the lockplate and drilled the tumbler hole in the bridle before fitting the bridle, but I couldn’t get perfect alignment so I had to ease the tumbler hole in the lockplate very slightly to stop it jamming ( I had probably got the fit too precise for my own good!
My tumbler shafts are 7mm and 4 mm, and the bridle screw and sear screws and mainspring screw are UNF 5, The sear spring screw and the cock fixing screw are UNF 4. I made the cock topscrew UNC 8, although with hindsight it is too thin and should be UNC 10.
Having got the tumbler and bridle attached I drilled through the bridle for the sear pivot and tapped that into the lock plate – now you can see the tumbler positions for half and full cock and the limits of travel.
Next job is to fix the cock onto the tumbler in the correct orientation on a slightly tapered square. I first drilled the cock with a 5mm drill and then filed it square using the faint original marks to align the qguare ( it doesn’t matter how its aligned at this stage) Having got a fair square with a slight (maybe 5 degree or so) taper the next, difficult, job is filing the tumbler at the exactly correct angle to put the cock in the correct alignment. This involved scribing a line from the cock hole onto the back of the cock and using this to align the first flat on the tumbler shaft
Cock alignment – I made the cock screw so that I could fix the cock onto the end of the tumbler shaft to try the alignment – the essentials are that on firing the cock must be stopped by the step on the back of the cock contacting the wide top of the lock plate and at this point the tumbler should not have rotated so the end is below the lockplate, and that it still provides a resting place for the mainspring. With the sear in the half cock notch the bottom jaw of the cock should be more or less parallel to the top of the lock where the cock rests on firing, and the cock should be more or less upright Having got a trial alignment the tumbler can now have a square filed on it to fit the cock, filing and fitting and smoking and tapping together and filing and so on until you get a good fit. Make sure you always test it in the correct alignment.
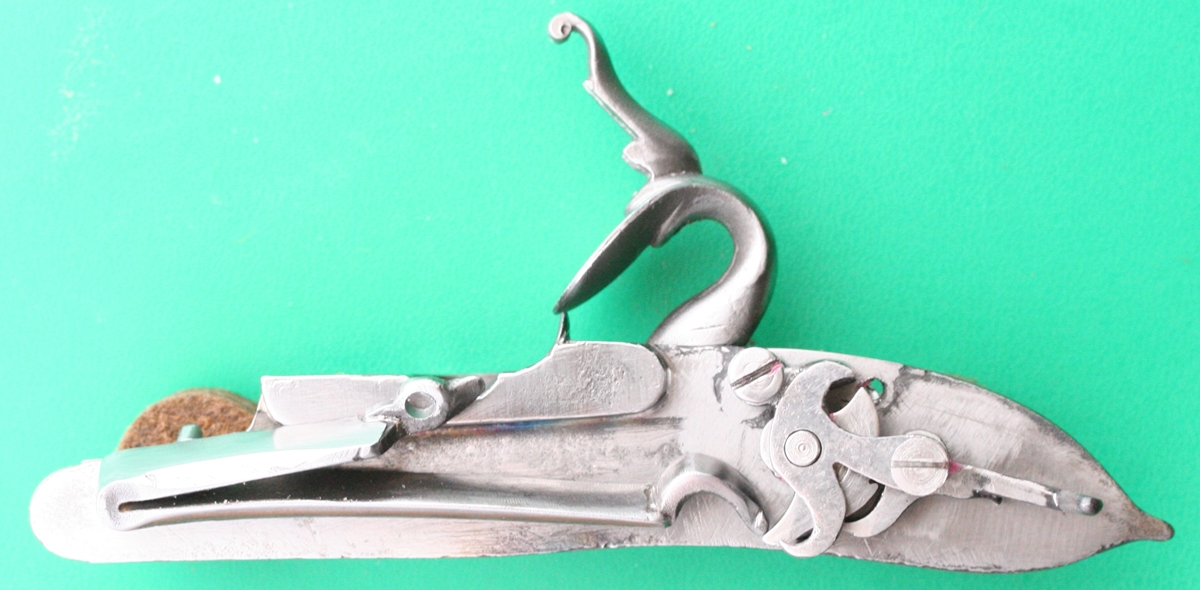
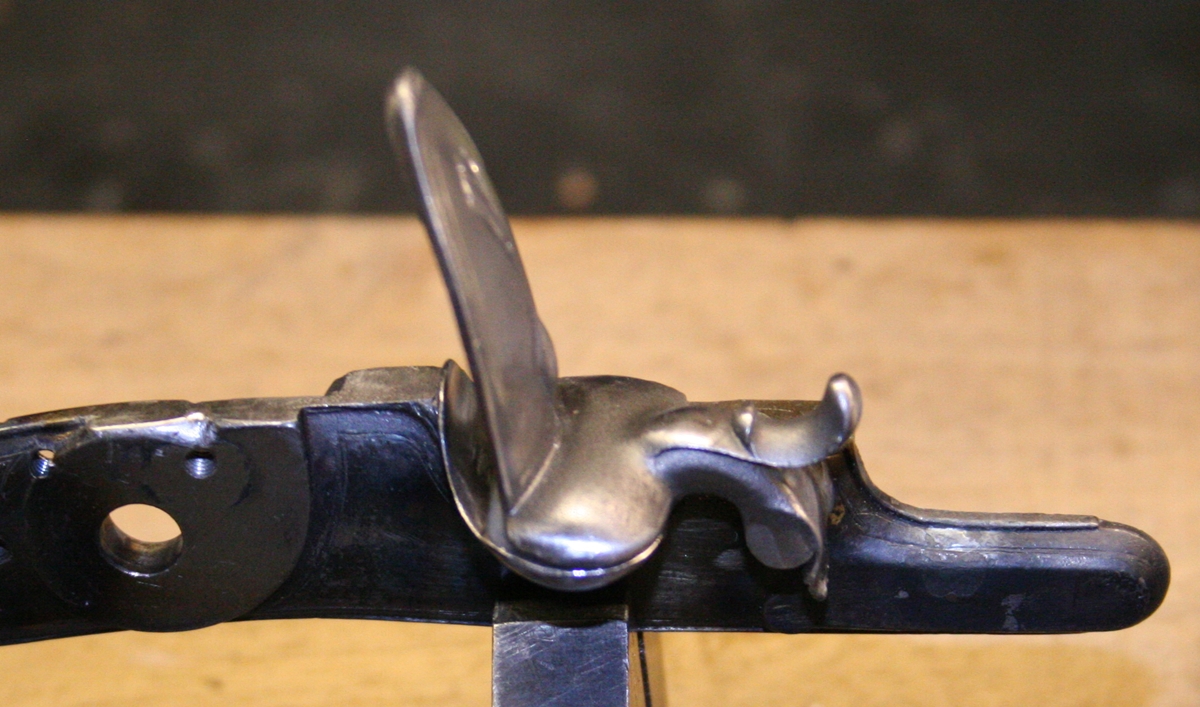
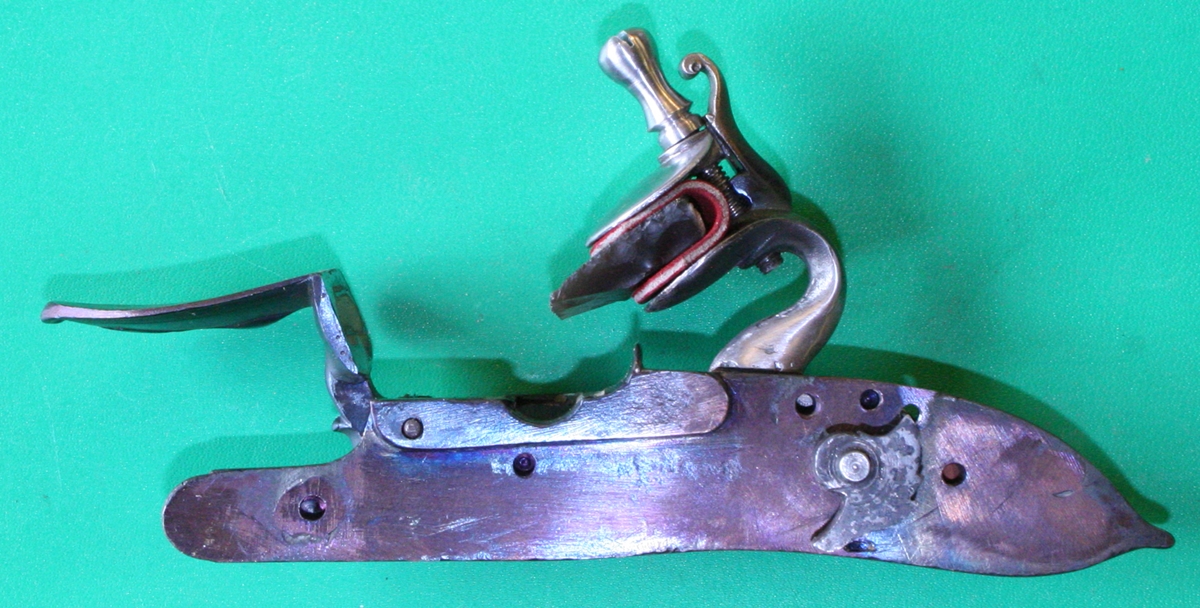
Fired position – the spring may be too near the end of the tumbler, in which case I may add some weld to the stop on the cock and refile it, or add some to the tip of the tumbler. I haven’t fixed the mainspring so its a bit of a guess how it will finally fit.
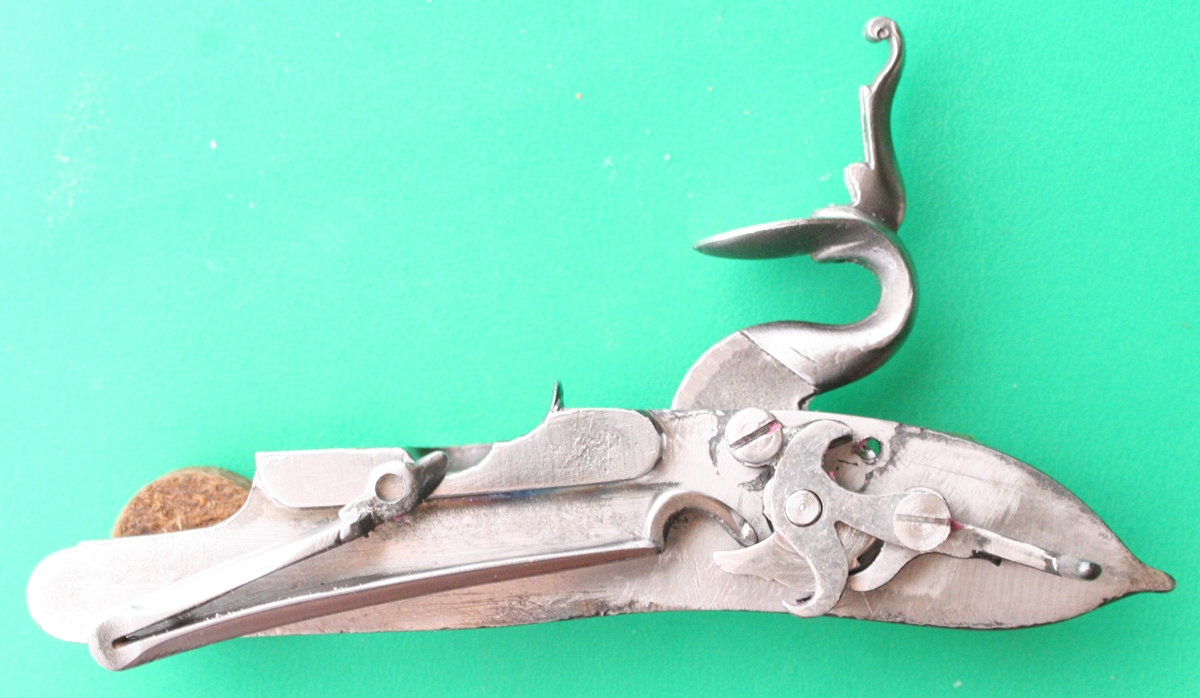
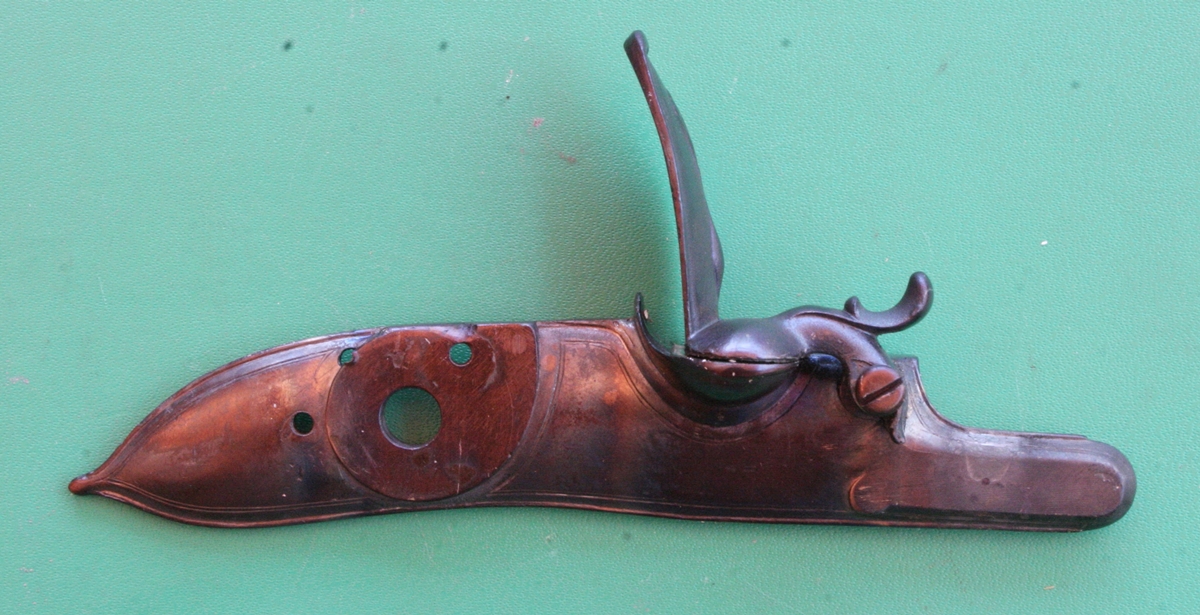
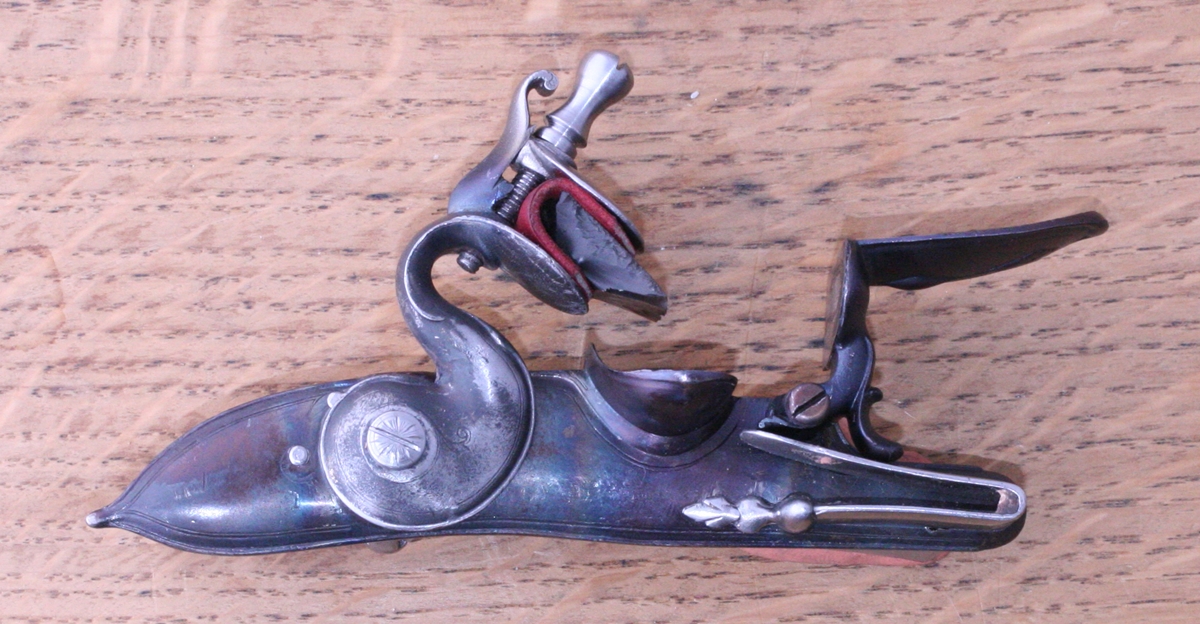
Half cock position – the cock lower jaw is reasonably aligned – it was a compromise with the tumbler angle in the fired position.
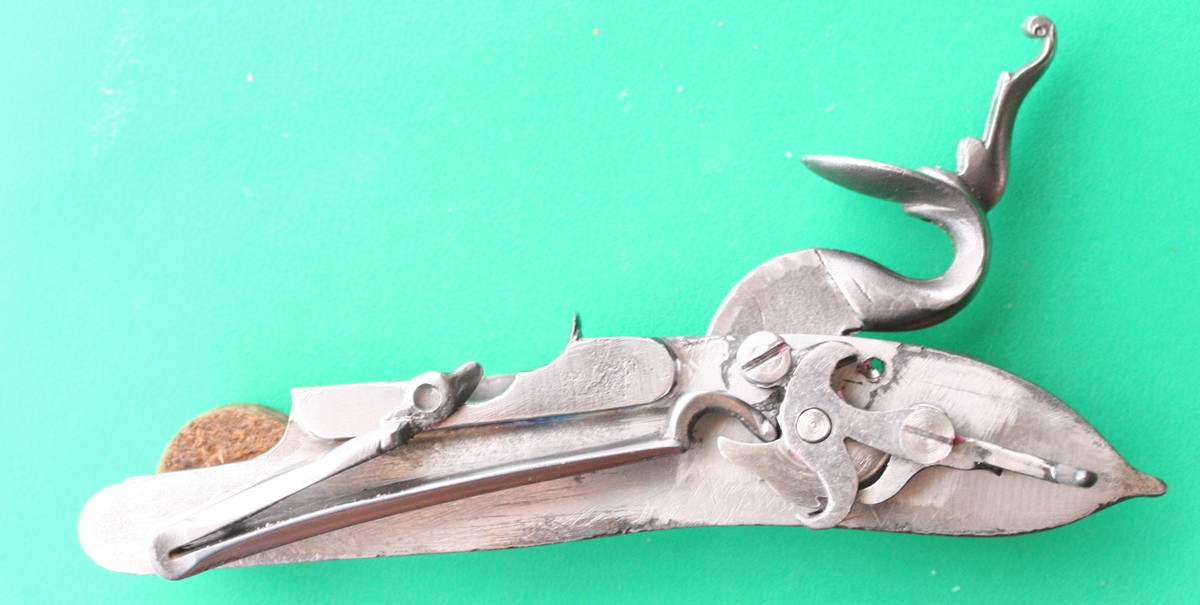
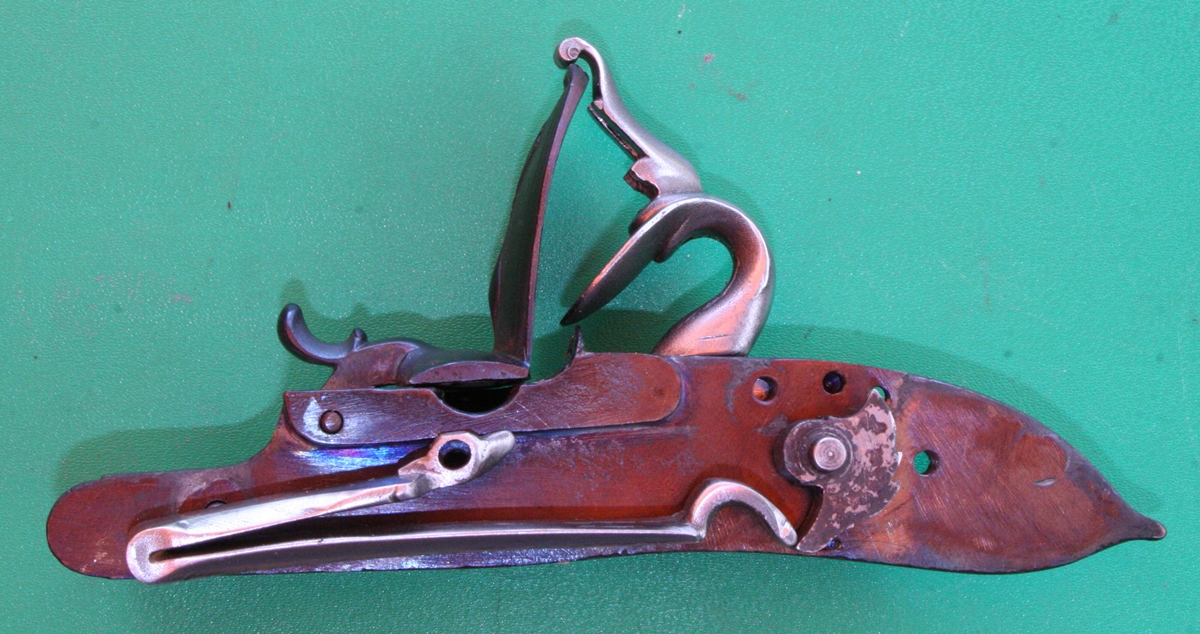
Full cock position – the mainspring is running out of space for the hook, but probably OK.
I have now got the tumbler shaft to a good fit in the cock – I shall probably have to put a bit of weld on the tail of the tumbler to stop the spring slipping off. Next step is to drill the hole for the frizzen pin – to do this I’ve glued the frizzen to the pan in the correct alignment so I can drill right through at tapping diameter and then put a bigger hole in the frizzen for the shaft.
Frizzen glued to the lockplate in the correct position so that the pivot can be drilled right through – first face off the boss, then ‘drill’ into it with a 2 mm end mill ( they go straight in without wandering) then through with an UNF 5 tapping drill, then through the boss with a clearance drill, then tapped the hole in the lockplate, not quite through, then get rid of the Epoxy glue – I tried the freezer – that made it brittle enough to break off, and then I tried the oven but despite the nice blue colour (300 C plus in the Aga top oven) the glue was still too hard to remove, in fact worse than before! I made the UNF 5 pin and adjusted it so that it ended up a tight tight fit in the end part of the tapped bit of the hole while leaving the frizzen free.
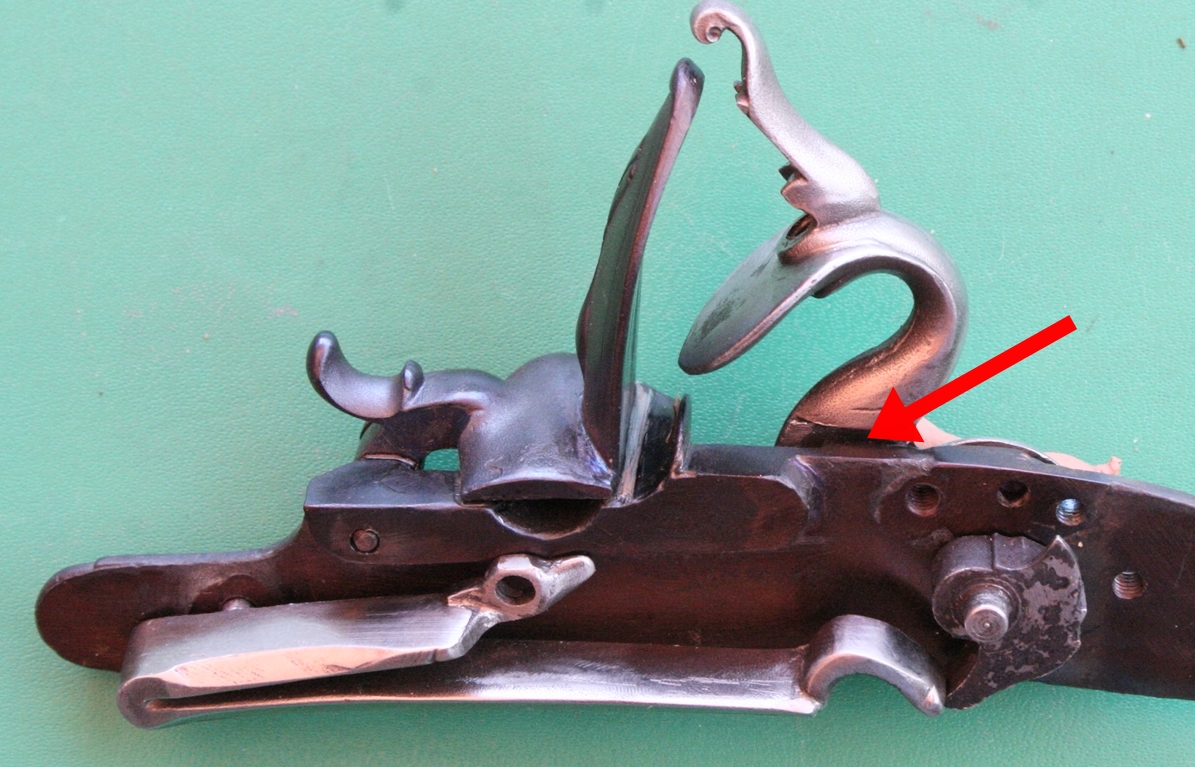
Now back to the fit of the cock, tumbler and mainspring – there is a bit of a problem because the mainspring is almost off the tumbler when the cock hits its stop on the top edge of the lock – the tumbler doesn’t have a solid stop, so there are two options here – I can either put a touch of weld on the tumbler to build it out a bit, or I can build up the edge of the step in the cock so that it hits the lock edge earlier ;-
It would only require a very small extension of the tumbler, and it doesn’t protrude below the bottom edge of the lockplate although its very close.
The alternative is to build up the step in the cock – that would probably be better as its not quite parallel in its current rest position and so will probably damage the lock edge in time. I think with a flint in the jaws the cock resting position is OK – maybe it will need the flint to have the edge down instead of up as is normal
I built up the back step on the cock and filed it to act as a stop – the cock is a bit high but if I take it any further the flint ends up at the back of the pan. I put the tumbler hole in the marked hole, ao maybe the original was like that. I’ll see it it sparks up when I have made the cock screw and fitted the frizzen spring…. If I reverse the flint it doesn’t stike the frizzen until the bottom third.( Slow job this!)
Now completed except for doing something about the finish…
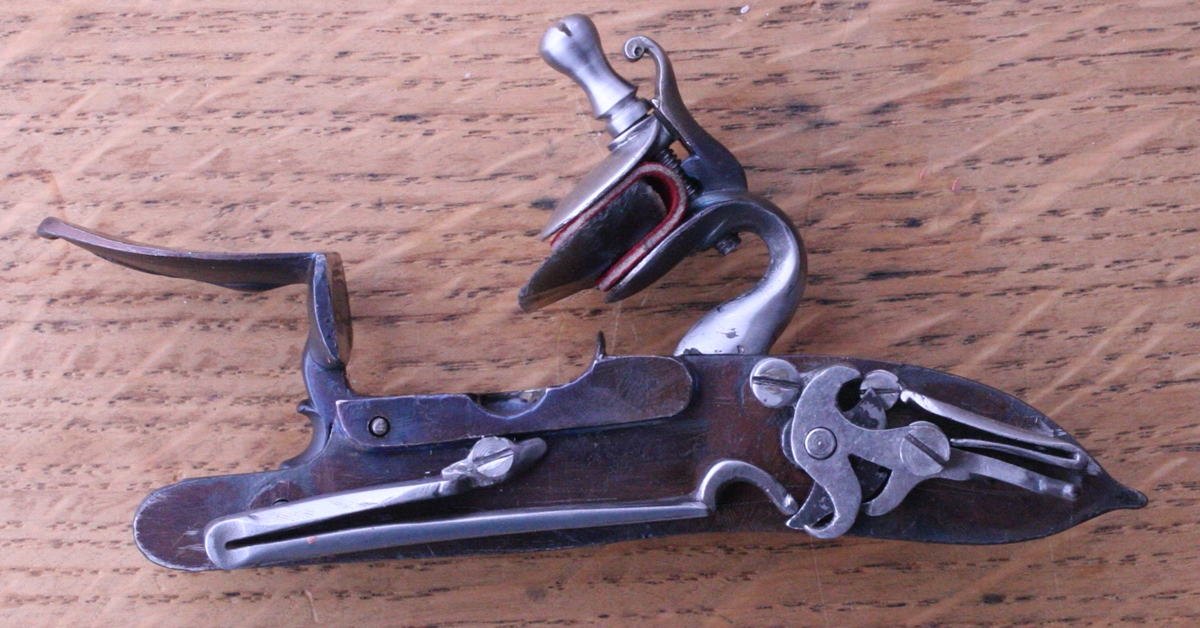
All together – now it needs tuning! the mainspring is not strong enough to open the frizzen, which is far too strong, so a couple of bits to sort out – I bent the sear arm, but its still a bit close to the spring.
All I have to do now is to make a gun or pistol to which it can be fitted! ….. It’s now happily installed in the sea service style pistol see INERT PISTOL post on this site.