May 062015
 

I’ve just engraved the brass sideplate of a hefty early blunderbuss with rather nice stripy wood that my friend Dick was restoring for a client.  The barrel has a classic ‘strawberry leaf’ motif on the breech, and the new sideplate needed to have a bit of life put into it.  The original would probably been cast and quite 3D but the replacement is rather thin so I tried to get some 3D effect with the simple engraving – it remined me that I hate engraving brass more than anything else – I resorted to my Gravemaster in the end.  The Gravemaster relies on resonance to work, so it depends on tuning the pressure and frequency (see below) so I can’t always get it to cut consistently, sometimes its too fierce and sometimes it hardly cuts at all  – it is a frustrating tool, but it does have its uses and presumably I’ll get used to its foibles and learn to control it one day.  (Added later…. I have sorted the Gravemaster now I hope, but uncovered a mystery – the pressure regulator on the compressor was blowing off above the set pressure and loosing air, so the compressor tended to run continuously which it wasn’t rated to do.  I concluded that there was some kind of leak in the regulator and bought a new one.  The new one worked as I thought it should and now acts as a pre-regulator that stabilises the Gravemaster and it seems to be fine.  When I stripped the old regulator it seemed that it was meant to blow off and not regulate – more of a safety valve than a regulator –  a mystery….


sideplate

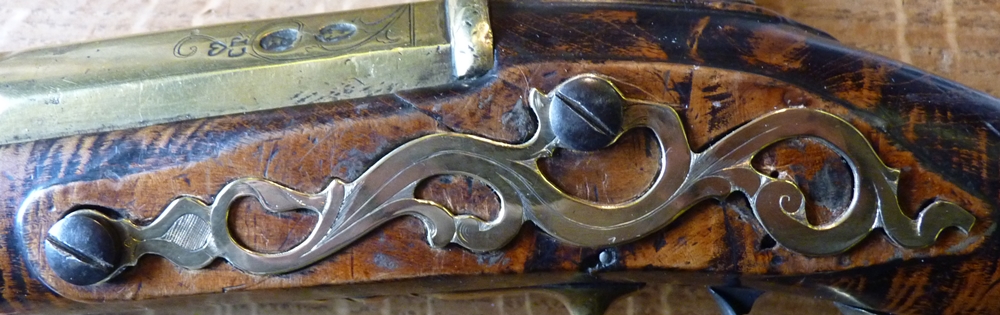
I didn’t do a particularly good job of getting rid of the Brasso!


blunderbuss breech

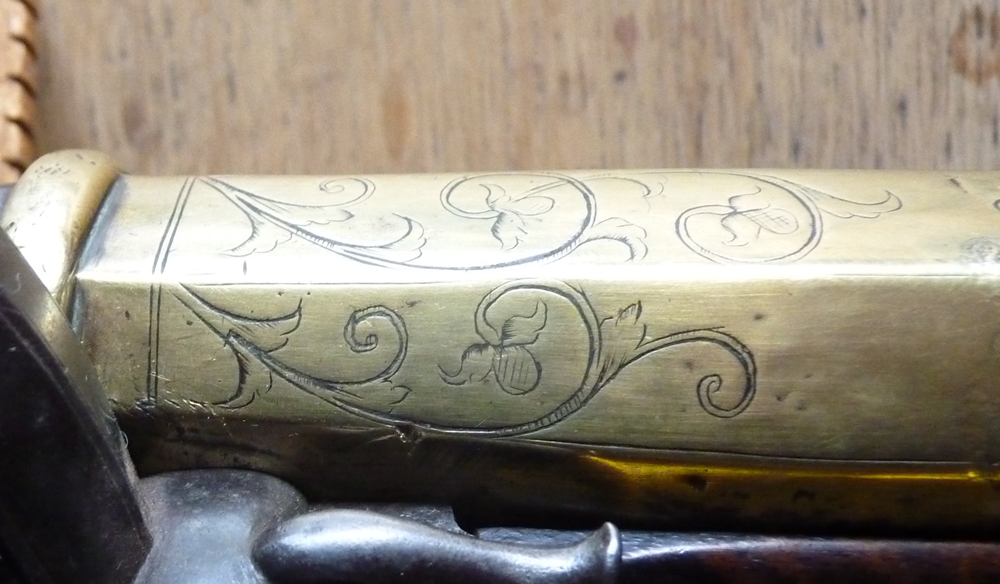
 Good quality mid to late 17th century engraving

Feb 242015


Since putting this up originally  I’ve changed my microscope – the Wild I now use is described, but I also more recently  bought a Chinese AMSCOPE zoom trinocular microscope because I wanted to have a digital video camera that showed my work while it was in progress for demonstrations – unfortunately the cheap trinocular microscopes you can buy all seem to work by switching out one eye in order to use the camera, so you cant work normally and show it to a screen at the same time, so it didn’t do what I wanted it for.  It is, however, a perfectly good microscope, and I’ve fitted a pillar for a headrest in place of the digital camera mount.  Mine came with a very good stand with a sliding arm and quite a long reach, and it has the slight advantage over the Wild that the eyepieces have a longer ‘eye relief’ so your eyes can be further from the eyepiece lense and its easier to keep your glasses on.  The zoom isn’t much of an advantage compared to the 3 stage click magnification of the Wild as its easier to get the scale of things if its one of 3 magnifications.   All in all it is a perfectly acceptable microscope and for our purposes there is not much to choose between it and the Wild which probably originally cost 10 times as much, and even second hand cost 50% more.   ( I paid £600 for the Wild with case and stand and light, the Amscope was £422 with stand).

as of Oct 2018 I mostly use the Wild microscope in my workshop and the Amscope for demonstrating as it saves disturbing the Wild.


The starting point for engraving is the tools, for me that’s mostly push gravers, and mostly square gravers.   Since engraving steel wears the tools very quickly, and the biggest cause of slips and errors is blunt tools or broken tips, you won’t get anywhere until you have got the equipment and skill to sharpen your gravers – there is no short cut to this.  Experienced engravers can (mostly) sharpen their tools by hand without jigs or guides but for ordinary mortals it is not possible. Disbelieve me at your peril!

tools1


Part of my setup – the tools are mostly squares sharpened the same way so I only have to stop and sharpen tools when I have blunted a number.  There are a few other tools – knife and ongulet and some lozenge.

There is more here…………………………….. Continue reading »