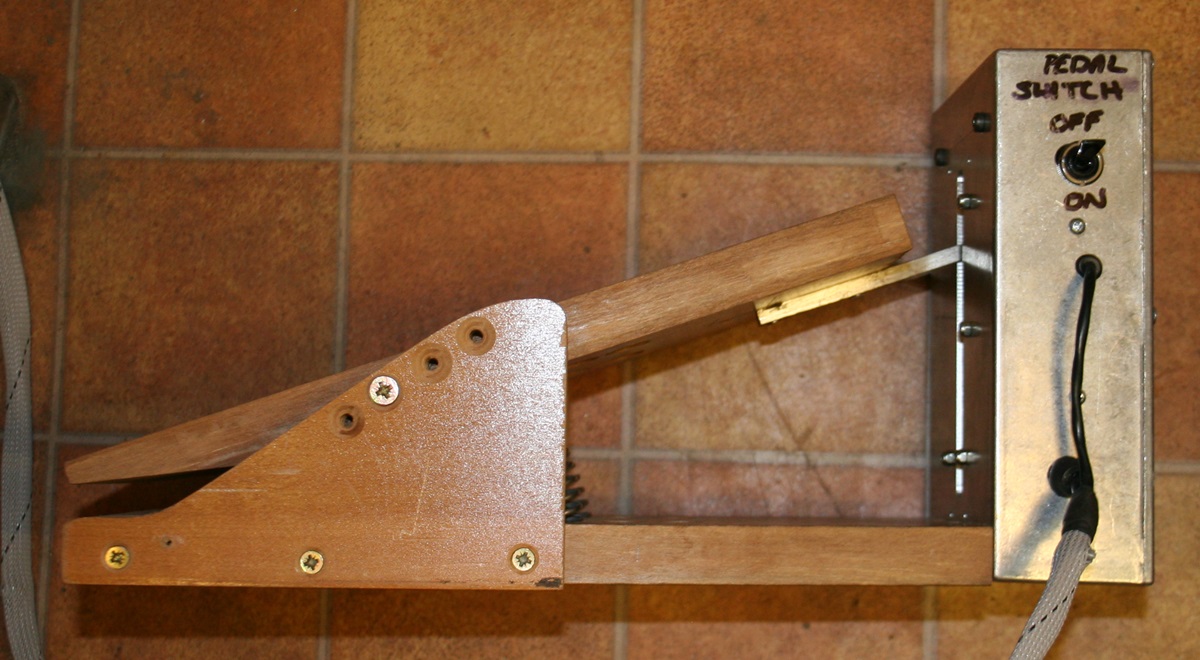
I am putting this up in case anyone needs to do the same – I have a SIP P178 HF welder and wanted to get lessons in precision TIG welding from Jason McDougall, who said that without a foot pedal control on the current and stop start I wouldn’t get very far! Welders with foot controls don’t come cheap, and I didn’t want to scrap my almost new SIP, so I had a look around to see if I could fit a pedal control. No info on the web that was relevant, although there were a few pics of pedals, and unfortunately no circuits available for that model. Under the hood I found the current knob was a dual gang potentiometer of 1K Ohm resistance, which was a bit of a problem, as I would have to substitute my pedal for this potentiometer – I couldn’t find suitable 1K slide potentiometers to make my pedal from, so ended up with a bit of a Heath Robinson arrangement with a cord running round a drum that sat between two 1K rotary potentiometers moved by an arm on the pedal – after a bit of messing about I put in a sprung idler pulley to keep tension on the cord and a microswitch that operated right at the top of the pedal movement – doesn’t quite cover the full range of the pots but probably goes to 120 amps – so far so good….
Wiring it in was a pain because the 6 wires going to the current control on the front panel of the welder and the two wires for the start/stop switch shared no common signals. In the end I cut the 6 wires between the current pots and the control board, and took the control board wires ( extended) to flying lead 8 way socket coming out of the back of the machine. The 6 pot wires I extended and took to a fixed 8 way ( 6 signals, earth and 1 spare) plug fixed to the back of the welder, so that the flying lead could be plugged into the plug and the welder operated as normal. The foot pedal pots are wired to a 3m 7 way lead ( the extra lead is a ground for a screen) cable that terminates in an 8 way flying plug. Plugging this plug into the flying socket on the welder connects in the pedal to the control board. The stop start switch has a separate cable and plugs into the regular socket on the front of the welder where the torch on off switch usually goes. I haven’t bought a new plug for the pedal, I just pinched the one off the torch.
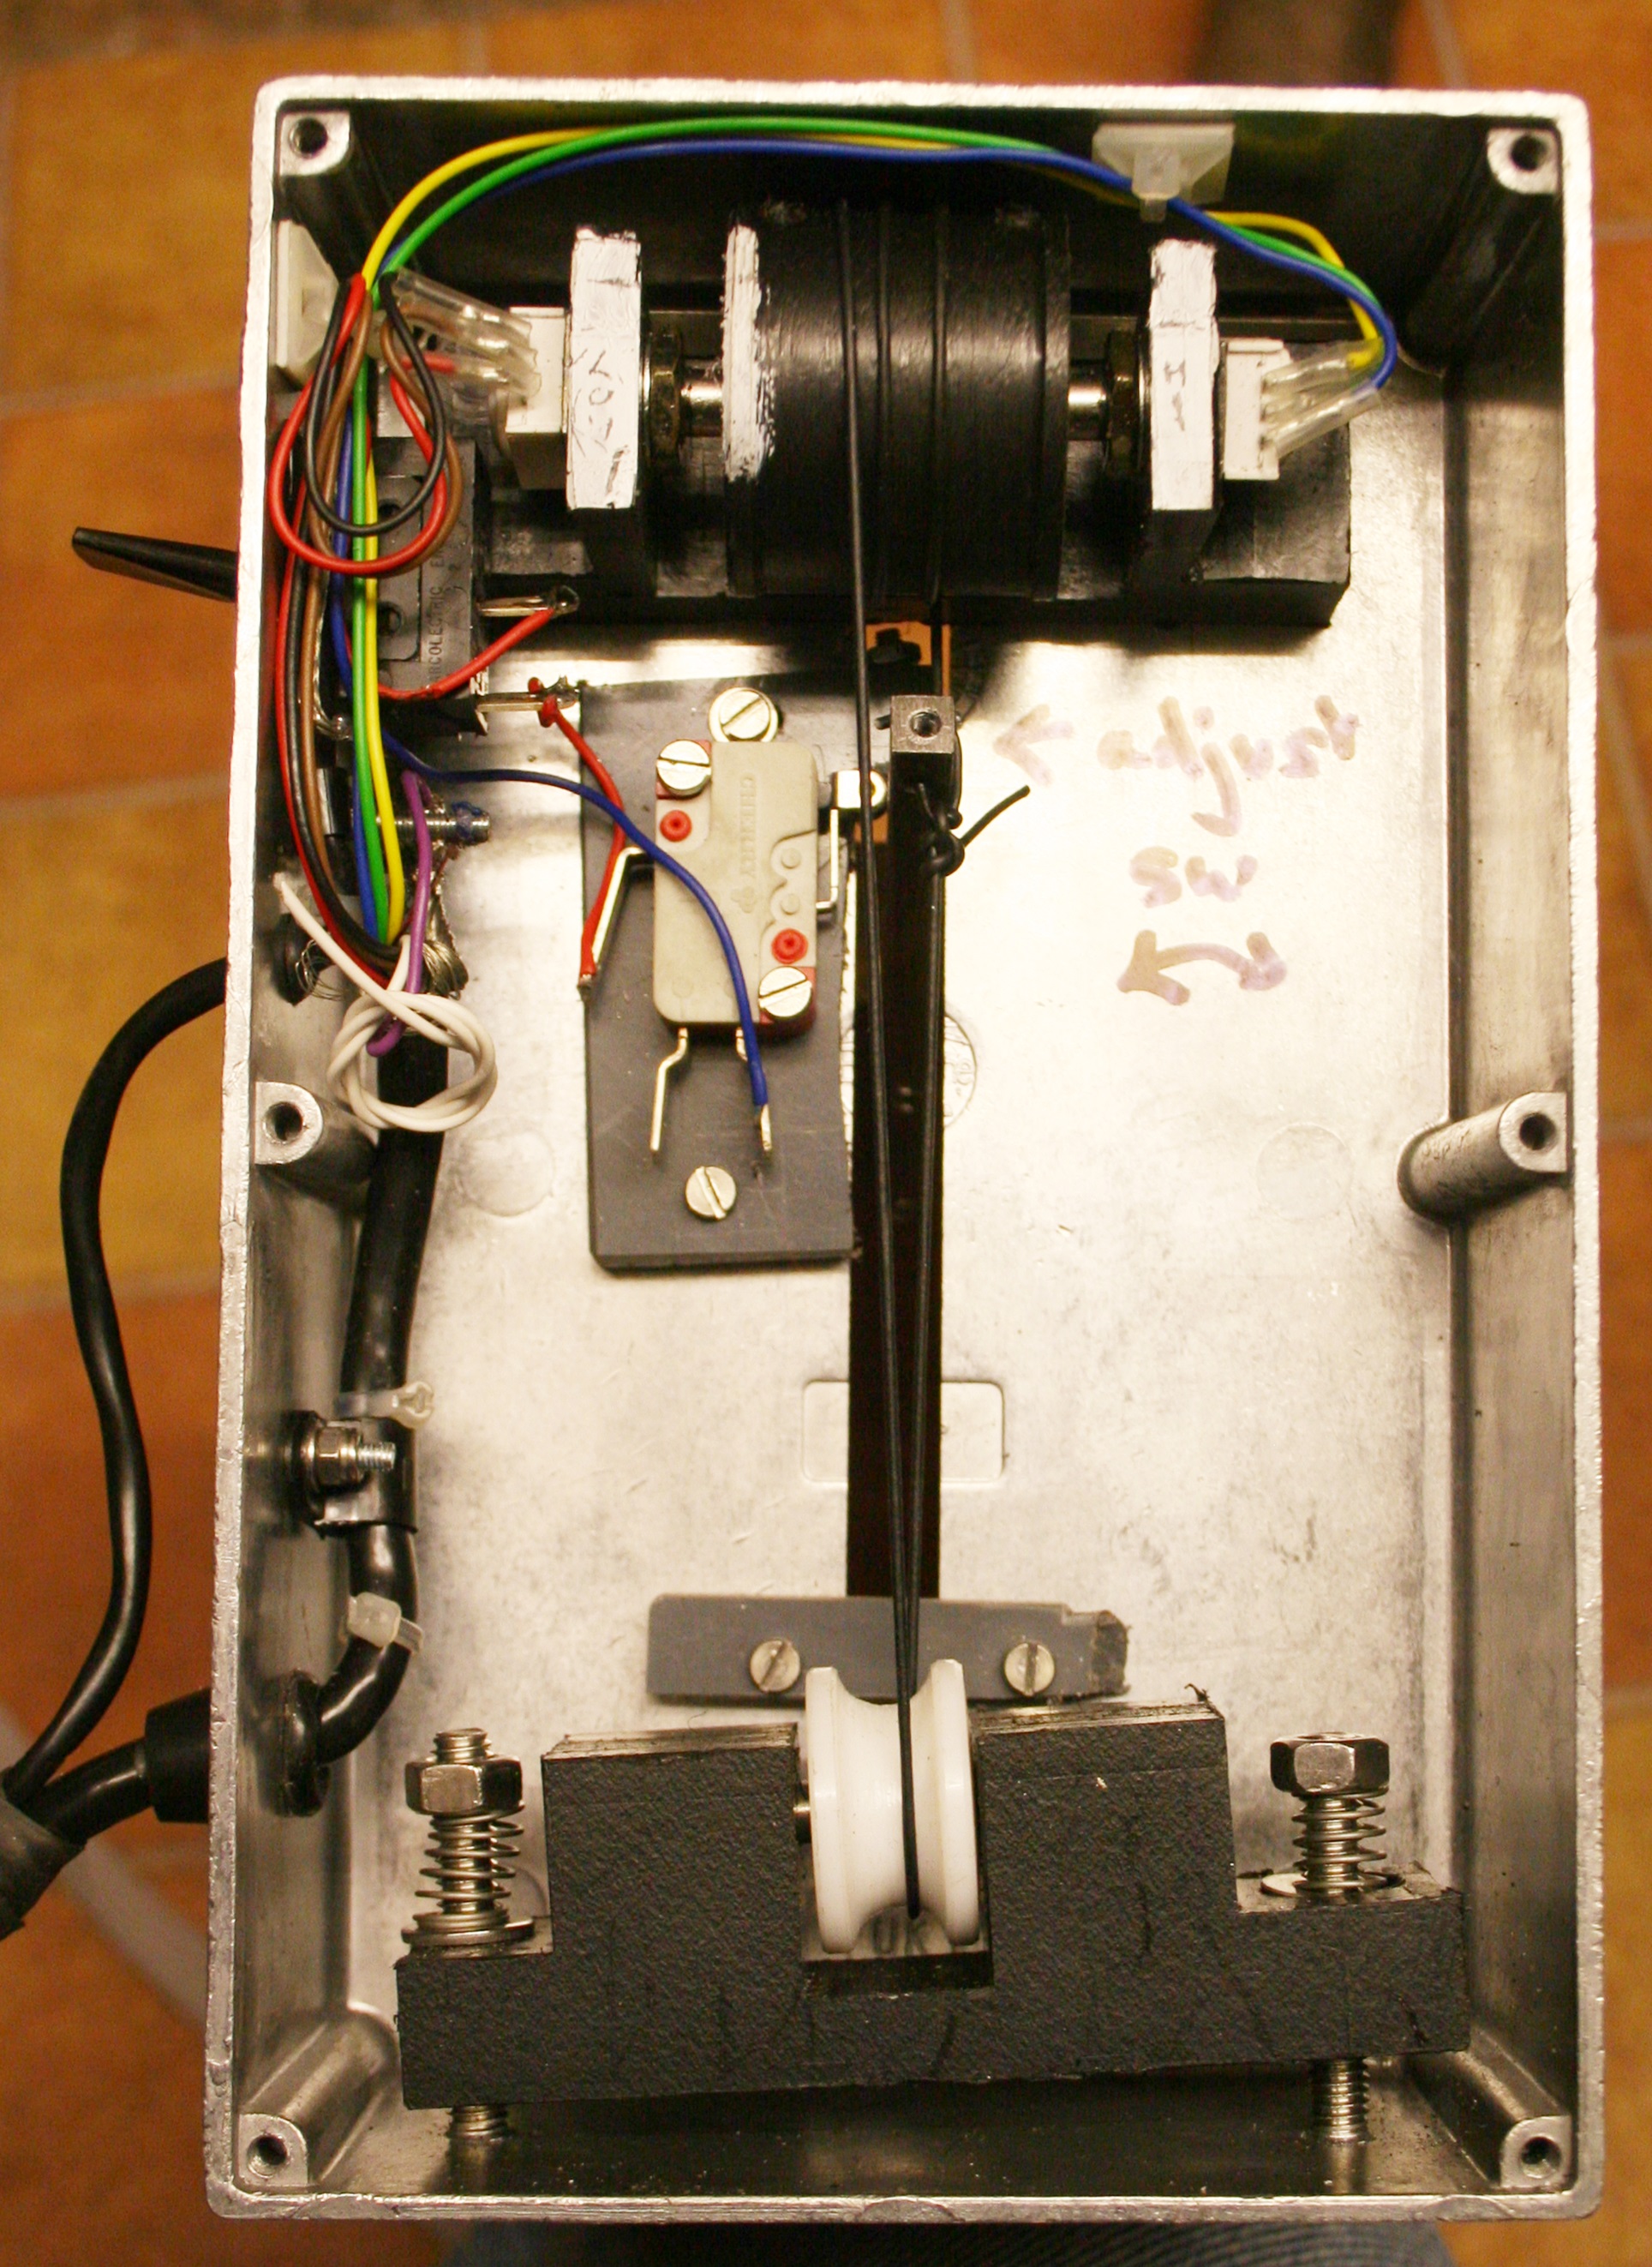
The arm from the pedal works through the vertical slot in the back of the box and is tied to the cord. The springs maintain enough tension to stop the cord slipping – it is wrapped a couple of times round the drum for good measure. The two pots form the bearings for the drum.
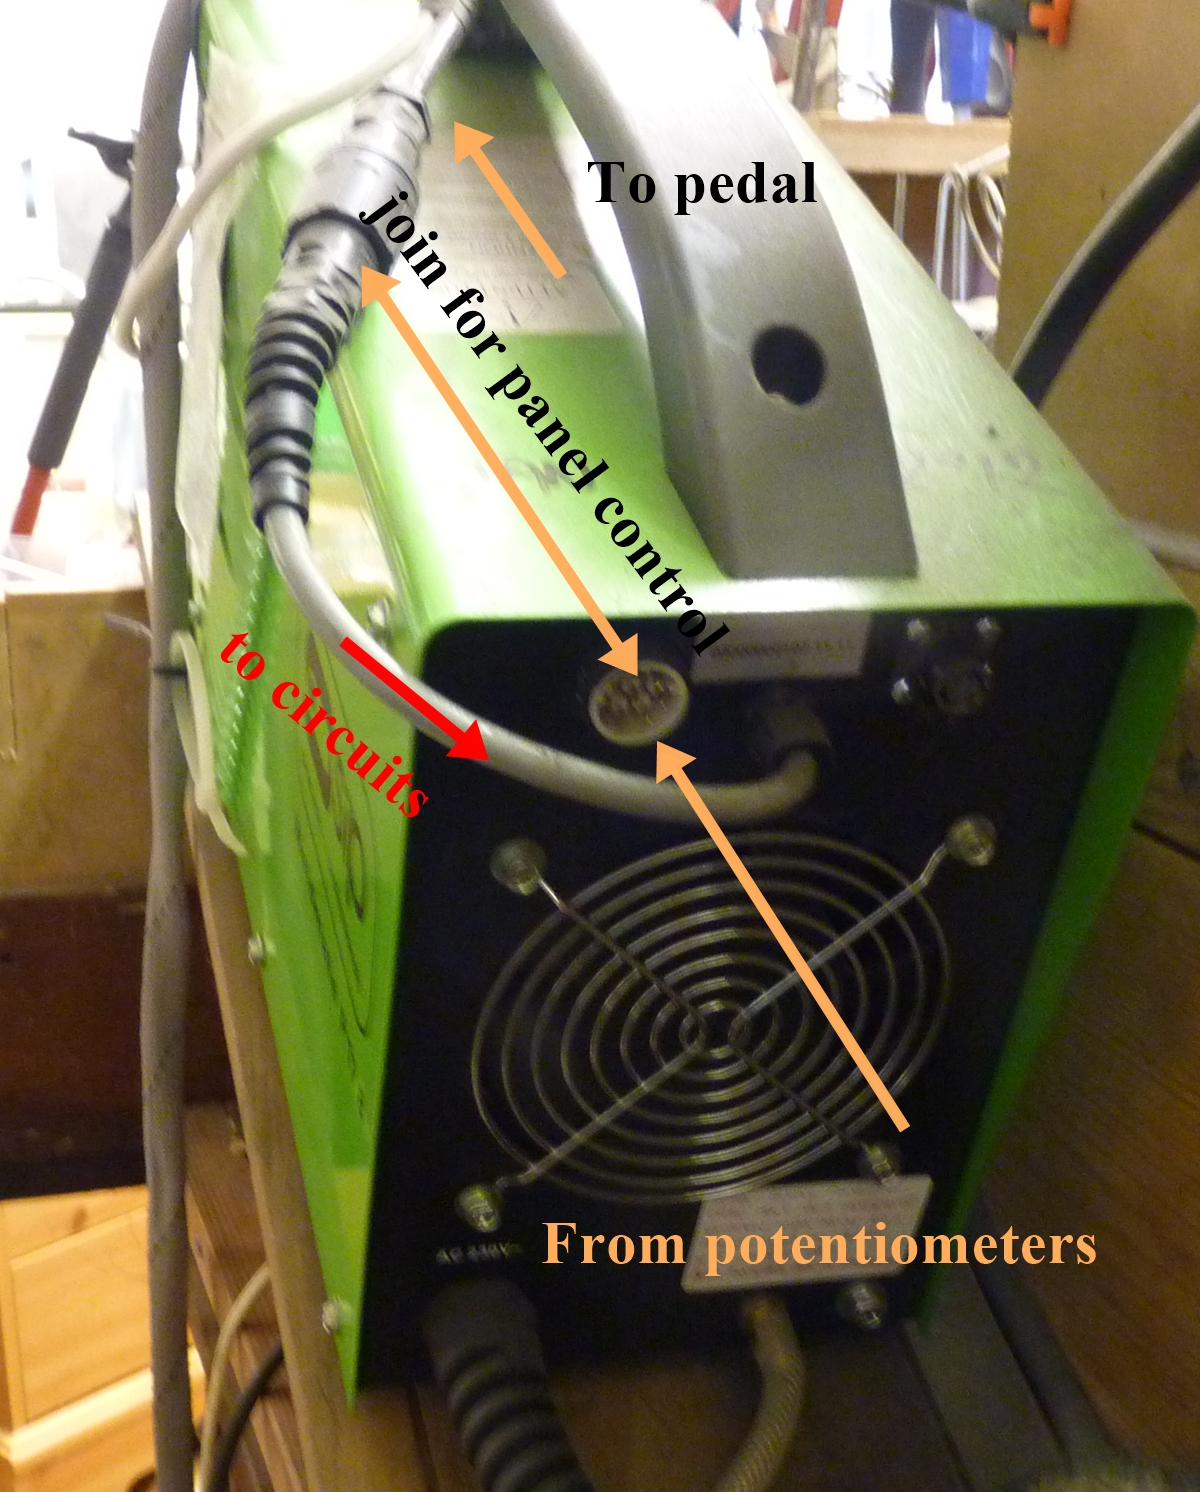
Rear view of welder showing 8 way connectors and cables
Does it work? well, stupidly I tried it with a separate stop/start switch cable and left the torch one still connected so the HF arc start got picked up on the pot. cable and interfered with the control circuits – by the time I had sorted that out the current meter had developed a fault and is now no longer a reliable indicator of weld current, but with the pedal that is not so important as you control it while looking at the weld, not the meter. It now seems to be good – I had to find a preset potentiometer on the circuit board that adjusted the minimum current setting as it was giving about 20 Amps minimum – too much for precision work, but having adjusted it down to an estimated 10 amps it works just fine. I did manage to butt weld two pieces of 1.6mm stainless welding rod together without melting them to nothing,. I’m looking forward to some lessons from Jason when I’ve got a smaller (WP9) torch.
Don’t try this is you are not happy cutting the fine wires and joining them, and are generally familiar with circuit wiring and making up fiddly plugs and sockets! This route to getting a pedal controlled TIG welder will save you £300 to £400, so its worth a bit of trouble, but not if you wreck your welder!
I’ve actually complicated it since then, putting in a switched resistor chain in series with the top of the pots in the foot control so that, I hope, I can control the top current and also make the pot less sensitive for low current settings – it hasn’t yet been tested!
An additional point – I took the welder to Jason for a lessons and it was just fine but he says the HF starting is quite fierce and it wouldn’t do for some of his precision work as it can mark polished stainless before the main arc starts – that isn’t a problem for me as I don’t do that kind of work. I gather that a welder that is up to his standards costs a couple of thousand pounds, so I’m quite happy to put up with the slight marking and the fact that it does blow off the tip of the electrode if you make it very fine. All in all it is now well capable of doing all I need – I just need to hone my skills!
Update July 15 – My pedal went wrong because the contacts fell off one of the pots – I found that it didn’t need both pots – I think one is only used to drive the weld current display, but I’m not sure. Anyway it works with one!
Update after a couple of years…Amazingly the Heath Robinson mechanism in the pedal survives intact and its all still working and I can undertake much finer welds – it will arc on most parts at below the melting point of steel and then you can ramp it up and down to start the weld pool – a good success – I did buy a small sized WP9 torch, although the hose/cable is rather stiff and resists twisting so you have to sort it out before you start. I found that my automatic helmet wasn’t ‘opening’ in the light on my bench, so a piece of paper is hung in front of the sensor and adjusted to give the right sensitivity – if I wasn’t such a cheapskate I would have bought a helmet with adjustable sensitivity – you get what you pay for (if you are lucky) If you can hack the wiring OK its a worthwhile mod to a handy welder – if you want to do stick welding you can just plug the two connectors on the back of the welder together and set the current on the pot on the welder – I have to guess the current as that circuit got fried!
Three obligatory warnings:
1) Don’t plug the welder in to the power with the covers off,
2) Don’t attempt this if you are not competent to work with electrics and electronics.
3) Guess what? you invalidate the guarantee!