GRAND OPENING OF THE NEW ROOF – 13th September 2009
at 3 p.m. All welcome.
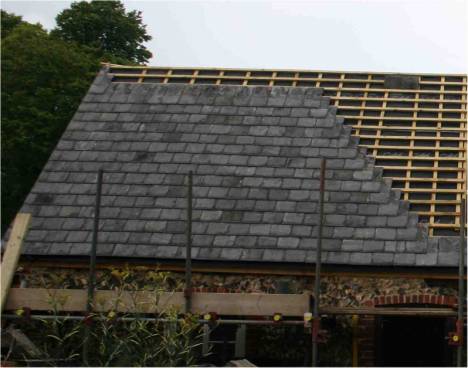
Its now finished! The last bit of slating and leading was done a couple of days
before we went on holiday in mid August.

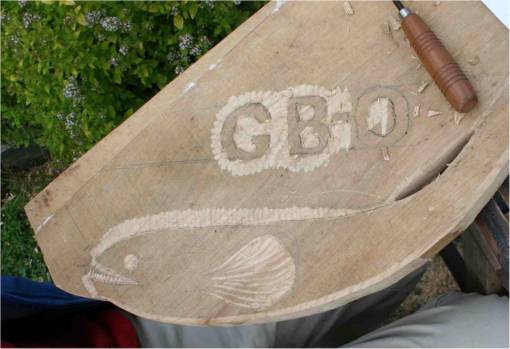
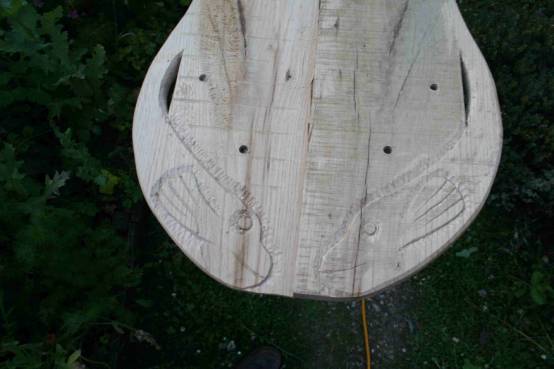
Dated Barge board with eels’ tails.
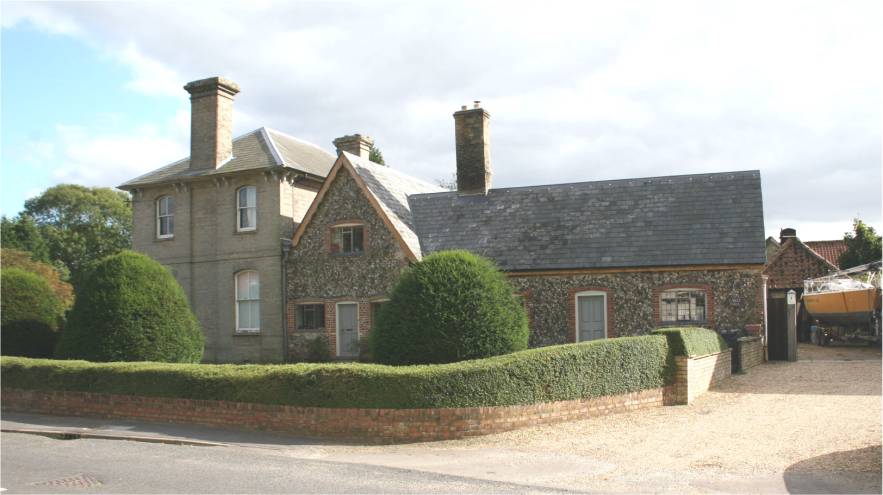
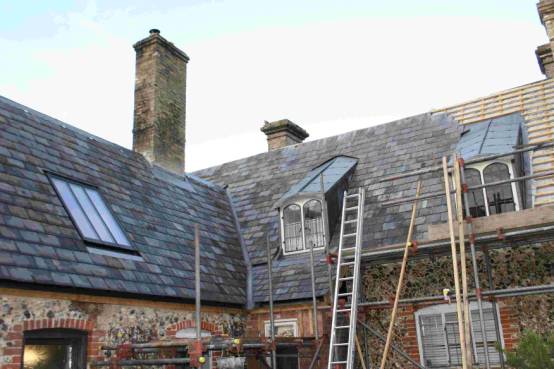
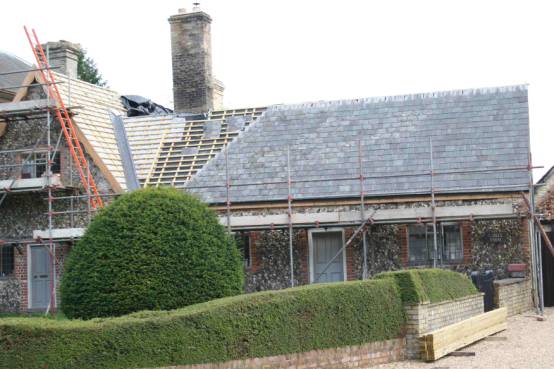
first view of completed N elevation without
scaffold on 10-9-09.
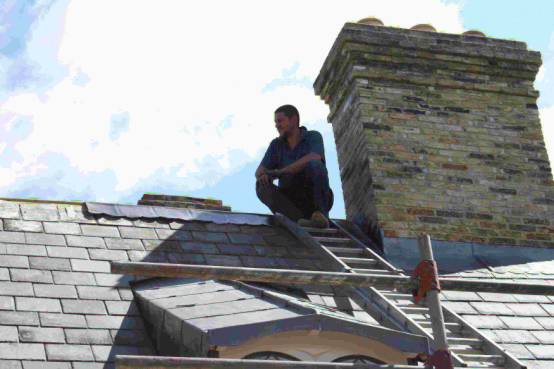
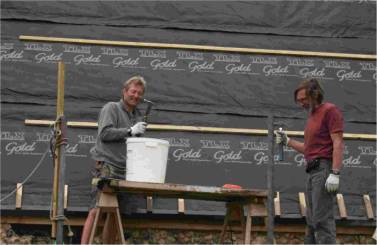
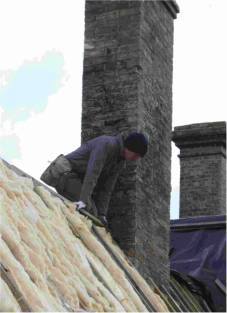
Brian looking satisfied, the last slate is
on! And one bit of lead to go!
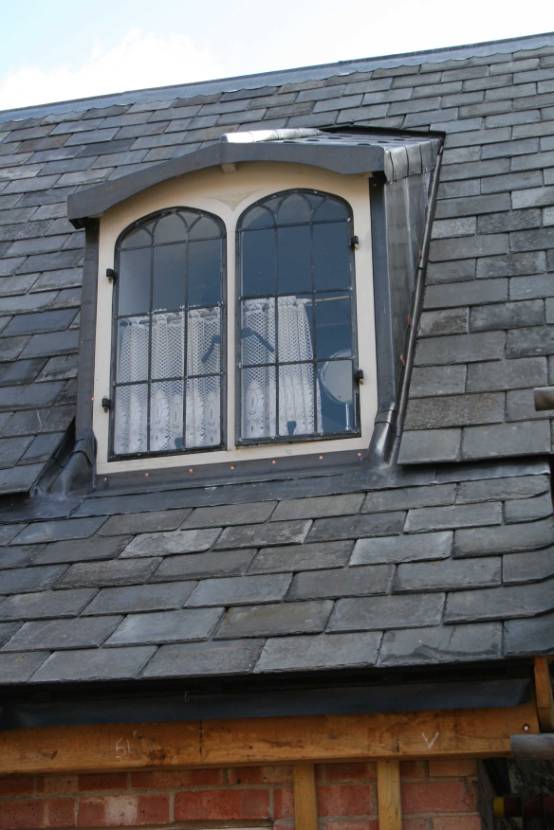
Finished bathroom dormer
This is a diary account of the roof
renovation phase in 2009 – mostly in June, July and early August.
Newest entry is at the top.
HERE ARE THE PEOPLE AND FIRMS THAT I HAVE
USED SO FAR AND AM HAPPY WITH!
Carpentry – Richard Barker, Keeper’s
Cottage, Station Road, Dullingham – 070970 596868 – great work!
Scaffolding - Burwell Scaffold 01638 742471 Very helpful, quick and good value.
Roofing Supplies - Sudbury Roofing Supplies
- Long Melford - 01787 881398 The best
prices around for everything for roofing.
Timber - Ridgeons, Newmarket – 01638
666900 Reliable quality and service,
sometimes a bit ( or very) expensive.
Fixings etc – Screwfix 0800 056 7689 - very fast and reliable, good range and reasonable prices.
Insulation – Enigma Insulation XXXXXXX TLX Gold is unique product, prices of glass
wool etc are sharp and service good.
OAK – Duke and Brown – Wimbish 01799516084 – good source of green and seasoned oak and other hardwoods.
Reclaimed materials – Butler Bros. Duxford – the best organised yard in town!
STOP PRESS – I’m getting lots of fond references to the old
blue tarpaulin that graced the roof for may years and shed blue fibres all over the village – I miss it
too, but archeologists should have a field day in a few hundred years – the
blue tarpaulin horizon! If you want to
contact me with expressions of sympathy,
email timowen@carrack.co.uk.
DAY BY DAY ACCOUNT
Tuesday 4th
August – The weather has slowed things down a bit, but I’ve got the valley roof
sorted and yesterday I completed the rest of the ridge timberwork. Quite a tedious job as the ridge board was
original and wandered up and down and from side to side. In the end I had to get my electric planer
up on the ridge and take around 15mm
off in places – I got it acceptable in the end and put on the chamfered
2x5 and the mopstick. On the West elevation there is quite a wide gap for the
top ‘half’ slate to cover at the front, tapering out at the back to normal.
I ran out of 30mm copper nails and
thought it would be easier to buy them at Ridgeons, - I needed 4 Kg, but at
£28.50 per Kg + VAT against the £7.50 + VAT at Sudbury Roofing, I figured it was worth the 50 mile round trip to Long Melford! I don’t know if Ridgeons were charging the
5Kg price by mistake or just a rip-off - probably the latter. As luck would
have it Subury Roofing had some good secondhand Welsh slates at £1.45 + VAT so
I got another 270 which I hope will finish the roof. Their price for good new Spanish slates is 85p which is cheaper
than the rubbish on ebay! Ben and
Brian are tied up on another job and are going to try to finish my roof next
Saturday and Sunday. I’ll try to get
things ready for them, so they can finish in the 2 days – putting on the ridge
timber has already saved them a lot of time.
I got a new spring for Ben’s slating cutter and punch at Sudbury and
fitted it – so its now as good as new.
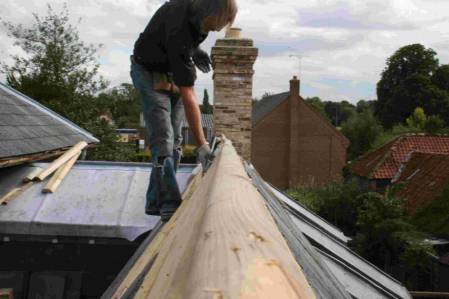
I enjoyed working on the ridge – wonderful
view of everything that is going on in the village too!
I managed to finish off the lead flashing
over the GRP joint that had been on the ‘to do’ list for some time. I got some plastic downpipe from Sudbury Roofing
to replace the rotted iron pipe that has been missing for a year – I got the
new ‘cast iron effect’ plastic as it isn’t really visible up in the valley and
its cheaper than the aluminium stuff I have ordered for the rest of the house. I suppose I ought to paint the gutters up
there while I have easy access – more jobs….
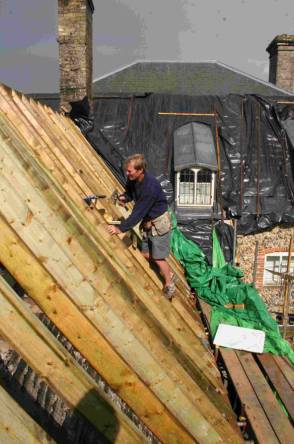
Wednesday 28th July – I’m now on my own and doing a
range of jobs so things have slowed down, but today I got up to the valley roof
and banged on a few dozen slates before it started to rain. The valley is not really visible from the
ground so I am using up my Spanish slates, which are perfectly good but a bit
bland in appearance. At least a couple
more days work on this section as I’ve got all the soakers to put in the
corners, and the joint between the 10 x20s and the 12 x 24s to sort out. Yesterday I picked up a load of slabs from
Butler Bros which I think they had mis-identified since I got around 8 sq m of
mellow natural sandstone in 22 x 44 inch slabs for just over £80, which seemed
like a bargain to me.
Slating this week is slow!
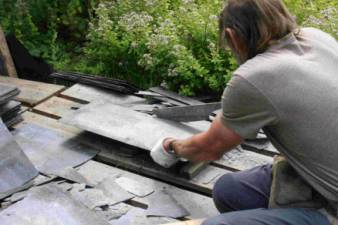
Trimming slates – a lot of 12 x 24 s ended
up as 10 x 20 - Spanish slates with small marks over the
surface - I’ve only used them in the
valley where they are not visible from the ground.
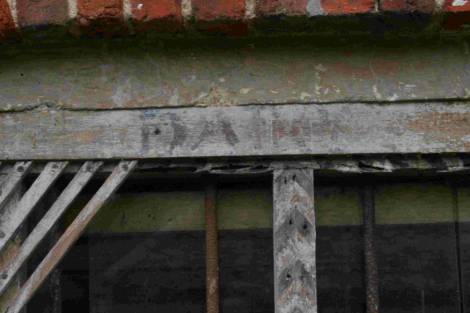
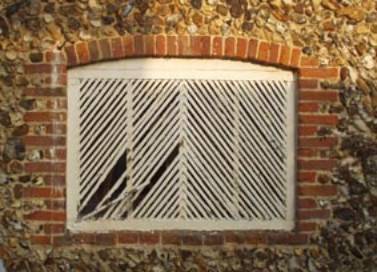
Over the weekend I stripped the dairy
window in preparation for repairing it and found, under many layers of white,
grey and beige paint, the word DAIRY painted directly on the oak frame above
the window – faint but quite definite. Its lucky that most of these very old
labels are painted in something that isn’t eaten by paint stripper! I have found several labels on different houses, our last C17 cottage had numbers
on the bedroom doors under all the paint.
Day 19 – Friday – missed putting anything
on the site yesterday. Today was fine
and a bit cloudy – a few small showers.
Ben and Brian arrived to start work at 6.30 as Ben was going on
holiday at midday. Very good progress
on the West elevation, and the valley and bathroom dormer now look superb. In the scrabble to find enough slates I bought some 20 x 11 slates as Butler Bros
had run out of 20 x 10s and I didn’t have time to do a full search. So rather than cut them down to 10 inches
wide we used them in the W valley. If
you know, you can see the difference, but very few people would notice it
unprompted – the original roof was an eclectic mix of 10 x 20s and 12 x 24s so
I think it’s a ’secret’ reference to what was there before. Ben
is now away for a week in Corfu, and may have to do another job for a
few days when he returns, so in order to finish the roof in a reasonable time, I will slate the East
elevation using the better Spanish slates where they won’t show. Ben ‘perped out’ the elevation for me and
set up the gable line, and Brian had graded the slates, so I only have to bang
them up and slip in a few soakers at the far end of the valley and work out how to run the South
part I slated ten years ago with 12 x 24 slates into the new 10 x 20s over the
top of the cross passage. It will be
interesting to see how much slower I am than the professionals. Ben kindly lent
me his special roofing hammer so no excuses about not having the right
tools. Ben and Brian will finish the W
elevation and do the leadwork in 2 or 3 days when they are free. I just have to source another 150 or so
10x20s – its getting boring, I have come to believe that the roofers are eating
them, they go so fast!
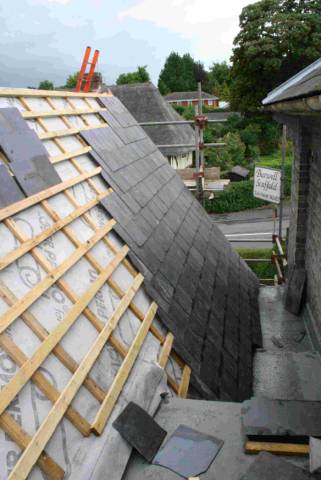
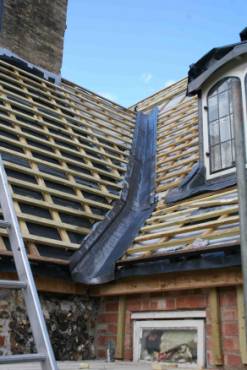
The result of today’s and yesterday’s work
– the whole thing is coming together now and you can see what it will look like
when finished. The valley looks good as
it negotiates the change in slope at
the loo outshut, and the bathroom dormer doesn’t look too squeezed up into the
corner – both details have lived up to
my design hopes.
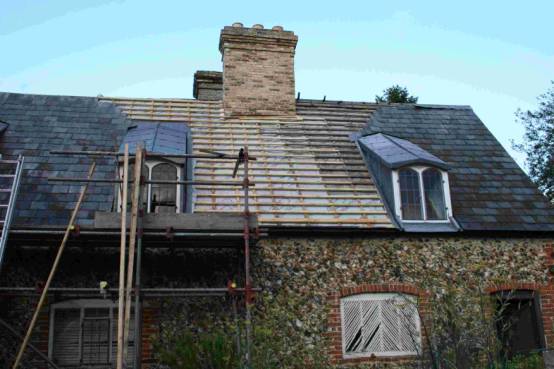
This, and part of the W elevation is all
that remains to do!
Day 17 –Wednesday 22nd July –
Pleasant sunny day with a couple of moments when a few drops of rain might have
fallen but didn’t. Work on the Kitchen
roof continues – the slating of this bit is almost finished except for some of
the top of the valley, and most of the ridge is complete. I decided to
ridge the roofs in lead as the previous ridges were in folded over corrugated
iron or in capping tiles that were
designed for the top of a wall and were the wrong angle for the roof –
they balanced on top and looked very precarious. We cut plain scallops in the ridge lead because it adds visual
interest and makes the ridge look less heavy.
Probably the main ridge will be
plain as it can stand a heavier looking ridge as its higher. Ben did half of the chimney flashing. I went to get more 20 x 10 slates on
Tuesday, and managed to find 330 at Butler Bros in Duxford – a wonderful
reclaimed materials yard. On Wednesday
Brian sorted them and rejected around 30, so I took them back and changed them,
cleaning the yard out of 20 x 10s. We
are now a bit pushed for Welsh slates, and still have the W facing elevation around the dormers and the E
facing main valley between the Victorian and older bit. We will use the ‘cut edge’ Spanish slates in the
unseen parts of the E elevation (most of it) and probably change to the more
chamfered Spanish slates for the top courses on the W elevation. I started cutting down the 24 x 12 slates
I recovered from the previous roof
covering, which was an eclectic mix of 20 x10 and 24 x 12 – even on the same
elevations! So far I’ve cut 80 in about
2 hours, and probably have another 120 to cut down. It’s a bit of a shame to
cut down perfectly good large slates, but needs must! Butler Bros do have a load of 20 x12 and 20 x 11, so if the worst
comes to the worst I can get those and cut them down, but they are
expensive. I discovered that I’d bought code 4 instead of code 5, and
Ben wanted 450mm wide for the chimney flashing so I went back to Suffolk
Roofing and changed 10 rolls of 300mm wide code 4 lead for code 5 in 600mm wide
so the ridge is in one piece, plus some
450mm wide.
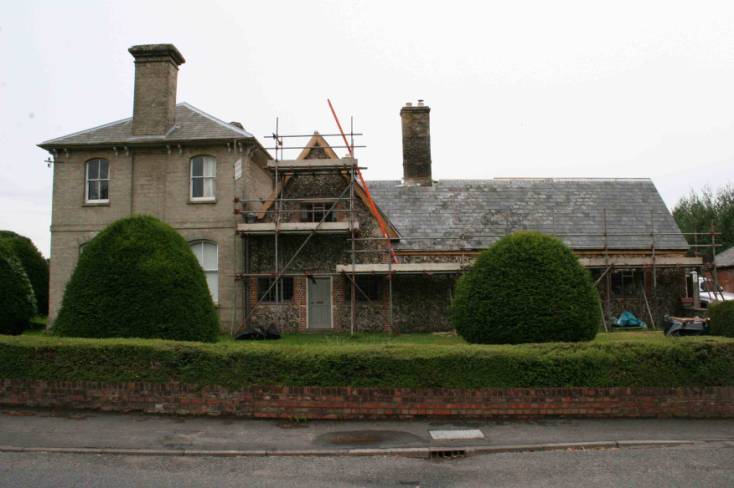
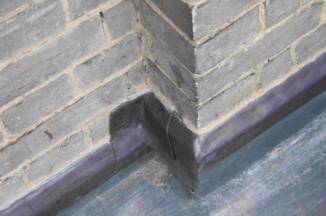
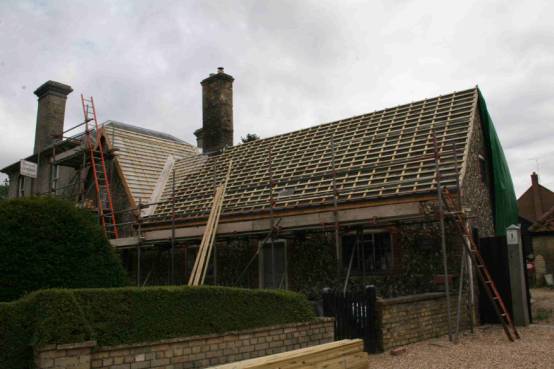
Almost complete street view
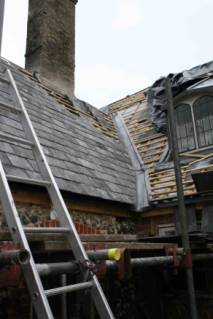
Valley in S elevation Almost complete N elevation with
chimney flashing.
Bit of a gap in the record as Ben and Brian didn’t come on Monday as they were
fixing a roof that that leaked in the torrential rain at the weekend, and I
forgot to take any photos on Tuesday until it was dark.
Day 15 – Friday 17th July –
Heavy rain in the night and very near Dullingham during the day, but no
more than a few drops here so work progressed - so far we have lost a total of
about 30 minutes work in 3 weeks due to rain.
Ben carried on slating the North elevation valley and preparing the
chimney for flashing. Brian started
slating the South elevation. I cut chamfers on some 6x2 so it would sit on top
of the ridge plate to take the top row of half slates – I burned out my old
portable circular saw in a rather spectacular fashion – it tripped the 40 Amp
cutout on the distribution board, the 32 amp trip in the shed and the 13 Amp
fuse in the plug. The 6x2 was a bit wet
and I was cutting a 40degree chamfer so I
had to take care not to trip out the radial arm saw – but I got around
10m cut – more tomorrow. I went to Long
Melford for MORE lead and copper roofing nails. The ridges will be in code 5 lead – a 300mm strip each side
doubled over the mopstick. Giles glued
and pegged his window frame together.
Brian’s slating on the S elevation –
slated ‘backward’ – i.e. left to right
so it takes a bit longer to do.
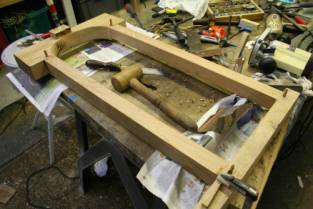

Giles’s window frame progressed !
Day 14 – Thursday 16th July –
pleasantly sunny day here.
Very industrious here today – Ben slating
the valley on the N gable, Brian busy sorting through the various piles of
slates that came from the house or that
I bought 10 years ago for £1.15p each, or the ones I got on ebay recently at
85p each, but which have rather machine cut edges and don’t look right mixed with the others. We shall soon see if I managed to collect
enough to finish the job – there are also a few 12 x 24s that can be cut down
if necessary. I cut up some old oak
for a window frame for the loo, and Giles took over cutting the mortices and
making pegs to hold the frame together.
When the scaffold is removed from over the loo window, we’ll take out
the old window and I’ll get a new opening iron casement made by Dave Gowlett at
Spring Forge, and Tom can try his hand at a stained glass window! Tom spent a couple of hours filling the
skip.

Street facing elevations in rugged slates.
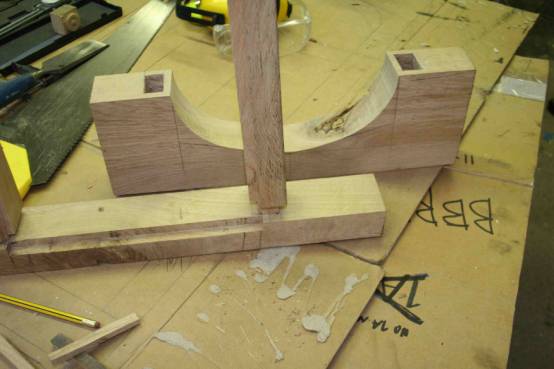

Window frame for 10 inch wide window for loo out of some scraps of seasoned
oak. Giles shaping pegs for the frame.
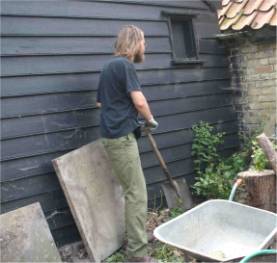
All that is left of last year’s rubble!
Day 13 – Wednesday 15th
July - A couple of ‘almost’ showers but
otherwise pleasant
Ben continued slating the North elevation
while Brian adjusted and leaded the valley in the South elevation and sorted
slates. Tom and I started loading the
large pile of last year’s builders’ rubble into the skip. I
started to plan the guttering
and the new loo window frame.
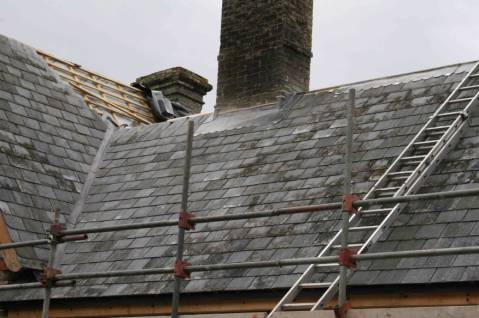
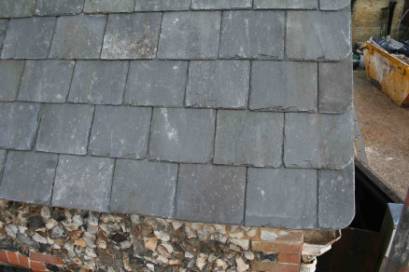
Today’s progress – about 500 slates sorted
& fixed and the valley finished – beginning to look like a proper roof
. It must be the first time in 20 years
that there haven’t been holes in this roof!

Giles’s barge board installed.
Day 12 – Tuesday 14th July - fine, threatened showers didn’t
materialise, but it poured in Cambridge.
The whole roof is pretty well battened out
except for a couple of small areas, and Ben started slating the North elevation
while Brian leaded the valley. I went
to Suffolk Roofing Supplies in the morning to buy some Code 5 lead for the
valley and Code 4 for flashing the chimney etc. and 8 Kg of copper roofing nails.
We fitted the barge boards to the West Gable – Giles was quite
uncomplimentary about my mythical eel carving, so it was agreed that he would
carve a ‘proper’ one for the bargeboard on the loo outshut.
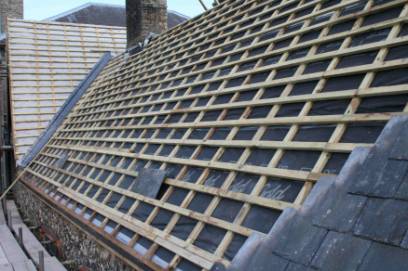
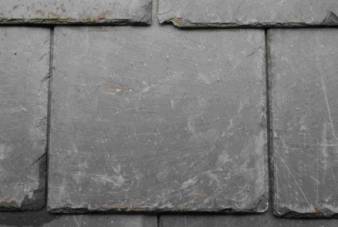
Battening, valley leading and some slating
– The slates are the original ones from the roof – good and solid with lovely
ragged edges so the overall effect is not too brash and modern. Note the radiused corners – a feature I am
fond of, although I gather it’s more typical of Cornish roofs than East Anglia. Never mind – we do spend time each year in
Cornwall.
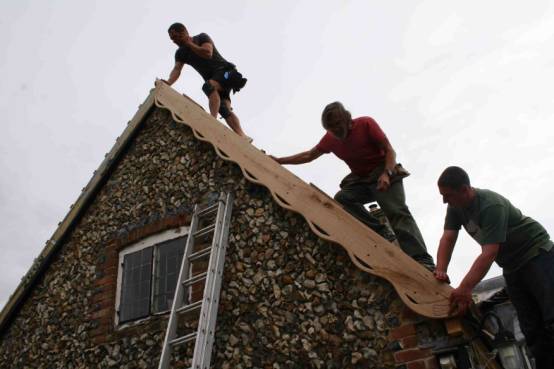
Ben, Tim and Brian fixing the barge board.

Barge boards finally fixed – the joint at
the top fitted perfectly despite the two sides of the roof having different
pitches.
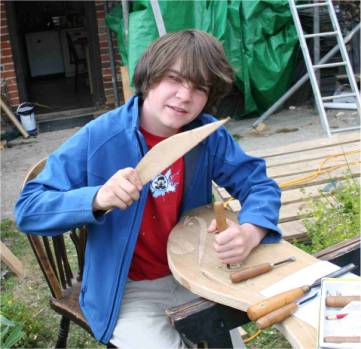
Giles carving his version of the Dullingham
eel for the barge board on the loo outshut.
The family seems weighed down by long hair at the moment!
Day 11 – Monday 13th July – fine
and breezy with a few clouds.
Ben and Brian started today and battened
and sorted the North elevation and the valley roof in short order. The second load of 500m of John Brash
battens arrived from Sudbury Roofing Supplies just in time (ordered Friday p.m.
delivered Monday noon!) – looking at the large pile left over from today’s
work, I think I miscalculated badly and I’ll have enough left over to reroof
the sheds, which I want to do anyway. I had a number of urgent jobs to make
sure that I didn’t hold up the slating -
I finished getting the eaves
over the loo up to the same level as the main roof, and planting a new valley board on top of the
original one, tapering to nothing where the slope changes. I also put in a 4 inch pipe for an extractor
fan and closed up the loo roof ready for battening. My main job after lunch was to make the barge boards for the W
gable end – they match the main gable but in simplified form.
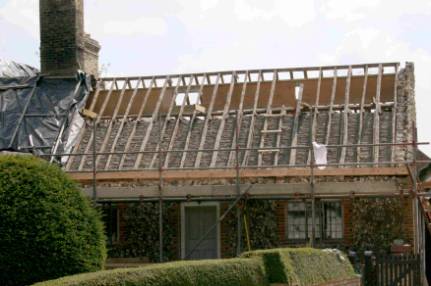
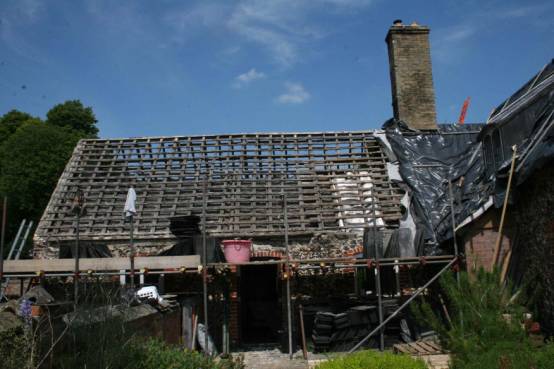
North elevation ready for slates once the
barge boards are up! The original
slates from this elevation and the South side will go back on here – I think we
recovered around 80% from this elevation and a bit less from the South – so you
won’t notice anything has changed!
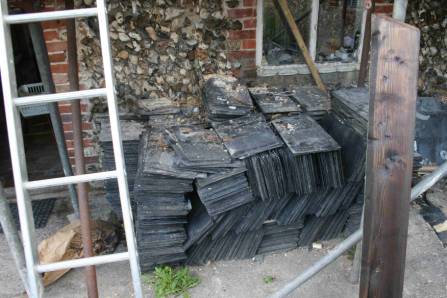
Most of this pile
of slates has been waiting to go on the roof for the last 9 years! - The result of my mis-ordering of battens!
I’m probably equally overstocked with slates – there are piles everywhere!
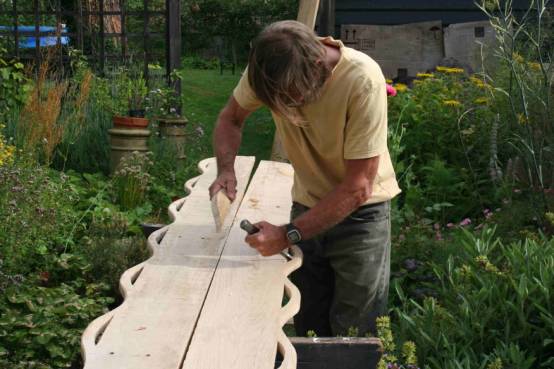

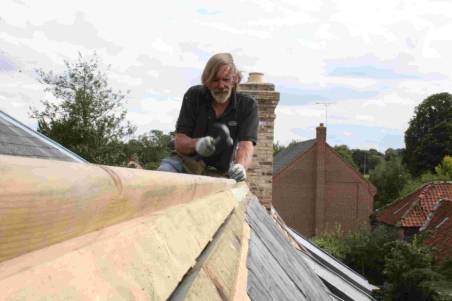
Tim carving the Bargeboards from green oak
– they will split and shrink and fade to a silver colour in time so its not a
precision carving job – These have to
go up tomorrow so that the slating can start, so I made them both in one (long)
afternoon. I will have to plane the top
edges straight so that it fits snugly against the slates – didn’t notice how
crooked they were !
The curved edge is copied from an
Elizabethan example at Baddersley Clinton Manor – but I added the mythical eel
heads and tails for a bit of fun.
Day 10 – Friday 10th July Fine
weather and not too hot.
Richard and Jim finished the roof structure
and insulation today – ready for slating by Ben Blows, starting on Monday! The
work was a repeat of yesterday’s insulation, but on the North elevation. Giles took loads of photos – here are a
few;-
Richard’s final sheeting up – just to keep
the covering pristine!
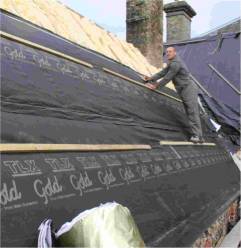
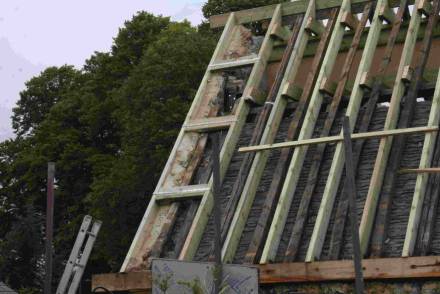
Insulated and counter-battened and ready to
go!
Taping up the covering insulation– we
didn’t think the recommended Duct tape was particularly good and preferred
double sided sticky tape so we used both!
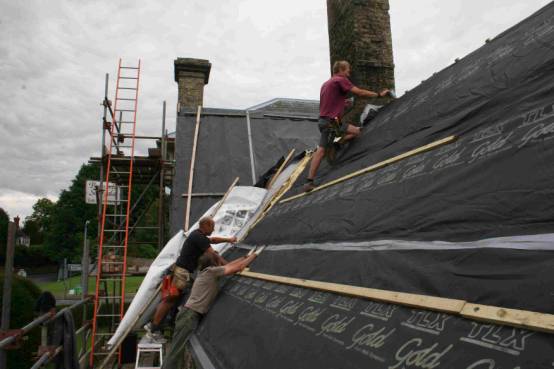
It takes a 3 man team – Richard, Jim and
Tim to get the TLX Gold on neatly.
Again the three strips reached exactly to the ridge – whoever built the
original house must have had TLX in mind.
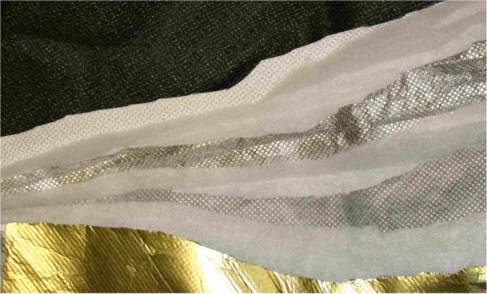
TLX Gold section from inside : gold
foil, PET wadding, silver foil, wadding, foil, wadding, white outer layer –
total uncompressed thickness 33mm .
There has been some controversy over the effectiveness of multifoil insulation, and it is not
recommended as the sole insulation – so we used it with 100mm of glass wool,
which used up all the available space.
I will only use permeable roofing materials as old houses invariably
have quite a lot of moisture to get rid of, and TLX Gold is the first permeable
multifoil insulation. I would have used
it on the whole house if it had existed when I did the rest!
Day 9 – Thursday 9th July –
threatened to rain occasionally but only a few spots. Now on the home straight!
Giles joined the workforce for the whole
day and we all worked at insulating the South elevation.
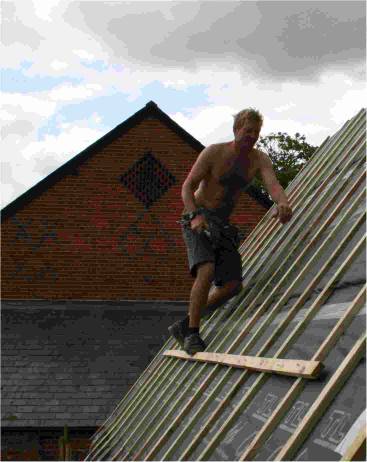
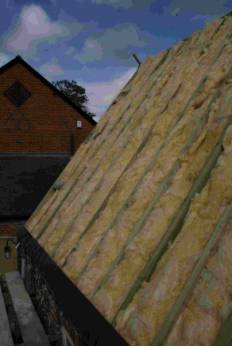
Final stage of this part – Richard nailing
the counter battens over the TLX Gold multifoil. Due to extreme good fortune
3 strips of TLX exactly covered the roof with a perfect joint to the
ridge to give a very good breathable
warm roof.
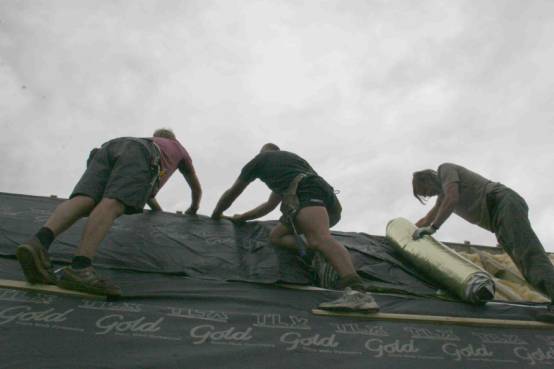
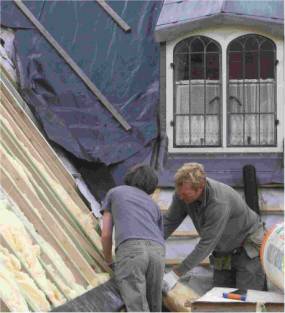
Fitting the TLX Gold breathable multifoil
insulation over the glass wool – this is voted the product of the day – the
first breathable multifoil – we voted it excellent to use after a slight
problem when we unrolled a whole roll at once and the inner foils got displaced! We had to send Giles through the whole 10m length (on the ground!) to sort it out. Here is a rare picture of Tim with Richard – Tim is usually
behind the camera, but this time Giles was the official photographer.
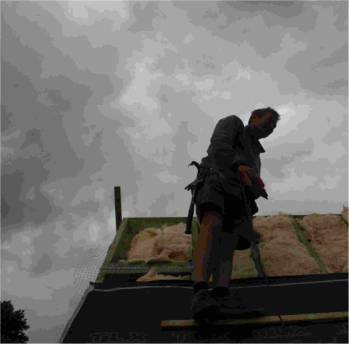
At times it looked a bit dark over Bill’s
Mother’s but didn’t rain. Glass wool
installed.
Richard and Giles installing fibreglass
insulation . Jim at the ridge – this
morning’s hat is a beanie.
Day 8 – Wednesday 8th July – a
few showers but not too bad.
No
pictures today but plenty of work.
Richard and Jim re-worked the South elevation into the valley gutter as
the rafter line that we had started last year by the chimney turned out to be
wrong and we had to pack the rafters to line up with the rest. Richard sprayed the old timber with Boron
insecticide to slow down the woodworm.
I spent part of the day repairing the flintwork at the top of the North
gable end wall, which wasn’t too difficult as I had the gable rafter to build
flints against.
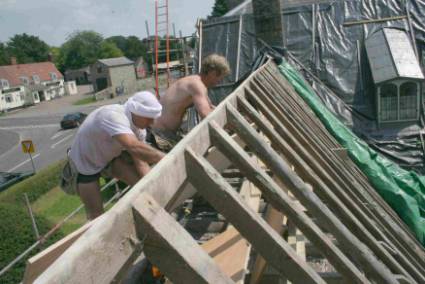
Day 7 – Tuesday 7th July – more
showers, but still managed to keep on target!
The main structure is now complete with the
top collars that hang the secondary rafters and the lower collars all fixed
with wood fasteners and M10 bolts – ‘the tool of the day’ is a hex shanked socket adaptor to allow a
battery impact driver to tighten bolts using an M17 ½ inch socket. Together
with a heavy duty right-angle drill borrowed from a friendly plumber this made
fixing the collars very quick. The
new roof structure sits over the old
roof – the only connections are a few nails joining the old and new ridge plate
to aid alignment, and a few places where the old rafters were missing on the South elevation and the old collars
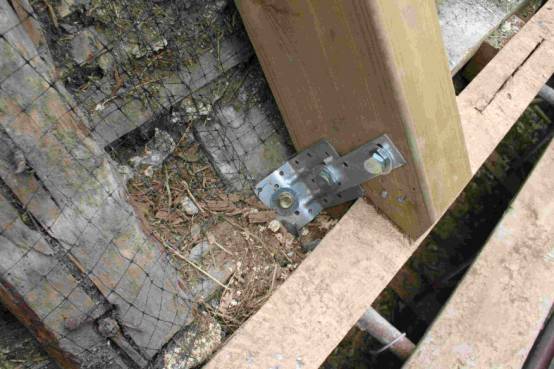
and purlin are strapped up to hang from the new lower collars. The new rafters sit on both the old
wallplate, where it is OK, and the added 6x3 oak facing. The secondary rafters are only held onto the
wallplates by light clips so they can settle as the I Beam takes the main load.
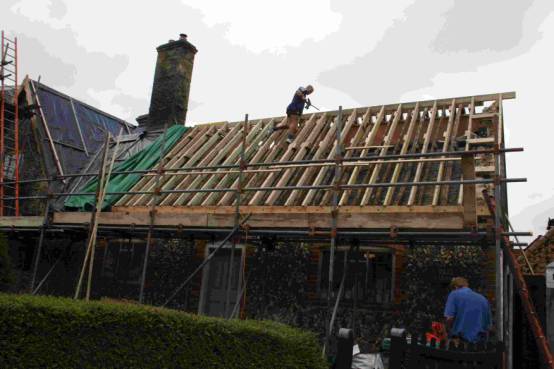
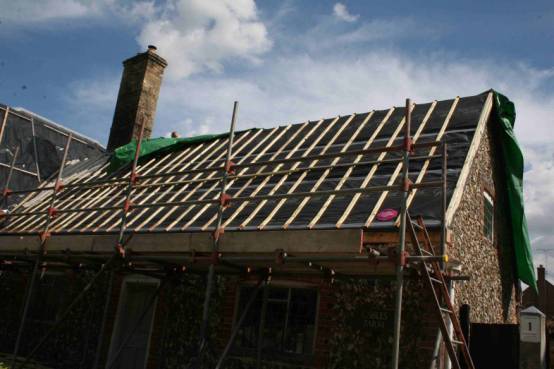
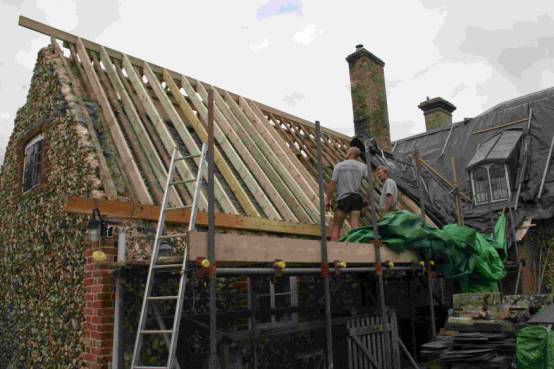
Rafters and collars in place with gable
ladder fitted.
Gable end flintwork on South side is now
complete
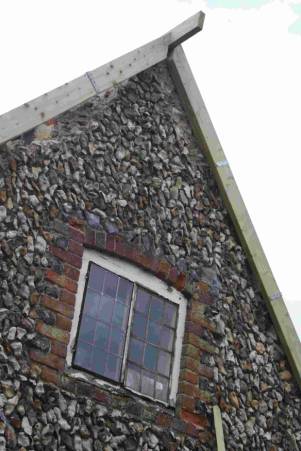
Gable end – right hand side repaired but
needing mortar cutting back and brushing.
Left hand side showing large missing area
of flintwork – tomorrow’s job if the weather permits.
Day 6 – Monday 6th July –
overcast with a few short heavy showers, but not much time lost.
Despite the weather Richard and Jim managed
to get all the rafters in place and made a start on the collars for the
principle rafters. I put in the
ironwork that supports the I Beam at the gable end.
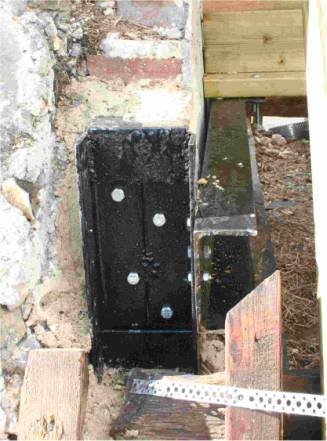
Richard fixes twin collars to principle rafters - Ironwork I beam gable support
Day 5 – Friday 3rd July – less
hot and a couple of showers that didn’t stop work.
Richard and Jim spent the day putting in
rafters and fixing down the feet of the main loadbearing ones.
I cut and welded 75mm angle to make the I
beam support to transfer load to the
gable end wall. It is ready to be offered up on Monday.
So far there are no fixings between the old
roof and the new roof except the new ridge is nailed on to the old one.
By the end of the first week, half of the rafters are up.
The foot of one of the main75 x150 rafters
– its bolted into the iron-hard oak wallplate next to the old iron tie that
links the wallplates across the walls.
Day 4 – Thursday 2nd July 2009 –
and another very sunny day!
The bulk of the timber for the roof construction
arrived early on, just in time to start on the timber and ply I-beam that forms
the spine of the new roof and from which most of the rafters hang . Richard and Jim prefabricated top and bottom
T beams using 10mm coachscrews and then fixed them to the 18mm ply web in situ
using super strength glue and a nail gun and finished it by lunch time. Aligning it and sorting out the ridge and
rafter lines and cutting the first rafter took the rest of the day. Its now a
matter of completing the 3 principle rafter frames that are part of the
beam support and adding the 20 pairs of
dependent rafters, each with two collars, one on top of the I-beam and one
underneath it, These supplement the old rafters and take the slate load. Its interesting to see my structural design
given shape by Richard and Jim’s expert carpentry.

Loading the pre-fabricated I-beam parts
into the roof.
The giant I-beam in situ - it takes the spreading load off the
wallplates, which are only tied together at the ends and the partition in the
middle.
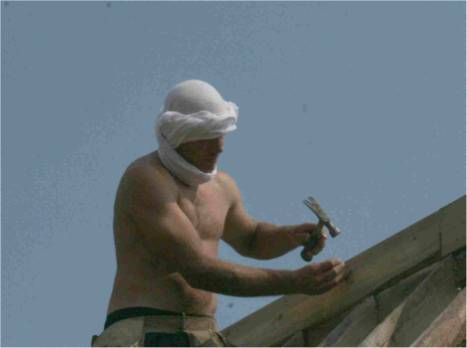

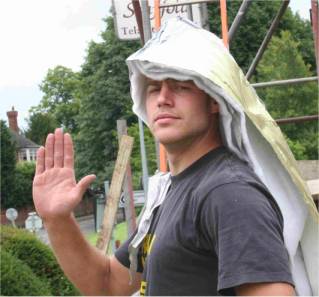
Jim’s latest headgear fashion – he reckons
the Arabs know a thing or two about sun.
The patch of flint wall I rebuilt yesterday looks better after going over it
with a small plastering tool and a stiff brush,
Day 3 - Wednesday 1st July – another
scorching day!
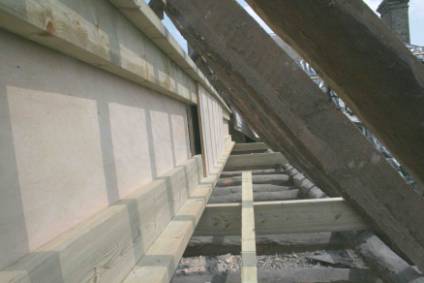
Today the North wallplate had its facing
beam of 6in x 3 in green oak applied – fitted in 3 pieces as I couldn’t get
long enough pieces (6 metres) to do it in two.
This side took longer than the South side despite not having to patch a
rotten section, because getting it level and keeping the curves gentle was
trickier. While Richard and Jim were
sorting that out, I spent most of the day crouching on the scaffolding poking
mortar and flints into gaps and holes
to give the wallplate and beam a firm seat.
It’s a tedious activity as you seldom have the ‘right’ flint for the
space, and its sometimes quite difficult to get them to stay in place. The only way I have found to do it is by
wearing gloves and applying the mortar by hand so you can push it into small
holes and gaps. The result looks a
complete mess with mortar smeared around the flints – but then when the mortar
has gone green I go back with a small plastering tool and cut the mortar back
so that it forms an angle where it touches the flints, instead of being a
rounded fillet. Then I go over it with an old washing up brush to get rid of
the loose mortar and bring out the larger sand particles. It looks reasonable, but not the same as the
old flinting, which shows virtually no mortar on the face. I don’t really understand how they did it in
the 18th and 19th century. I have been on an English Heritage courses on flintwork and
discussed it with their experts, and they don’t know either. My technique is a variation of the EH flint
re-pointing technique I learnt at West Dean.
1) Jim preparing a joint in the beam, note the stylish headgear – I won’t comment
on the use to which he is putting his
hammer!
2) The North beam in place and ready to
serve as a datum for the rafter feet.
I built up the wall to support the
wallplate in a few vital places. Once
you start trying to clean up the old wall to take a new layer you find that you
have loosened a flint or two. If you
take them out, you find that the old mortar gets in the way of where you want
to put the new flint, so you remove it – then you find that you have loosened a
flint or two…… - before you know it,
you have a large pile of flints and no wall!
So the real skill is in knowing when to stop – you can see this patch
went down quite a way before I found a base to work on. The patch looks better than this now as I’ve
cut back the mortar and brushed the wall.
When this mortar has gone hard in a few days, I’ll remove the car jack
and fill the holes, In some places on the wall someone plastered hard cement
over the flints with a trowel, presumably as a ‘repair’, so this has to be
removed, which also takes a great chunk of wall out! At about ½ to 1 hour per square foot it’s a slow business.
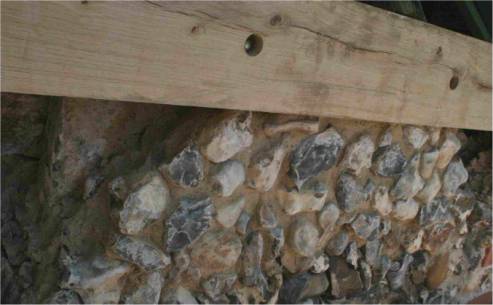
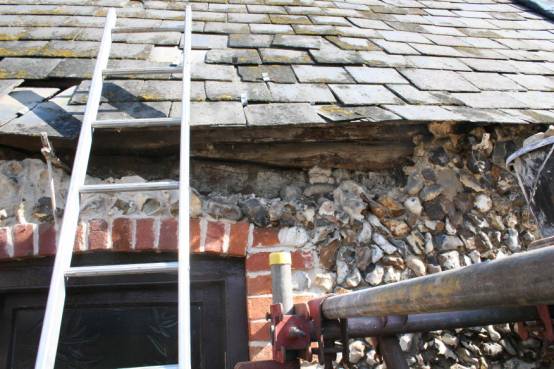
This is the gable end wall – you can see
the construction clearly with an inside plaster layer to the left, then clunch/chalk blocks and finally the flint
facing - total thickness around 15 inches.
On the other side of the gable the wall seems to consist of fewer clunch
blocks and more large flints.
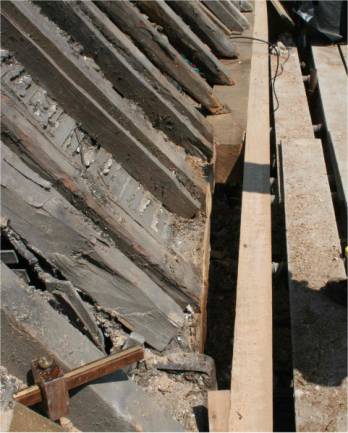
Day 2
Tuesday 30th June 2009.
Yesterday was stripping off and destruction
day – today the wallplate on the South side was tackled . Since the top of the wall is neither
straight nor level, and the existing
wallplate ( where it still exists) is set back by variable amounts from
the flint face, there is no easy way to arrive at a datum for the feet of the
new rafters. So some time was spent head
scratching and measuring and stringing lines, until a plan emerged. I had a old 3m length of oak 150x150 that
filled the gap where the rotten wallplate had been, in the vicinity of the old
window – Richard and Jim got this perfectly tied in to the ends of the
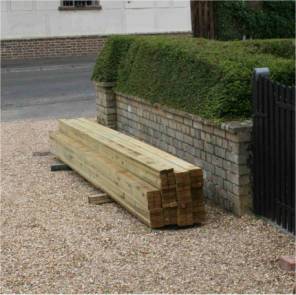
remaining structure. Yesterday I collected enough 150x75 green oak beams to
face the wallplate out to be flush with the face of the flints, as the old
technique of sticking a thin layer of
flints on the outside face of the wallplate doesn’t last well. We are planning to bring the face of the
rafters out – probably by 75 to 100 mm
to allow us to get 150mm deep rafters above the back surface of the old laths –
we can then get in a bit more insulation.
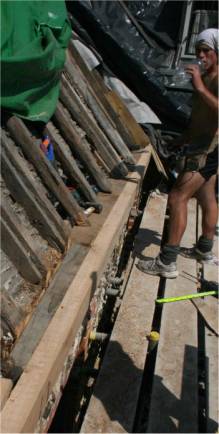
R & J fitted the facing beam
and managed to get a very fair curve right down the roof, fixing it to the
structure with 160mm coach screws. The
new facing beam and the replacement
wallplate are now fixed to the old
structure, but for the most part are suspended in the air – the replacement wallplate is on a car jack,
so my job tomorrow is to build up some
solid support from flint and mortar.
The new facing beam is green oak, and very wet, so it will shrink 5 –10
mm in width and 3 – 6 mm in thickness
over the next 2 to 4 years, so however carefully I pack underneath it with
mortar, there will eventually be a gap.
The wall wobbles in and out a lot more than our facing beam, so the flint won’t be flush along the whole
length.
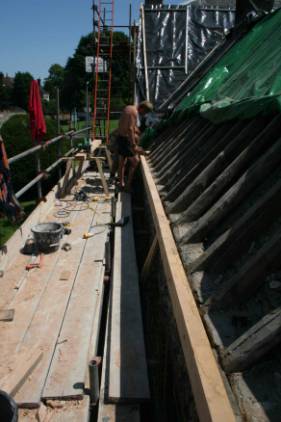
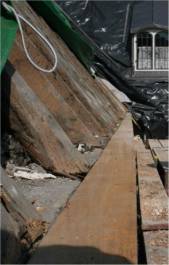
This is the end result of day 2 – facing
beam on old and replaced wallplate sections.
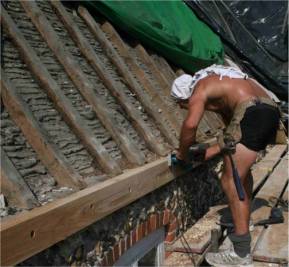
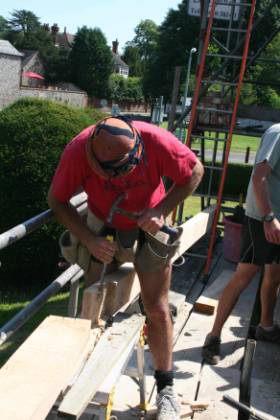
Jim removing deep bandsaw marks from facing
beams with planer, which you can see is very gently curved.
Another incredibly hot day, but the
occasional breeze.
The new section of wallplate wasn’t quite
long enough so left a gap to be filled with a chunk of seasoned oak.
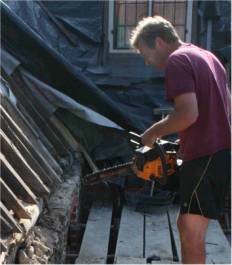
Missing section of wallplate – and Richard
trimming up the rotten ends with a
chain saw – Richards’s new carpentry discovery!
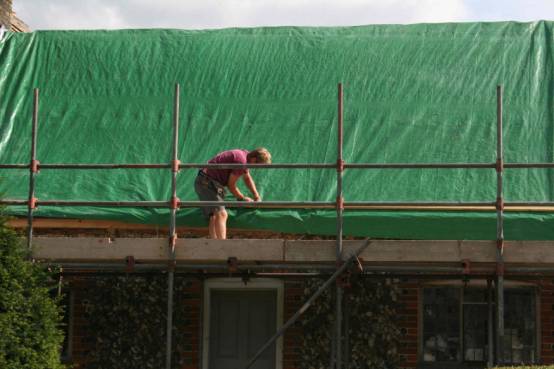
My discovery this year is a new tarpaulin
that fits the roof and elastic cords with hooks that loop onto the scaffolding
– sheeting up now takes a few minutes – so it saves several man-hours a week
for an outlay of £60!
Day 1
Monday 29th June 2009
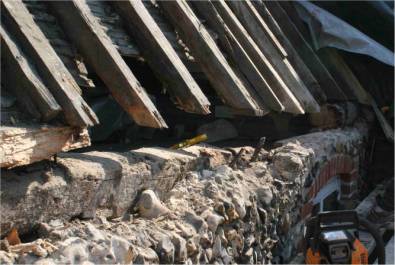
5.30 p.m. day 1 – stripped
roof sheeted up.

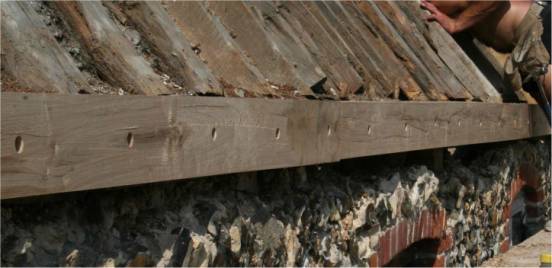
The old South wallplate is mostly the original oak with pegs where the timber
frame uprights were tenoned in
There is a joint just before the window
head, with the carpenter’s mark II on
the right hand side. All the structure above these wallplates is in softwood –
sawn larch poles or roughly squared
small trunks – and dates from the original slating of the roof – which would
have been at some time after the railways came to Dullingham (1856?) – probably
late 19 or early 20th century.
The oak is in pretty good shape – some surface softening where it has
been covered with haired mortar but still as hard as iron inside. In the foreground wallplate there
has been water ingress – there was a
window in the roof here, which had obviously been letting in water for a long
time as the wallplate had several layers added through its history. I cannot find any clue as to when the roof
was last re-slated. The slates are good
quality (Welsh?) slates but they vary along a course in thickness more than one
would see now . The nails are tapered square copper
nails. I don’t have any definite date for the original timber framed
structure, but the stops on the internal beams look mid to late 17C although
they could be re-used. The stud spacing
is 21 inches, neither narrow studding like the old Guild Hall opposite (15XX)
or square framed – probably OK for 17Century?
I think the whole timber framed house – all the current parts except the
Victorian extension, was flinted around
1800 when Repton was doing a makeover of Dullingham House grounds, at which
time the windows and doors were moved to symmetrical positions. I found one stud still embedded in the
wall, and another with the tenon cut off and left in the mortice in the beam,
so no doubt it was timber framed, almost certainly thatched like the rest of
the old house was before slate took over.
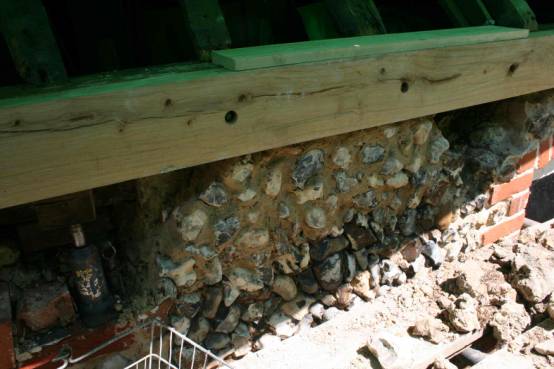
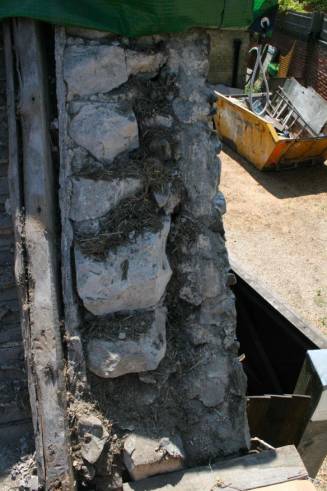
Poking away at the loose flints reveals 3
layers of wall plate here – each one rotted through then with another bit
shoved on top – plan to put in a solid piece of oak 3m long.
I fetched 28m of 150 x 75 oak beams to face
/ reinforce the wallplates today, tomorrow’s job is to fix them.
June 26th 2009 and things are
moving at last!
The work being done is a joint effort
between me (Tim Owen, joint owner of
Cables Farm) and Richard Barker and Jim – carpenters and general experts in
wood construction who are happy to work with Tim as a very effective team. Ben Blows is lined up to do the slating when
all is ready.
So it looks like no more tarpaulins and
plastic sheets after this summer – I am already suffering from withdrawal
symptoms – like loosing an old friend.
Still, there is a load more work inside, and all the shed roofs to do,
so perhaps its not over yet.
A major burst of activity is in progress
now! ( June 2009).
The main N-S roof was rebuilt last year,
along with work on the landing and bathroom and fibreglassing of a large valley
above the landing ceiling. I also replaced the two ground floor windows in the
Gable end with oak framed leaded windows I made, with iron casements made by
Dave Gowlett at Springwell Forge in Ugley.
This year so far I have leaded the two
remaining dormers that we built last year and put oak Barge Boards on the N gable and replaced the remaining window
in the first floor of the gable end. We
are now beginning to strip and rebuild the roof above the kitchen, having
partly cleared the attics for action.
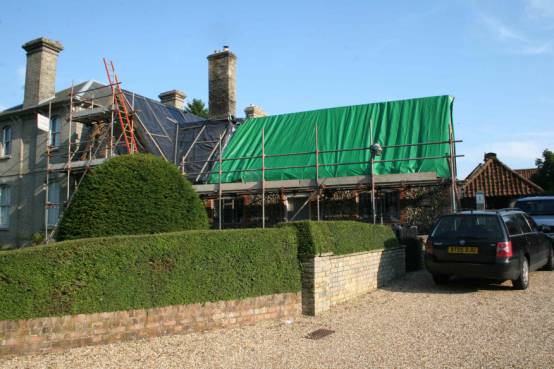
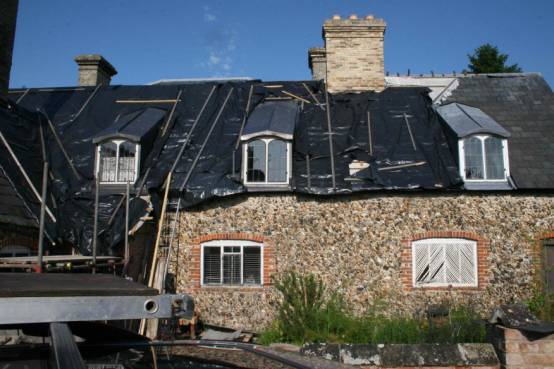
These pictures below were taken on 26 June 2009 as we prepare to strip the roof.
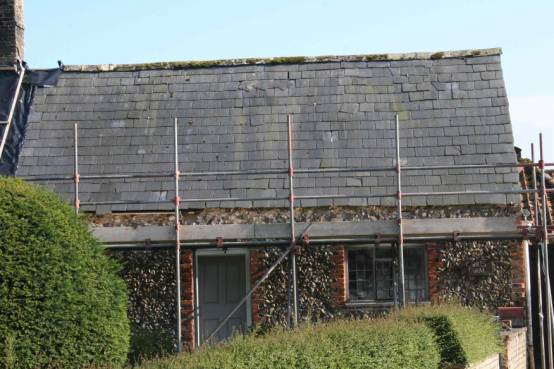
This is the current project area!
Compare this with the picture below – there
has been some progress in the last few years – most of it under the plastic!
This picture was taken in 2005!
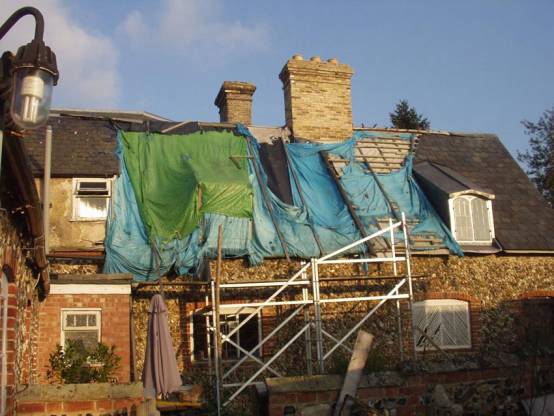
I rather like this state, although others
thought it was a bit too much!
After a few years like this the local
Conservation Officer kindly put us on the ‘Buildings at Risk Register’ which
meant we were eligible for a grant – although we didn’t take it up – she has
now taken us off the Register.
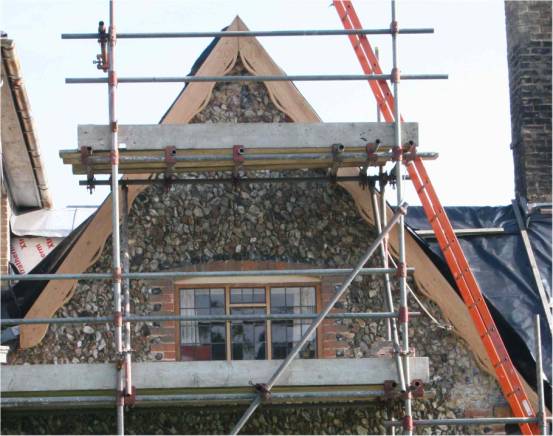
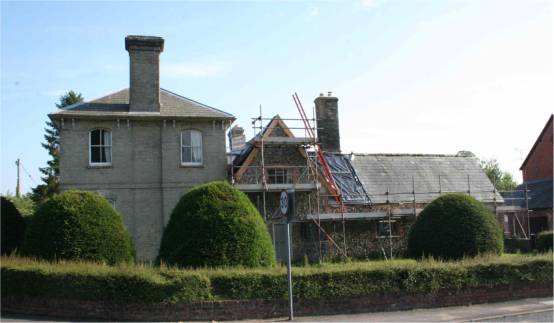
New Barge Boards and new bedroom window.
The Barge board design is loosely copied
from those at the Elizabethan Manor House of Baddersley Clinton at Knowle – the
National Trust kindly gave me a tracing of a sample.
Every time you go near the tops of the
flint walls at wallplates and gable ends, you end up having to sort out masses
of flintwork that comes away as you look at it – its quite absorbing crouching
on the scaffolding with a big pile of flints and a bucket of lime mortar ( St
Astier 2.5 + 2 parts sharp sand and a
bit of febmix) – its like doing a giant jigsaw puzzle upside down when you have
a pile of pieces taken at random from dozens of puzzles. You never seem to have anywhere near the
shape of flint you need – you realise that flints come in an infinite variety, which I suppose is obvious but
frustrating nevertheless! You end up
getting off the scaffold and trying to hunt down a few of the ‘right’ shaped
flints.
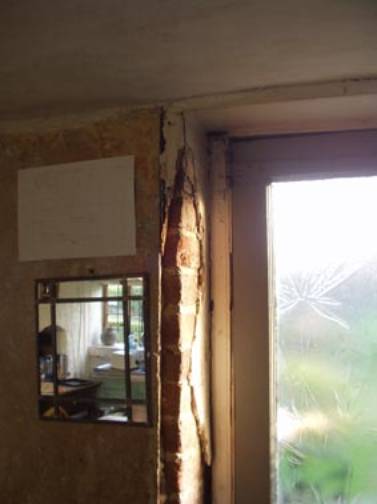
This
window has now been replaced – no yet pictures as its all in the scaffolding.
kitchen
was due for an upgrade! - now
re-plastered in lime plaster and painted with limewash
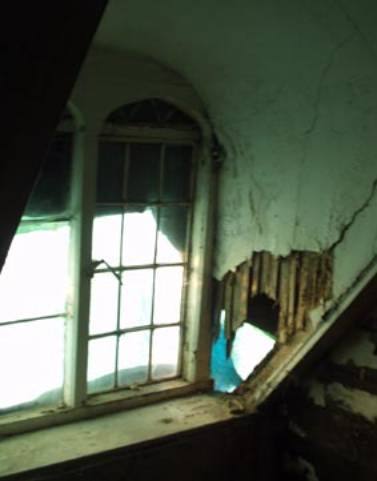
this
dormer has been replaced !
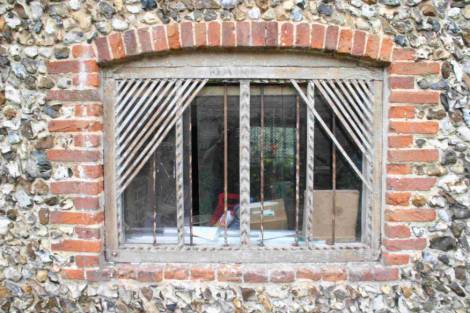
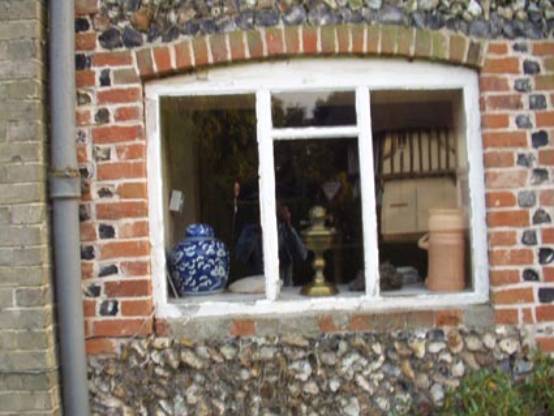
window
of old dairy / game larder – still to do.
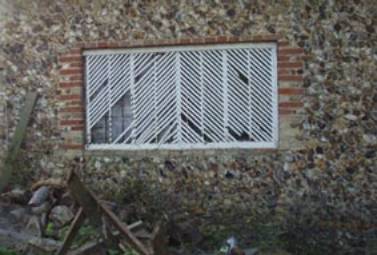
back
window of old dairy / game larder still to do.
Cables Farm Home Page | Top of picture page |