Extracted from my 2018 diary, so it is to be viewed in reverse order, start at the end and work back!
30th march – I put all the furniture back on the 8 bore, where I know the fit is bad I put a bit of hard black wax on the edge using my tiny hot air gun (1/4 inch nozzle) to take up the gap, and melt more into any remaining gaps. The butt plate needed the bottom edge trimmed slightly – they often stick out a bit and catch, anyway it all went together reasonably well, and I got the screw heads aligned perfectly. So its beginning to come together – at the moment its all covered with sticky slacum ( boiled linseed, beeswax and terbene driers) waiting for it to go jelly like so I can wipe/rub it all off again. This process will be repeated until the finish is good enough, although it is always possible after a few coats to change to wax furniture polish and cheat! I was checking Brownell’s website for honing stones – I might just buy a few bits to make up a hone – the regular ones go up to 10 bore but I’m sure I can fudge things – the extension rod to make the hones long enough to go down the barrel are much more expensive than the rest of the kit and definitely won’t work with 8 bore barrels, so again I’ll resort to making something. I wish I had access to a Delapina lap, but never mind! I am not sure I have the perfect recipe for Slacum – I did a series of trials and came up with a maximum of 5% beeswax and around 1% terbene driers – but it didn’t seem that critical, apart from keeping the beeswax content at 5% or less. On the last lot I made the terbene went into short strings when I added it to the oil – not sure what happened there……….. My hard wax is made up of beeswax and carbon black, but it is possible to buy very hard coloured wax for repairing scratches in furniture that would be better – trouble is it costs £100 for a kit and has mostly colours we wouldn’t use. 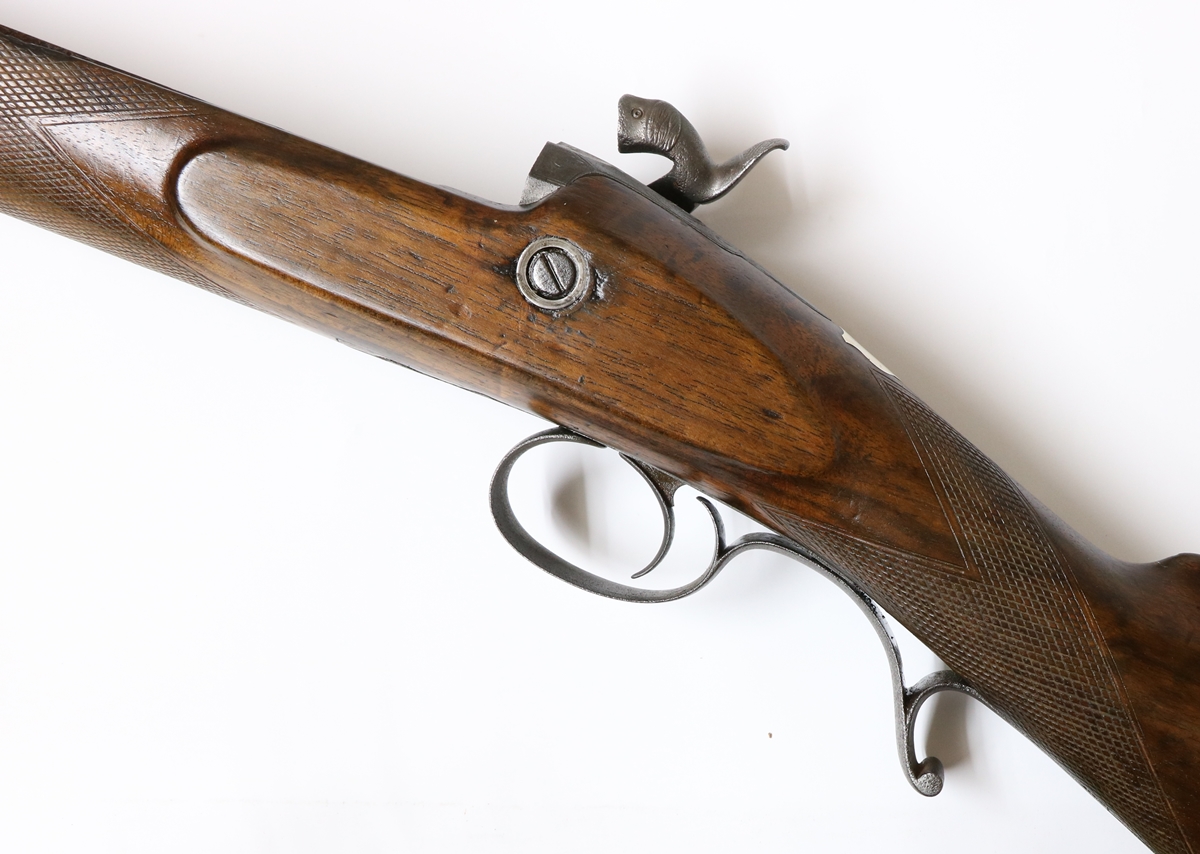
The steel cup is a bit thick (limited by size of available end mill!) and I didn’t get rid of all the defects around it, but its meant as a functional restoration. Steaming has taken most of the dings out – minimal sanding was done – it is very effective.
The finial is quite badly rusted round the edges, which makes the fit rather poor, but improved! It no linger looks like a tired old gun that has been neglected and I hope one day it will see use again when the barrel is done.
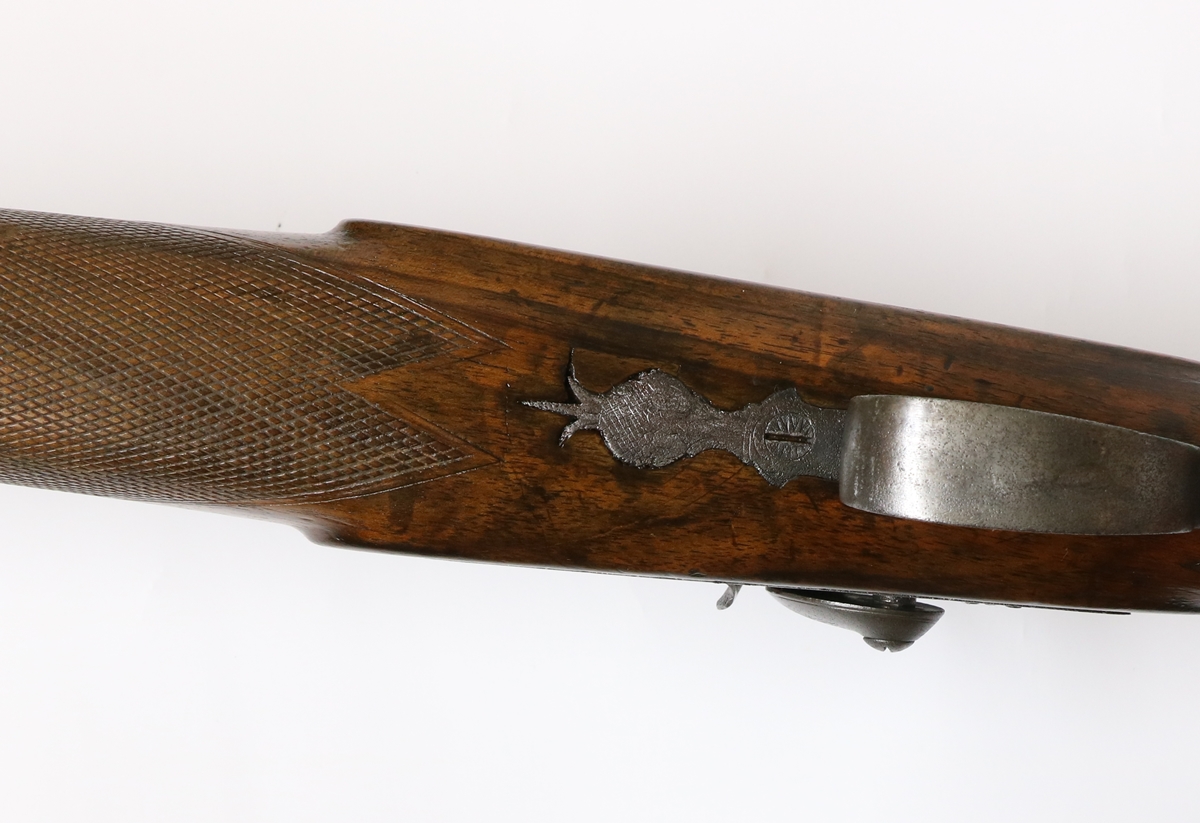
29th March – More 8 bore… I forgot to mention when discussing removing screws that one of the problems with fitted screws in old guns is that the heads are contoured to fit the furniture and as you unscrew them you need to keep the screwdriver aligned with the slot, which often means tilting it as you turn it, otherwise you partially come out of the slot. Anyway having stripped and cleaned all the furniture I escalated the job to include gently refinishing the stock as it had plenty of dings etc. I inlet a small piece of wood where a bit had come out round the finial of the trigger plate and cut the surface flush and refitted the finial temporarily, then set about steaming out the dings in the spout of a kettle on the AGA – difficult to do if you are using an electric kettle, but a wallpaper steamer would work. That got out or reduced a lot of the dings and destroyed some of the finish so I removed most of the rest on the butt with 320 grit sandpaper and methylated spirits (wood alcohol) as it was varnished with shellac. I cleaned the chequering using an old toothbrush and meths, enough to show the chequering reasonably clearly. Several goes over the stock with medium grade steel wool and meths got it to a reasonable finish – I didn’t want a complete strip to bare wood, just a somewhat better finish. There were a number of black stains – probably iron stains, so I very carefully applied oxalic acid with an artist’s paint brush to soften the stains – you need to be very careful or it will bleach the unstained wood very pale – if that happens you will need to colour it down with Van Dyke crystals in water or a spirit stain, applied carefully. When you apply oxalic acid or stain using an artist’s brush, apply it streakily along the grain of the wood – that way you hide any edges amongst the grain markings. Having got the wood to a fair finish and acceptable colour I wipe over it all with a piece of kitchen roll dipped in shellac dissolved in meths – button polish is one name for it – this seals the grain. Applying a second coat messes up the finish because it leaves smear marks, so at that point I’ll go to using ‘slacum’ to give an English oil finish, which will require several dozen coats, but before that I’ll remount all the furniture. At the moment I’m waiting for the butt plate screws and the sling mount to derust….. I also need to fit the steel cup for the side nail. The next big job will be to sort the barrel, but that may have to wait a while as I need to make/buy a tool for lapping the barrel before I rebrown it.
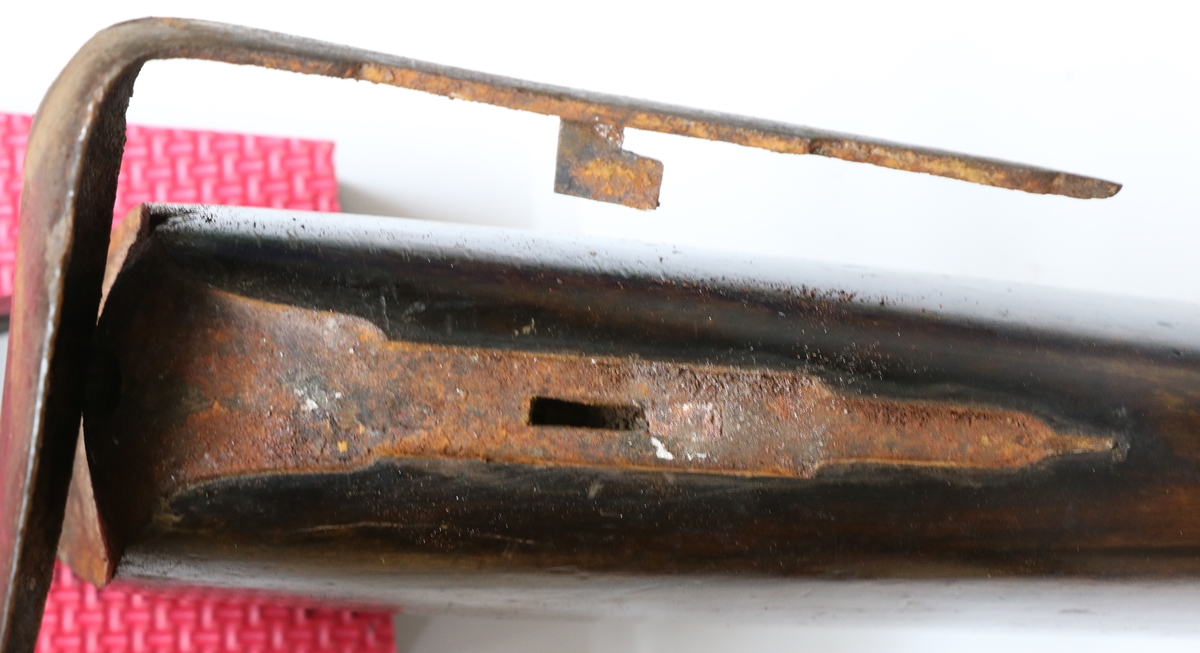
28th March – Continued with the 8 Bore restoration today with a visit to Dick to use his vice and torch to shift the breechblock, which we did successfully – its a strange fact that breech plugs almost always come out with perfect threads without a trace of rust. Any rust is usually confined to a tiny bit around the joint at the barrel and on the edge facing into the powder chamber. I don’t know what they used to lubricate the thread, but it certainly lasted 200 years or so! This one was no different, once heated almost to wood charring temperature and held very very securely in the vice it yielded to a 2 ft lever and came out easily thereafter. The passage from nipple to main chamber contained a lot of hard blackish powder, but as it was slightly damped with cleaner or whatever I couldn’t get it to flare like black powder although I think it may have had some in it – by the way, I DID carefully probe the barrel with a screw rod to check it wasn’t loaded before heating it! Anyway a trip to the electrolytic bath and a bit more picking out the passages with bits of bent wire and I’m sure its clear now. Now the breech plug is out I can see that the barrel is pretty reasonable, certainly shootable. I may have a go at lapping it if I can make a suitable tool. The side screw hole was a mess so I dropped a 16mm cutter into it and made a plug and glued it in, but I then made a steel cup for the head of the side nail so I might put that in instead. I initially thought that I would leave the butt plate as they are usually horrible to get out, but the rest of the furniture looked so much better than it did, so I took it off. The two screws holding the butt plate are almost guaranteed to be rusted around the heads and stuck fast. The threads are often rusty and stuck in the wood too, often pulling most of the threaded wood out with them. The technique to get them out is to very carefully pick out the slot in the head of the screws down to the metal, and put some release ‘oil’ on the joint – I put a small drop of gun oil and then take a brush of Acetone and brush it around the edge of the screws – it penetrates better than proprietary penetrating oils. You need to hold the butt very securely and have a screwdriver that is a perfect fit and try carefully. The top one is usually the worst – if it doesn’t budge fairly easily play a fine torch flame onto the screw head ( it does need to be a very fine flame) and try again. The 8 bore butt plate screws came out fairly easily, the top one with heat, and once started the screws themselves were as clean as a whistle. There was quite a bit of flake rust on the inside of the buttplate and on the wood and it took about 3 hours at 2.8Amps to derust the buttplate fully. Having derusted the furniture and thoroughly wire wheel brushed them ( .03mm wire brush) I generally coat the hidden surfaces with ‘Metalguard’ which leaves a thin anti-corrosion film over the surface of the metal as its in a fairly active state after derusting and will rust easily. I’m generally happy to put the furniture back with just the Metalguard as protection, sometimes putting on another coat if the part has been handled much since first coating. Most oils and greases soak into the wood so be sparing if you use any behind the fittings.
You know how it is? Having got so far with the restoration (actually more of a tidy-up) I can see that the woodwork could be a bit better, so for completeness I might just steam out the dings, and possibly refinish it – in for a penny, in for a pound……
Yes, I know its not quite centered!
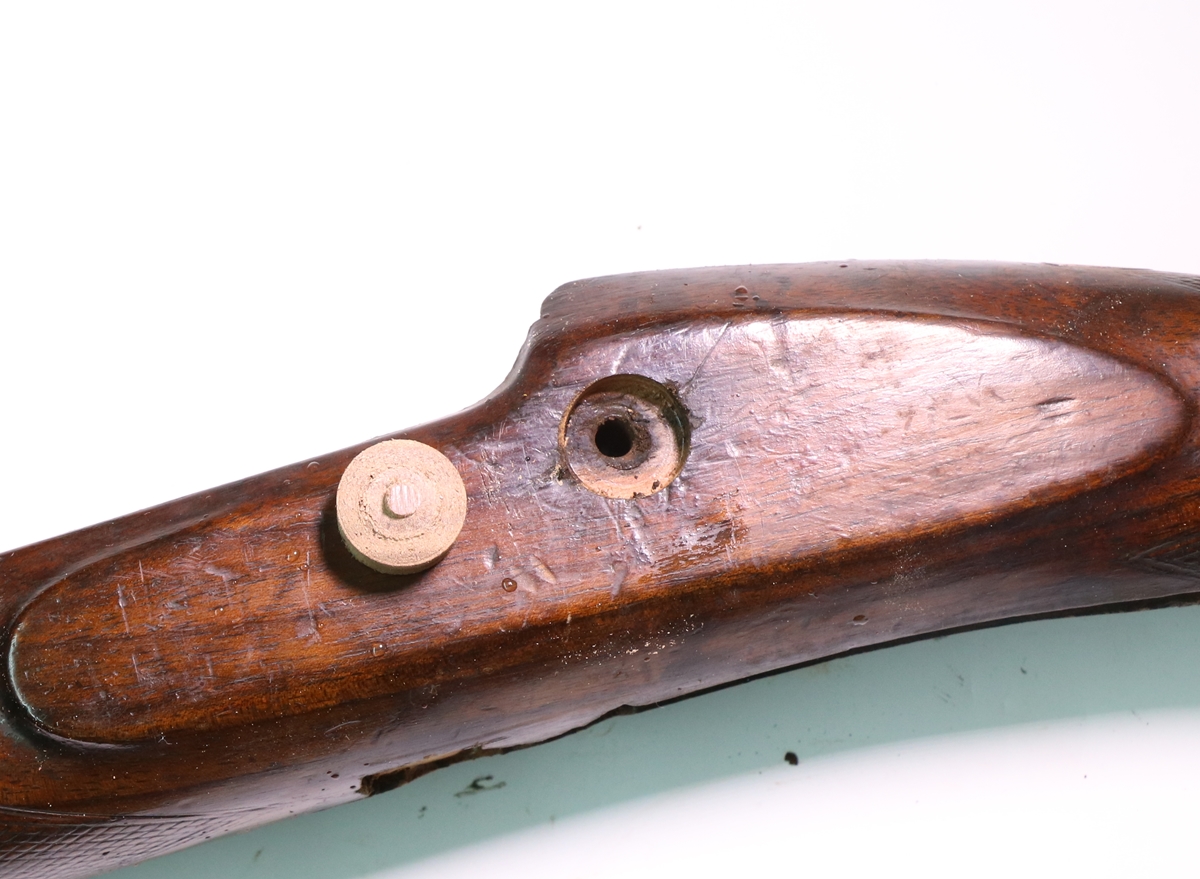
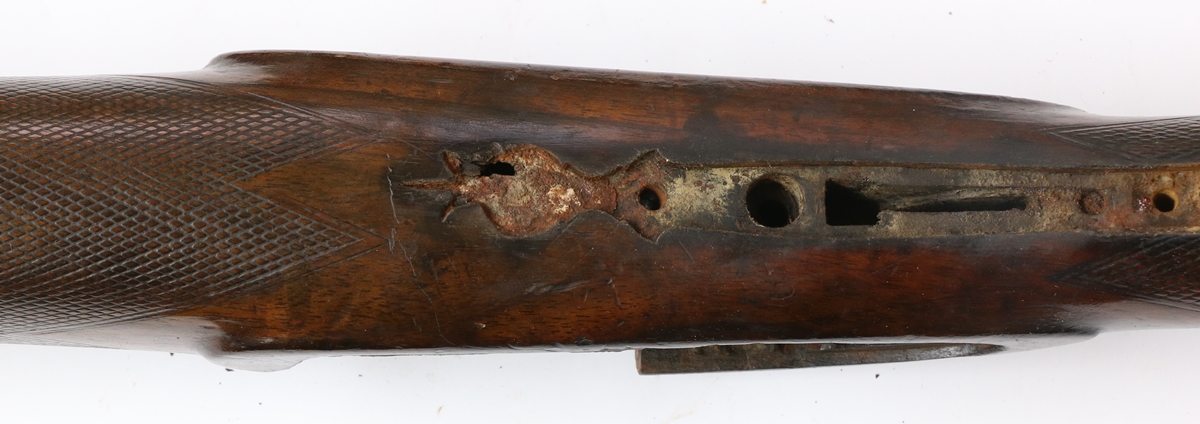
The buttplate is held on by two screws and the tab along the top. After removing the screws the whole buttplate must be moved backwards by 6 mm to disengage the tab. As you can see, there was quite a lot of rust under the plate- its surprising that the two screws were in perfect condition in the wood.
27th March I stripped the furniture from the 8 bore and put it through the electrolytic derusting. It was quite pitted and the engraving is quite worn and pitted so it won’t restore to anything like original state, and as most of the bits are hardened, I can’t easily recut them. I did try on the finial of the trigger plate by annealing it, but its too far pitted to make any difference so I’ll leave it. The wood around the furniture is badly stained black, and on one side of the finial is missing – I think the staining is a combination of rust and too much oil on the wood – my father, who owned the 8 bore before me, used to slosh oil about on guns and several of ‘his’ guns suffered from staining, although in this case there is also quite a lot of rust under the furniture that I have now scraped away carefully. I’ll go down to Dicks tomorrow and we’ll remove the 8 bore breech plug (with luck) – I ran out of gas for my Butane torch today, and my vice is not really man enough.
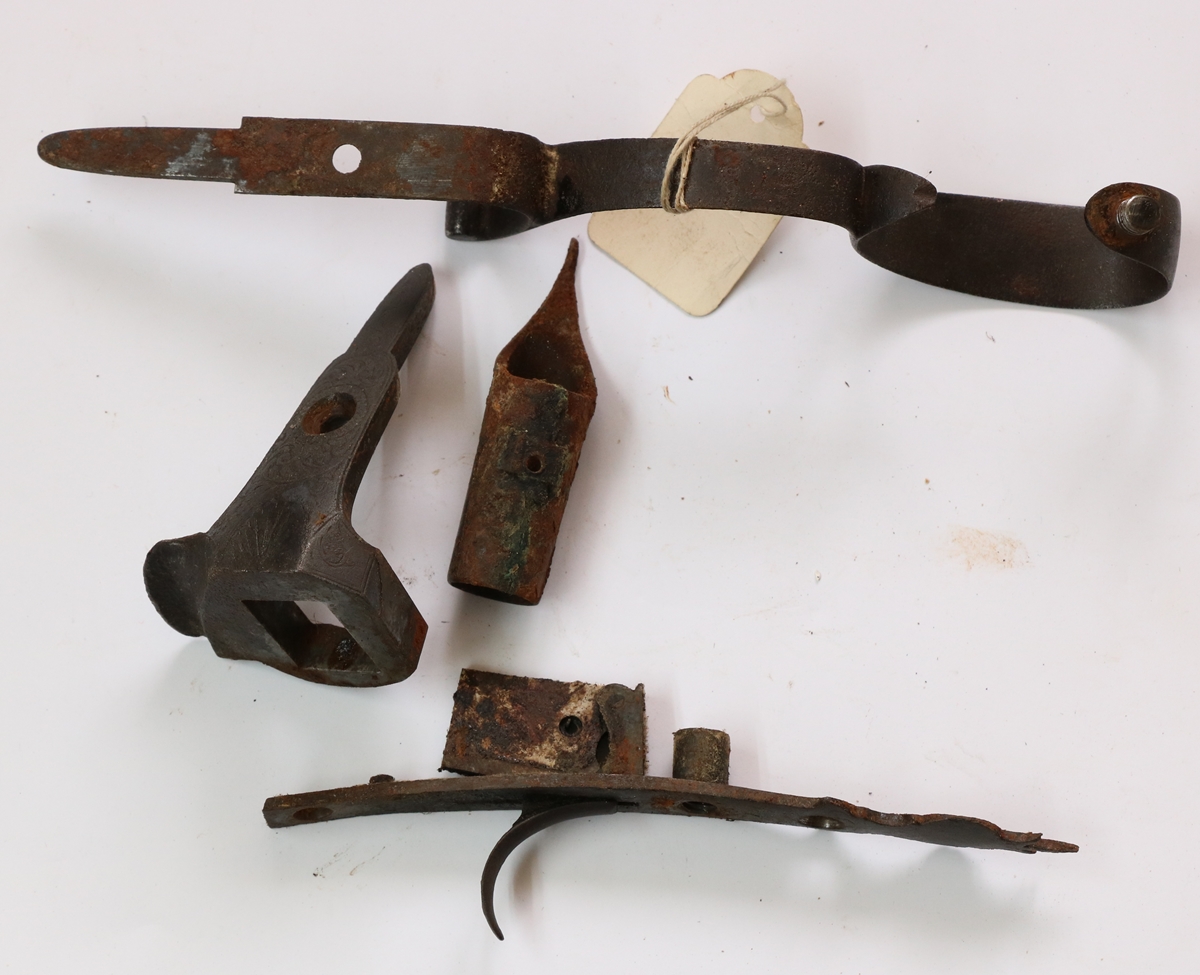
Furniture as was – click on pictures to see in detail.
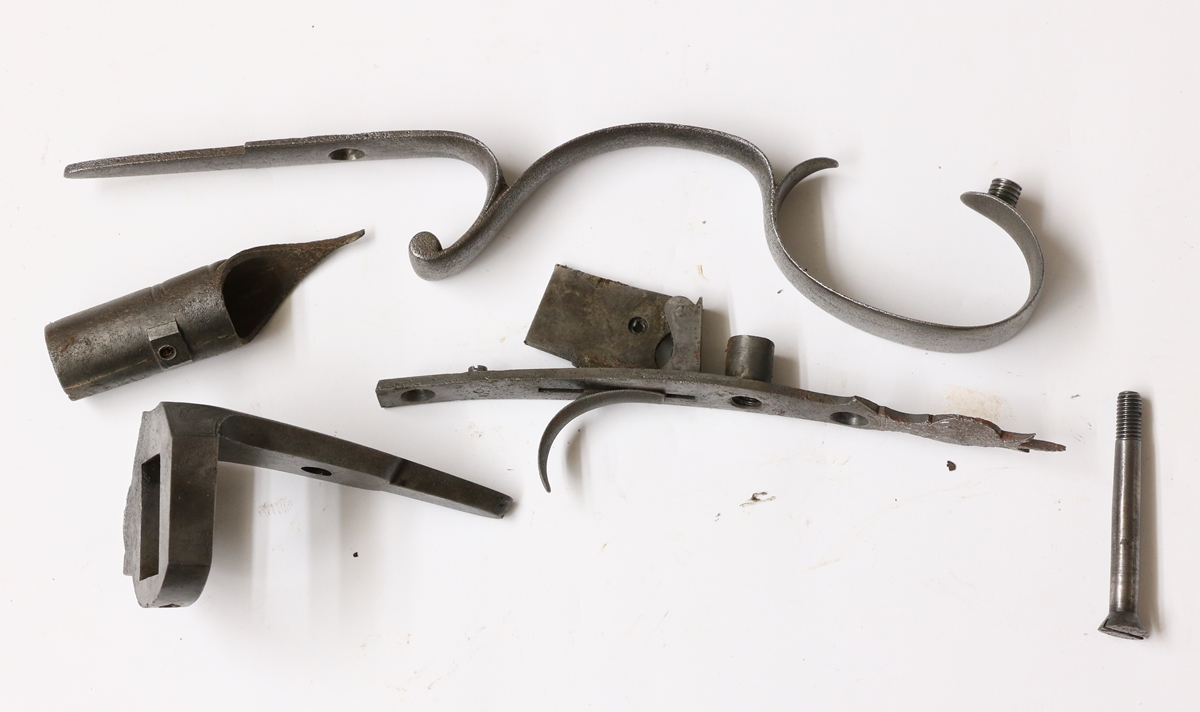
After an hour each in the electrolytic derusting bath and a fine wire wheel.
Breech plug threads were traditionally treated with Stockholm tar, presumably as a sealant and to prevent rusting. Quite often one can smell the tar when unscrewing a plug which has been undisturbed for aeons. It is certainly effective.
Hi Robin,
Thanks – that is interesting – I haven’t noticed the smell even when I’ve heated the whole thing, but it sounds very likely – I’ll look out for it next time I take out a ‘virgin’ plug.
Whatever it is, its certainly very effective.
Tim